Whether you’re an educator creating a lesson for your students or a designer who has to explain their diagrams, annotation is an essential facet of modern-day computing that you’re better off learning. If you’re like us and sporting the ever-magnificent Chrome OS, knowing how to annotate a screenshot on Chromebook can pay off well.
That is why we’ve decided to put together this handy guide that’ll go through all the possible ways of annotation on Chrome OS. Be sure to follow each method as instructed for the best results.
- If you want to start with the basics and learn all the different ways of taking a screenshot, here’s a detailed guide to get started.
Best ways to annotate screenshots on a Chromebook
Option #1. Use the built-in Chrome OS annotation tool
If your screenshot annotation requirements are pretty basic, you may not need to stray any further from one of the built-in Chrome OS image editing features. Annotation is a relatively new addition to Chromebooks, and users had to tend to third-party applications and extensions before it. However, now that you have annotation functionality built right into Chrome OS, things are a little easier for adding more depth to your images and screenshots natively.
The following is a step-by-step guide illustrating how to use the built-in Chrome OS annotation tool effortlessly.
- The first step is to open the “Files” system application on your Chromebook. Next, we need to open the native Chrome OS image editor to get to the annotation tool, and that’s most easily accessed through the system’s local storage, where all of your images are kept.
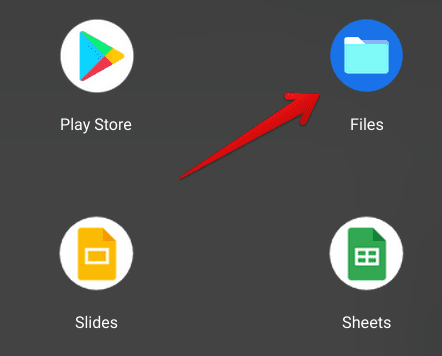
Opening the “Files” system app
2. You now have to select the image or screenshot you want to annotate. A list of all saved items will be displayed in the “Files” application. Take your time and choose the relevant image to get to the next step.
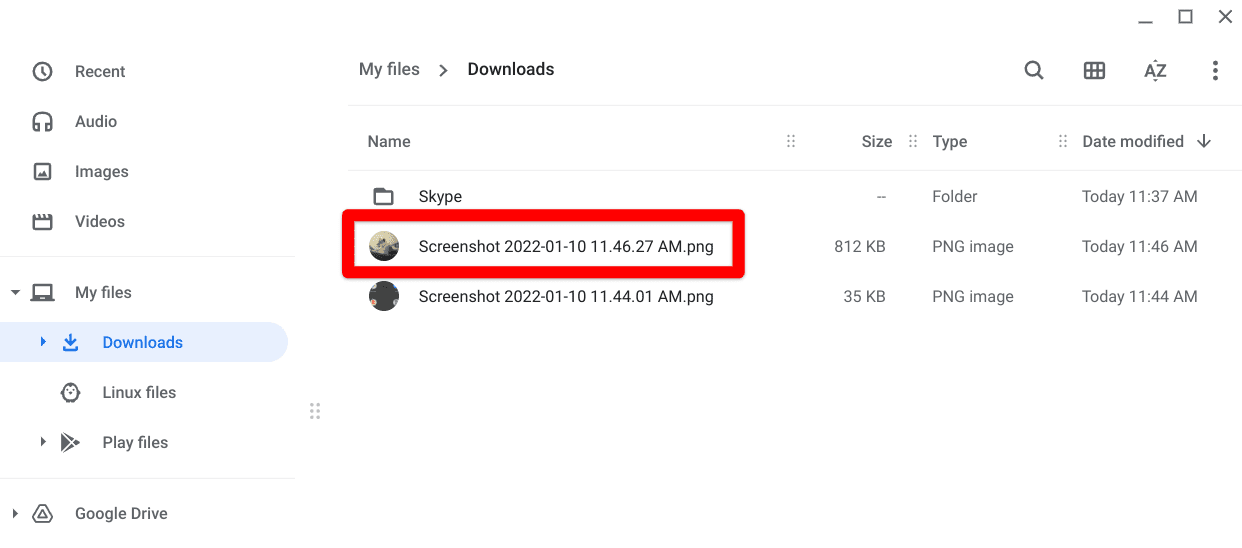
Picking a screenshot
3. After selecting the screenshot that you want to annotate, the Chrome OS image editor will launch. This is where you can crop, rotate, rescale, and annotate your screenshot using the operating system’s in-built tool. Click on the relevant button as shown in the screenshot below to continue.

Clicking on the “Annotate” button
4. After clicking on the “Annotate” button, the image editor interface will resize itself and transform into an annotator. You will be seeing a bevy of options on the screen now. The main tools you will use to annotate are the pen, the highlighter, and the eraser. You will have the size selection right below to accommodate this set of tools. Choose the size that you feel will suit your screenshot the best and carry on to selecting the color. The pen and the highlighter have different colors so that you know. Once you’re done, click on “Done” to finalize the process. We’ve tried to annotate the screenshot of the Chrome browser’s “New tab” in the following screenshot. Given the lack of a stylus, the effort was desperate, so don’t take out distorted arrow too much to heart.
- This method’s annotation is best done using a touch-enabled Chromebook with a built-in stylus. So if you’re looking for the best ones in the business at present, we have to nudge you toward our top picks.
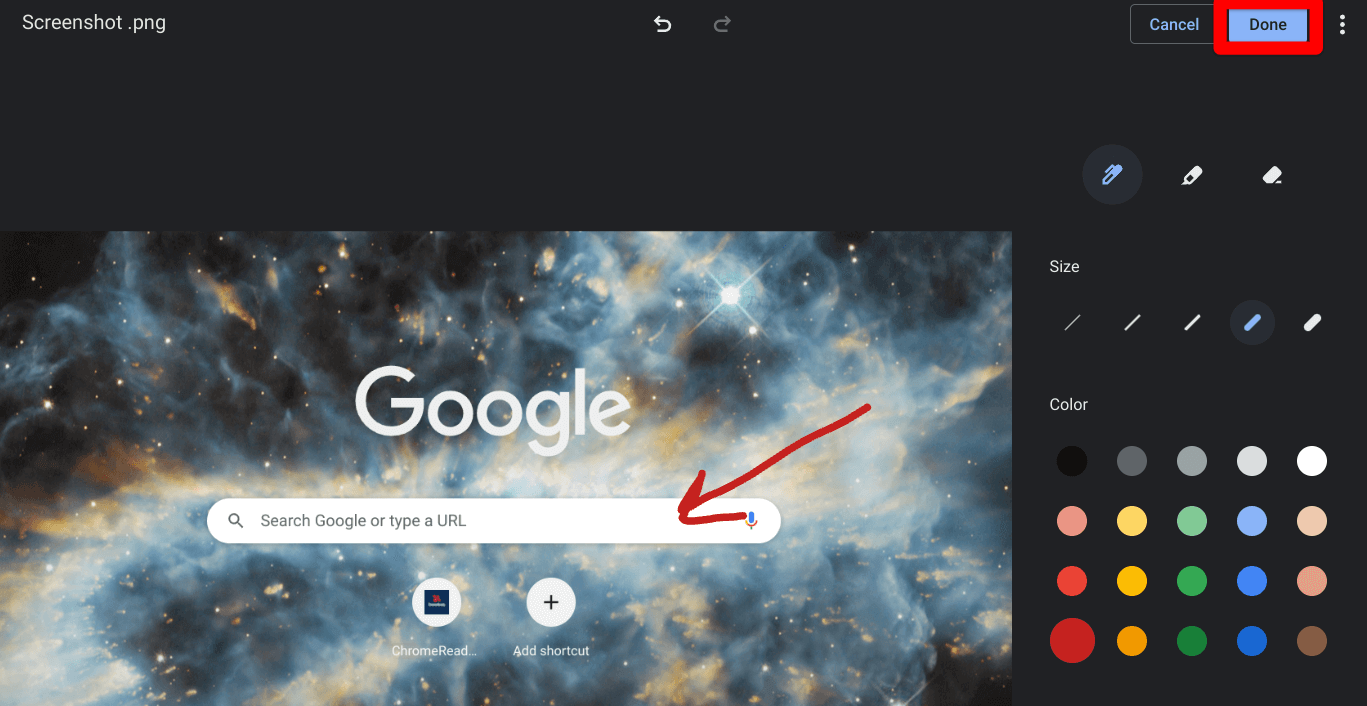
Chrome OS annotation tool
That’s all about the first method of annotating a screenshot on Chrome OS. Although this is a convenient way of labeling your images effectively, it’s only for the best that you’re well-aware of the other options that you have in this regard. So keep on reading to find out more great ways of annotating screenshots.
Option #2. Use Monosnap— a Chrome Web Store extension
The second option is a personal favorite over at Chrome Ready. This seemingly effortless add-on is one of the best Google Chrome extensions that you can get on your Chromebook today. Monosnap is fast, simple, and incredibly lightweight in doing what it does best. It’s a capable screenshot-taking tool that provides multiple options for annotation and makes the whole affair painless to approach.
Without any further chit-chat, let’s talk about how you can install Monosnap on Chrome OS.
Installing Monosnap on Chrome OS
The following steps are going to take it from here.
- Begin by heading over to the Chrome Web Store on your device. If you’re unsure about doing that, look for the following app icon in the Chromebook Launcher. Alternatively, you can also click on this direct link as a shortcut.
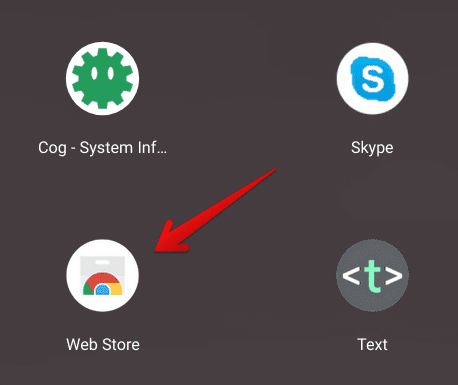
Opening the Chrome Web Store
2. Once you have the Chrome Web Store up and running, use the web application’s search bar to look for Monosnap. Type in the extension’s name and press the “Enter” key to continue.

Searching for Monosnap
3. You’ll get the search results shortly after pressing the “Enter” key. Once you do, click on the “Monosnap” entry to get to the next step. The following screenshot illustrates this step.

Selecting the Monosnap extension
4. Completing the last step should take you directly to the official installation page of the web app. Here, you’ll have to click on “Add to Chrome” to begin the installation process. However, a confirmation prompt will appear as soon as you select the button above. Let’s talk about how to deal with that in the next step.

Adding Monosnap to Chrome
5. The confirmation prompt will ask you whether you want to proceed with the installation or not. Click on “Add extension,” and you’ll be golden.
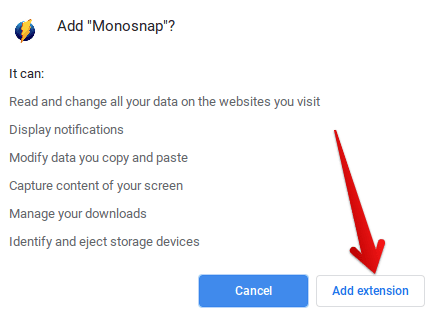
Confirming the installation
6. The system will now take a brief moment to check everything and install Monosnap on your Chromebook. This will take no more than mere seconds, so don’t expect to wait excessively at this step. Once the extension is installed, you’ll be notified by a prompt that will appear from the top-right area of the browser window.
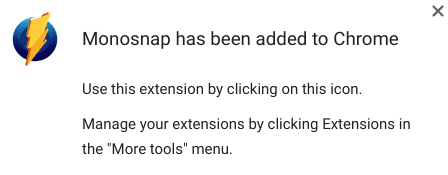
Monosnap extension installed
That’s about it for installing Monosnap on your Chromebook. Great going so far! Let us now delve into this useful add-on and talk about its functional working and how you can annotate screenshots with it.
Annotating screenshots with Monosnap
As iterated earlier, operating Monosnap is child’s play, given the extension’s excellent efficacy at getting things done. You can get started by clicking on the extension icon in the area specified below.

Clicking on the Monosnap extension icon
As soon as you do that, multiple options will be revealed on the screen for you. Now, here’s our favorite application. Monosnap allows you to capture screenshots in real-time on any page.
It even provides multiple ways of capturing a screen on your Chromebook, including “Capture page area,” “Capture visible part,” and “Capture full page.”
After taking a screenshot by using any of these options, the Monosnap editor will launch, paving a hurdle-less way for you to annotate the captured image.
If you do not want to do that and instead already have a screenshot on your Chromebook that needs annotation, click on the “Open” button.
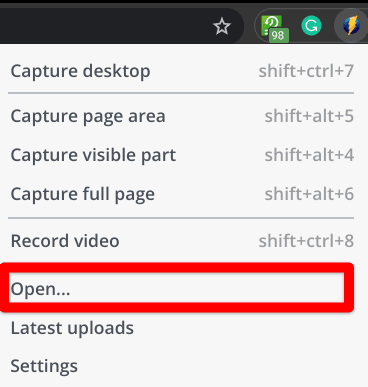
Clicking on “Open”
Doing so will launch the local storage of your Chromebook. Next, you will have to select the screenshot to annotate here. Finally, double-click on the image, and it should subsequently load into the Monosnap editor. The following screenshot is just an illustrative example of this step.
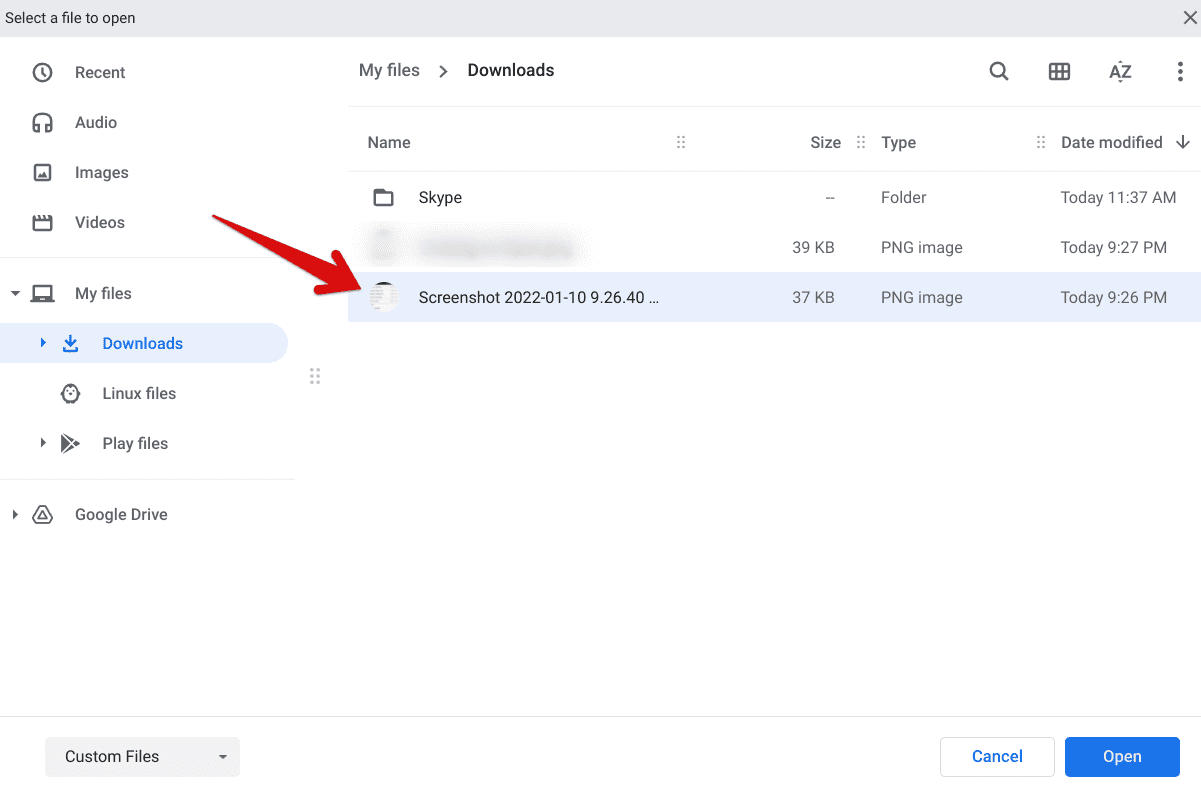
Selecting the screenshot
Now that you’ve finally arrived at the Monosnap editor screen let us dive into the nitty-gritty of annotating screenshots using this effective tool. Let’s get started by taking a close, hard look at the following, a screenshot that we opened in Monosnap.
The arrow in the image below represents the main toolbar of the Monosnap editor, where you have the following features available:
- Color Selection
- Size of the Annotation Tools
- Arrow
- Rectangle
- Line
- Ellipse or Circle
- Brush
- Text
- Bubble
- Blur
- Crop
- Resize
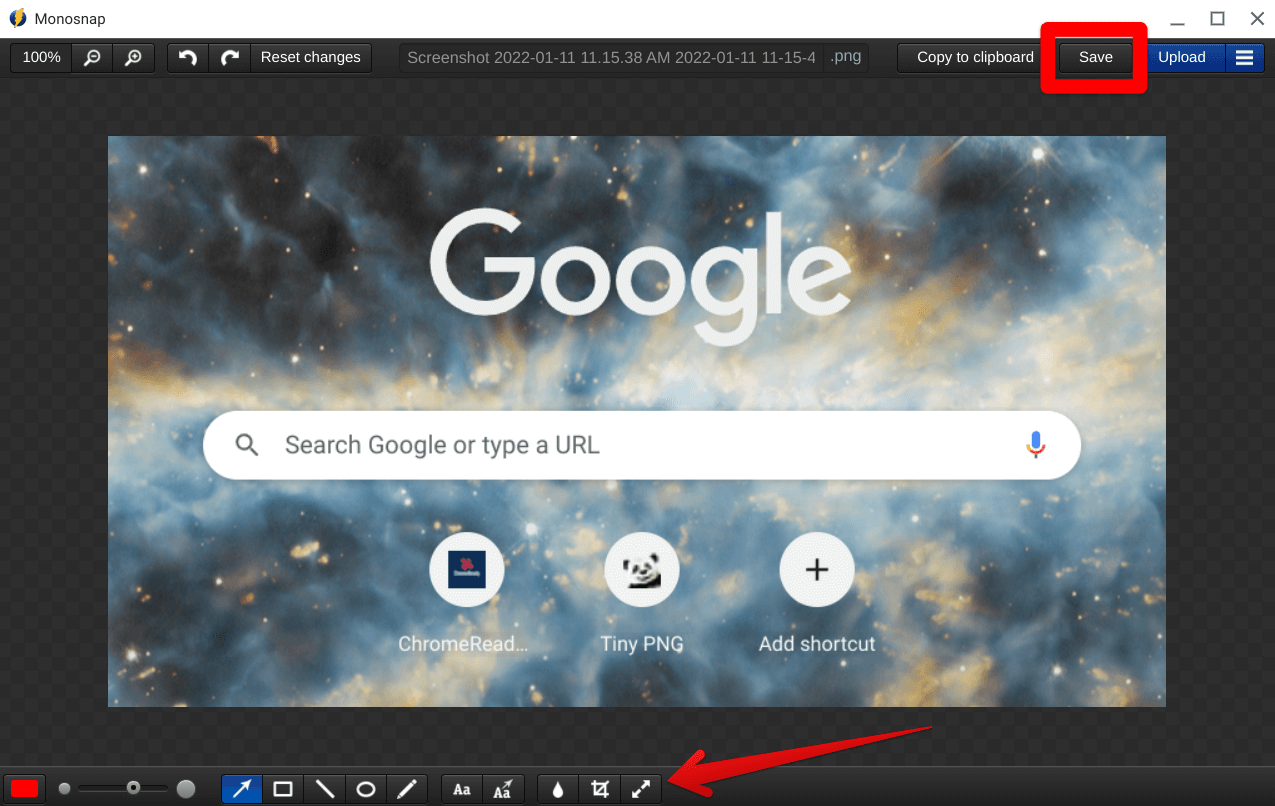
Monosnap editor
There’s just a lot of freedom when you’re out and about using Monosnap for annotating your screenshots. You can use arrows to highlight a point of significant interest or encircle something to draw the reader’s attention to a specific part. In addition, you can use the “Bubble” tool to draw an arrow and write a description of the highlighted part above it.
If you have a stylus, you can even use the “Highlighter” feature to draw a design on your own on the screenshot to explain better what it is that you need to. Furthermore, you can even rescale your image to hide anything unnecessary that you don’t want others to see. Speaking of which, Monosnap even has a reasonably effective “Blur” tool that can diminish imperfections in the screenshot and pave the way to picture-perfect annotation.
The reliability that Monosnap offers day in and day out keeps thousands of its users hooked to it. It’s the go-to annotation tool over at Chrome Ready as well, if that lets it have an additional seal of approval. It’ll take a minute or two to familiarize yourself with its minimalistic interface, which is adorned with simplicity from top to bottom. Once you’re done with the annotation, click on the “Save” button as shown in the screenshot above, and you’ll be all set.
That’s everything that you need to know about Monosnap for annotating screenshots on Chrome OS. Let’s further the article and talk about another way of image annotation on your trusty Chromebook.
- Do check out the best tools for image editing on Chromebook to revamp your photo retouching skills like never before.
Option #3. Download Annotate from the Google Play Store
The third option for annotating screenshots on Chrome OS pertains to the Google Play Store. Before getting started, please make sure that you already have the Play Store up and running on your device to save time. If you haven’t used the Play Store on your Chromebook ever before, checking whether your device is even compatible with this feature seems like a good idea.
- Take a look at this descriptive guide detailing all Linux- and Google Play Store-supported Chromebooks.
Now that we have the initial disclaimer out of the way let’s talk about Annotate—a highly convenient Play Store application with more than 50,000 downloads a solid reputation on the marketplace. We’ve tried it out on our device, and it works like a charm to annotate screenshots and give them more meaning.
If you’re in the mood of installing a Chrome Web Store extension and don’t find the built-in Chrome OS suitable enough either, having a downloaded Android application can get you going the right way.
Annotate is feature-rich, lightweight, and is optimized to function on Chrome OS. These traits are pretty desirable, especially when people prioritize speed and effectiveness above everything else. So let’s show you how to download the application on your Chromebook without further ado.
Downloading Annotate from the Google Play Store
The following steps are going to take it from here. Be sure to follow them carefully for the best results.
- As always, the first step in downloading any application from the Google Play Store is to fire up the Play Store itself. That can be done quickly through the Chromebook Launcher or from the interface’s shelf if you have it pinned there.
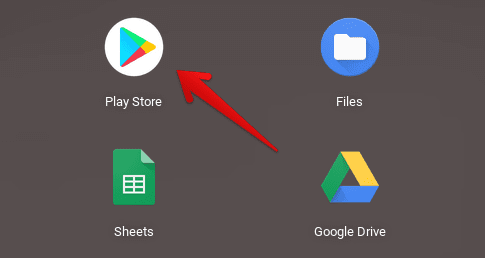
Opening the Play Store
2. After opening the Play Store, click on the search bar within the app’s interface and type in “Annotate.” You will receive multiple suggestions based on what you wrote, but pressing the “Enter” key will do just fine.

Searching for Annotate
3. After pressing the “Enter” key, you’ll have to pick the right “Annotate” application from the bunch of options that are shown to you. The following screenshot illustrates the correct Annotate app. Match the app icon on your end and click on it to continue. To be sure, here is a link to the application on the Play Store.
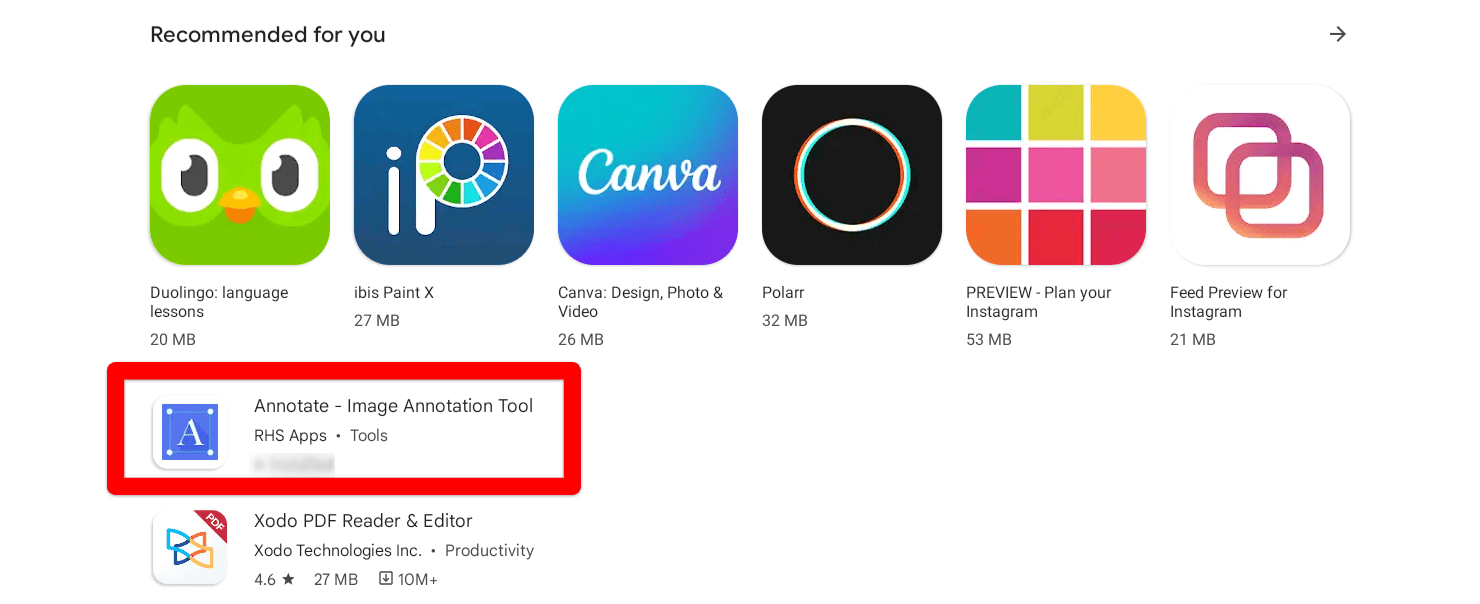
Clicking on the correct Annotate app
4. After clicking on the “Annotate” application on the search results page, you’ll be taken to the app’s installation section. This is where you can painlessly click on “Install” to commence the download. The following screenshot explains the process.
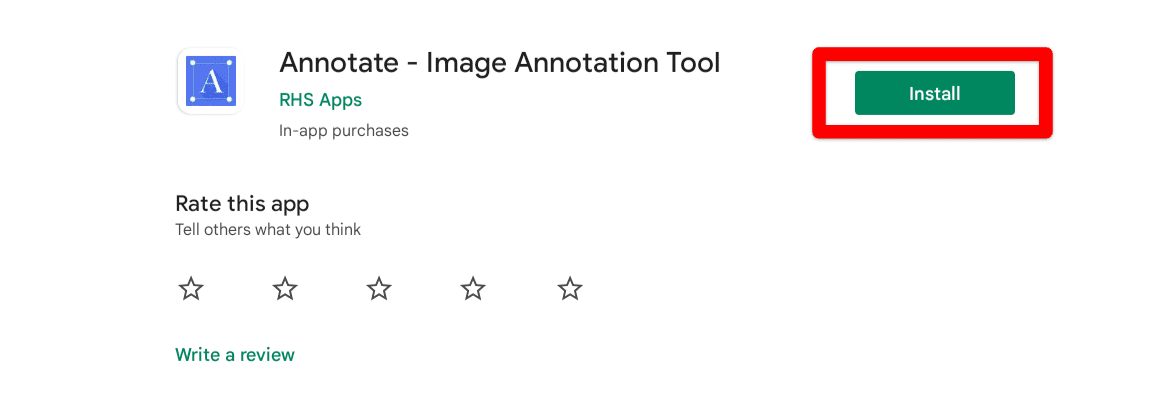
Installing Annotate
5. Once you click on the “Install” button, the download will begin. The app’s file size is around 2.75 MB, so it’s pretty small-scale and shouldn’t take more than a minute to finish downloading on most internet connections. When you have been notified that the installation has concluded, head over to your Chromebook Launcher to find the Annotate app.
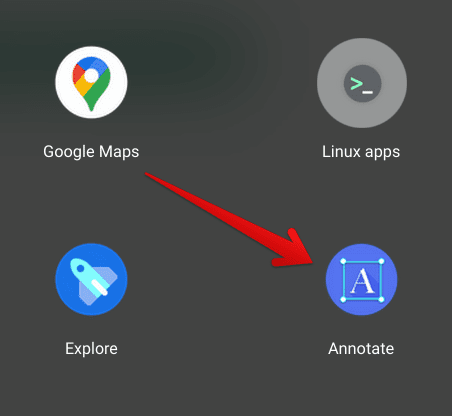
Annotate installed
That’s about it for installing the Annotate application through the Google Play Store. Let’s launch it right away and learn how to annotate screenshots on Chromebook with it.
Annotating screenshots with the Annotate app
After launching the Annotate application, the first thing that you will have to do is to allow some permissions. They will mainly revolve around sending diagnostics data to the developer and allowing the app to access your media storage.
Once you’re through the initial phase, the Annotate app will automatically open your local storage and ask you to pick a screenshot to annotate it.
You will have to double-click on the image of your preference and let the application load it into its interface. All of this should not take more than a couple of minutes.
As soon as the photo loads, you’ll see the editor of Annotate with all its tools appearing at the bottom of the screen. Similar to Monosnap, that is from where you can pick all the features you need to annotate your screenshot.
Do note that some functions will be locked because Annotate also has a premium version that you can purchase. It unlocks many Advanced-grade tools, such as blur or pixelate, smart highlight, and showcase.
If that sounds convincing enough to you, you’re free to purchase Annotate Pro. However, if basic annotation tickles your pickle, go forth with the annotation as shown in the screenshot below.
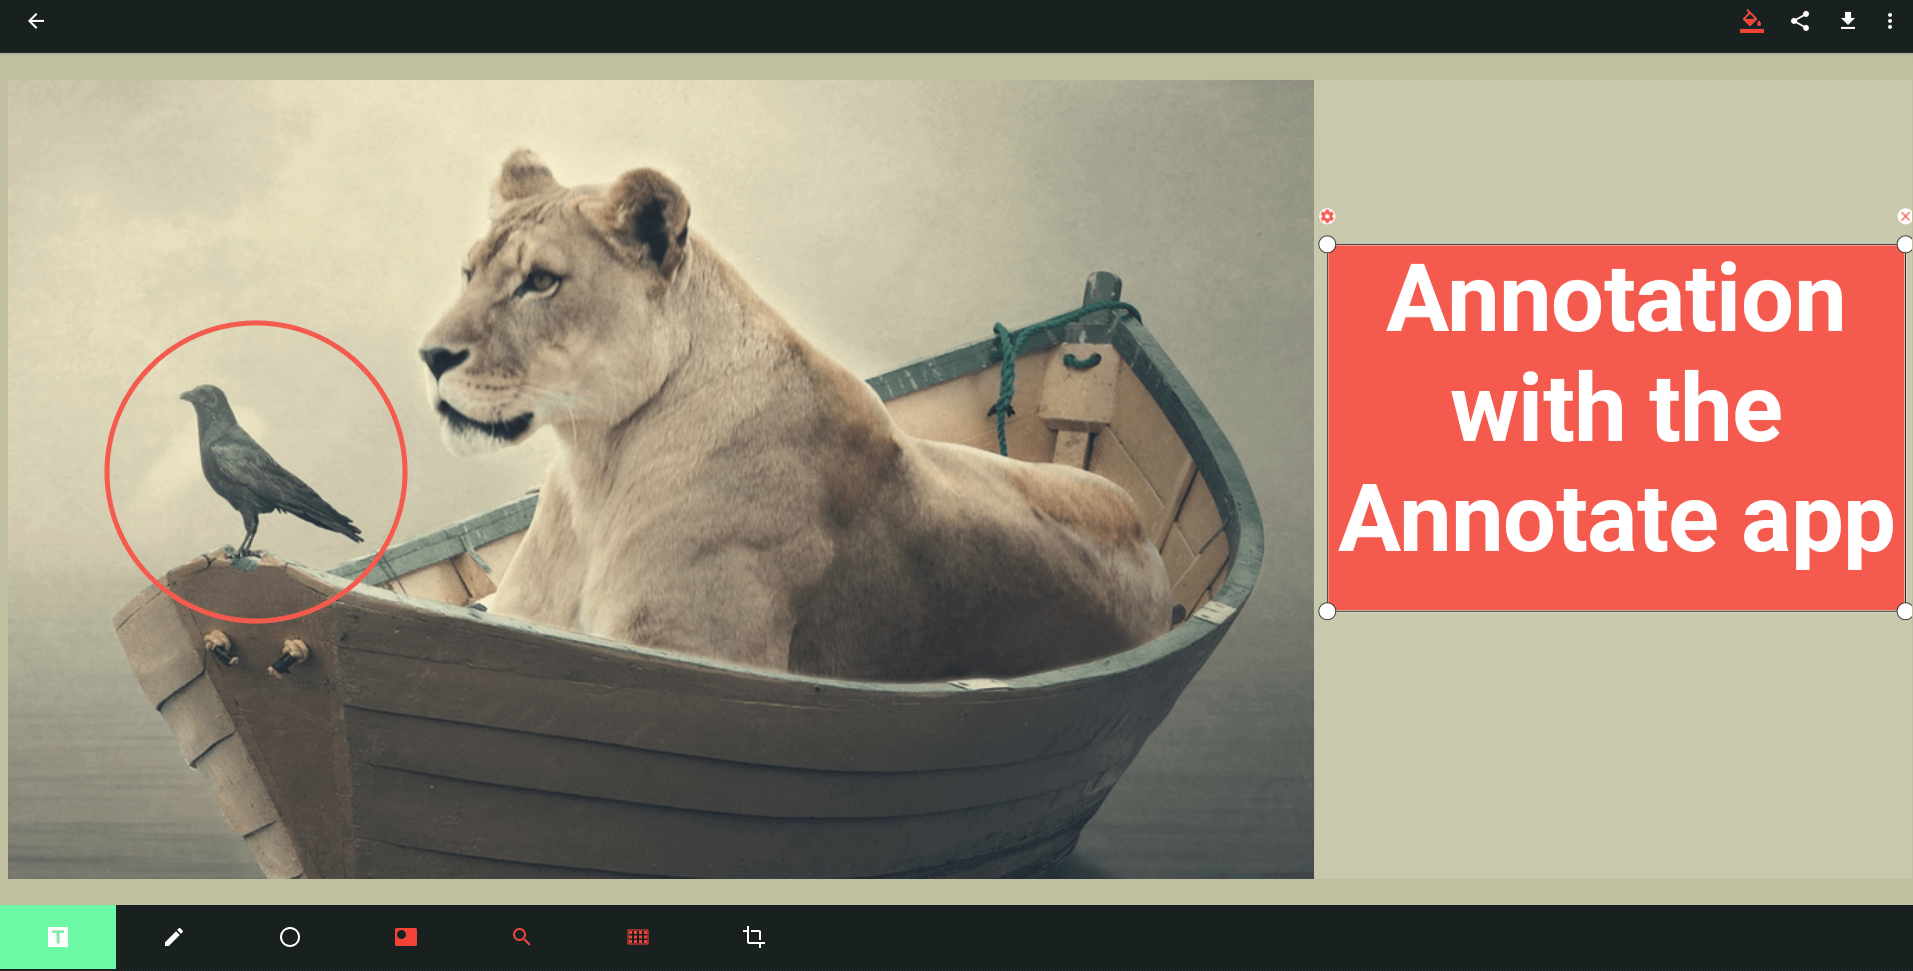
Annotate working
We’ve encircled the crow and implemented a text box to the right in the wallpaper above using the relevant tools. You can also draw with a pen and a highlighter within the application, and there’s even a feature that lets you rescale your photos.
Annotate is a reasonably basic application for annotation that doesn’t comprise an expansive list of functions. However, it is speedy, reliable, and perfect for users who can annotate their screenshots minimally.
Now that we’ve covered three methods of annotating screenshots on a Chromebook let’s talk about how we can use one more option of doing the same thing. Some users are going to like this one.
Option #4. Use a browser-based web application
From playing online games to using web-based video editors with no watermark, there’s a myriad of things you can do on the web without having to download anything on a Chromebook. This even goes for annotating screenshots on Chrome OS, as we’ve got a browser-based web application called Markup Hero on the ready-to annotate screenshots effortlessly.
It’s a reasonably straightforward web application that’s feature-rich and boasts a lightweight interface. Of course, you can also annotate PDFs with it, but we recommend checking out the top 10 PDF editors on Chrome OS for some genuinely great options in that regard.
Many users prefer the convenience of not downloading anything whenever they need to get something done. However, there are pros and cons to everything. Using a web-based application necessitates a stable internet connection at all times. Otherwise, you won’t be able to get anything out of any online web app.
As for now, let’s check out the working of Markup Hero and how you can use it to annotate your screenshots.
How to use Markup Hero to annotate screenshots on Chrome OS
Markup Hero doesn’t require an account or any other tedious sign-up process for you to use it. All you have to do is head over to this link and click on the “Try It Out” button to launch the web app. The following screenshot illustrates this initial step.
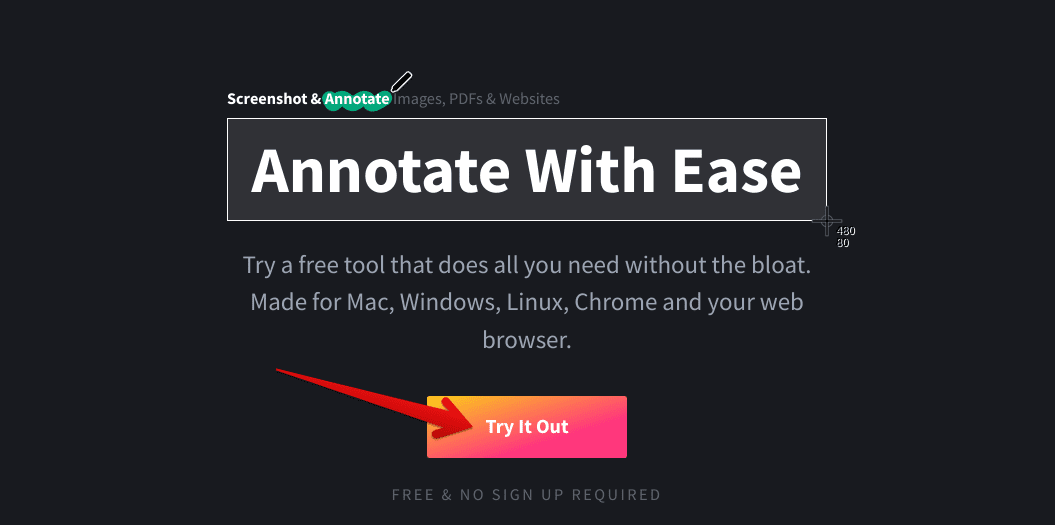
Launching Markup Hero
As soon as you click on the section above, the editor of Markup Hero will launch on your screen. As promised by the web application, there’s not going to be a hold-up in between. First, to begin the annotation, you import your screenshot to the editor interface. Do that by clicking on the “Upload image(s) or PDF” button as shown right below. You can also paste the photo link directly into the editor if you haven’t downloaded it yet. This is quite a convenient feature.

Uploading an image to Markup Hero
You’ll now be taken to the main interface of Markup Hero after inserting the image into the editor. Here, you’ll see multiple options dedicated to annotating your screenshot. The basic ones, such as arrow, line, circle, pen, and highlighter, are readily available in the toolbar at the top. In addition, you also get a unique “Signature” feature within the editor interface that lets you copyright your screenshot if needed.
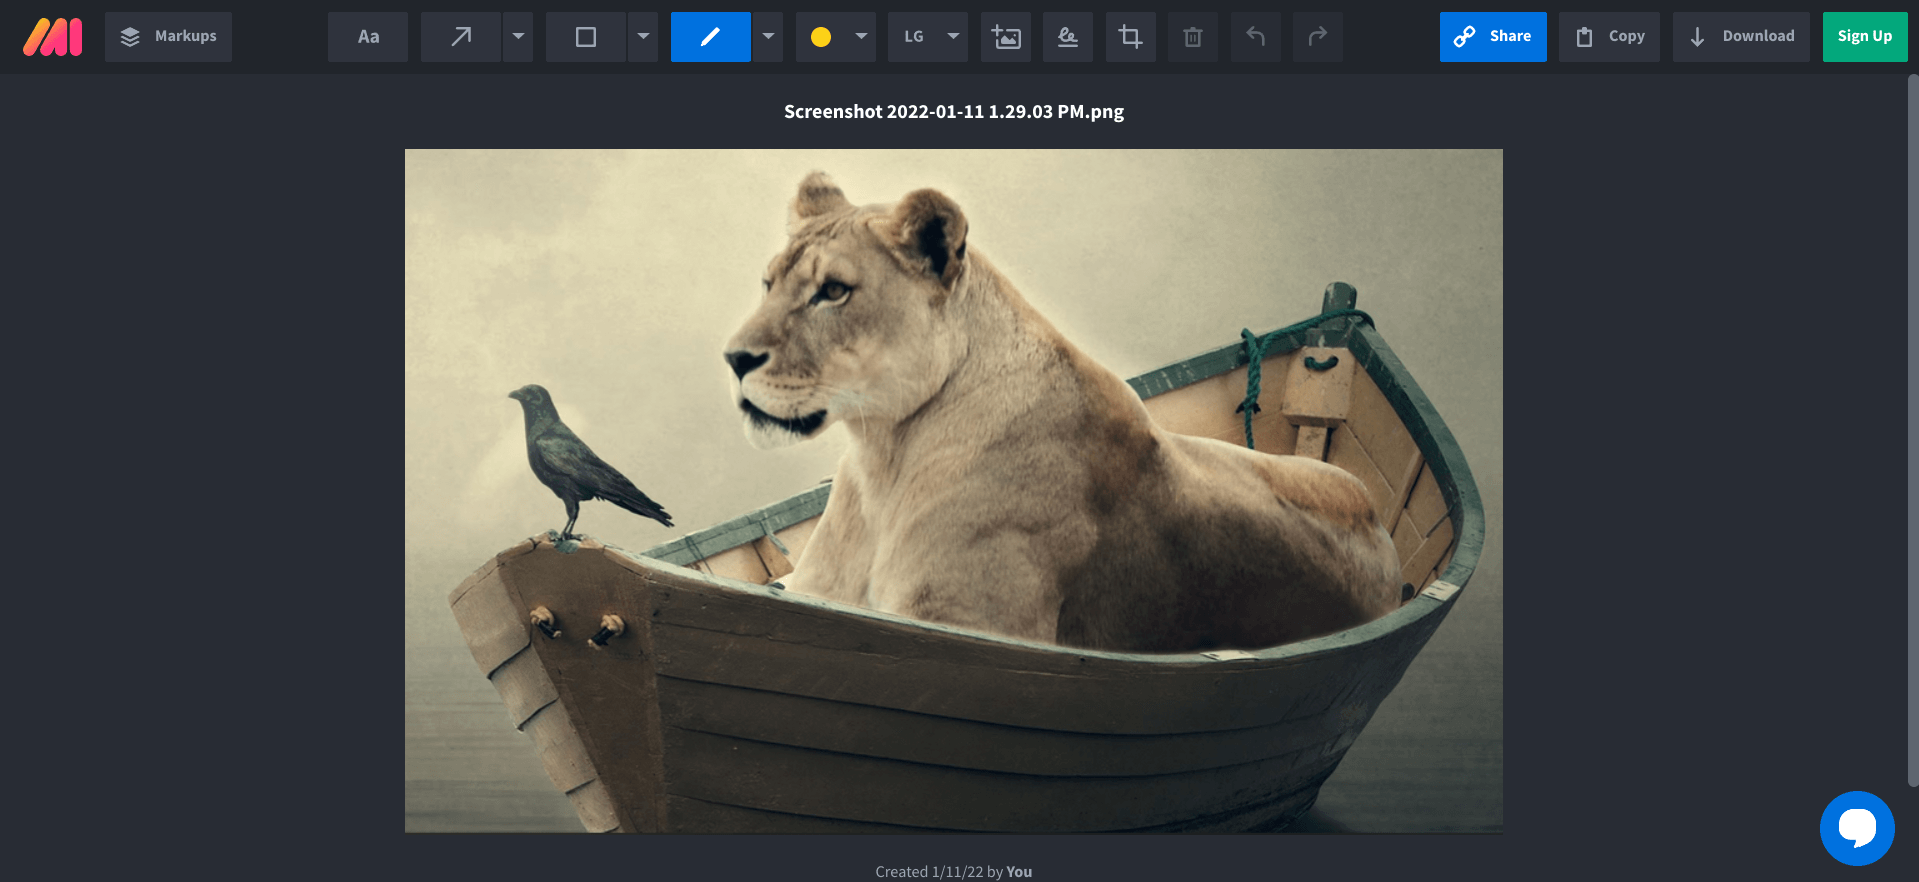
Markup Hero editor interface
However, the latter will only be available for premium users who have purchased the paid version of Markup Hero. If you’re willing to get your hands on a bunch of Advanced-grade tools, consider going for it.
You can also create an account on Markup Hero to save your history of previous works and return to them whenever you want. Once you’ve done the annotation, you can click on “Save” in the top-right corner of the screen to download the edited screenshot to your Chromebook’s local storage.
That’s all about annotating screenshots on a Chromebook through the fourth and final method, utilizing the Markup Hero web application. We’ve now concluded the article.
Conclusion
Chromebooks are no longer mere web browsers, as many people previously thought they were. Instead, they’ve changed the game by packing cutting-edge hardware, as shown in the likes of the ASUS Chromebook CX9, and bringing in loads of functionality to plummet that antediluvian thought into ruination. Chrome OS, today, is capable of running WordPress, Microsoft Office files, scanning documents using an in-built feature, and even Adobe Photoshop to some extent.
Therefore, when an operating system is out there doing so much, it’s only plausible for us to assume it can annotate photos as well, and in not just one, but in a wide variety of ways. We’ve talked about how to annotate screenshots on a Chromebook using the native tool, the Chrome Web Store, the Google Play Store, and the web app method, so it’s now up to you what route to tread on. We recommend giving each of them a go if you have some free time to pinpoint the best option.
Chrome Ready wishes you good luck!
