Welcome to our guide on how to rotate the screen on a Chromebook. Whether you need to view documents in a different orientation, use a stylus for drawing or handwriting, or simply want to change things up, knowing how to rotate the screen can be incredibly useful.
However, the process can be a bit different on a Chromebook than on other devices. In this guide, we’ll show you the various ways to rotate the screen on a Chromebook, including using keyboard shortcuts, the quick settings menu, and other tools.
Understanding the basics of screen rotation
First things first, screen rotation on a Chromebook isn’t just a cool trick; it’s a feature that enhances usability and accessibility. By rotating the screen, you can adjust your display to better fit the content you’re viewing or creating. This can be especially handy if you’re using a convertible Chromebook or one with a touch screen.
How to rotate screen on Chromebook
There are a couple of methods to rotate your screen. Starting from the easy one, we’ll get to both of them so that you know all your options.
Option #1: Using your keyboard to rotate Chromebook screen
Rotating your Chromebook screen is surprisingly simple, and there are a couple of ways to do it. Here’s the most straightforward method:
Quick keyboard shortcut: Press and hold CTRL + SHIFT and the Refresh key (the key with a circular arrow, typically located above 3). This will rotate your screen 90 degrees. Keep pressing this combination to keep rotating your screen until you reach your desired orientation, such as 180°, or even 270°.
Chromebook Screen Rotated 90 degress
That’s the first method out of the way! Let’s get on to another way of rotating your screen. It might seem a bit longer, but rest assured, it has a rewarding benefit to it that the keyboard method does not. Please continue reading to find out what it is.
Option #2: Using your Device’s Settings
This is the second method of calibrating your screen orientation that we’re going to get to. The following steps will take it from here.
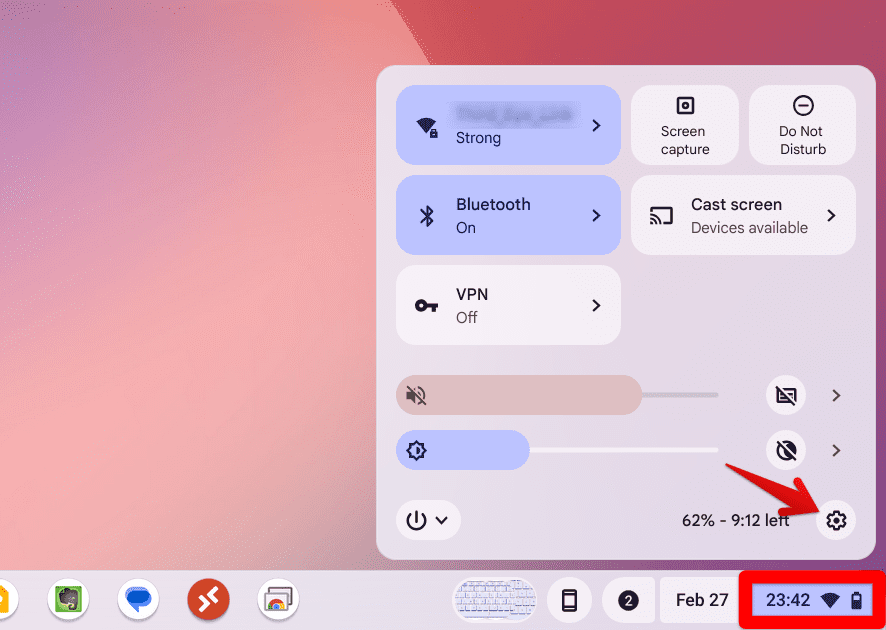
1) Open the ‘Settings’ menu by clicking on the time in the bottom-right corner of your screen and then the gear icon.
Launching ChromeOS Settings
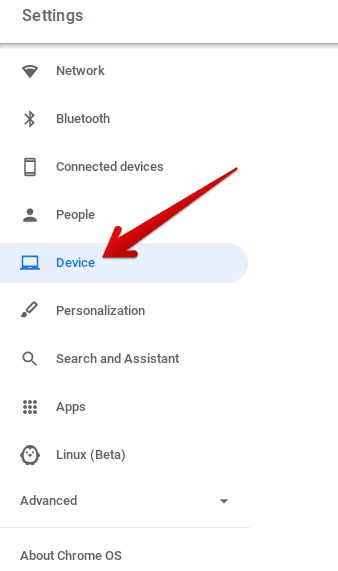
2) Continue by clicking on “Device” on the left column when your “Settings” open up.
Clicking on “Device”
3) Once you do that, you’ll be taken to a section where your device’s settings can be tinkered with. You’ll have to click on the arrow beside “Displays” here to proceed.
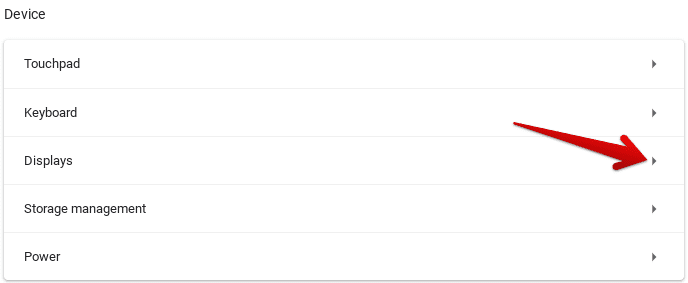
Clicking on “Displays”
4) As soon as you do that, you’ll be taken to the “Display” settings of your Chromebook. Here, under the “Built-in display” subheading, you’ll see “Orientation.” Click on the drop-down arrow beside it. Here, you’ll find the option to manually set your screen orientation to 0, 90, 180, or 270 degrees.
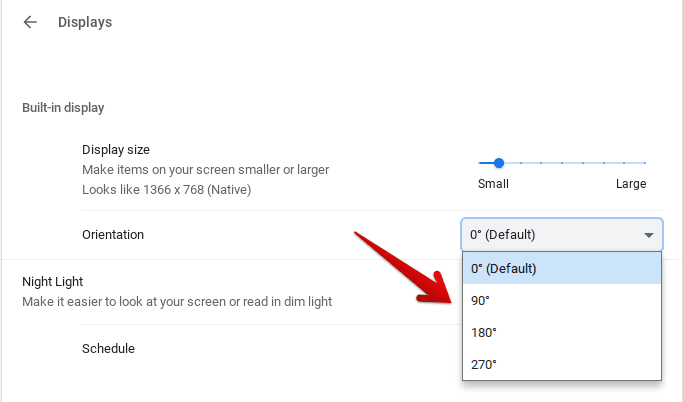
Choosing Screen Orientation
That’s about it as far as rotating your Chromebook’s screen is concerned! We hope that by now, you’ve thoroughly understood both methods of optimizing your device’s orientation.
External Monitors
What’s interesting about rotating your screen by going to your device’s “Display” settings is that you’ll also be able to change the orientation of any external monitor there that’s connected to your Chromebook. The settings for that display will appear right when you’ve connected any TV or monitor to your Chrome OS. This makes the long route useful for several reasons, out of which convenience and usability are a few.
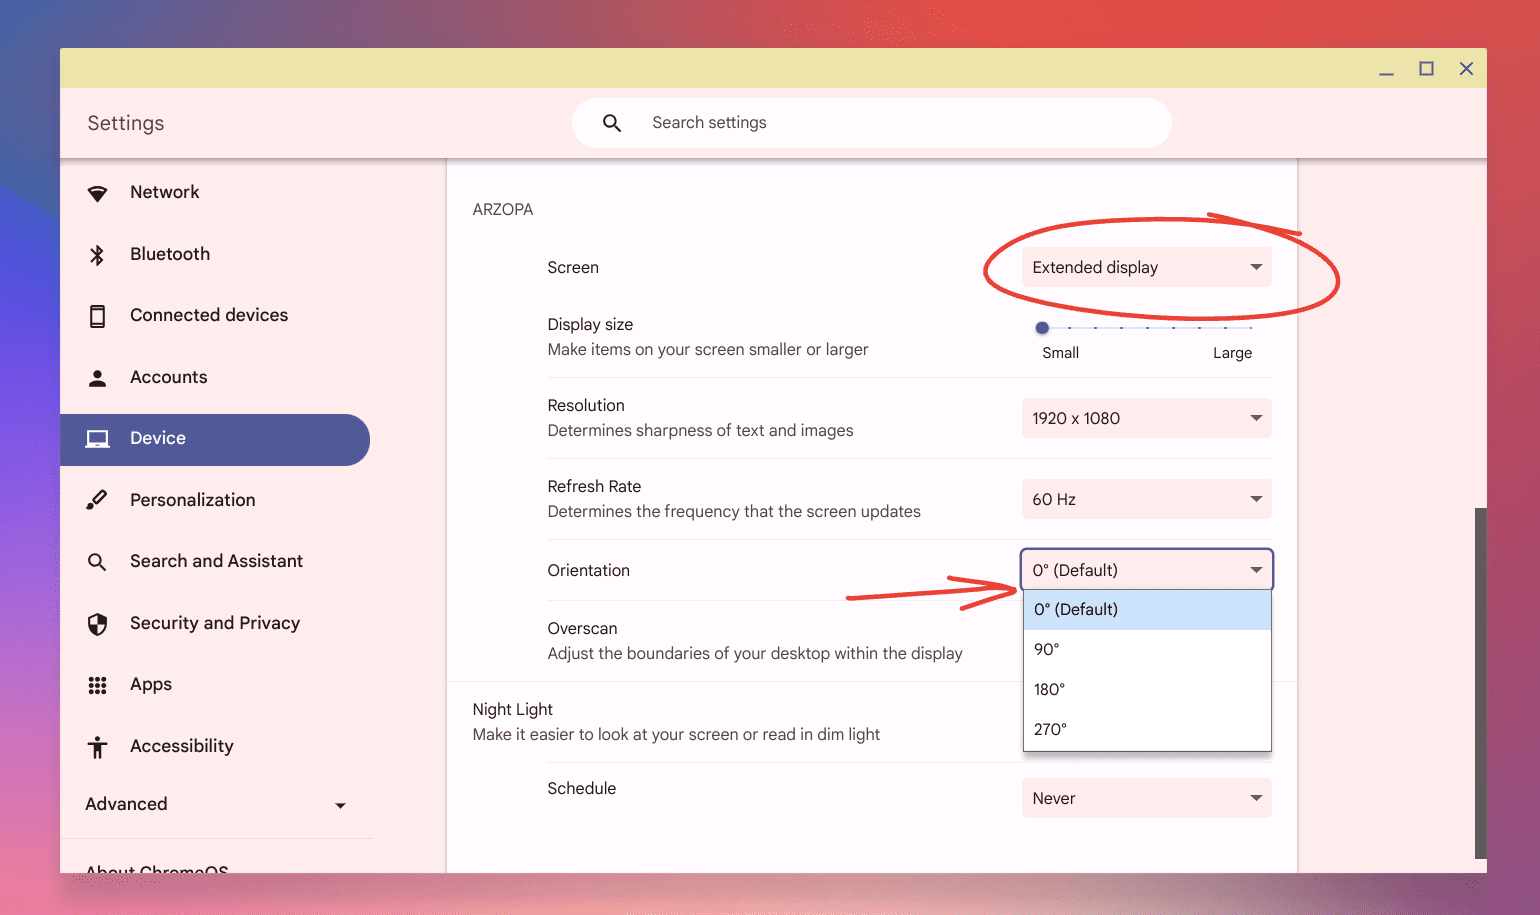
Rotating External Display Screen
Although screen rotation can come in handy when you wish to lie the device flat and make the screen visible for anyone sitting adjacent to you, you need to know that the functionality of the touchpad changes concerning rotation. For instance, if you rotate your screen to 270°, going down on the touchpad will move the cursor right, and if you intend to go up, the cursor will move towards the left. A Chromebook with a touchscreen will work wonders here, but other than that, you’ll have to make do.
Practical uses of screen rotation
For reading and browsing
I personally love rotating my screen when I’m settling down with a long article or an ebook. It just feels more natural, almost like holding a real book. Plus, portrait mode can make reading easier on the eyes by limiting line length.
Creative work
For those into digital art or graphic design, rotating your screen can give you a fresh perspective on your work. It’s like having a digital easel that you can adjust to suit whatever masterpiece you’re creating.
Concluding thoughts
Screen rotation on a Chromebook is one of those nifty features that can drastically change how you use your device. Whether for productivity, creativity, or just a bit of fun, it’s worth giving a spin (pun intended). Try to experiment with it cautiously, as not all apps and websites will play nice with your new orientation. Happy rotating!