Chrome OS is often thought of as an operating system that cannot handle anything more than mere browsing tasks. However, contrary to this vague belief, Chromebooks are efficient and competent devices that even beat macOS in the latter half of 2020, with speed and security being at the top of the hierarchy, as statistics show.
What’s more, is that you can download and install a bevy of optimized applications from the Google Play Store and even get Microsoft Office as a productivity suite to tackle work. All that considered, there’s one facet about Chromebooks that truly takes the cake when it boils down to increasing functionality and making Chrome OS a lot more than just an internet browsing laptop, and that is Linux.
- Read all about the top reasons you should run Linux on your Chromebook here.
Think of Linux as a particular feature that can help you install powerful desktop-based software on your Chromebook. But, quite possibly, Linux’s biggest empowerment to Chrome OS is enabling its users to program and write code by having the ability to install code editors and Integrated Development Environments (IDEs). This means that you can even do programming and coding on your Chromebook with comfort and ease – all due to the courtesy of Linux.
Therefore, this article will be a descriptive guide concerning all the various code editors you can work with on Chrome OS and how you can access or install them on your device. If you’re a programmer and have come looking for ways to code on a Chromebook, look no further as you’ve come to the right place.
Option #1. Programming With Code Editors Using Linux
The foremost step here is to make sure your Chrome OS supports Linux. All latest Chromebooks are Linux-enabled, but if you own a device that came out before 2019, there’s a chance that it might not have this essential feature. Check out whether your Chromebook is enlisted as a compatible device in this article here. If your device isn’t supported, skip to the Option #2 section of the article.
- If you do have Linux on your Chromebook and you’re not sure how to set it up, take a look at our complete Linux installation guide.
With the basics out of the way, let’s get into different code editors and how you can install them on your Chromebook using the Linux Terminal.
Microsoft Visual Studio Code
Microsoft Visual Studio Code is probably your best bet if you’re thinking about coding or programming on a Chromebook. But, again, we’re talking about a highly polished platform with a multitude of features to help smoothen your coding experience. We’ve extensively covered this software in one of our articles here, so do check it out if you’d like to read more about its features.
Visual Studio Code embodies a top-tier interface that works seamlessly on Chrome OS, whether you have a high-end device or a budget-friendly one. It’s free to use and has a wide variety of different extensions that allows you to add different programming languages such as C++ and Java to your workspace. Apart from being a highly specialized code editor, Visual Studio Code comprises in-built Git commands to help you collaborate and work with a group.
How to install Microsoft Visual Studio Code on Your Chromebook
The following is going to guide you on installing Visual Studio Code on Chrome OS. Let’s begin.
1) Click on this link to go to Visual Studio Code’s official website. When you’re there, scroll down a little to find the download section. Next, select the .deb Debian file and wait for it to finish downloading.

Downloading the Debian File for Visual Studio Code
2) When the file has finished downloading, go to it using your Chromebook’s “Files” and perform a right-click on it to reveal more options. Then, click on “Install With Linux” to continue.

Installing Visual Studio Code With Linux
3) As soon as you do that, an installer will pop up on your screen. An option to “Install” will be clearly visible. Click on it to begin the process.

Clicking on the Install Button
4) When the installation has started, click on “Ok” and wait for the installation to finish.

Closing the Installer
5) When you’re prompted to complete the installation, go to your “Linux apps” folder and find the Visual Studio Code app icon there.

Visual Studio Code Installed
Visual Studio Code has been successfully installed on your Chromebook if you see an app icon similar to the one pointed at above. You can now launch it and begin coding easily from the comfort of your sleek operating system, either right from home or at work.
How to Run Pythons Commands Using the Linux Terminal
Python is a popular programming language that uses high-level data types and dynamic typing to develop code much quicker than Java or C+++. A drastic increase in productivity is why programmers around the world easily pick this language up. If you’re a Python expert, you can code easily using a Chromebook.
Linux on Chrome OS comes pre-loaded with Python 3 and even allows you to install other versions of this programming language as per your requirement. To check what variant of Python you’re currently running on Linux, input the following command into your Terminal.
python3 -V
This command will make your Python version appear right in the Terminal window.

Python Version on Linux
Python 3.7.3 comes pre-installed, but if you’d like to install the latest version of Python on Linux, you can do that as well.
Installing the Latest Version of Python on Linux
Installing Python’s latest version requires a bunch of commands to be entered on the Terminal window. The following steps will walk you through the process.
1) The first step is to access a specific folder in the Linux Terminal. To do that, use the following command.
cd /usr/src

Access Terminal Folder
2) After that, the Terminal will gain access to the folder specified above, and you’ll be able to change your version of Python using the command given below. This method of upgrading your Python version uses the wget command, which is an easy way to accomplish the task at hand. In addition, if you require a specific Python variant, you only need to replace the version number in the following command and keep everything else just the same. For reference, we will install the 3.9.5 Python version, which happens to be the latest one currently. Check out this link for all Python releases. After entering this command and pressing the “Enter” key, the Terminal will install the required Python version.
sudo wget https://www.python.org/ftp/python/3.9.5/Python-3.9.5.tgz
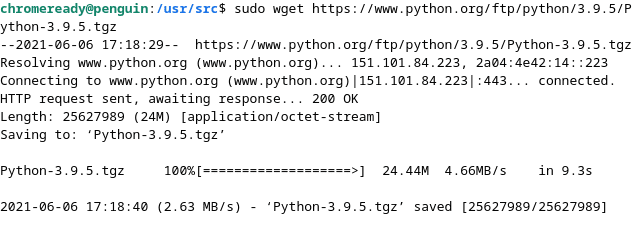
Python Version Updated
That’s it for Python on Linux. All that’s left is the actual programming part. To code with Python, you can take up Visual Studio Code as your coding environment. In addition, you can also run programs with Python using the Terminal. Let’s cover that briefly as well.
Running Python Programs Using Linux
The Linux Terminal can be utilized to run programs using Python. To do that, you’ll need to have your relevant files present in the “Linux files” folder in your Chromebook’s “Files.” Then, you can either drag the file across the interface to the required folder or copy and paste it – whatever tickles your pickle.
After the file is in the “Linux files” folder, the rest of the work will be done in the Terminal. You can even use the ls command on Linux to view all files present in said folder. To run programs using Python, input “python3” in the Terminal along with the name of your file. However, do note that your input command will change if you’re running another version of Python.
IDLE Code Editor
Integrated DeveLopment Environment, better known as just IDLE, is a famous tool for developing Python codes. It provides programmers with an easy-to-operate user interface that makes it possible to debug, run, and edit Python programs. By having the ability to execute Python programs from within this full-blown code editor, you’re going to have a highly convenient time writing code on IDLE. People usually ask if IDLE can be installed on a Chromebook, and the answer is a delightful yes. In fact, it’s quite uncomplicated to get IDLE on Chrome OS and have a friendly environment to code Python in. So let’s talk about how to install this tool on your Chromebook.
Installing IDLE on Chrome OS
To get the IDLE Code Editor on your Chromebook, follow the steps given below.
1) As always, start by opening the Linux Terminal. Once done, copy the following command and paste it into the Terminal window. Do note, however, that this tutorial is for those users that use python3. The command will change if you’re using a different version of Python.
sudo apt-get install idle3

Installing IDLE
2) You will need to confirm the installation. When you’re prompted to do so, press the “Enter” key to proceed.

Confirming the Install
3) The installation is now going to take a moment or two. When it’s done, check your “Linux apps” folder in the Chromebook Launcher and find IDLE there.
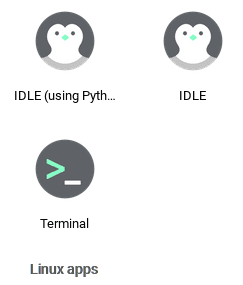
IDLE Installed
Jupyter Notebook
Another important code editor and computational notebook that programmers can use to merge multimedia sources, different types of software, and text all in a single document is Jupyter Notebook. It’s open-source, can be operated for free, and is a web-based tool that can interact with several coding languages at once. Thus, it’s not only an IDE but is also a presentation tool that plays a key role in interactive data science settings. Moreover, Jupyter Notebook comes in handy for Python programmers as the tool allows them to write Python code effectively.
You can install Jupyter Notebook on your Chromebook in a few easy steps. Let’s discuss how.
How to Install Jupyter Notebook
1) Begin by opening the Terminal window since that’s what we’re going to use here for the most part. When the Terminal is all fired up, use the following command to install some dependencies for the packages that we will download later. After entering, you’re going to be asked for confirmation. Press the “Enter” key again to proceed.
sudo apt install build-essential libssl-dev libffi-dev python3-dev libhdf5-dev
Installing Dependencies
2) The step above will take a while, but when you’re prompted that the operation has been completed, continue using the command given below. Note: python3 is being taken as an example for this tutorial.
sudo apt install -y python3-pip

Installing “pip”
3) When that step is over, your final ordeal is to use the newly installed pip command to get Jupyter Notebook on your Chromebook. Again, the input below is going to take it from here.
sudo pip3 install jupyter

Installing Jupyter Notebook
4) After the process finishes, you can easily access Jupyter Notebook by entering the following in the Terminal.
jupyter notebook
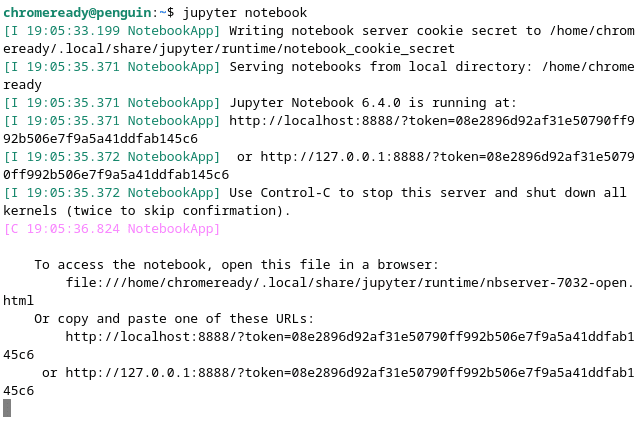
Launching Jupyter Notebook on Chrome
5) The Terminal will provide you a URL to copy and paste into your browser to launch Jupyter Notebook. Use that to launch the program.

Jupyter Notebook
Option #2. Programming on Chromebooks Using Web-Based Applications
Let’s give the Terminal a break now and venture towards other alternatives. Having a fully dedicated coding environment is nothing but great, but Chromebooks, with their cloud-based solutions, have a lot more to offer if we look at web-based applications. Chrome OS’s speedy browsing speed and quality standard of security have to be utilized somehow or the other; why not let it be coding?
Therefore, this section will focus on decent substitutes for traditional desktop-oriented code editors and allow you to code on your Chromebook by using your browser only. If your device does not come with Linux pre-loaded, you should definitely read what’s to come. So let’s dive right in.
1. StackBlitz
Kicking off this list is the genuinely renowned StackBlitz online code editor that is termed as ” The fastest, most secure
dev environment on the planet.” While we cannot vouch for this advertising, we can vouch for this IDE’s top-tier capability when it comes to programming. Using StackBlitz, you can painlessly create, edit, and run full-stack applications with increased speeds during package installation with a bevy of features to make your work unchallenging, all within a reliably secure environment.
Some of the front-end frameworks and libraries StackBltz’s GUI includes are Angular, React, RXJS, Ionic, SVELTE, and Vue. For starting bare-bones, you get the basic JavaScript, TypeScript, and other programming languages to help you get started. Other noteworthy features include IntelliSense, which Visual Studio Code users are quite fondly familiar with, lightning-fast import speeds for packages, and offline usage.
Check out StackBlitz here.
2. CodeSandbox
Another great option for programming enthusiasts is CodeSandbox, and you’re going to find this one a cut above the rest. This web application is a strong believer in teamwork and has many features to reinforce its stance. By implementing the concept of a sandbox, all you have to do is start projects, begin working on them, and get feedback from people by just sharing a single link. You can also get others to collaborate and co-create the project you’re working on. You can even begin coding by using a GitHub repository and start developing programs in a matter of seconds. A sandbox is purposely built for rapid web development, and this is where CodeSandbox truly shines.
The convenience continues when this browser-based code editor allows you to use private packages and import public ones. It’s also optimized for various frameworks such as Angular, Vue, and React. The integration with GitHub has brought benefits in the sense that you can import and run repositories directly from GitHub and export your development sandbox back to the repo.
Check out CodeSandbox here.
3. Google App Engine
One more service to pursue is Google’s very own App Engine – a serverless platform that makes it possible to scale applications without going through the hassle of infrastructure management. Say goodbye to configuration deployments as well with the Google App Engine as you continue coding with the variety of programming languages it’s compatible with along with other developer tools. You can also host different application variants to create development and testing environments for your website or app.
Google also provides diagnostic tools with App Engine. You can make the best use of features like Cloud Monitoring and Cloud Logging to keep tabs on your app’s performance. There’s also the Cloud Debugger and Error Reporting function that attends to bugs in due time.
Check out Google App Engine here.
Option #3. DroidScript on the Google Play Store
Don’t think of the Play Store as some slowpoke that cannot keep up with Chrome OS. On the contrary, more and more applications have started to receive specific optimization for Chromebooks that lead them to perform better and have a better-looking interface on the big screen. For programming, the Play Store has DroidScript to boast about, and all for the right reasons. This application makes it easy to write applications on Chrome OS using JavaScript.
There will be limitations here, of course, given that the app is coming from something intended for smartphones. However, best believe that it’s still a significant option to consider for all those who have just started with programming and code editing. So, let’s take a closer look at DroidScript by discussing some of its praiseworthy features.
Features
Learning Environment
DroidScript can facilitate beginners with learning JavaScript, one of the most popular and commonly used programming languages out there. The interface comes loaded with examples that are easy and simple to understand. Additionally, DroidScript has what it calls “active documentation” and comprises an expanding community that can help tend to your queries whenever the need arises.
Built-In Browser-Based IDE for Large-Scale Projects
DroidScript has an in-built code editor with a larger, more advanced interface that the developer prefers you use when bigger projects are in question. This feature can be easily accessed from within the application and is thereby launched in your Chrome browser. No further downloads are required since this IDE is based on the web.
WebView Control
Using DroidScript’s Webview Control feature, you’ll be able to make HTML5 applications in no time. The program also offers you ways to build hybrid or native applications for different operating systems as well.
Plug-Ins for Added Functionality
DroidScript has a store inside the app that makes it possible to grab a wide variety of plug-ins to increase your productivity when writing code. There are a total of 8 plug-ins currently, with more on the way. One of them includes Jimp – an image processing library that’s written totally in JavaScript. Another one is known as “Moment,” which allows you to parse through dates and validate them. You also have the ability to perform manipulation and display them – all in JavaScript.
Installing DroidScript on Chromebook
The following steps are going to guide you on getting DroidScript on Chrome OS.
1) Open the Play Store on your Chromebook and search for “DroidScript” using the search bar. You’re going to get multiple suggestions along the way, but pressing the “Enter” key will do just fine.

Searching for DroidScript on the Google Play Store
2) The step above should take you to the official installation page. Then, click on “Install” to begin downloading DroidScript.

Installing DroidScript
3) When you’re prompted that the installation has been completed, check your Chromebook Launcher for the application.
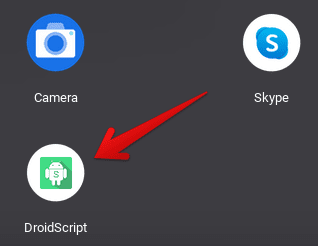
DroidScript Installed
DroidScript’s Working
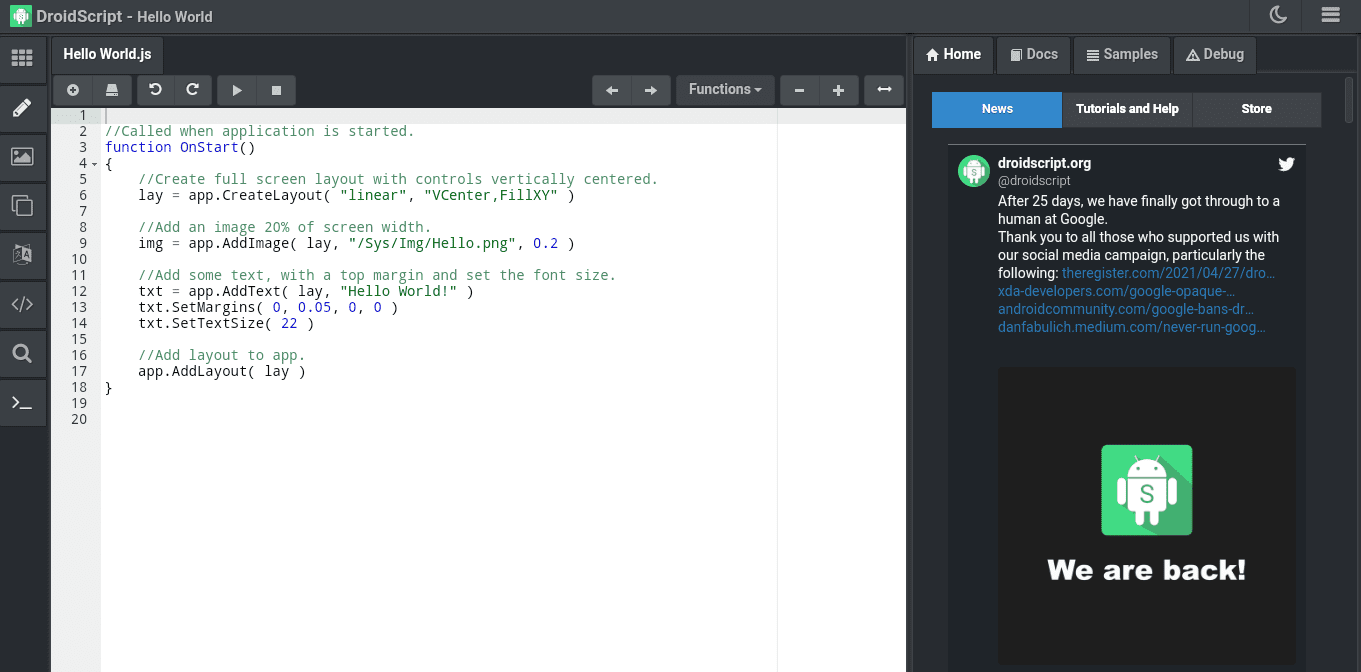
DroidScript on Chrome OS
DroidScript on Chrome OS loads up pretty fast and stays that way for the rest of its say on your device, all due to the courtesy of its lightweight design. The interface is easy to understand, and there’s even a news section on the right that shows you anything related to DroidScript in recent times. You can begin coding from scratch or upload a file of your own from cloud storage. Multiple plug-ins can be installed from one of the options on the left column as well.
DroidScript is a great option for mobile coding and app development. It isn’t too extensive in its functionality and does not have many other programming languages as well. However, it’s still a deserving mention on this list because of its speedy interface, JavaScript tutorials, and convenient app development.
Conclusion
Coding on Chromebooks, not to mention coding itself being severely complicated, seems like a difficult prospect at first. Still, once you know what to look for, all the challenge seems to fade away as you make yourself at home with a local development environment. Linux on Chrome OS has made it possible to cross unseen horizons, and programming is just one of the multiple applications of this powerful Chromebook feature. In this article, we’ve shown you a handful of ways you can use to set up coding environments on Chrome OS and get yourself some decent code editors. We truly hope that this guide will prove useful for your cause. Chrome Ready wishes you good luck programming!
