ChromeOS is one of the most popular operating systems on the planet, but if you’re hearing about them only now, that’s no worry. Since their inception in 2022, Chromebooks have undergone a swath of changes and improvements, both from the perspective of software and hardware.
Looking at one of these in 2022 while comparing a 2011 Chromebook side by side, the day and night difference between the two is unbelievable—that’s how much ChromeOS has grown in the previous decade. The development gap here is immense, from the first Chromebook made to the HP Elite Dragonfly Chromebook.
That said, if the operating system has your interest fairly piqued, and you want to know more about it before purchasing, you’ve come to the perfect place. This guide will talk about ChromeOS in general while diving deep into the cornerstones of its graphical user interface.
Stick around as we go through the essential parts of what makes up a Chromebook to give you an authentic look and feel of ChromeOS. But let’s get started with the basics right away first.
- Recommended read: Master guide – How to choose your Chromebook.
What is ChromeOS? The basics explained
ChromeOS home page
ChromeOS, previously written as Chrome OS, is a cloud-first operating system with speed, stability, and simplicity serving as its core principles. This exceptionally lightweight operating system relies heavily on cloud computing and tends to exchange data back and forth with remote servers whenever needed.
For instance, Google Drive — one of Google’s major proprietary applications and one of the world’s best cloud-based storage solutions — comes pre-loaded on Chromebooks and even features its designated section in the “Files” system utility of ChromeOS, which is the “File Manager” app of this operating system.
Since Chromebooks resonate with the cloud so much, they come across as minimalistic. That is to say, expect the most straightforward user interfaces from ChromeOS. It does not even engage a speck of complication, let alone be hard to grasp.
Now, as far as the build of ChromeOS is concerned, the operating system at hand is Gentoo Linux-based and has been built off of the mainframe of ChromiumOS, which in simple terms, is the open-source counterpart of ChromeOS. The latter has been made closed-source, of course, but traces of its roots are found in ChromiumOS—that’s for sure.
Back when Chromebooks came out, people bashed them for being portable internet surfers and nothing more. Come 2016, though; these energy-efficient machines started integrating with the Google Play Store—the popular Android app marketplace—and a lightweight Crostini Linux terminal.
Ever since then, Chromebooks have become much more capable in their functional capacity than ever before. The fact is that desktop-grade software such as WordPress, Kali Linux, VirtualBox, Blender, and many others is something that ChromeOS can run almost painlessly. Still, its performance will vary depending on your device’s hardware.
Chromebooks have become home to some of the best Google Play Store apps in the business, whether those are oriented toward productivity or just meant to cheer you up. Other popular applications, such as Microsoft Office, have also been available on ChromeOS.
Being a Chromebook owner in 2022 is miles away from being one in 2011. Today, these portable speed demons come in all shapes and sizes. You’ve got convertible Chromebooks making the cut, not to mention the ones that come with an in-built stylus for unrivaled versatility on a day-to-day basis.
That’s more or less it as far as the basics of the operating system are concerned in theory. We believe the rest of the guide can be carried out better with in-depth explanations of the various user interface elements of Chromebooks along with accompanying illustrations. For that, the following section is going to take it from here.
In-depth ChromeOS user interface overview
Concerned individuals who need to explore ChromeOS before purchasing should be aware of all that a Chromebook’s graphical user interface can offer consistently. For this purpose, we’ve laid out this distinctive section, so you can better understand discovering a Chromebook’s GUI to the full.
We’ll be sure to break down the major components of a Chromebook’s user interface in the following subheadings, so you can go through them all one by one and understand the whole picture that ChromeOS paints. Let’s jump right in with the home screen of these slick devices first.
Home screen
The ChromeOS home screen in 2022
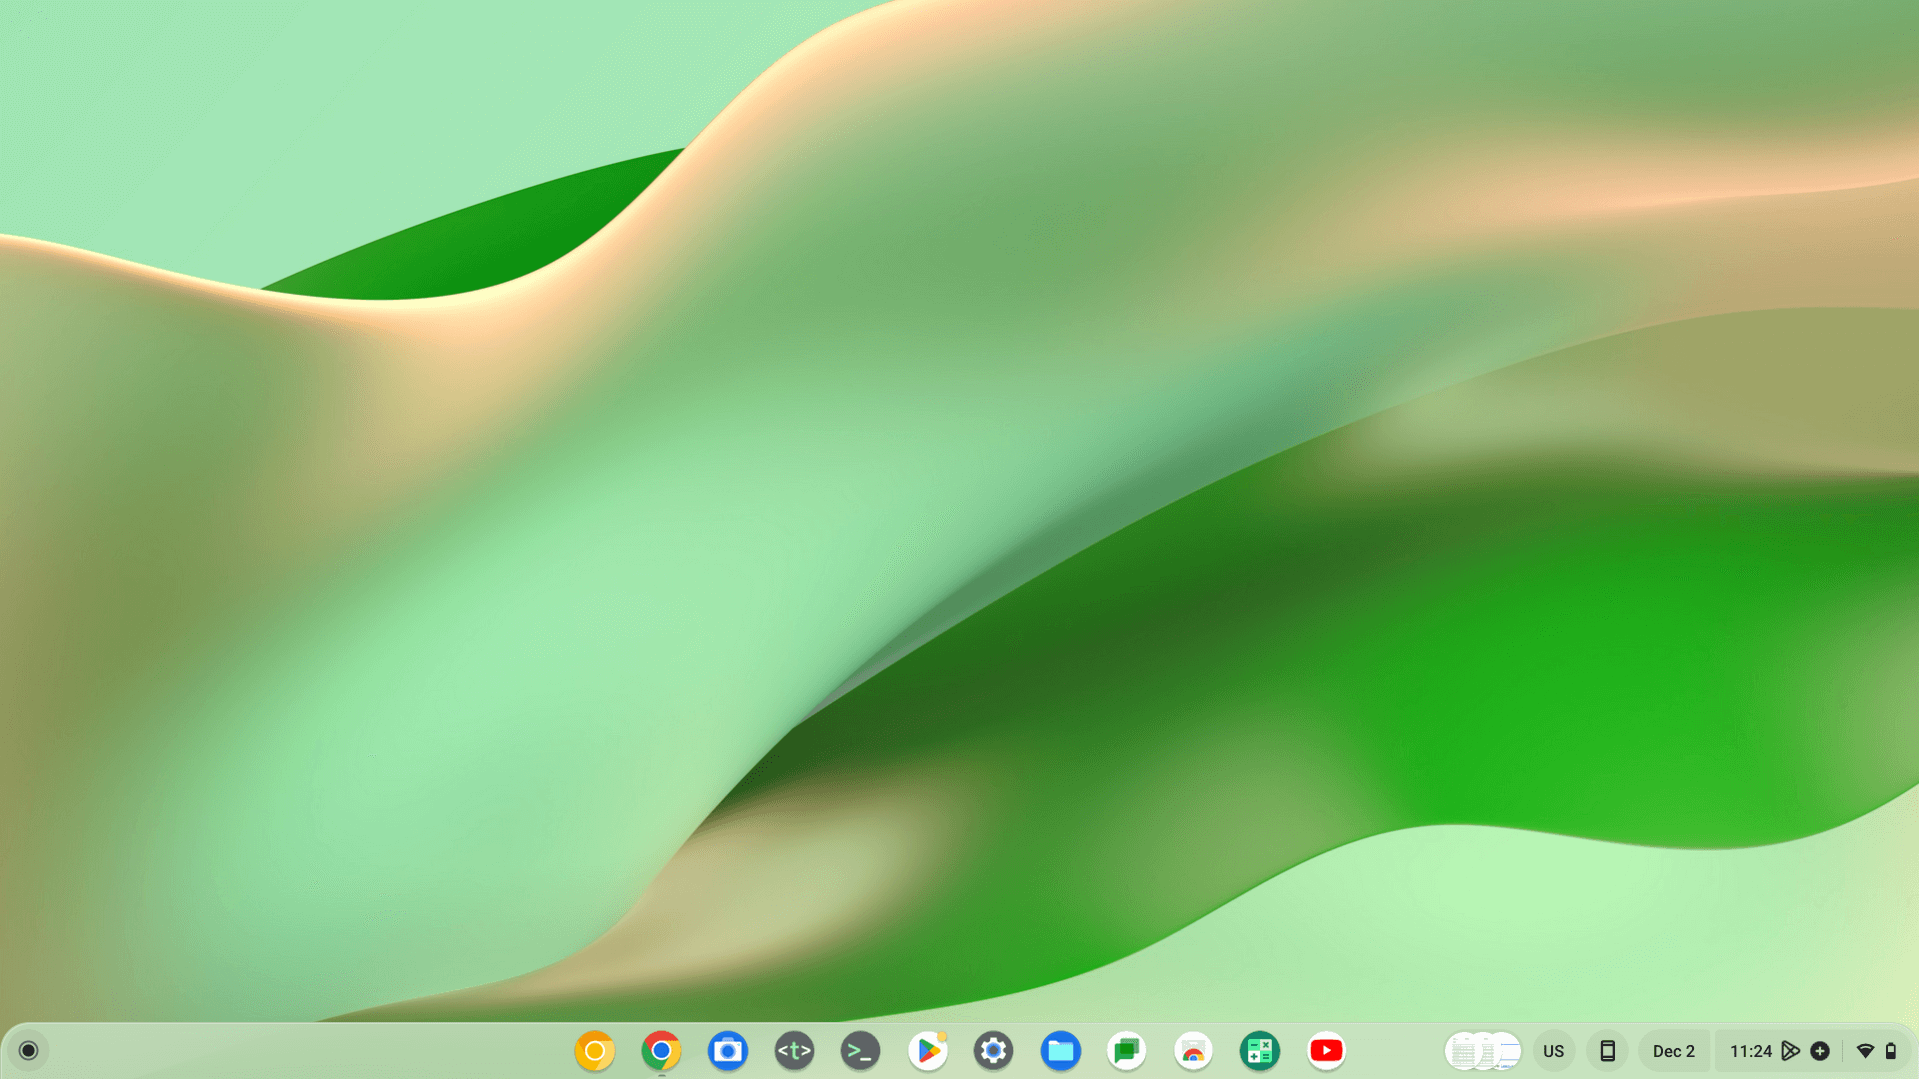
When you boot your Chromebook up, the image above is what you’ll see. This is the ChromeOS desktop or the home screen, if you will. As you can comprehend to a fair extent, the home page of Chromebooks is exempt from complications, unnecessary processes, widgets, tools, or anything of the like.
It comprises the launcher, the shelf, and the status bar, often called the “Status Tray.” While the launcher area will have its dedicated explanation ahead under a subheading, the shelf is an area of a Chromebook’s home page with app icon shortcuts. You can pin different apps and programs to your shelf to enjoy accessing them more easily.
All apps except the Google Chrome browser can be unpinned and again pinned from the shelf area. Google — the developers — have taken an utterly facile approach to design the home page of ChromeOS, which is, perhaps, why you cannot have desktop icons on a Chromebook.
This may come as a shock, but it’s true. You cannot place shortcut icons for apps and programs on your Chromebook’s desktop. The best you can do is right-click anywhere in an empty spot on the home screen, and the following options will appear on your end.
This means that it’s possible to change your Chromebook’s wallpaper, change the position of the shelf, and toggle on an option called “Auto hide the shelf.” The latter is for when you don’t want the shelf area to pop up when apps open.
- As for the wallpaper part, Google recently introduced a new array of innovative wallpapers that blend in with your Chromebook’s overall theme, whether light or dark. Find out more about this in the top 6 features of ChromeOS 104.
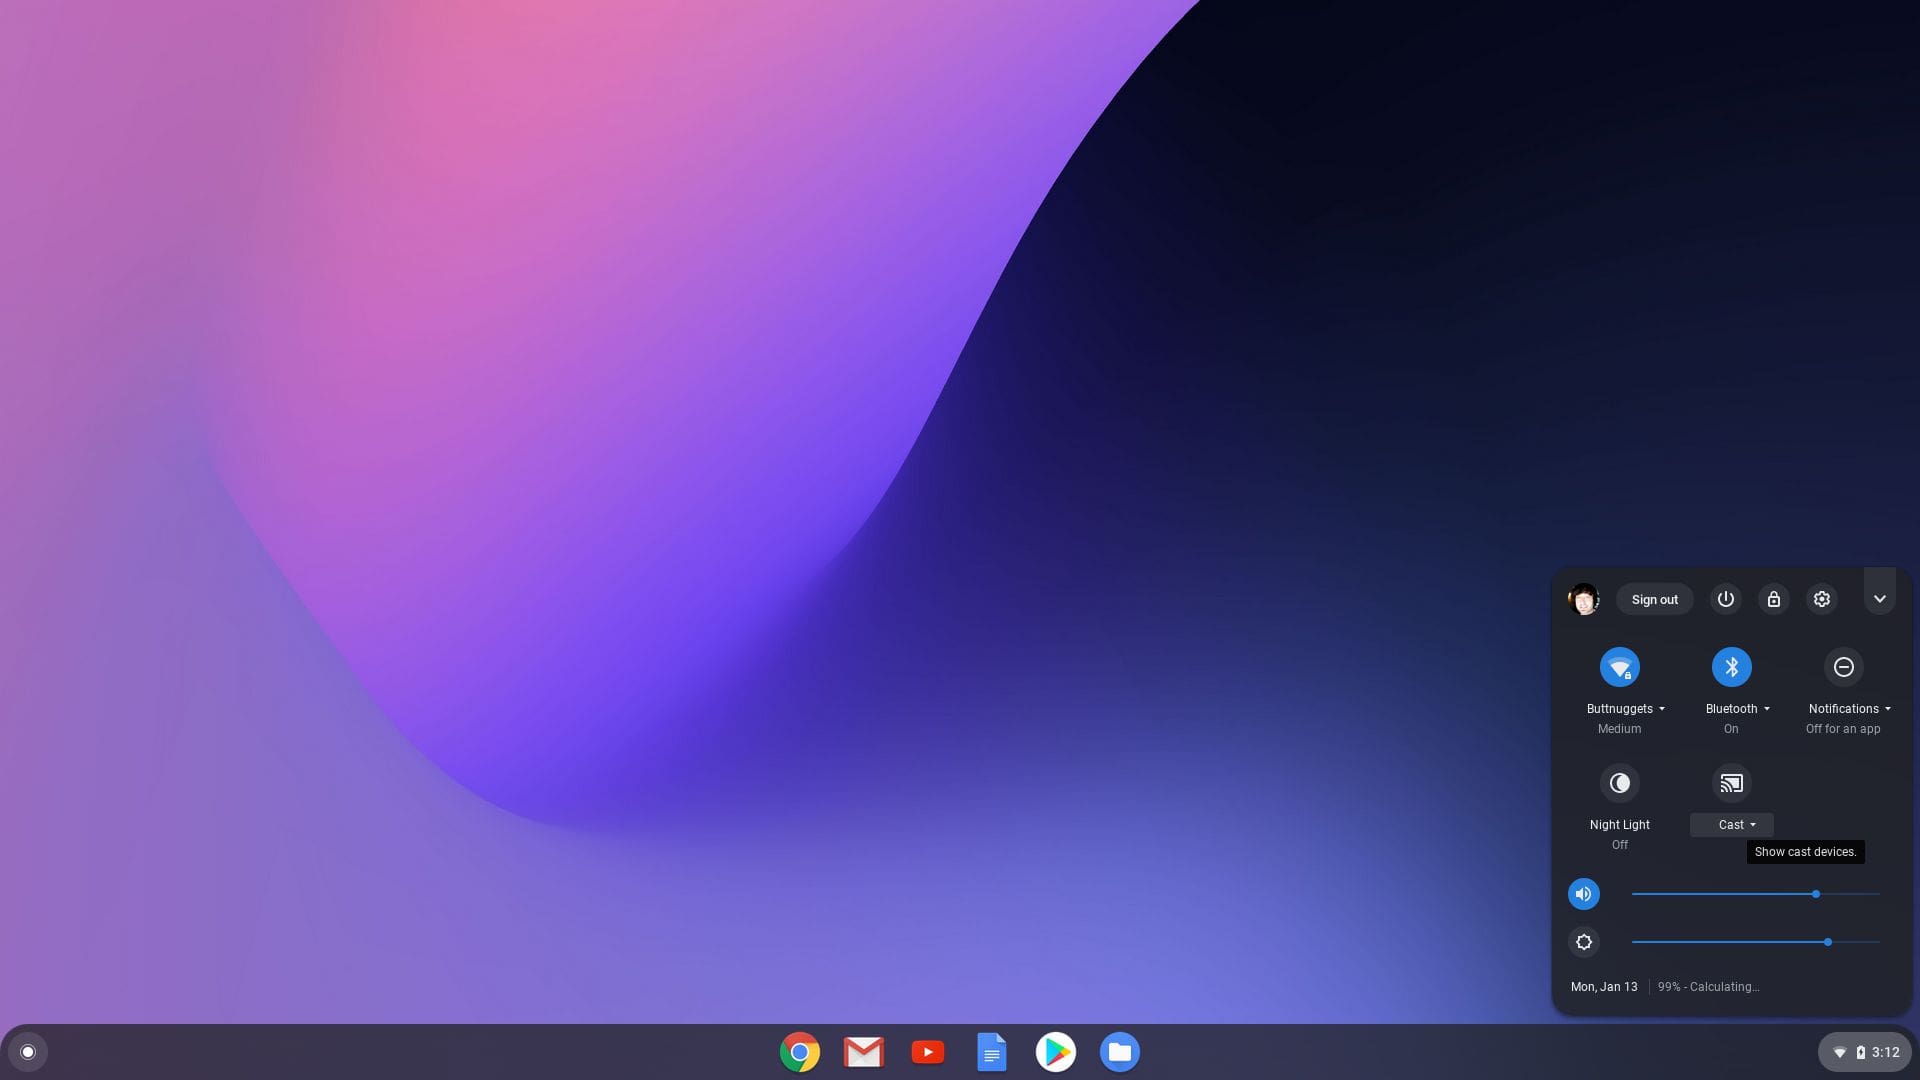
We now have the status bar left to talk about on the ChromeOS home screen. Otherwise called the Status Tray, this particular section is your go-to tool for toggling on various primary parameters of your Chromebook’s functioning. Some features in the status bar include Wi-Fi, Bluetooth, Notifications, VPN, Night Light, Dark Theme, and others.
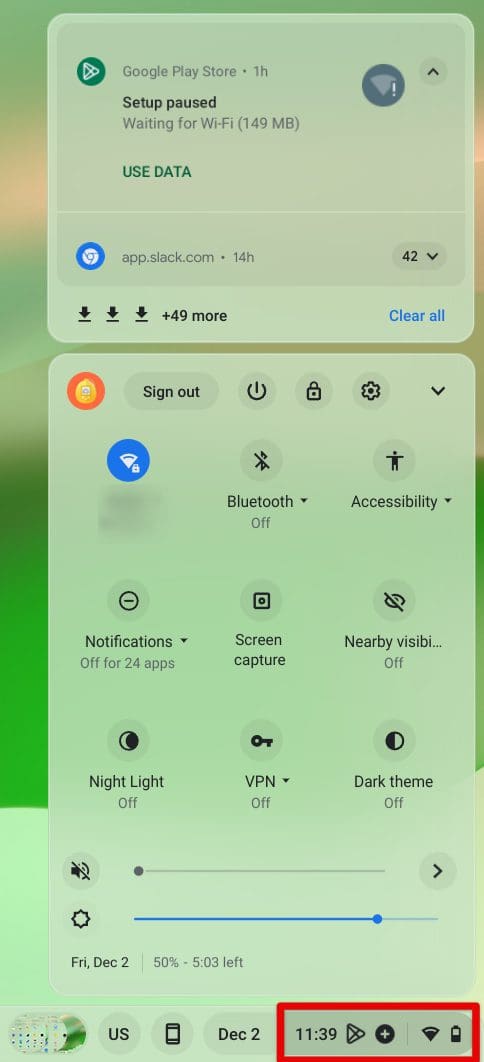
The ChromeOS status bar
- Features such as Nearby Share are also available at a glance in the status bar of a Chromebook.
In addition, the Status Tray can help you increase or decrease the device’s volume, although there are dedicated keys on a Chromebook’s keyboard to take care of that as well.
You can also adjust the brightness of your device’s display from this particular section. Let’s now move on to the launcher area and see what that specific facet of the ChromeOS GUI offers aspiring users.
Launcher
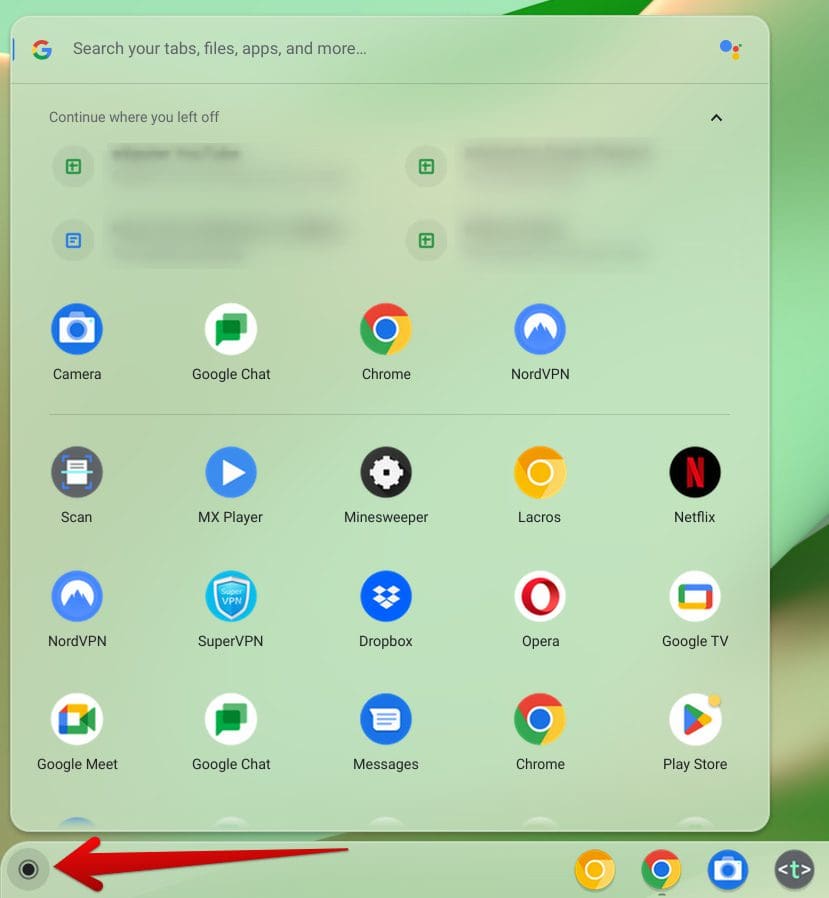
ChromeOS launcher area
A triple circular icon in the screen’s bottom-left corner denotes the launcher section of your Chromebook’s interface. Clicking on it will reveal a tray of all the installed applications on your Chromebook. In addition, the ChromeOS launcher integrates directly with the Google Drive portion of your account.
Doing so allows you seamless access to your recently opened Google Docs, Google Sheets, or Google Slides files, depending on what document you’ve worked on lately. In addition, a search bar in the launcher area can help you look for apps, specific settings, and other files on your Chromebook effectively.
You can also press the “Search” key on your Chromebook’s keyboard to painlessly bring up the launcher section. Last but not least, you’ll also find an icon for Google Assistant in the launcher. The latter is Google’s AI-powered virtual assistant that can help you get around the operating system faster and get your tasks done.
- A complete guide on the Chromebook’s Google Assistant awaits you. Check it for the full memo.
We’ll start working our way toward the major interface-centric applications and system utilities of ChromeOS and proceed with the beginner’s guide.
Settings
The “Settings” app is one of the most essential utilities of ChromeOS. It allows one to tweak the operating system to one’s interest and unlock a Chromebook’s full potential. To open it up, click on the “Settings” icon in your Chromebook’s launcher area. The gear-shaped icon in the device’s status bar can also help you achieve similar results.
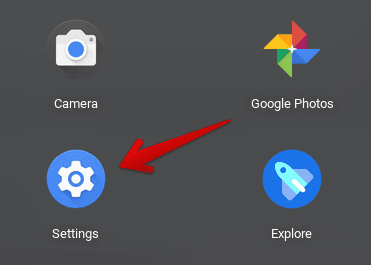
Opening “Settings”
As soon as the “Settings” app opens up, here’s what you’ll see. The sidebar to the left enlists various compartments of how you can tweak your Chromebook. It encompasses the following:
- Network – For tweaking Wi-Fi and SIM network settings
- Bluetooth – For toggling on Bluetooth and managing paired devices
- Connected devices – For accessing the Nearby Share feature and connecting your phone with ChromeOS
- Accounts – For managing the account(s) you’ve used to sign into your Chromebook
- Device – For adjusting some of the most major settings related to the device, such as Display, Power, and others
- Personalization – For changing the overall theme and the wallpaper of your Chromebook
- Search and Assistant – For diving into Google Assistant settings and features
- Security and Privacy – For managing the lock screen and sign-in process, setting a secure DNS, and other features
- Apps – For managing apps, app notifications, Google Play Store activation, and related settings
- Accessibility – For settings that make your Chromebook usable by as many people as possible
- Advanced (features multiple other settings to adjust) – Comprises settings such as Linux, date and time, and others
- About ChromeOS – For checking your Chromebook for updates, switching release channels, and more
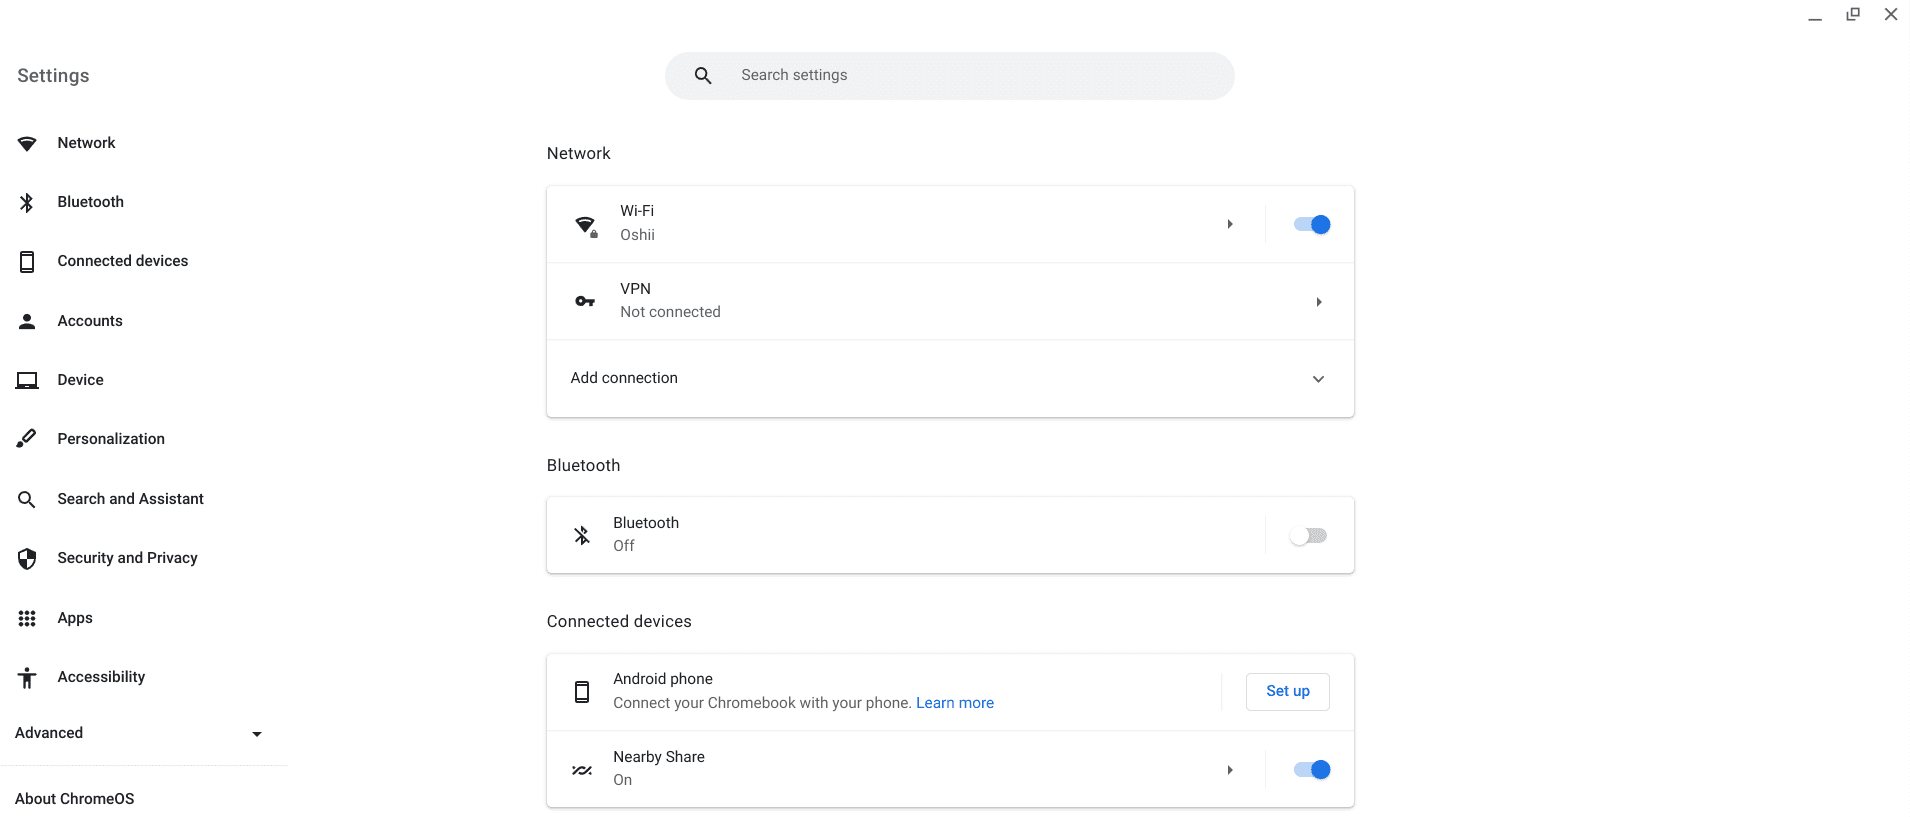
The ChromeOS “Settings” app
This is a remarkably expansive section so we won’t be getting into full details here. Instead, it’s easy to navigate the diverse settings of your Chromebook because of its user-friendly nature. Each section in the “Settings” app comprises minimal options, so you get a fair amount of functionality out of the device while not confusing yourself.
One of the most well-grounded areas of the device’s “Settings” is “Accessibility,” undoubtedly. The exhaustive range of accessibility tools and features that ChromeOS comprises remarkably makes one feel in proper control of their device. From inverting the screen’s colors to adjusting the cursor’s size, you should take a peek at that area.
Files
Next up, we’ve got the “Files” app to talk about, a Chromebook’s mainline “File Manager” application taking care of all your downloads and locally saved data. It’s yet another constituent of the facile design of ChromeOS, where one doesn’t take long to understand what’s going on.
The various elements of this particular application have been laid out in an organized manner. The interface it comprises is readily understood within the first 2 minutes of using it, and there’s nothing in there that can potentially trouble you in terms of overall usability.
To fire the application up, you’ll employ a similar strategy as opening the “Settings” app. Look for it using your launcher area and click on the relevant app icon accordingly. Again, it should be a walk in the park.
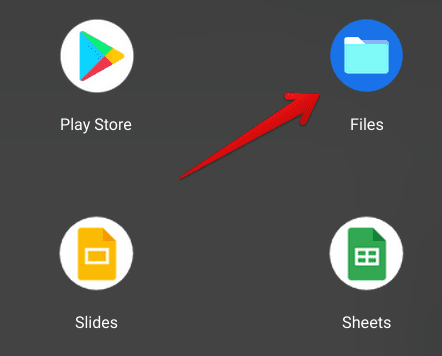
Opening the “Files” system app
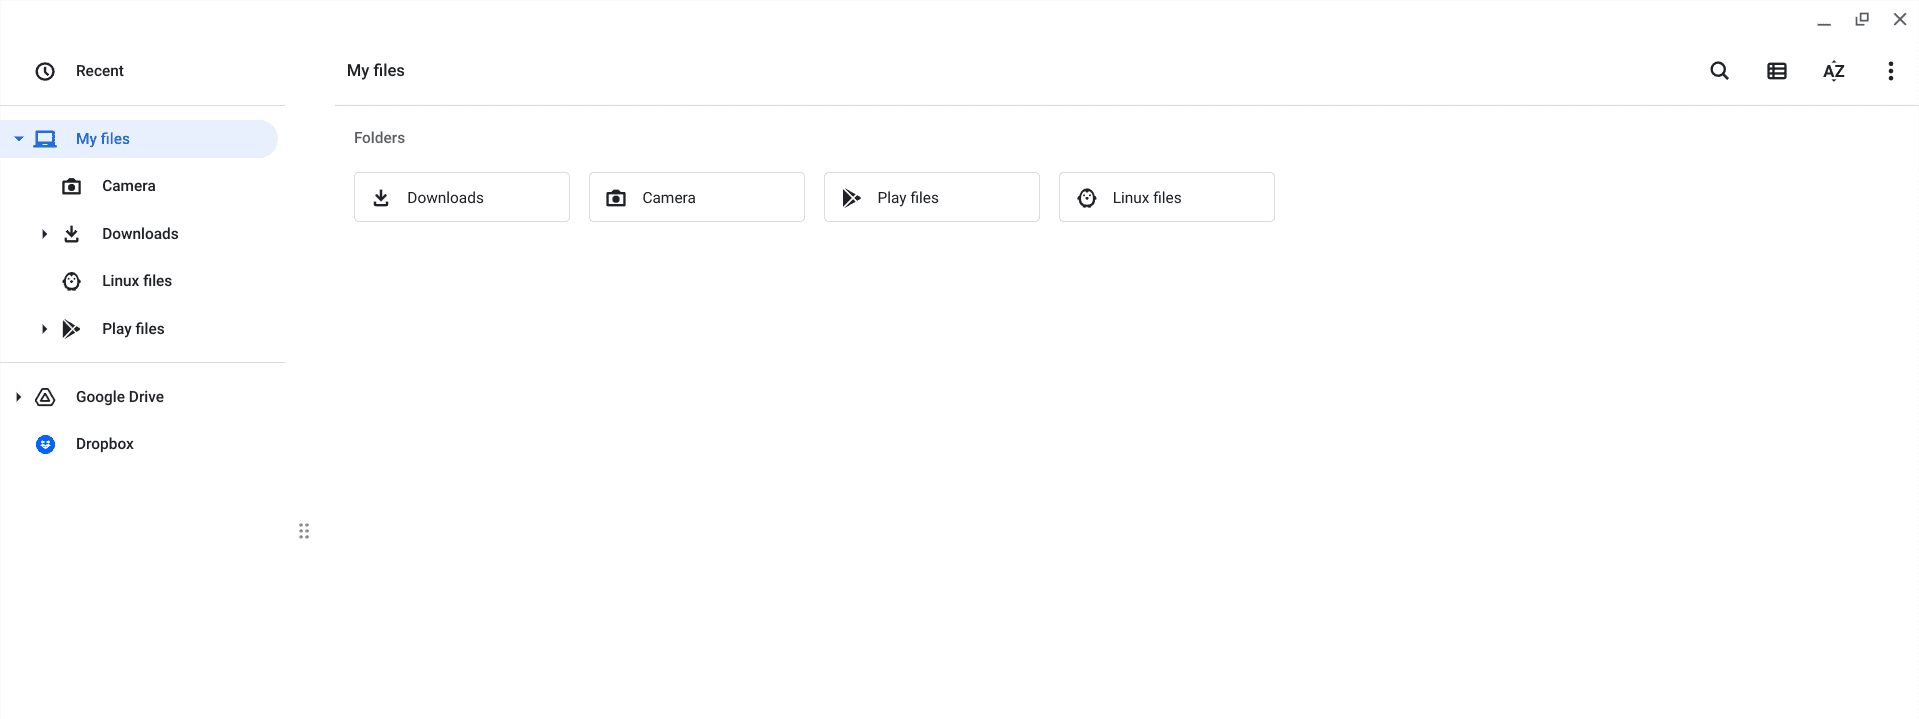
Clicking on the “Files” app will open a new window on your screen and lead you to see the following. As iterated earlier, this system utility is designed from top to bottom with through-and-through simplicity. The major tabs on the left include the primary “My files” area that further envelops “Camera,” “Downloads,” “Linux files,” and “Play files.”
In addition, there’s the “Google Drive’ tab that integrates your Chromebook directly with Google’s frontrunning cloud storage service. Click on it to automatically connect your Drive account to ChromeOS and enjoy unmatched convenience from here on out.
- Note: You might have noticed Dropbox, too, in the screenshot below, but this one doesn’t come pre-built in the Files app of your Chromebook. Instead, you need to add Dropbox to the Chromebook file manager yourself.
As for arranging all the different files in the Files app, you can switch up the layout in three different ways. Your available options include “List view” and “Thumbnail view.” Click on the relevant icon in the upper-right area of the app’s interface to get that done.
Apart from that, sorting options are also present in the app. You may choose to sort your downloaded items by name, size, type, or date modified—whatever suits your preferences the best. Oh, and an available search option can help you look for files in specific and widen your search horizons.
Last but not least, the “More” icon right beside the option to sort is shaped like three vertical dots grouped and opens you up to further tweaks, such as launching a new window, creating a new window, managing Linux sharing, and visualizing the amount of storage space that you have left.
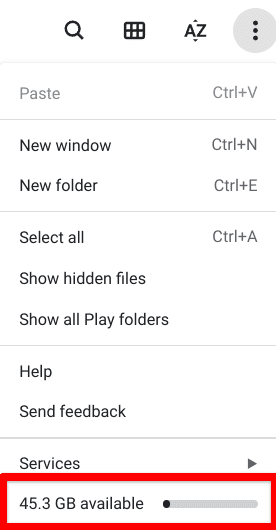
Available Chromebook storage space
Google Play Store
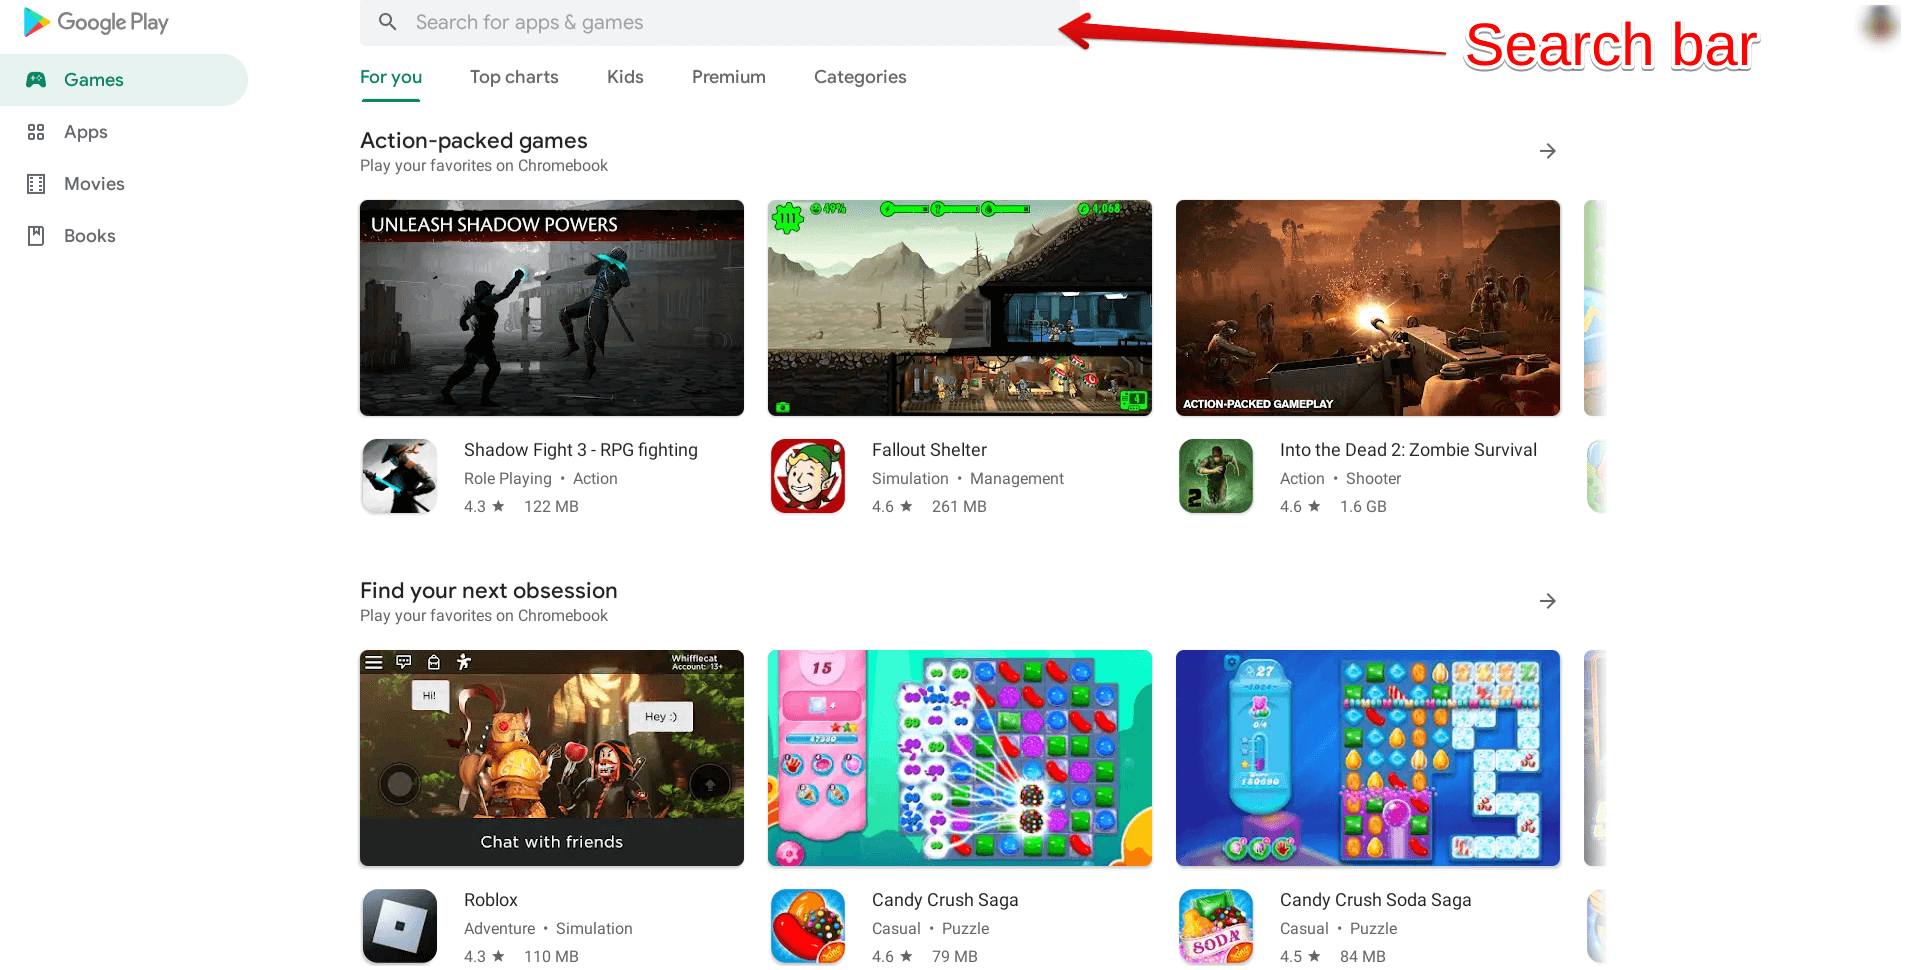
The ChromeOS Google Play Store is one of the defining highlights of a Chromebook. This platform is a gateway to the world of Android applications for Chromebook users, allowing them to deck the device out with more functionality than ever before.
If you look closely enough, you’ll find that the latter statement holds true after you search around and stumble upon the top-rated Android apps to download on your Chromebook. There’s just a sea of software awaiting your attention in the vast stretches of Google Play.
But the problem is the working interface of the Play Store is too expansive for us to dumb it down for you in this article. This is where we’ll have to nudge you toward our in-depth Google Play Store beginner’s guide that breaks down the world-famous Android app storefront into multiple sections and meticulously walks you through its interface.
Linux
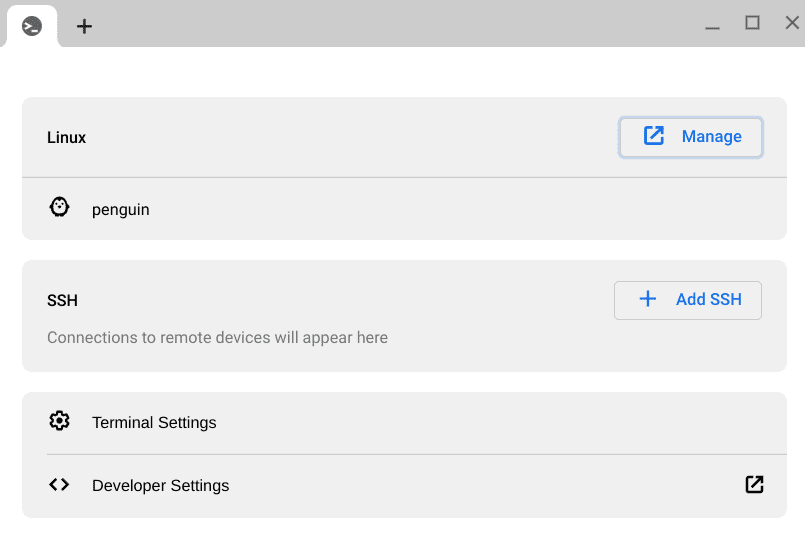
ChromeOS Linux terminal
Being regarded as another of ChromeOS’ most prized functionalities, the Crostini Linux terminal in a Chromebook is of utmost importance. A significant part of this operating system comes pre-configured on it but still warrants a quick and simple installation to fully get it working.
- When you get your hands on a Chromebook, check out our tutorial on installing and configuring Linux apps on ChromeOS for specific instructions.
On top of a Chromebook’s base functionality, the presence of Linux makes things stand out more. Recent developments have even allowed Steam — the world’s most popular PC gaming launcher — to make landfall on Chromebooks, and it’s all possible due to the Linux terminal in ChromeOS. Users can now download Steam alpha on select Chromebooks.
Other than that, high-quality desktop software such as LumaFusion, Lightworks, OpenShot Video Editor, Scrivener, and many other top-rated Linux apps can all be installed on Chromebooks without breaking a sweat. You even have various customizability options in modifying the Crostini Linux terminal, should you show any propensity to do that.
After installing Linux from one of the “Advanced” portions of your “Settings” app, you can find the Terminal app sitting in your Chromebook’s launcher area in a dedicated folder. You can use that folder to launch Linux on the device anytime. It looks somewhat like the following.
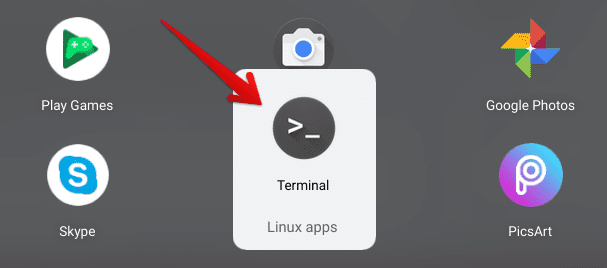
Opening the Linux Terminal
To get you started the right way, here are the top 20 Linux commands you should learn and use to get around the terminal app much faster than before. Oh, and if you’re a programmer with a deep interest in coding, don’t forget to check out these 5 best Chromebooks for Linux in 2022 that are worth every penny they come for.
And with that, we’ve now summed up all the significant elements of a Chromebook’s user interface. We genuinely hope that you’ve been given some clarity with the help of this write-up.
Our thoughts
Chromebooks are some of the most straightforward machines you’ll find out there, offering an unmatched computing solution to individuals from various domains, whether business, education, or just for personal use. Google likes to keep this system consistently updated to ensure smooth and stable performance day in and day out.
In this guide, we’ve talked about ChromeOS from the perspective of an utter beginner, so if you’ve been meaning to get a Chromebook but was still on the fence about your decision, you can comfortably move forward with your purchase now in case we have you convinced. Do let us know how things turn out for you in the comments section ahead.
As always, Chrome Ready wishes you good luck!
- Before you leave: Chromebooks for students – The ultimate guide.
