While Chromebooks are no stranger to the best text editors around, there are quite a few other programs out in this domain that Chrome OS hasn’t been able to get its hands on as of yet. These typically involve Windows software and applications that do not boast native support for Google’s lightweight operating system. If we’re to cast a lens on one of them, we have Scrivener to drool our eyes at as the latter happens to be one of the most terrific writing apps to boot.
The developing heads behind Scrivener had launched a Windows variant of the famous writing software shortly after its initial release. Previously, Scrivener was only exclusive to macOS and Linux, eventually making landfall on iOS. As strange as this sounds, the writing app releasing on Windows spells good news for Chrome OS users. This can finally allow Chromebooks to download and install Scrivener, although not entirely in a straightforward manner, we must warn you.
Whatever the case, this guide will cover how to install Scrivener on Chromebook. We’ll be jotting down a comprehensive guide in the sections to come, so continue the read and follow along with the article for more information.
- Similar-minded read: How to install WordPress on Chromebook.
Best features of Scrivener
The following is a round-up of Scrivener’s best features for its users.
Premium-grade text editor
Scrivener isn’t a free-to-use application. It’s nothing short of a premium-grade text editor costs about $49 to purchase from the official Literature and Latte website. Moreover, the latter is the “Standard” license for Windows, and the cheaper “Educational” license is available for you to buy.
The word “Scrivener” has many meanings, mostly denoting the same writing-related affair. However, one definition of the term couldn’t be any truer for what the application stands for. Scrivener goes along the words of “writing master,” and the program in question lives up to that with all its features and functionality.
Fullscreen editing mode
Escape nearby distractions, annoying pop-ups, and even adverts if the situation warrants it using Scrivener’s dedicated fullscreen mode. It creates a haven of freedom for you to let loose and enjoy the art of this magisterial craft. Whether you’re a novelist, a screenwriter, a children’s writer, or a poet, Scrivener robustly respects the skill of penmanship.
Various scriptwriting features
Scrivener is a great scriptwriter, offering users a painless way of organizing their final draft and making layout-based changes to them. That is to say; you’ll be able to pick the formatting of your created script yourself or let someone else do it for you.
Snapshots
Scrivener has in its working interface a component called “Snapshots.” This software allows you to take document-level screenshots of the application’s working GUI, so you always have a repository to look back at. This will enable you to create a backup of one kind and refer to it in times of need.
Installing Scrivener on Chrome OS
Before we get started with installing Scrivener on Chrome OS, there is one thing that you should be wary of beforehand.
Ensure you have an Intel-centric Chromebook before installing Scrivener on Chrome OS. Otherwise, you’ll just be following yourself into a dead end. In addition to this, make sure you’ve already set up and configured the Linux Terminal on your device.
If you’re not sure how to do that, take a look at this in-depth tutorial. Once you’ve got these prerequisites marked down, it’s time to begin downloading Scrivener. For this purpose, we’ll be breaking the process down into multiple sections.
With that being said, let’s get to the three-part process of downloading, installing, and using Scrivener right away.
Download the Scrivener AppImage
Scrivener isn’t officially available for ChromeOS and Linux, but a beta version of the Scrivener for Linux built by an open-source project comes to our rescue. Given the scarce availability, it won’t have the latest features of the writing application, but it will still be at a reasonably acceptable level for your writing requirements.
The concerned app is available for download in the AppImage format, which is nothing but a portable executable format in the Linux world.
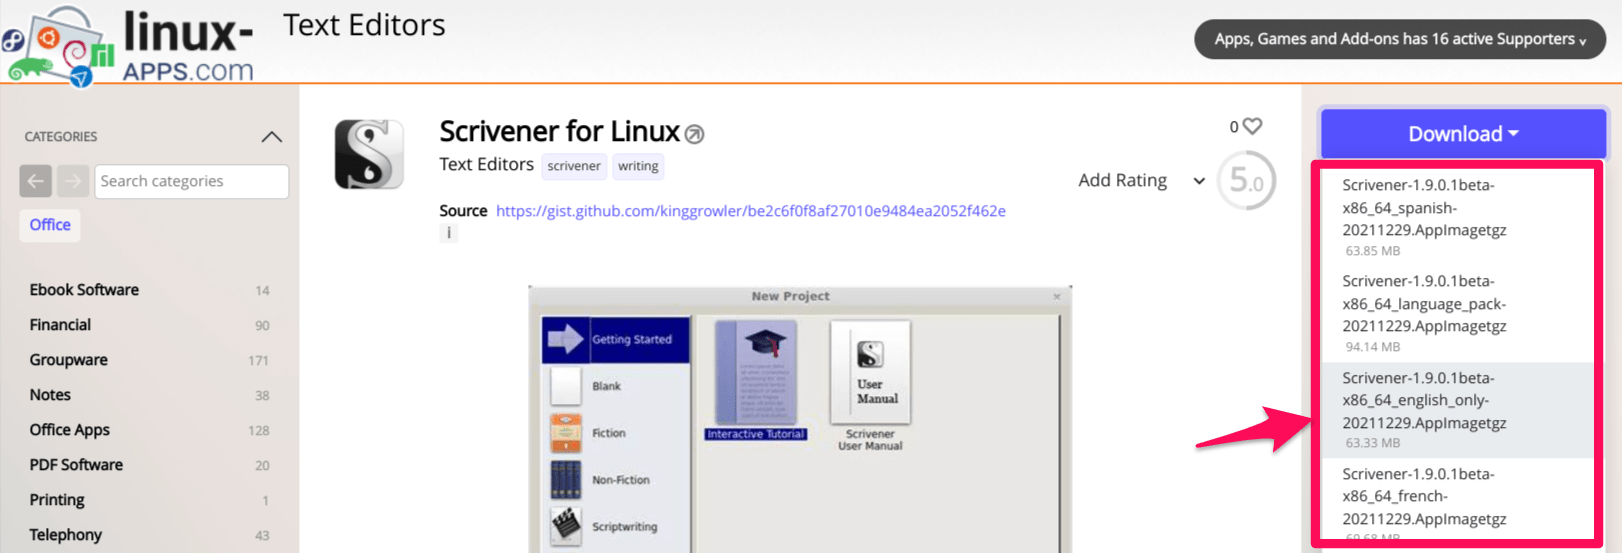
1. Head over to this page.
2. Expand the “Download” button on the top right and download the preferred compressed AppImage. In our case, we downloaded the English version named “Scrivener-1.9.0.1beta-x86_64_english_only-20211229.AppImage.tgz”.

Download Scrivener for Linux AppImage
3. By default ChromeOS settings, the downloaded file should get saved into the “Downloads” folder on your Chromebook. You might have noticed the downloaded file has a “tgz” extension. It is the compressed format in Linux. We have to decompress it to use it. Let’s get it all geared up for launch in the next section.
Configure Linux to install the Scrivener AppImage
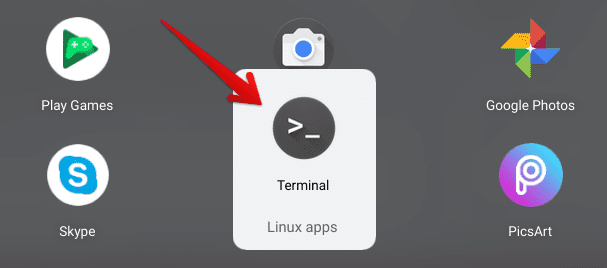
1. The first step is to launch Linux on your Chromebook. Do this easily from the Chromebook Launcher section or from the shelf if you have it pinned there.

Opening the Linux Terminal
2. After you’ve fired up Linux on your device, your next task is to update it. This will help us avoid any potential problems waiting for us in the steps ahead. Follow the command given below and enter it within the Linux Terminal.
sudo apt-get update

Updating the Linux Terminal
3. After having the Terminal updated and ready to go, the next step is to create a new directory in Linux. Do that with the help of the following command. Alongside “mkdir,” you’ll type in the directory’s name. You can name the directory whatever you want, so this boils down to you in this regard.
With that said, try keeping the name simple and easy to remember so that you won’t have issues referencing it in the future. For instance, you can set the directory’s name as “scrivener,” which should do the trick.
mkdir scrivener

Making a new directory in Linux
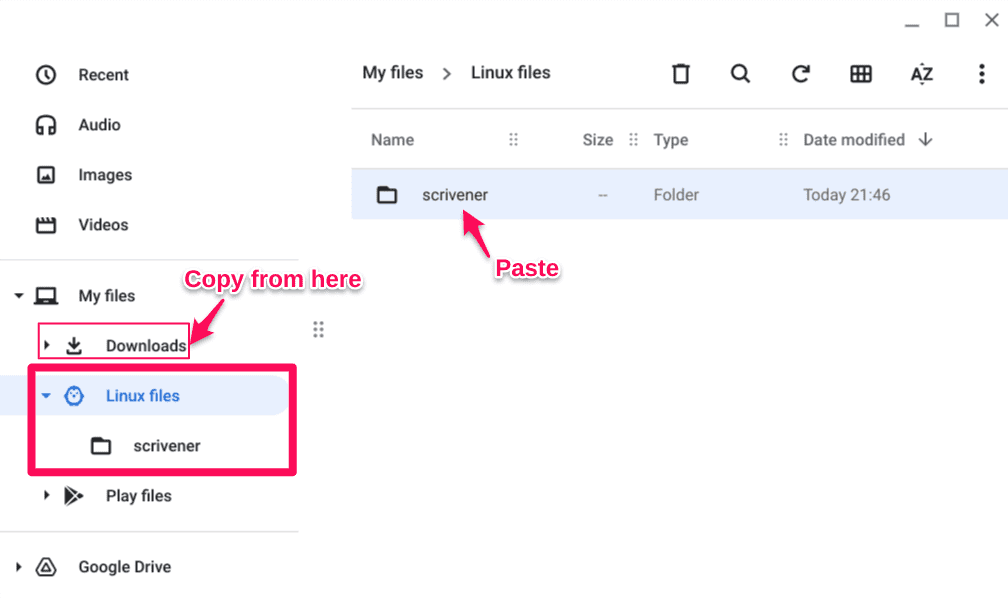
4. The next step is to open the “Files” system app on your Chromebook and copy or move the downloaded Scrivener .tgz to the “scrivener” directory in your “Linux files” folder. Check out the following screenshot for a visual explanation of this procedure.

Copying the downloaded file
5. Good going so far! You now have to turn back to the Linux Terminal again and input the following command. This will help us focus on the “scrivener” directory in particular and help us process the downloaded file.
cd scrivener
6. Use the list command to see the contents of the directory.
ls

Exploring the directory
7. Next, we shall extract the content from the compressed archive, then use the list command again to view the content.
tar zxvf *.tgz

Extracting the tgz file
8. It’s now time to run the Scrivener AppImage and install it on our Chromebook. However, we have to add a troubleshooting step here. If you do not see the “scrivener” directory text highlighted in blue like the screenshot above, you must make the AppImage executable. For this purpose, you’ll use the following command.
chmod a+x *.AppImage
Applying elevated permissions
7. We can now finally run the Scrivener AppImage from the particular directory and get it to install on our Chromebook. Use the command given below and paste it onto the Terminal to get started. When you press the “Enter” key, you’ll soon be asked for confirmation regarding the continuation of the installation. You will have to press “Enter” to continue the download. Rest assured because Scrivener will be installed on your device in a moment.
./*.AppImage
Launch Scrivener
That’s all about it for the installation of Scrivener on Chrome OS! After executing the AppImage, you will eventually have the writing app installed on the device.
8. If everything went well, you should see this unusually wide warning. Click “Yes” for the integration.

Confirm Integration
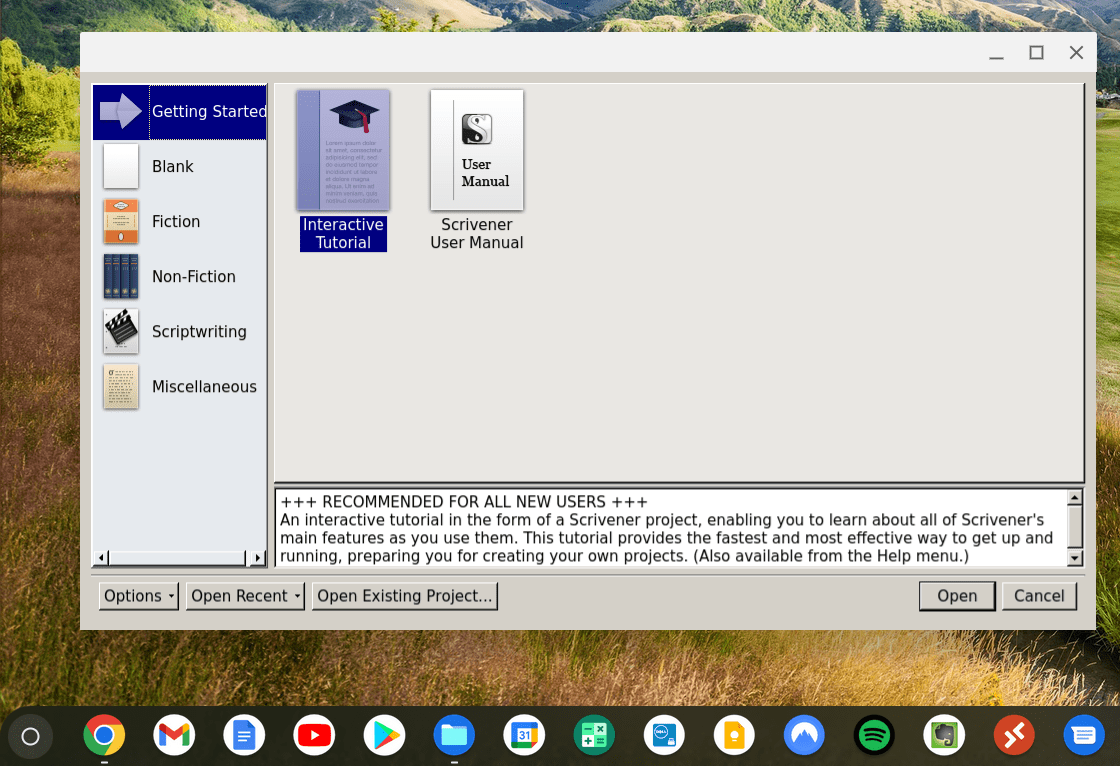
9. Congrats! Scriver should pop up, and you are on the way to experiencing the text editor you love.

Scrivener running on ChromeOS
With that being said, you don’t have to launch the Linux terminal to launch Scrivener. Launch Scrivener from the Chromebook Launcher, mainly using its dedicated app icon in the “Linux apps” folder.
Easy Icon-based launcher
Conclusion
Chrome OS doesn’t have far-flung support for most Windows-grade software, but given the number of features over time, there’s always a workaround available for anyone willing to walk the extra mile. Such is the case with Scrivener—a text editor that’s loaded to the brim with full functionality. It’s highly popular on platforms like macOS and Windows but has little to do with the Linux and Chrome OS domain.
This guide has shown you the exact process you’ll need to employ to download and install Scrivener on Chrome OS. The process is lengthy but readily achievable, considering that you follow the inscribed steps meticulously. Please let us know in the comments section if you could get Scrivener working on your device. Chrome Ready wishes you the best of luck!
- Recommended read: How to install STM32CUBEIDE on Chrome OS.

5 comments
Is there a license fee?
I bought a version from before 2013 or so. This worked like a charm. Thanks!
It’s not letting me paste scrivener into a linux file. Not sure where i went wrong.
I’ve tried a few other more complicated ways of adding Scrivener via Linux without success. This route was easy and fast. It works really well. Thank you!
Matt, great post! I’ve preferred Scrivener since 2017 but have not known how to get it on to my Chromebook until now. The version installed appears older (a Beta version?), but I think it will work fine. The extra features are usually distracting anyway. Thanks for this helpful information.