Chromebooks are becoming a norm in the education and office space due to the functionality they boast and the speed they offer to users all across the spectrum. Apart from being ultrasafe and secure from viruses and everything of the like, Chrome OS has been blessed by the potency of Linux, which is a competent feature of Chromebooks. The latter makes way for a Terminal to manifest and write code and develop software on Chrome OS while opening up the world of top-tier Linux applications.
Not only that, but if you’re an ingrained office worker, you’re probably versed with the ecosystem of Microsoft applications, particularly Microsoft Office. So it might comfort you to know that there are ways to work with Office 365 files on a Chromebook. Still, there are also terrific workarounds and alternatives to the famed suite of Microsoft’s productivity applications. You can check all of them out here.
However, another program has our interest fairly piqued, and it’s known as OnlyOffice. It’s a totally free-of-cost “pocket’ office suite that gets some serious work done if you’re willing to go with it. Its functionality is quite similar to Microsoft Office, so those familiar with the former should experience no hassle when using OnlyOffice, even for the first time. In this article, therefore, we’ll be showing you how to install this suite of desktop-grade productivity applications, so read along as we dole out this simple-to-understand tutorial. First, let’s jump right in with the most salient features of OnlyOffice.
OnlyOffice features
Offline functionality
OnlyOffice makes it possible to work offline, and this is a huge plus that’s not even available in the free-to-use version of Microsoft Office. You can access, view, edit, and create documents, spreadsheets, and presentations without having to connect your Chromebook to the internet. This is the type of convenience that has your back in rough times, so you know you can pick up your Chrome OS laptop and get going while fully aware that no hindrances will come in the way of your work.
Support for multiple formats
OnlyOffice doesn’t support the basic file formats but has compatibility for a dozen others. The supported file formats include DOC, XLS, PPT, ODT, ODS, ODP, DOTX. Moreover, PDF files can also be viewed and accessed. You can download files as PDF, TXT, CSV, HTML too.
Control over who can access your files
You can collaborate with your co-workers and other acquaintances using OnlyOffice. However, total control will reside with you when that happens. You can share files with your teammates and grant them different access rights, such as read-only, review, or complete access that lets others do whatever they want to your file. In addition, you can give access to your files through links so they can jump right into the action seamlessly.
Cloud storage
OnlyOffice also lets you work with cloud storage without breaking a sweat. To get rolling with this functionality, you will first have to log into WebDAV. Therefore, using the benefit of the cloud, it’s outright effortless to deal with your documents, presentations, and spreadsheets. If you’re an avid editor, this feature will come in exceptionally handy for you. Lastly, you can also view PDFs that have been stored in the cloud. You can upload, download, and work with your collections too.
Easy document management
Work can get extensive, especially if you’re a 9 to 5 office worker. In that scenario, you must have easy-to-use software that doesn’t complicate the basics for you. OnlyOffice definitely makes the cut when it boils down to convenience. You can upload and download files with just the click of a button and sort, filter, rename, delete, and add favorites in a similar facile matter. OnlyOffice also has its own portal that you can create from within the application.
You have two options: opt for a paid corporate portal or create a free personal one. Whatever you choose is entirely up to you. As with every other premium-grade feature, the corporate portal has its own array of advanced tools and increases the maximum limit of downloading and uploading files.
Co-edit files
OnlyOffice boasts a highly interactive user interface where collaboration can happen in real-time. As you’re working on your file, you’ll see other typing and working on said file side by side as well. This is the software’s method of co-editing files. All the changes appear simultaneously, and you don’t have to skip a beat ever.
Installing OnlyOffice on Chromebook
Now that we’ve mentioned some incentives to get OnlyOffice on your Chromebook let’s get into the methods of installing it right away.
Option #1. Using the Linux Terminal
The first method that you can use to install OnlyOffice on Chrome OS is through the Linux Terminal. This is a preferable approach since Linux apps are more optimized for Chromebooks, so we’re definitely vouching for the Terminal. That said, you need to make sure that your Linux is updated and ready for action. If you’re unsure about that, do give this article a read to find out the process of updating and upgrading your Linux Terminal.
Let’s now get into the installation of OnlyOffice on Chrome OS. The following steps are going to take it from here.
1) Begin by launching the Linux Terminal.
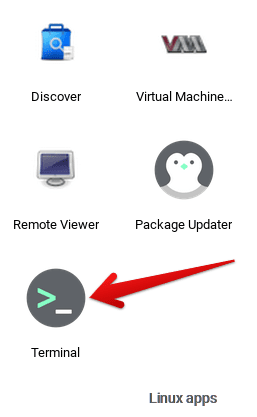
Opening the Linux Terminal
2) Enter the following command in the Terminal window to get started.
sudo apt install flatpak
If you happen to run into an error saying, “E: dpkg was interrupted, you must manually run ‘sudo dpkg –configure -a’ to correct the problem,” run the command the Terminal has told you to, and you’ll be all set.
sudo dpkg --configure -a

Priming the Terminal for OnlyOffice
3) Next, you’ll have to enter the following command to grab the relevant directory.
sudo flatpak remote-add --if-not-exists flathub https://flathub.org/repo/flathub.flatpakrepo

Installing OnlyOffice
4) Lastly, you’ll enter the following command to begin installing OnlyOffice on your Chromebook.
sudo flatpak install flathub org.onlyoffice.desktopeditors

Beginning the download of OnlyOffice
5) As soon as you enter the command shown above, the installation of OnlyOffice will commence. All that’s left is to wait until all the necessary packages have been installed and you’re ready to go. Then, when you see your username popping up on the Terminal window again, you can check your “Linux apps” folder in the Chromebook Launcher for the OnlyOffice Linux app. The app icon should be similar to the one shown below.
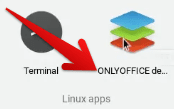
OnlyOffice installed on Chrome OS
That’s it! You’ve successfully installed OnlyOffice on your Chromebook. Let’s now get into the second method of installing this application, so you know your options and have flexibility in this regard.
Option #2. Using the Google Play Store
The second option you have for installing OnlyOffice on Chrome OS is the courtesy of the world of Android applications, catered by the Google Play Store.
- If you suspect that your Chrome OS does not have the Google Play Store, you might want to look at this article to confirm what Chromebooks can run Android and Linux applications.
The following steps are going to take it from here.
1) Open the Google Play Store through your Chromebook’s Launcher.
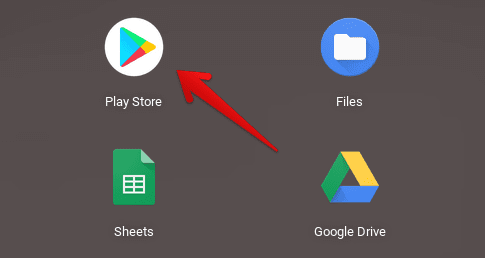
Opening the Play Store
2) Next, you’re going to use Play Store’s search bar and enter “OnlyOffice” there to look for the application. You’re going to get multiple processes halfway through the process, but pressing the “Enter” key will do just fine.

Searching for OnlyOffice on the Play Store
3) Doing so will take you to the main installation page of OnlyOffice. There will be a clear “Install” button on the page, so do click on it to begin the process.

Installing OnlyOffice using Play Store
4) After clicking on “Install,” you will have to wait for a couple of minutes until the installation concludes. When you’re prompted that OnlyOffice has been installed, go to your Chromebook Launcher and find the application sitting there awaiting your attention.
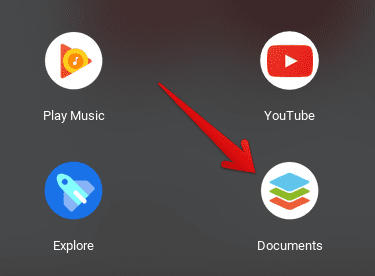
OnlyOffice installed on Chrome OS
That’s about it as far as installing OnlyOffice on your Chromebook is concerned! Time to launch the application and see how it works on your device.
OnlyOffice working
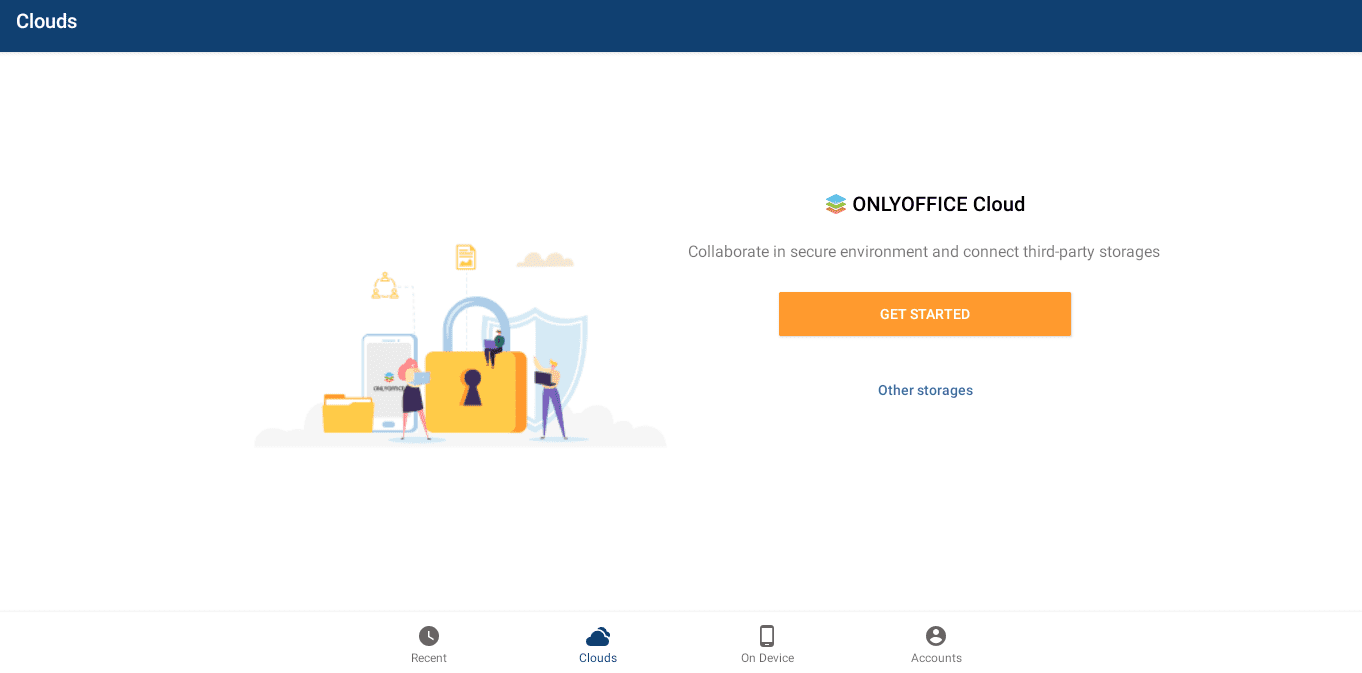
OnlyOffice in action
When you first launch OnlyOffice on your Chrome OS laptop, you’ll be greeted with a welcome screen that’s going to fill you in on all the relevant features of the application, but strictly on a superficial level. Subsequently, you’ll be shown the program’s main interface on your Chromebook, where you will be able to sign up for cloud networking or select your own cloud-based storage option.
There’s also a distinct “Device” section that you can select at the bottom of the interface to check out some sample documents, spreadsheets, and presentations. This is to familiarize yourself with how OnlyOffice works. Moreover, whatever work you do in the program will show up in the “Recent” section. That is where you can continue working on your project after taking a break.
We highly recommend that you set up the cloud service of OnlyOffice if you intend on making this software your daily driver. Moreover, it would also do you good to check out the sample files to get a better idea of the functioning of OnlyOffice. The text editor, in particular, comprises several tools to help you do the work required, such as formatting, fonts, different font colors, and a lot more. There is also an array of advanced settings that let you tailor your text to perfection. Some of the high-grade options include orphan control, spacing between letters, and spacing of the paragraphs.
Other than that, you also have a feature-rich presentation maker in OnlyOffice that comprises a slew of exceptionally appealing features, making it possible to create stunning presentations on the go. There is a total of 11 themes – all virtually unique from each other, so you can start making your slides and exhibit a remarkable impression. If you’re more of a perfectionist, you can also change your presentation’s layout, edit the style, and pick the transition animation of your choice to get your system flowing.
How to uninstall OnlyOffice on your Chromebook
If you’ve had enough of this program and like to return to it at a later time, or you want to uninstall it so you can install it back again, let us now turn to the uninstallation process of OnlyOffice.
Uninstalling through Linux Terminal
To uninstall through Linux, you will need to enter the following command in the Terminal window.
sudo apt-get remove onlyoffice
Alternatively, you can also double-tap on the OnlyOffice app icon on your Linux Terminal and click on “Uninstall” to remove the application from your device.
Uninstalling through Google Play Store
Uninstalling OnlyOffice using the Google Play Store is a simple affair. All you have to do is go to the installation page of the application using the same steps listed in the tutorial above. Doing so will reveal an option to “Uninstall” instead of the usual “Install” button because the application is already on your Chromebook. So please give it a swift click and watch the program turn to dust pronto.

Uninstalling OnlyOffice through the Google Play Store
Another option is to go to the OnlyOffice app icon in your Chromebook launcher, double-tap on it, and select “Uninstall” from the options that are revealed afterward. This will duly remove the application from your device as well.
Conclusion
In a world chock-full of files and work, you’re going to need all the help you can get to take care of your official matters as plainly as possible. Thankfully, Chromebooks offer a haven for those who crave speed, security, and stability. All three of those work as a direct measure of a Chrome OS laptop’s worth and competence, and that is exactly where Chromebooks shine.
You have multiple options for a desktop suite of productivity applications on this minimalistic operating system, but the efficacy of OnlyOffice deserves a solid mention. It boasts a highly fluid and uncomplicated interface that even the most casual type of users can get the hang of in no time. Therefore, in this article, we’ve talked about the best features of OnlyOffice and illustrated the installation process using two different methods. We’ve also shown its operation in action while talking about its uninstallation. Have a great time working with OnlyOffice!
