Chromebooks are embellished with simplicity and top-end security. These devices are a favorite in the education space due to the reliability they offer to students and teachers alike. Contrary to popular belief, school Chromebooks can even be used to write code and program with different languages, such as Java, despite their fair share of restrictions. The point we’re trying to make is that ever since the integration with Linux and the Google Play Store has arrived on Chrome OS, Chromebooks have come a long, long way.
There is a bevy of applications that you can install using the Linux Terminal window. This functionality is what makes Chrome OS stand out in the competition and, perhaps, one of the reasons Chromebooks have outclassed Macbooks in the latter half of 2020. However, there is one small difficulty in installing Linux applications – there is no dedicated app store for them. This is highly unlikely the Play Store which is a hub for Android apps. The issue at hand, therefore, can become challenging if you want to discover what applications can be installed on a Chromebook using Linux.
Installing Linux app store on a Chromebook
The good news is that there’s actually a way to install a hub, platform, store – whatever you can call it to explore all the Linux applications that can be installed on your Chromebook. Not all of them will work, of course, since Linux is still in its Beta phase. However, with the upcoming Chrome OS 91 stable release, that scene is about to take a dramatic turn. In this article, we will show you how to install not just one but two different app stores for Linux. Without any further ado, then, let’s jump right in.
Option #1. Installing Gnome Software Center on Chrome OS
Gnome Software Center is the first app store that you can install on your Chromebook for Linux applications. It boasts an interactive user interface with a vast library of Linux apps. Before we get into the installation part, please ensure that you’ve cleared enough disk space to install Linux applications painlessly. With that out of the way, let’s get into the tutorial now.
1) The first step is to make sure that your Linux Terminal is enabled and ready to work with. Take a look at this article to find out how to configure the Terminal, and complete the installation setup if you’re stuck somewhere. After having that done, open the Terminal using the Chromebook Launcher.
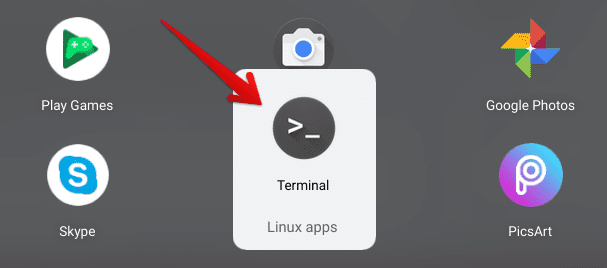
Opening the Linux Terminal
2) With the Terminal window opened, use the following command to check for updates. As soon as you press the “Enter” key after inputting the command, Linux will begin updating itself if there are any available at the moment.
sudo apt update

Updating the Linux Terminal
3) The next step is to upgrade our Terminal’s distribution and core components if any require so. This will ensure that the installation to come is carried out smoothly. Use the following command and enter it on the Terminal window. Once you press the “Enter” key, you’ll soon be asked to confirm the necessary upgrades if the system detects that some areas can use them.
sudo apt dist-upgrade

Upgrading Linux components and distributions
4) With the Terminal all good to operate, let us now get into installing Gnome Software Center. You will have to use the following command to start the process.
sudo apt-get install gnome-software gnome-packagekit
Installing Gnome Software Center
5) Right after that, you’ll be asked whether you’d like to continue with the installation or not. Press the “Enter” key to move forward.
Confirming the Install
6) The download will now start. When you see your username back on the Terminal, it means that the process was executed successfully. You’ll now check your Chromebook Launcher for the “Linux apps” folder to find the Gnome Software Center application sitting there.
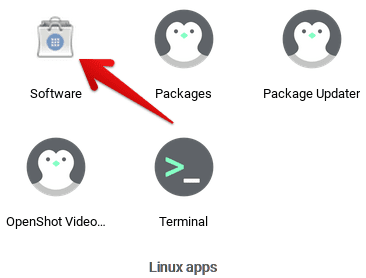
Launching Gnome Software Center
Awesome stuff! You’ve now got the first Linux app store down on your Chromebook. Please give it a go and see how it works.
Tip: It’s common for Gnome Software Center to not load up properly on your first go. In that case, you won’t see any applications to download on the app store. If that happens, you will restart your Chromebook. When your device boots up again, click on the Gnome Software Center app icon again to launch it. There’s a great chance that the application will work like it’s supposed to now. However, it’s infrequent for the app not to work even then. If you find yourself in this situation, open your Terminal and run the following command.
sudo apt update
Once done, restart your Chromebook and relaunch the application when your device is back on. By now, hopefully, Gnome Software Center will work.
Gnome Software Center working
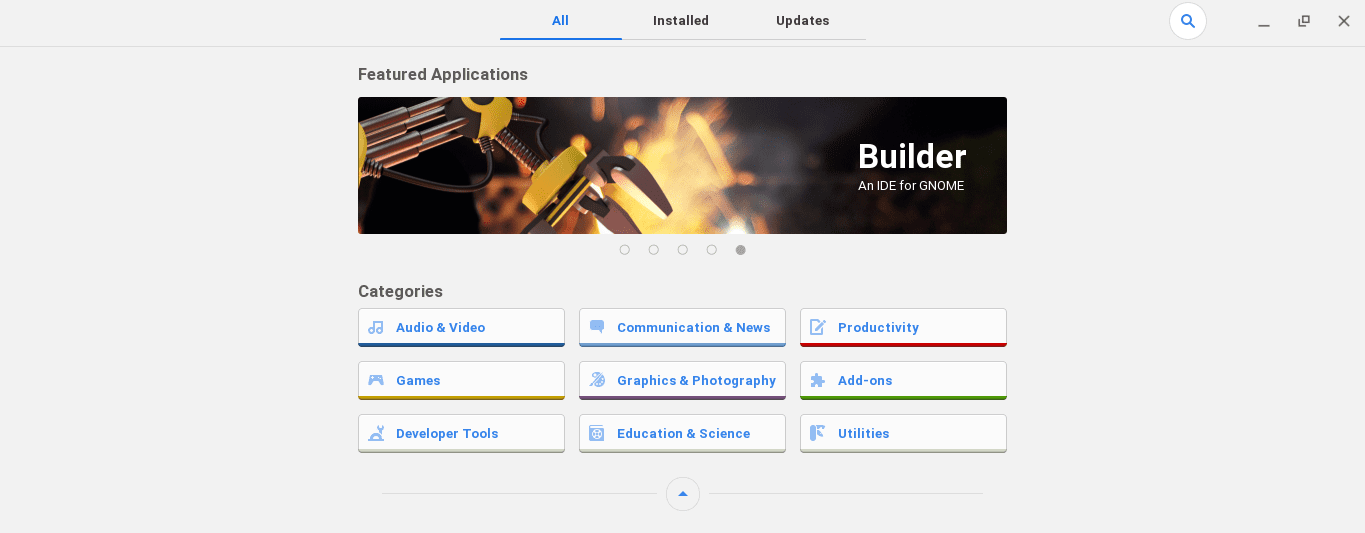
Gnome Software Center on Chrome OS
As soon as you launch Gnome Software Center on your Chromebook, you will see the application loading components and some needed downloads for it to function. After it’s done, you’ll be taken to the home page, where different categories of applications will be available to choose from. Clicking on any category would load a page that would show you all available apps related to that category. The rest of the process is basically clockwork. You get the application you need. Click on the “Install” button and find the app in the “Linux apps” folder using your Chromebook Launcher.
Option #2. Installing KDE Discover on Chrome OS
It’s nothing out of the ordinary for you to shoot for another app store for Linux applications other than Gnome Software Center after getting an overview of its interface above. Fortunately, you have another option right up for grabs, and that is the KDE Discover. Let’s now talk about how you can install this application on your Chromebook.
1) Quite naturally, the first few steps will be the same as installing Gnome Software Center if you didn’t install it. You’ll have to update the Terminal and upgrade the core components and distributions using Step 2) and Step 3) in the tutorial above. If you’ve already gone through all that, please continue to the next step, but make sure your Terminal is opened up.

Opening the Linux Terminal
2) Having the Linux Terminal opened, type in the following command in the window. After you’ve done that, press the “Enter” key to continue. Like before, there will be a confirmation prompt coming up subsequently, so be sure to press the “Enter” key once again to continue the installation normally.
sudo apt install kde-discover

Installing KDE Discover
3) After using the command given above and confirming the download process, wait for a few moments to let KDE Discover install on your Chromebook. When you see your Linux username appearing on the screen again, it indicates that the installation has been finished. Check your “Linux apps” in the Chromebook Launcher to find the KDE Discover application.
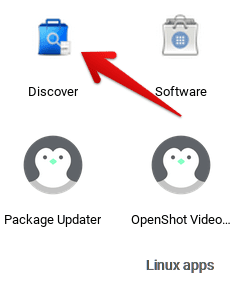
KDE Discover installed
That’s about it as far as installing KDE Discover is concerned. If you see an app icon that’s the same as above in your Launcher, you’ve successfully gotten KDE Discover on your Chromebook. Time to launch it and see how the store performs.
Tip: KDE Discover can have the same problem as Gnome Software Center – applications not loading up the first time you launch it. The solution here is pretty much identical. All you have to do is restart your Chromebook, and if that doesn’t work, update your Linux Terminal and then restart the device one more time. That should do it for KDE Discover’s applications not popping up.
KDE Discover working
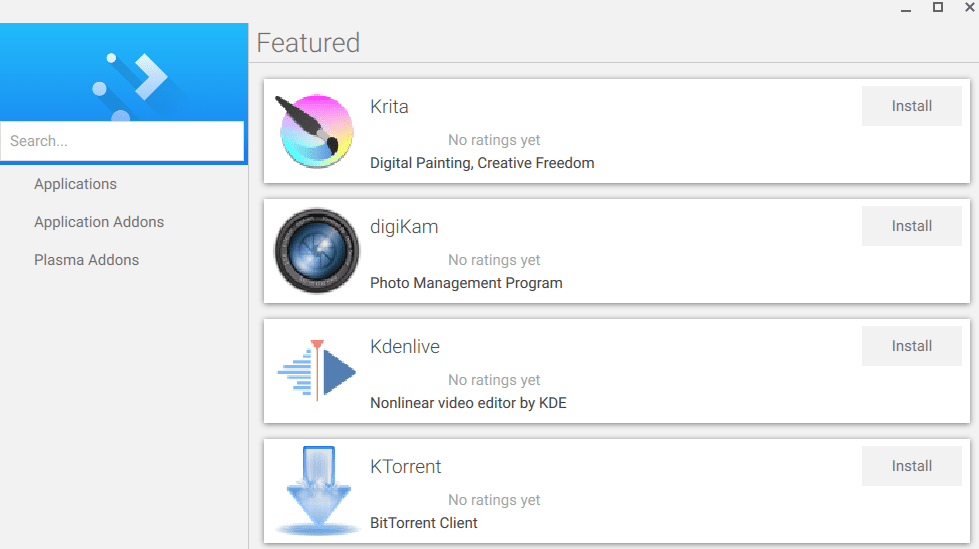
KDE Discover working
KDE Discover, in our opinion, sports a refined user interface and a much more diverse catalog of applications compared to the Gnome Software Center. One significant pro of KDE Discover is that it shows you the real-time progress of your downloads as they are happening. Gnome Software Center, on the other hand, is a bit more primitive in this regard. The download can jump from 0% to 70% instantly, whereas, in KDE Discover, the download status is much more transparent when an application is downloaded. There’s also an “Installed” section in KDE Discover that lets you view all the currently installed Linux apps on your Chromebook. You even get an option to remove them as well.
Conclusion
Linux is curated for Chrome OS to bring the best out of this speedy operating system. Not only do you get to enhance the functionality of your Chromebook by installing powerful software such as OpenShot Video Editor and LibreOffice. With a Linux app store by your side, the experience is bound to be enhanced tenfold. You get a visual interface to download your Linux applications from, and this is quite possibly, the biggest advantage that Linux app stores have to offer. In this article, we’ve penned down two functional ones for you to try out right now on your Chromebook. Both differ slightly from each other, with KDE Discover sprinting out just ahead of Gnome Software Center in terms of usability. However, it all depends on personal preference at the end of the day, which is why we highly recommend that you experience both of them. Don’t forget to follow the tip we gave in each section if you run into the applications not showing up issue. Good luck!

2 comments
the command for kde discover is wrong
it is supposed to be sudo apt plasma-discover like in the image
Just installed the Gnome update, it now adds 91.5 MB of space and the icon is different now, labelled “Software” when done.