Thanks to the Chrome Web Store and Google Play readily offering their services to ChromeOS users; there’s no shortage of high-quality screenshot apps to look into. However, not everyone knows the best tips and tricks that let one fully utilize the ChromeOS snipping tool and other relevant extensions to the best of their ability unless you’re looking at this guide.
In this detailed write-up, we’ll be dishing out a pro guide on taking screenshots on a Chromebook in 2023—one that you can always rely on to stay ahead of the curve. Do read until the end of the guide for the best results.
- In the meantime: Top 12 accessories for your Chromebook.
Basics: What are screenshots?
To ensure clarity, let’s talk about what screenshots are and what purpose they serve in general. As the phenomenon’s name depicts, a screenshot simply takes a photo of all you see on your device’s screen.
The feature is prevalent across various devices, including PCs, mobile operating systems such as Android and iOS, macOS, and even video game consoles such as Xbox Series X, PlayStation 5, and Nintendo Switch. If it’s a digital device with a display and an interactive user interface, it’s due to have a screenshot feature—that’s for sure, more or less.
Now, onto the role that screenshots play when it comes down to it. Why would you want to take a photo of your on-screen content? It turns out that there is a diversity of reasons you’d like to take screenshots, whether that’s to show someone proof of something remotely, such as a payment transfer, or to request help from IT admins for PC errors.
In addition, screenshots come in handy if you’re looking to keep a record of something on your end. Assume you’re scrolling down on your TikTok feed, and you catch a glance at a clip of a movie unknown to you. The footage seems exciting, and you want to learn this movie’s name.
The following section will discuss everything you need to know about taking your screenshots to the next level. We’ll ensure that this is the only guide to taking screenshots on a Chromebook you’ll ever need.
- Recommended follow-up read: How to take screenshots of an entire webpage on Chromebook.
Quality tips and tricks for taking screenshots on a Chromebook
Now that we have that out of the way let’s get right down to the business end of this article. This section will walk you through every tip and trick that will help you take stellar screenshots from this point onward.
Keep reading for the full memo, from the tools you should be using to capture the content on your screen to common screenshot-taking mistakes that can be easily avoided if you know what they are.
Taking screenshots on ChromeOS – The best tools that you should be using
First, what tool, application, or software will you use to take screenshots on your Chromebook? That is the primary question that you should be asking yourself. Luckily, ChromeOS faces no shortage of options here, with the in-built screenshot tool well-established enough for people to dive into right off the bat.
However, while the latter is pretty resourceful, it’s not precisely loaded to the brim with features. That is where we will have to rely on the Chrome Web Store’s boundless potential in installing a couple of high-rated Chrome extensions to help us facilitate our screen-capturing ventures.
Let’s have an overview of all screenshot-taking tools on ChromeOS and assess their strengths and weaknesses, so you can understand the perfect way and scenario to employ them all. Kicking things off below is the in-built screenshot tool for Chromebooks.
Built-in ChromeOS screenshot tool
The built-in ChromeOS screenshot tool that Chromebooks feature hasn’t been around in ChromeOS forever. This basic yet highly effective way of taking a screenshot on a Chromebook, but you should be wary of what it can do and what’s simply out of its domain.
It comes to life when you input the shortcut key combination of “Ctrl,” “Shift,” and the “Show Windows” keys. The latter is in place of F5 and shaped like a rectangle with two vertical lines beside it; alternatively, it’s just “Ctrl” and “Show Windows” if you want to snap a photo of your screen instantly. Of course, doing so would cover your whole desktop.
With that said, when you take the former approach for taking a screenshot, you’re more in control. In addition, several different methods of grabbing a screen capture pop-up, such as taking a full-screen screenshot, a partial screenshot where you can specify what screen area will get snapped, and finally, a whole window screenshot.
As a bonus, the in-built screenshot tool of ChromeOS even features a screen recorder, but we won’t be getting into that in this write-up. Here are some of the significant strengths and weaknesses that the native screenshot-taking feature of every Chromebook brings to the table for ChromeOS users.
Strengths
- Exceptionally fast and lightweight.
- It can be used effectively with keyboard shortcuts.
- Allows different ways of taking a screenshot natively on your Chromebook.
- It can be used anywhere in the operating system and not just within the Chrome browser.
- Instantly copies the taken screenshot to your clipboard.
Weaknesses
- No annotation features to help you draw over your image.
- No blur tool to cut out unwanted content from your screen.
- No other editor interface to tweak the screen capture.
Monosnap
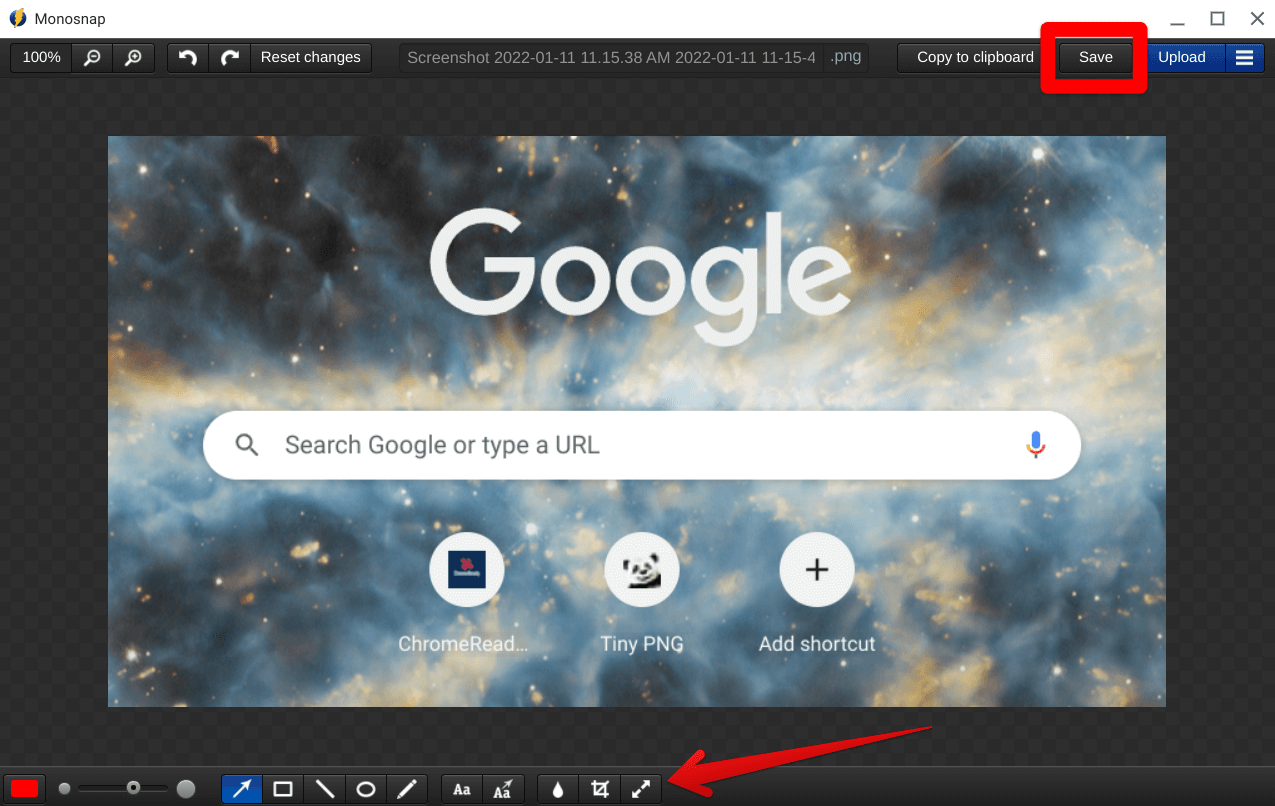
Monosnap editor
The other primary tool you’ll need right alongside the built-in ChromeOS screenshot tool is Monosnap. This reliable Chrome Web Store extension can help you take your screen captures to the next level with its easy-to-use annotation tools, a blurring feature, and more.
The combined effectiveness of Monosnap and the native screenshot functionality of Chromebooks is bound to propel your ability to take screenshots on ChromeOS to greater heights. If you ever find the Monosnap extension too slow in capturing your screen’s content, you can always depend on the native ChromeOS screenshot tool to get that done.
Then, you’d open up the Monosnap editor and start annotating and working on your captured screenshot with the help of its “Upload image” feature. This tip, therefore, is quite helpful to factor in when you’re looking to stand out and create first-rate screenshots on your Chromebook. Here’s a brief overview of Monosnap’s prominent strengths and weaknesses.
Strengths
- It packs powerful annotation features such as arrow, rectangle, line, ellipse, blur, text, bubble, brush, crop, and resize. You can also pick different colors for tools to annotate and draw on your screenshots, not to mention being able to adjust the size of the arrows, rectangles, lines, and other functions.
- You can copy your saved screenshot directly to your ChromeOS clipboard to allow seamless follow-up from there on out in terms of pasting your screenshots.
- Poses various ways of taking screenshots that are otherwise unavailable in the native screenshot feature of Chromebooks, such as a full-page scrolling screenshot and a screenshot of an entire web page.
- It also lets you record videos as a cherry on top.
- If you sign into Monosnap, you can benefit from its upload feature that lets you work with a cloud-based user interface.
- You can implement various keyboard shortcuts to take screenshots via Monosnap.
Weaknesses
- Comparatively slower and bulky compared to the ChromeOS in-built screenshot tool despite being far more feature-rich.
- Not too quick in terms of taking a screenshot. Extra steps are required to grab a screen capture, edit it within the interface, and finalize the process by saving the edited image.
Lightshot
We thought it best to provide an option between Monosnap and Lightshot here, given the dominance of both high-class Chrome Web Store screenshot-oriented extensions, so you can decide which add-on to go for. Lightshot is just what the name of the extension depicts it is.
It’s much more lightweight than Monosnap in terms of its user-friendly graphical user interface and functional capacity. However, it’s pretty limited in its feature set as well. Unlike Monosnap, you won’t be able to enjoy additional ways of taking a screenshot in Lightshot, such as full-page screenshots or scrolling web page screengrabs.
However, what you will get, on the other hand, is lightning-fast access to capturing your screen’s content. The convenience and flexibility of the extension in question here are certainly worth it, so you can readily opt for Lightshot if it suits your preferences.
As for its core features, the add-on does allow you to annotate your screenshot the usual way, just like Monosnap. To make your screenshots stand out, you can add arrows, text, bubbles, rectangles, circles, lines, and everything else. However, you won’t be able to capture desktop screenshots with Lightshot, so bear that in mind moving forward.
Strengths
- Much faster, lightweight, and easy to use than Monosnap.
- It boasts powerful features that allow you to annotate your screenshots.
- Integrates with Dropbox.
- It lets you copy the image to the clipboard and print your screenshots from the editor interface directly.
- Sports a “share” feature to get around the screenshot on your social networks, such as Facebook, TikTok, Instagram, and Twitter.
Weaknesses
- Not as feature-rich as Monosnap.
- It does not allow you to blur unwanted content from your screenshot.
- It cannot take different screenshots, such as desktop screen captures like Monosnap.
Taking screenshots on ChromeOS – The best tips and hacks that you should know
Now that we’re all caught up on the right tools to use for the job let’s dive deep into the heart of this article now. This section will talk about all the best tips and hacks you should know about when taking a screengrab on your trusty Chromebook.
We recommend users employ all of the following techniques for nothing but the best results. The tricks given ahead can make your screenshots stand out with a noticeably substantial margin if you’d want to do a before vs. after comparison. With no further ado, therefore, let’s dive right in.
- Don’t forget: How to maintain your Chromebook and extend its life.
Utilize the right mix of screenshot tools available on ChromeOS
Before we go with anything else, it’s essential to know exactly what device you should use on ChromeOS to grab screenshots. To break it to you, there’s no singular option that we can put our finger on and tell you that this right here will do the job every time you want a screengrab. It doesn’t work that way.
You will need to be proactive to take the best possible screenshots conveniently. Let us explain with the help of a couple of examples. First, the reason we laid out above the strengths and weaknesses of the most recommended ways of taking a screenshot on ChromeOS is to help you acknowledge the right tool for the right scenario.
For instance, if you have to take a screenshot of something on your screen in the Chrome browser with no need to annotate it and get the desktop in your screen capture as well, then you should be using the in-built ChromeOS screenshot tool because of its fastest functional capacity out of the other two options.
Similarly, if there’s a case where you need to take a screenshot but need to explain all that is happening in the photo, we recommend using Monosnap or Lightshot, depending on whether you’d like advanced annotation tools or not. If you see yourself blurring something out or involving the desktop too in your screenshot, Monosnap would be your ideal choice.
At last, if there’s a unique setting where you need to draw over a screenshot but aren’t looking to utilize anything complicated, Lightshot is the tool you should be going after. Please take a minute to re-read this section and understand what we’re about to grasp here.
Every scenario demands you to think critically about the perfect tool to take a screenshot. There will be numerous possibilities to consider here, so going with the best possible mix of your screenshot tools will always bode well for your convenience.
In some instances, you will also want to take a screenshot of the screen with the built-in ChromeOS screenshot tool and then follow it up by editing and annotating with either Monosnap or Lightshot. Again, this is a variable scenario where you’ll need to be alert of your available options and the best way to utilize them, given that you know about them.
This is one of the main tips to be aware of moving forward, but we’re now going to come down to the ins and outs surrounding screenshot-taking on ChromeOS, starting with getting into the habit of annotating your screenshots.
Get into the habit of annotating your screenshots
A screenshot without the proper annotation often feels dry and uninteresting. Regardless of whether there’s little room to explain what’s going on in an image, it never hurts to make your screen captures stand out more with the help of the various annotation tools in applications like Monosnap and Lightshot.
Of course, the ChromeOS screenshot tool won’t be able to cut in somewhere here unless you’re using it for the initial screen-capturing process. That way, you can capture the image using the latter feature and then open Monosnap’s or Lightshot’s editor to work your way up to creating a high-quality screenshot next.
To put things into a clearer perspective, here’s a screenshot of the Chrome browser’s user interface that is supposedly trying to explain to someone to click on the “Customize and control Google Chrome” button.

Google Chrome interface screenshot without annotation
Here’s the same screenshot, but now you’ll see it properly annotated. The difference is vastly clear.

Google Chrome interface screenshot with annotation
Crop out the unwanted parts of your screenshot
Sometimes, we forget or ignore clearing out parts of our screenshots that have no role to play in the image. That’s a big no-no if you want to ensure that your screen captures leave a striking impression on anyone who views it. Develop a habit of developing your screenshots to a high-quality level.
The best part is that it’s easily achievable if you put a little bit of effort into cropping your screenshots and leaving the focus on the significant components of your screengrabs. To clear this instance up with the help of an example, check out the following image.
Note how it’s pretty challenging to make up what’s being shown in the image due to the photo not being to divert the focus from the unnecessary elements of the photo. You’ll need to fix that if you wish to take top-tier screenshots on your Chromebook.
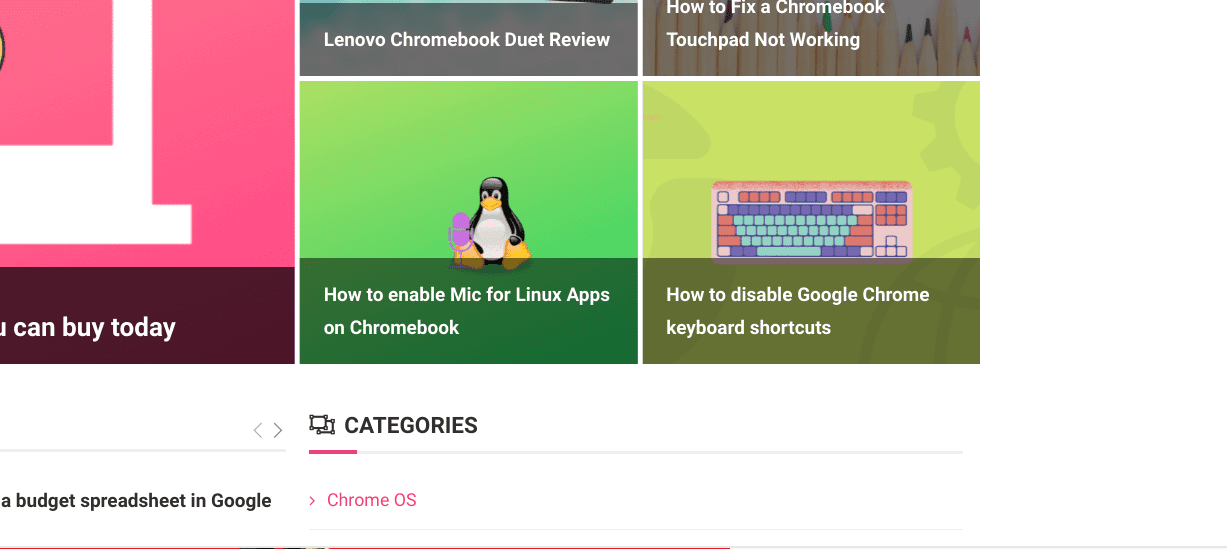
Uncropped screenshot gives off a low-quality impression
However, let’s now take a look at the following screenshot. Assess how properly cropped it is, thereby giving off the correct impressions to attract a solid user base.

A properly focused screenshot
Employ the “Blur” tool to highlight the screenshot’s focus
The “Blur” tool in any screenshot-capturing tool is beneficial for retaining the focus on the major metrics of the image. Thankfully, you’ll find the feature apparent in “Monosnap,” where all that it takes is to click on the functionality once and then hide anything unwanted that’s seemingly prevalent in your screenshot.
For instance, in the screenshot below, we’ve hidden our email address and password credentials to clarify how to sign into a Reddit account but not get our sign-in data stolen.

Using the “Blur” tool in Monosnap
Implement steps whenever needed
Sometimes, simple annotation isn’t enough to clarify your point and get it across to the other person. Again, an application like Monosnap can help you accomplish the task. It would be best if you simply outlined all a user needs to do to get something specific done. It’s what we do at Chrome Ready to write effective tutorials.
Let’s illustrate this with the help of the following screenshot. Suppose that you wish to access Chrome’s “Settings” area. The button in the top-right corner of the Chrome browser’s interface is called “Customize and control Google Chrome,” and it’ll help you get there.
However, many wouldn’t know this button’s literal name, so we’ll need to outline this in our illustrated screenshot for the best results. Clicking on this button leads to a drop-down menu where you can further access Chrome’s settings. Here’s how you can sum all this up with a single image.
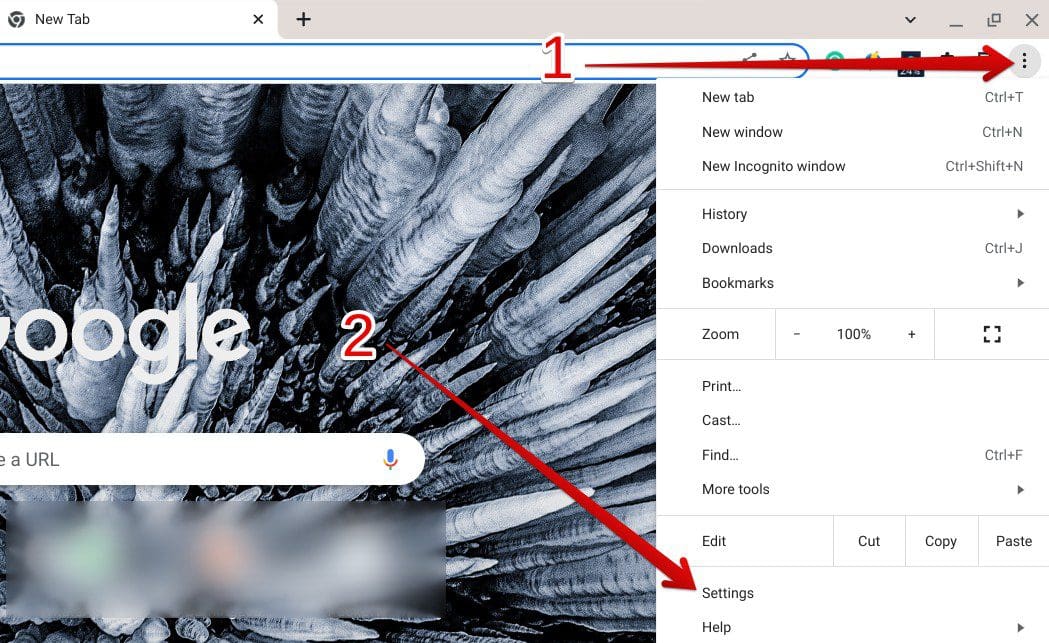
Creating steps in a screenshot
- Bonus points if you detect the usage of the “Blur” tool in the screenshot above.
Use the right file format for saving your screenshots
Another great tip for taking next-level screenshots on your Chromebook is to be wary of the correct file formats associated with images commonly. The typical file types in this domain that you will primarily work with are PNG and JPEG. Don’t write these off as synonymous or interchangeable.
It bears noticing that there are significant differences between these two file formats. PNG is recommended for compressing images so they turn out as high-quality. As for JPEG, this file type boasts a smaller file size but is similarly low overall quality. Another major factor to consider here is processing speed.
Although high in quality, PNG takes considerably more time to process when uploading it somewhere. One reason for this is the large file size associated with PNG images. JPEGs may not be on the same level of quality as PNGs, but they are quick to be processed, and uploading them is lightning-quick.
Therefore, make sure you’re using the best file format that suits your preferences. Monosnap, in its settings section, allows you to pick the output image format in which you’d like your screenshots to be saved. It’s pretty straightforward to get into that.
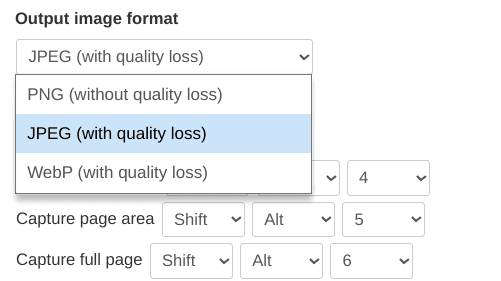
Different file formats in Monosnap
Use keyboard shortcuts for more productivity
Last but not least, all the Chromebook screenshot tools mentioned above feature keyboard shortcuts for faster access and more productivity. For instance, the native screenshot tool in ChromeOS can be kicked off using the “Ctrl” and “Show Windows” keys.
As for the rest of the extensions, you can specify shortcuts to get them to work as per your requirements. Both Monosnap and Lightshot feature changeable elements that allow you to designate hotkeys to operate them, but make sure you’re not using the same critical inputs for both add-ons to avoid a clash between the extensions.
ChromeOS keyboard shortcuts are a game-changer — truth be told — and you should acclimate yourself to them as soon as possible when working with a Chromebook.
Taking screenshots on ChromeOS – Common mistakes to avoid
Now that we’ve gone through the best tips and tricks for taking screenshots like a pro on a Chromebook let’s take a look at two of the most common mistakes users make when taking screenshots on ChromeOS.
Don’t accidentally take low-quality screenshots.
In case you’re unaware, many extensions feature a quality setting that determines how good-looking your screenshot will be. To highlight Monosnap in particular, you will find its quality ratio set to 90% by default. Make sure to crank that up to 100% whenever you get the chance for the best results.
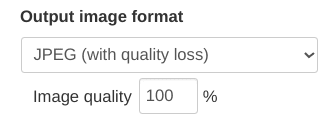
Determining the quality of your screenshot
Avoid oversimplifying your screen captures
It’s preferable to take screenshots and not go to town annotating them every so often. Why waste time over-detailing a screenshot when the job can be done with just one arrow? Avoid oversimplifying your screen captures for the most desirable results. Pay heed to the following screenshot and do the exact opposite moving forward.
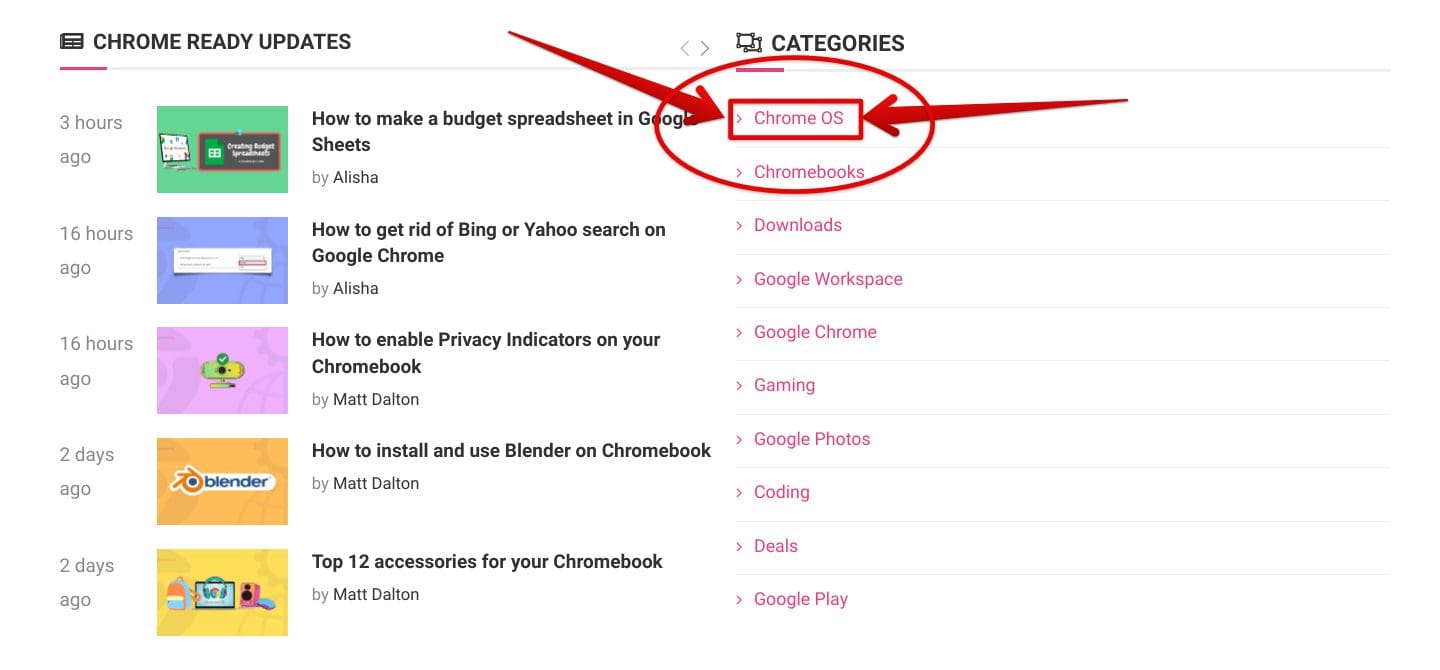
Oversimplifying a screenshot
Conclusion
We’ve talked about taking screenshots on Chromebooks, but not just any screenshots, the most high-quality level of screen captures that do nothing but amaze right from the get-go. Do let us know in the comments section ahead whether you found some of the enlisted tips and tricks useful for your cause.
As always, Chrome Ready wishes you good luck!
- An interesting read: How to enable Privacy Indicators on your Chromebook.
