Google Lens is an AI-powered search tool within Google Assistant that makes life a whole lot easier with just a couple of clips. On Chromebooks, it integrates with the Chrome browser quite profoundly, allowing users to pull off a variety of uses from it. Keep reading to explore what Google Lens can do on ChromeOS in this detailed tutorial ahead.
We’ve always said ChromeOS has been built on the founding principles of speed, security, and stability, thereby hitting the perfect trifecta that makes up a quality modern-day operating system. However, recent developments are adding one more trait to Chromebooks: excess functionality. Take a look at these top Chromebook features, and you’ll know.
For now, though, let’s talk about a high-quality Chromebook utility that you may have found ubiquitous across different Android devices. In the meantime, check out our in-depth guide on how to paint on ChromeOS.
- Trending on Chrome Ready: How do I install ChromeOS on an old laptop?
What is Google Lens?
It’s easy to take a guess from the name of this feature and dismiss Google Lens as a mere camera app. However, the functionality and the working capacity of the utility in question go beyond the constraints of a regular camera-centric tool. Google Lens is Artificial Intelligence-powered and practically falls in the domain of image recognition.
It was first announced back in Google I/O 2017 and was made to launch as an independent application. If you’re viewing this on an Android phone, the Google Lens app on the Google Play Store can be installed effortlessly on your mobile platform. The tool does come pre-built on the default camera application of Android devices, though.
Think of Lens as a magical app that can detect the content of images for you when you’re not aware of the said image’s source. Think of a picture you stumbled upon on the internet, but you’re not sure where it’s from. Now, if your curiosity is piqued and you seek to discover the roots of this photo, Google Lens will offer you a through-and-through solution.
Other than that, the functionality of Lens goes way beyond specialized image recognition. Some of the other most sought-after features of Google Lens include scanning QR codes and barcodes, translating text on the fly with in-built Google Translate integration, and even extracting text from images in Google Photos.
There are even more functions that Google Lens is capable of, and we’ll be sure to explore them all in the forthcoming section. Keep on reading to discover how exactly you can use the feature on ChromeOS and utilize it to the full accordingly.
- Related read: How to use the OCR text tool on Google Lens on the desktop.
How to use Google Lens on Chromebook effectively
Google Lens on ChromeOS works wondrously, but there’s no dedicated app on the Google Play Store or elsewhere for Chromebooks yet. Therefore, we will have to capitalize on the situation and utilize the presence of Google Photos to the best of our ability.
Since the Google Lens utility does not have a home yet in the “Gallery” application in ChromeOS for seamless access, Google Photos offer a viable alternative here. And in case you were wondering, the Google Lens Android app isn’t compatible with ChromeOS either.
Anyhow, if you’ve already set up the Google Photos app on the device, as if you’ve installed Google Photos on your Chromebook, you can directly open your photos and images in the app right from the “Files” utility on ChromeOS. Check out the screenshot below, and you’ll understand what we’re on about here. That is how you get it done.
- Ensure you’re opening the Google Photos app on the web and not via the Google Play Store. Otherwise, you won’t be able to utilize Google Lens’ search feature moving forward.
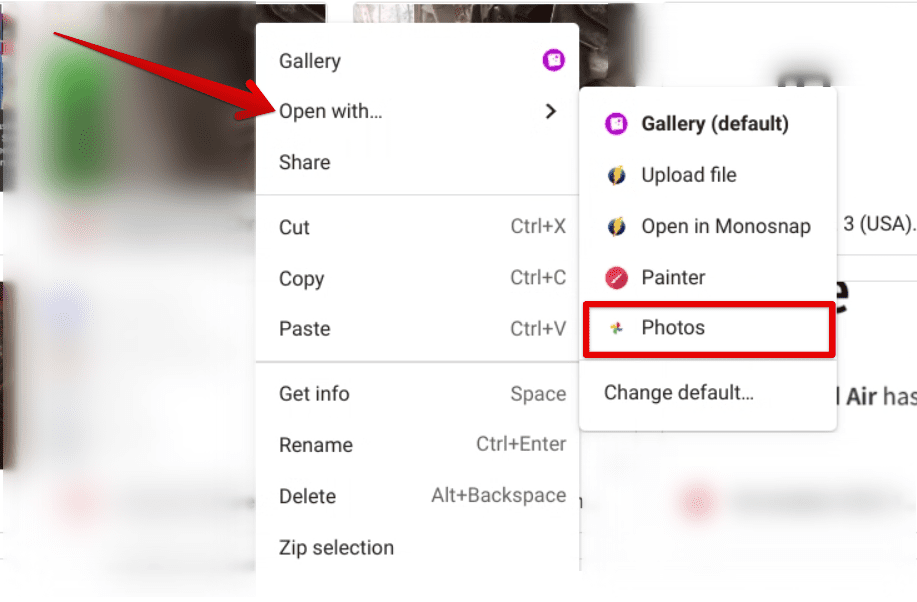
Opening an image in Google Photos from the Files system app
You are free to utilize the functionality fully when you open up an image in Google Photos. Begin by right-clicking on the photo and selecting “Search image with Google Lens.” The following screenshot will explain how this will be done.
In the image above, we’ve taken an example of a fairly common scenario to help you explain what Google Lens can do for a Chromebook user. By using the image of a famous celebrity, we’ll try to see if Google Lens can detect the person’s name in the photo.
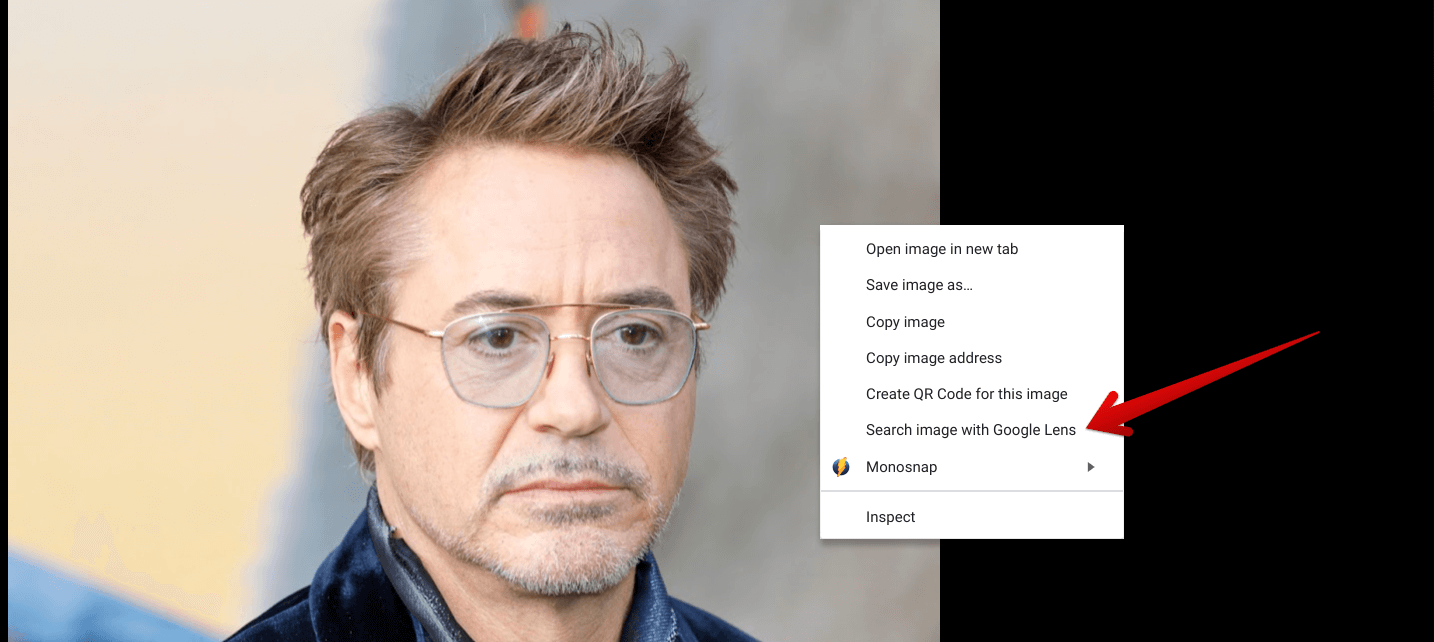
Searching the image with Google Lens in Google Photos
After clicking on “Search image with Google Lens,” a panel on the right will pop up, and this is where all the magic will happen. On ChromeOS, you’ve got three major Google Lens features to interact with: Search, Text, and Translate.
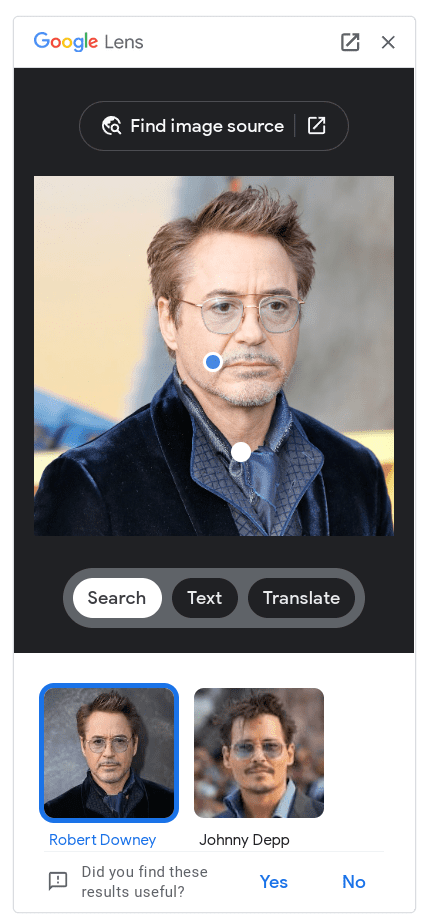
Google Lens on ChromeOS
Let’s break each of these down into multiple subsections, so you can fully recognize the full potential of Lens. Each of these functionalities is curated to perform a specific function, so you’ll love exploring everything that Lens can do on your Chromebook’s end.
If you’d like the full Google Lens experience, click on the “Open” button in the top-right corner of the app’s panel, and another tab will open up. That is where you’ll use Lens in full flight.
Search in Google Lens
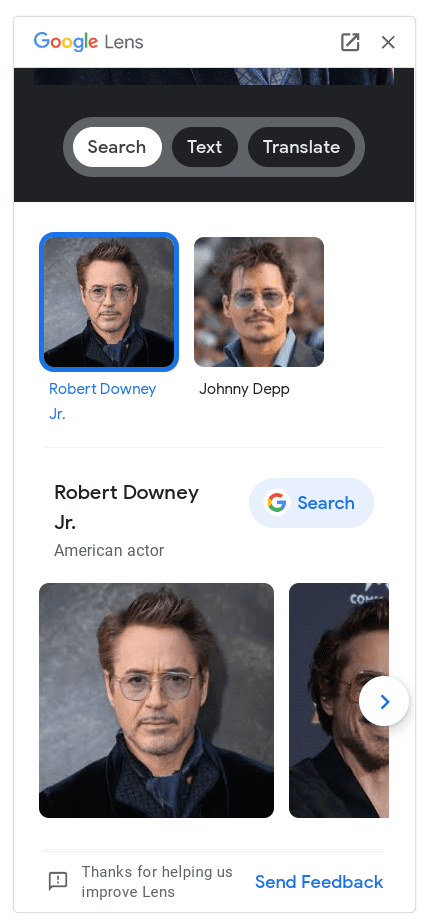
The “Search” feature in Google Lens
First, we’ve got the “Search” feature making strides for Google Lens, and perhaps, this is the most robust functionality the camera detection utility can offer its users. Most users employ the diverse services of Lens just for this tool alone, simply because of its effectiveness in solving problems for them.
Using the “Search” feature, you can quickly get the answers you’ve been prying for about a specific image. You must upload the photo to Google Photos if it is saved on your Chromebook and analyze the image using Google Lens.
As soon as that is taken care of, various search results will start getting pulled in, allowing you to visualize all on the internet related to the image you’ve searched. In the case of the photo above, we tested Google Lens to see what it could do for us, and the results were delivered as expected.
The first search result comprised the name of the man behind the iconic role of Iron Man—Robert Downey Jr. Therefore, this is how useful the “Search” feature can be in Google Lens. You better go ahead and put this functionality to the test yourself.
Text in Google Lens
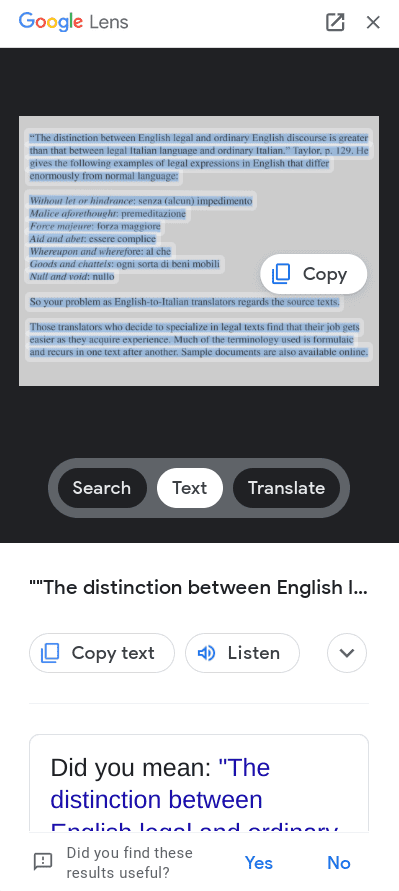
The “Text” feature in Google Lens
Next comes another highly popular Google Lens feature that has been making rounds across the vast spectrum of Android devices in the context of its usability. If you’ve got an image that could do well with text extraction, let Google Lens in on the fun and watch what it can do for you.
Use the same “Search image with Google Lens” trick but click on “Text” as the photo gets processed by the image recognition tool to utilize this feature. Once done, Lens will take a moment to detect the text and then allow you several follow-up options to look into.
As soon as the text gets detected, select some portion or all of it, depending on your use case. A separate button in the Google Lens side panel will allow you to pick all of the written text and set it up for further use. Click on it to get that out of the way.
Once that is taken care of, you may copy the text, listen to it out loud, search for it using Google’s search engine, and even translate it if the need arises. Some of these features will be discussed more in-depth later in the article.
Translate in Google Lens
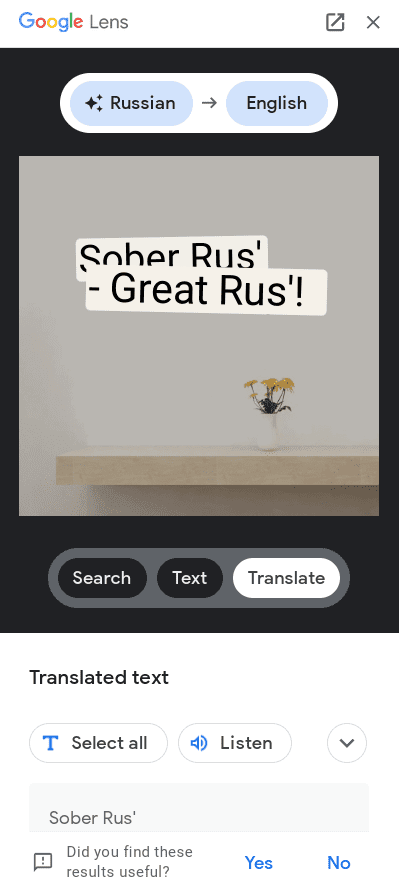
The “Translate” feature in Google Lens
Last but not least, multilingual people or those simply looking to learn a new language will appreciate this intuitive functionality. Similar to how the “Text’ feature works, “Translate” allows you to interpret one language into another, one that’s preferable for you to understand.
Get the photo to open up in Google Lens and then proceed to click on “Translate.” Lens won’t take more than a moment to sort that out for you afterward. The best part is that the tools of the previous mainline feature, “Text,” also kicks in after the translation process. All you need to do is click on the relevant options, and you’ll be good to go.
In one way, therefore, all the front-running functionalities of Lens are intertwined with each other. If you search for something specific, you can use your search results to get copied text or even translated text, in case you’d want it that way. Lens
This brings us to a close as far as the fundamental features of Lens are concerned. You’re now left with some additional tools and functionalities worth getting into.
Additional features in Google Lens
The following are some extra features posed by Google Lens, allowing millions of users to delve into a world of convenience like never before.
Copy text

Copying text in Google Lens
“Copy text” is a handy tool that allows you to copy all selected text in Google Lens. It’s available to be used from all three primary Lens features, which are Search, Text, and Translate. Forget about ever having to trouble yourself with manual typing by cross-checking images repeatedly now that Google offers a straightforward solution to its users.
Listen

Listening to the copied text using Google Lens
Apart from simply copying selected text in Google Lens and using it for designated purposes, the “Listen” feature kicks in Google Assistant to speak and say the text out loud. If you’re not ready to read up and want to listen to the selected text, the functionality in question will sort things out for you.
- Before we conclude the write-up, here’s a comprehensive guide on Google Assistant and how to use it effectively.
Conclusion
Not only do you get a swath of Google Play Store apps and Linux software to help you conquer your work days frequently, but the fast boot-up times and the relentless security of ChromeOS make it the perfect choice for operating systems.
In this guide, we’ve talked about Google Lens on ChromeOS and how it can improve your life. Do let us know in the comments section ahead if you’ve found the write-up useful for your cause. As always, Chrome Ready wishes you good luck!
- Before you go: 7 ways to transfer photos from Android to Chromebook.
