Have you been meaning to learn how to use a camera on a Chromebook? The functionality may seem bare-bones at first glance, but take it from us; there’s much more to this tool than meets the eye. In this guide, we’ll explore the ChromeOS camera app in-depth so you know what strings to pull every time you set out to use it.
Chromebooks are loaded from top to bottom with accessibility features and tools, allowing individuals to get the best out of these sleek devices daily. Thanks to the integration of the Google Play Store and Linux, ChromeOS in 2022 is one of the recommended operating systems, whether it’s an enterprise or a school setting.
- A must-read: How to enable JavaScript on Google Chrome.
What is the ChromeOS camera app?

The ChromeOS camera app in the launcher area
There isn’t much explanation due here, considering the fundamentality of the ChromeOS camera application, but it doesn’t hurt reading up on some extra information. First, the camera app on your Chromebook serves as the primary source for taking photos and selfies, hosting video conferences, one-on-one meetings, or anything of the like.
It can be opened with the help of the launcher section in Chromebooks which you may recognize as the section where all of your installed applications are made presently available. The “Launcher” section denotes the tri-circular icon in the lower-left corner of the ChromeOS interface. The “Camera” app will always be available for effortless access here.
Now, depending on the make and model of the Chromebook, your device might come with two cameras: One in the rear and one in the front. These Chromebooks are likely 2-in-1 convertible devices whose top lids can rotate back to 360°, thereby opening the machine up to multiple viewing mode accessibilities.
If you’re unsure about your device, take a better look at it by inspecting it physically, and we’re sure you’ll have the answer in no time. Chromebook tablets offer a diverse sense of functionality due to their versatile form factor, which also sets you up for additional ChromeOS camera features. Again, we’ll go over this in the forthcoming section.
The best part about your Chromebook’s camera app is that right alongside the rest of the processes of ChromeOS that have been getting revamped, updated, and fixed — in some cases — the camera utility has also been getting its fair share of enhancements over time.
Late last year, in 2021, the camera app in Chromebooks was blessed with the ability to scan documents—a first for the operating system. Since then, additional upgrades have also made landfall on these minimalistic devices, such as the ability to scan QR codes, among other changes.
Now that you have a fair idea of the ChromeOS camera app let us get down to the business end of the article and discuss the best ways you can utilize this considerable utility.
The ChromeOS camera app – an in-depth guide
Your Chromebook’s camera app is towed away inside the launcher section of the operating system’s interface. Simply use the “Search” button on your device’s keyboard to bring up the launcher. You can search for the app at hand by typing “Camera.” The utility should pop up in an instant. Select the app when it appears to get to the next step.

Launching the ChromeOS Camera app
Clicking on “Camera,” as shown in the previous step, should launch the application right away on your end. As simple as the camera utility of the operating system truly is, we’ll be breaking down every usable facet of the tool to help you get to grips with it. We’ll pay due attention to the detail here, so you won’t have to.
Simply continue reading from the following subsections to get a hold of every nook and cranny that the ChromeOS camera app is currently sporting. Let’s get started right away.
Video
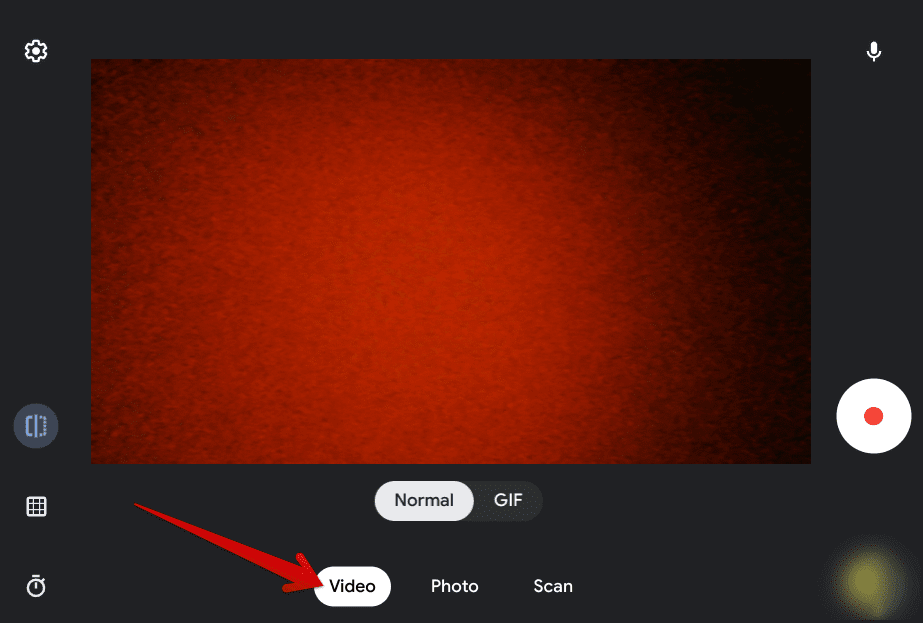
The Video mode in the ChromeOS camera app
One of the first features that the ChromeOS camera app boasts on the fly is the “Video” mode. With the help of this tool, your Chromebook’s camera will help you record videos with or without your microphone. The dedicated mic button in the top-right corner of the interface should help you mute or unmute your microphone before recording.
Unlike the “Photo” mode, however, the “Video” side of things in the ChromeOS camera app sports two-sided functionality. It lets you make desirable videos, and there’s now an added function that allows people to create GIFs. The feature works smoothly and just as intended, and you can truly get some high-quality GIFs out of it.
That said, the functionality wasn’t always in your Chromebook’s camera application. It was introduced to the camera app in the notable ChromeOS 100 when the operating system struck a century in terms of official update releases.
With the video-making and GIF-creation features combined, the “Video” mode of the camera app comes off as a well-rounded functionality that takes care of users’ rudimentary requirements around this particular domain. Let’s move forward with the various capabilities of the ChromeOS camera app.
Photo
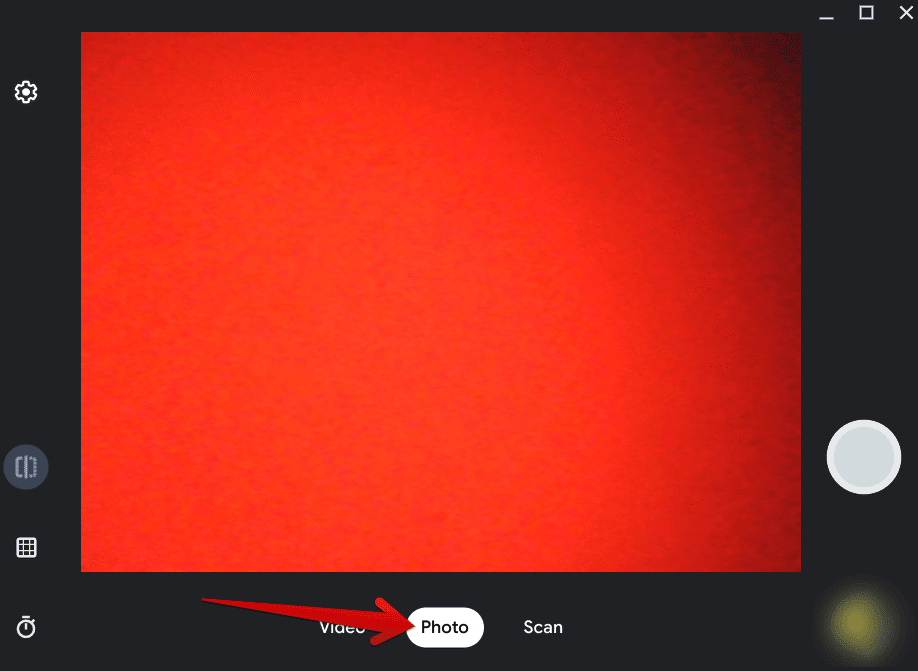
The Photo mode in the ChromeOS camera app
The “Photo” mode is the most fundamental feature of the Chromebook camera application. As the name of the functionality depicts, it allows one to snap images, take photos, and do about everything else you can think of the camera to do for you.
To use the “Photo” mode, you will need to click on the “Photo” tab first, so the camera app can detect what function it’s been requested to perform. Once done, click the vividly apparent shutter button on the right-hand side to take a photo. Check out the photo above for a clear illustration of what you should do in this regard.
Speaking of which, the screenshot above is taken from a Chromebook that only comprises a single camera. However, for those devices that come with a convertible form factor, you can switch back and forth between the rear and the front camera with the help of a dedicated button.
That’s all there is to know about the “Photo” mode in the camera app. With that said, there are a bunch of more relevant features here that we’ll discuss in one of the subsections ahead. These nifty functionalities will facilitate your photo-snapping experience to the maximum possible extent.
Scan
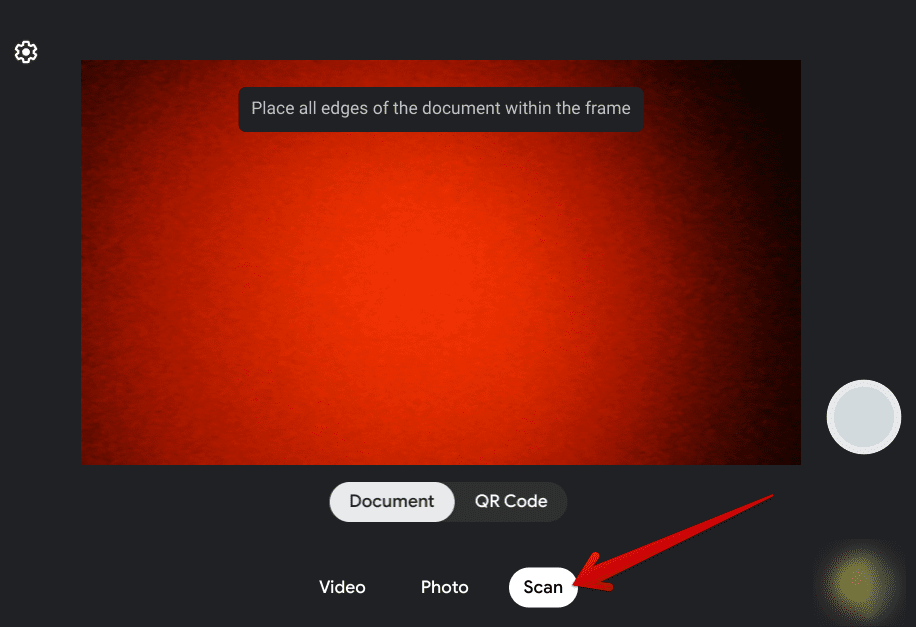
The “Scan” feature in the ChromeOS camera app
Next up, we’ve got the “Scan” feature to talk about. This novel functionality was added to the ChromeOS feature set’s spate not too long ago. Now, as we’re almost nearing the end of 2022, all modern-day Chromebooks will be able to scan your documents, thereby pitching the perfect solution that negates the need for a scanner.
Currently, two different types of features are further supported by the “Scan” function. One is “Document,” which, titularly, scans the documents you put into the device’s camera. The other one is a relatively newer facility offered by the developers. It’s catered toward detecting QR codes, so you’re pretty much sorted with this functionality.
The “Scan” functionality does not offer anything more than what we’ve described above. Still, it’s convenient to have this kind of functionality built into the operating system. So, let’s explore what else the Camera app has to offer.
- Related read: How to create and scan QR codes in Google Chrome.
Photo and Video settings
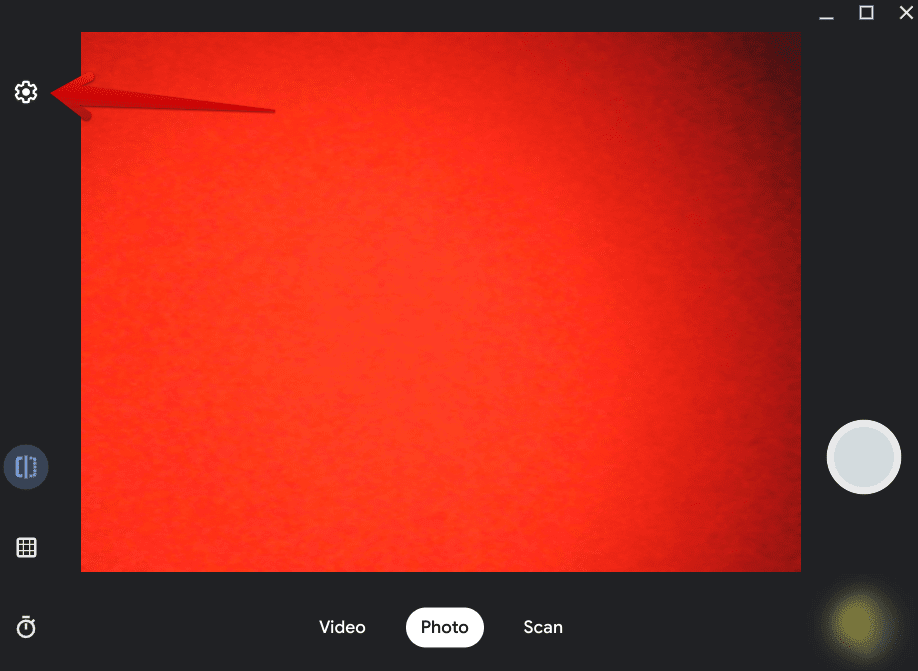
The Settings area of the ChromeOS camera app
Complimenting the “Photo” and “Video” modes of the camera app is the respective “Settings” section. Using the dedicated cog-shaped icon in the top-left corner of the camera app window, you can access a couple of tweakable features of either shooting mode, whether photo or video. Let’s take a look at what “Photo” mode settings have to offer.
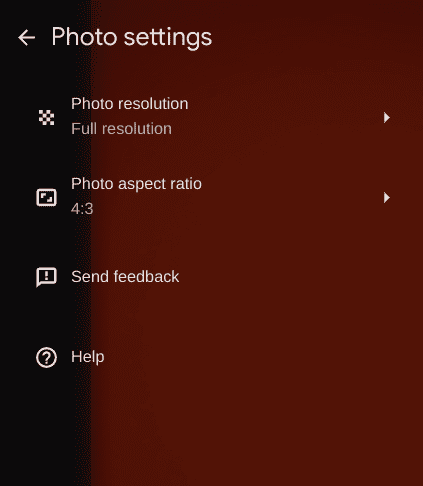
Photo settings in the ChromeOS camera app
According to the screenshot above, the “Photo settings” section allows you to adjust the resolution of the photos you’ll be snapping. This, however, primarily depends on the Chromebook you’ve got. Some devices, such as the HP Chromebook x360 14c, Google Pixelbook Go, and the Lenovo C340 Chromebook, possess some of the best in-built webcams.
Those can dish out high-quality photos consistently, so you should be able to rely on them without breaking a sweat. On our end, we had a total of two selectable resolution options: “High resolution” and “Medium resolution.” There’s no reason you shouldn’t opt for the former.
Next, there’s the “Photo aspect ratio,” and this is a useful one. You get plenty of options to choose from in this regard, such as “16:9,” “4:3,” “Square,” and even “Others,” which picks a randomly curated photo aspect ratio. This setting will be selected per your preference, so we have no say here.
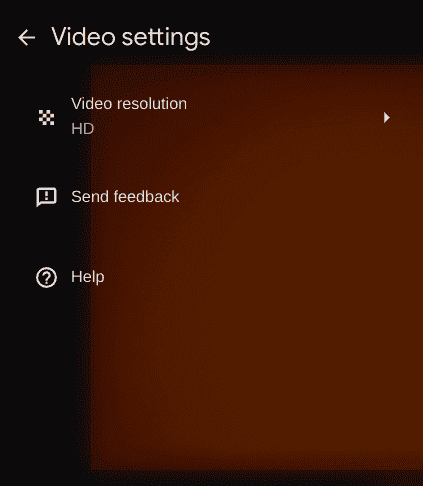
Video settings in the ChromeOS camera app
Next up comes the “Video settings” portion that can be accessed by first selecting the “Video” portion and then clicking on the “Settings” icon. Clicking on it will only allow you to tweak the video’s resolution, which will also vary on your device’s technical specifications and hardware.
In addition, some Chromebooks will even offer you a video aspect ratio feature, but this facet varies from device to device. Lastly, the present options for “Send feedback” and “Help” can offer you some insight into the innards of the ChromeOS camera app.
Mirror preview
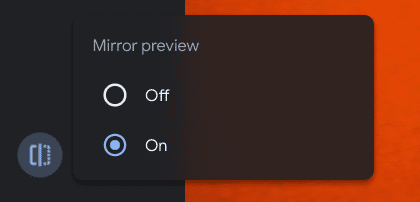
Mirror preview
We’re now into the final third of the various features that the ChromeOS camera app has up for grabs. The “Mirror preview” functionality sits on the left side of the ChromeOS camera app window and can be toggled on just by clicking on it. Doing so will bring up a dedicated menu for it and would thereby let you toggle it on or off.
If you’d like your photo or video mirrored, this is the feature that you’ll have to turn your attention to. Its easy-working mechanism will make it effortless for new users to get the hang of it. Let us now delve into the other front-running side feature of the ChromeOS camera app.
Grid
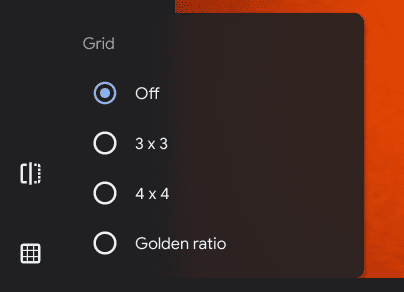
Grid
The “Grid” feature is another added functionality that tries its best to facilitate ChromeOS users. Grid draws horizontal and vertical lines on the display interface, so you can better orient your photos and avoid taking shaky snapshots.
Enabling grid lines is a pro-grade trick many expert photographers utilize to take near-perfect photos. On ChromeOS, however, the functionality is best used when you pair it with a rear camera, considering that your Chromebook has one.
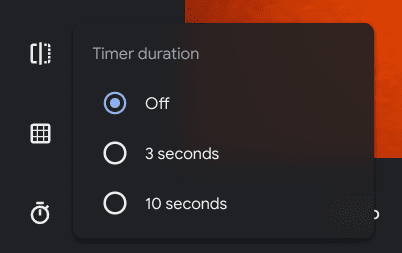
Timer duration
Timer duration
Last but not least, the “Timer duration” feature is a handy tool that can help you time your selfies right how you want them to be. The currently available options are “3 seconds” and “10 seconds,” so you can choose either to go about your day.
Selecting any duration will ensure that your photos are not taken as soon as you click the shutter button or press the “Enter” key to snap a photo. Instead, after the initiation of the photo-taking operation, a timer will go live, allowing you to position yourself properly until the time runs out and then take a photo automatically. It’s a pretty neat tool.
What to do if your Chromebook’s camera doesn’t work sometimes
Now that you’re all caught up on the do’s and don’t’s regarding the ChromeOS camera app, it’s high time that we discuss a couple of troubleshooting scenarios that can potentially fix pertinent issues with your Chromebook’s camera utility. If your Chromebook’s camera is not working, here’s what to do.
First off, you can simply try and restart your Chromebook. Doing so boasts favorable results most of the time, but if something isn’t adding up right still, you can get yourself an external webcam to see if that brings about a much-needed change. Here are 10 best ones we can recommend for casual and professional users alike.
Even if that does not pay off, next in line is a full Powerwash. This completely resets your Chromebook from top to bottom, so no local data is on your storage drive anymore. Powerwashing is the go-to trick for fixing a wide variety of common ChromeOS problems, including issues relating to the Google Play Store.
Conclusion
Although there is a versatile array of camera apps for your Chromebook, the camera app in-built on ChromeOS is certainly no slouch. Not only does it pack an exciting number of features at the moment, but it’s also happy to receive even more improvements, upgrades, and feature additions as time goes on.
This guide has covered an in-depth tutorial on how to use the camera app on a Chromebook, so you should be pretty much sorted moving forward. Do let us know in the comments section whether you found the guide useful for your cause. As always, Chrome Ready wishes you good luck!
