Chromebooks present their users with a comprehensive variety of ways to transfer files, some of which aren’t available on other platforms. In this guide, we’ll look at how to transfer files on a Chromebook in detail. The article comprises multiple options available for a regular user in this regard, so you know your options at the end of the day and can choose between them flexibly.
- Related read: How to enable the Recycle Bin in Chrome OS.
Best ways to transfer files on a Chromebook
The following is our cherry-picked round-up of the best and most helpful ways to move files around on Chrome OS and get them where they need to be. Let’s dive right in, therefore, without any further ado.
1. Using the Nearby Share feature

Nearby Share in Chrome OS
Starting off this list is the number one file transferring feature on Chrome OS called Nearby Share. This functionality is exclusive to Android devices, and most modern-day tablets, phones, and Chromebooks are naturally ingrained with this feature right from the get-go. Nearby Share arrived at the Chrome OS forefront in the 91st stable release of the operating system, making users’ lives profoundly.
The functionality operates by connecting two devices with the Nearby Share feature enabled. Once you form a link between the two ends, you can effortlessly transfer files from your Chromebook to another Android device, given that you want to do it. This is a genuinely simple, fast, and effective way of moving your files around without other demanding methods.
- We’ve written a detailed guide on sharing files with devices using Nearby Share in Chrome OS, so do check that out if you’re after a step-by-step tutorial.
However, the only downside of Nearby Share that beckons us to seek out alternate ways of transferring files is the absence of support for non-Android devices. Such lack does not have this functionality in their working interface. For instance, if you want to transfer files from your Chromebook to a Windows PC, using the feature at hand won’t be possible.
2. Plugging in an external storage drive
The following method in line is more or less a universal one. It works on every device, regardless of the operating system, and can be utilized ubiquitously across the globe. Take any external storage device, a USB, or a compatible hard drive and plug it inside the Chromebook. Make sure you know what ports your particular device has to avoid running into unwanted hiccups. For instance, the Lenovo Chromebook Duet only has a single USB-C port as its peripheral.
As soon as you’ve plugged the device in, give the system a moment to detect the foreign agent. Once done, head over to Chrome OS’s “Files” system utility and select all the files you wish to transfer to the external storage device. This will be pretty easy to do. Double-tap on the file in question and choose the “Copy” option afterward.
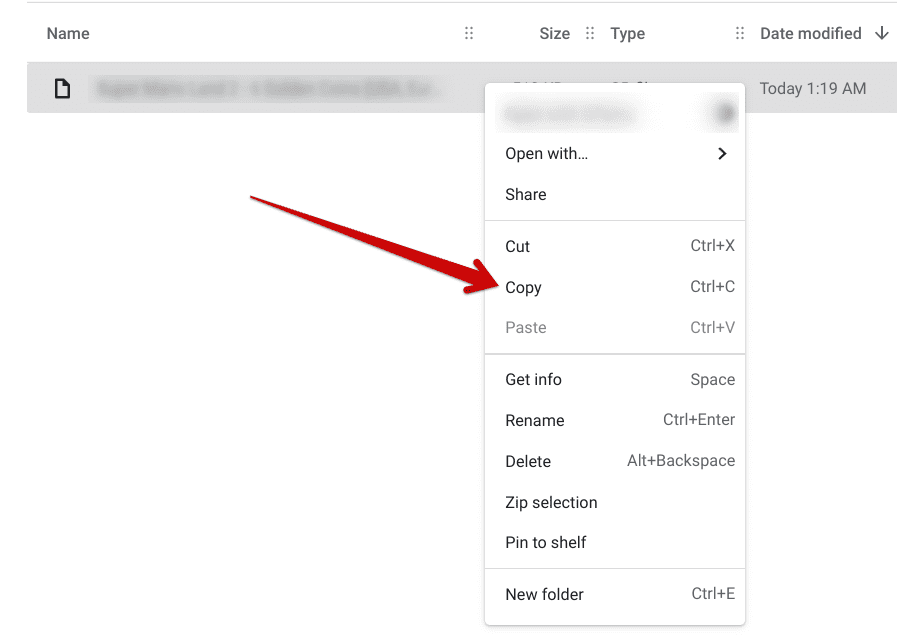
Copying a file to transfer
Next is to click on the USB storage device you’ve plugged into the machine and paste the copied file. Repeat the process as many times as you need. You can copy multiple files by single-clicking on a file once and then pressing and holding the “Shift” button. Go in the direction you want afterward by either using the “Up” or “Down” arrow key, and you’ll see that all present files are being selected almost instantly.
After selecting them, press “Ctrl” and “C” together to copy all chosen files. Head back to the USB storage and use “Ctrl” and “V” to paste the copied files. When you feel like you’re done, press the “Eject” button right beside the name of your USB in the sidebar to safely remove the device from your Chromebook.
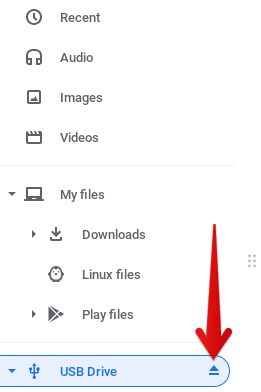
Ejecting the USB drive
You can now use this geared-up USB and plug it into any device you want to transfer the files. Keep reading for more information if you’re looking for more convenience and other ways to approach transferring files on a Chromebook.
- More from Chrome Ready: 5 unconventional ways to save storage space on a Chromebook.
3. Going wireless with cloud storage
Chromebooks are devices that live and breathe on the cloud, mainly thanks to their integration with a highly robust Gmail account that takes care of all our sync options. If you wish to transfer files more effectively from one device to the other, regardless of any wired or wireless constraints, like not having a compatible functionality or the absence of required I/O, consider looking into the marvel of cloud storage.
Chromebooks already benefit from the best cloud-based storage options, with pCloud being at the forefront. However, Google Drive is the software that comes pre-installed on Chrome OS with a separate toggle for enabling it within the settings section. It’s pretty simple to copy or move files to the distinct “Google Drive” folder in the “Files” app of your Chromebook and store the particular data on the cloud.
- In the meantime: Can’t decide between Google Drive and Dropbox? Check out our comparison article to quickly acknowledge what sets these two programs apart.
By implementing this methodology, you can fire up Google Drive on any other device, provided that you’re using the same account as the one you’re signed into on your Chromebook, and you’ll get all of your stored or copied files on that device. This is a highly recommended way of transferring files on Chrome OS, so let us look at how you can pull this off exactly.
First off, make sure you haven’t disconnected your Google Drive account from the Chromebook. Once done, make your way to the “Files” app, copy anything that you’d like to transfer by selecting it first, and then using the “Ctrl” and “C” shortcut key combination. After that, click on the “Google Drive” folder in the sidebar, as shown in the screenshot below.
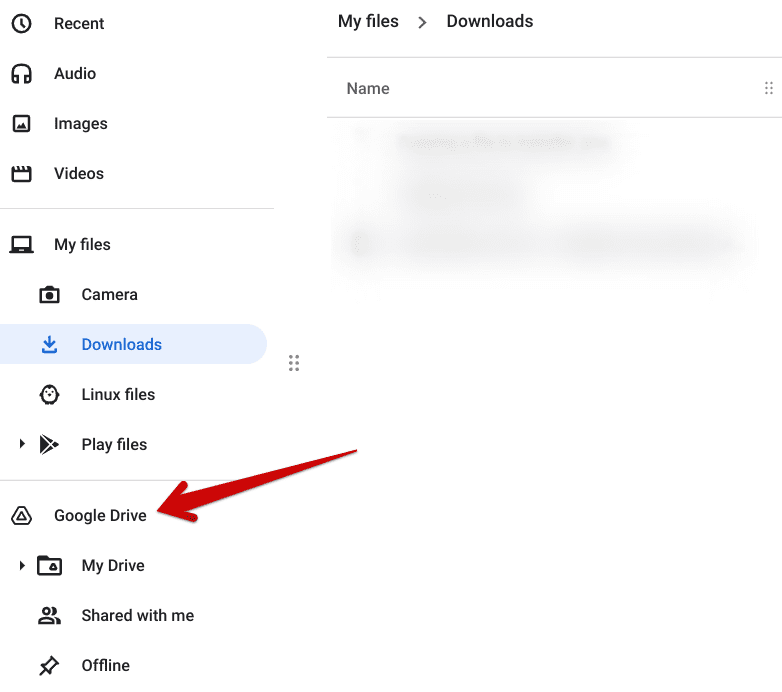
Clicking on the “Google Drive” folder
Feel free to paste the copied file anywhere after arriving at the dedicated Google Drive portion of the “Files” system utility. You can even create a folder inside Drive to meticulously store your possessions.
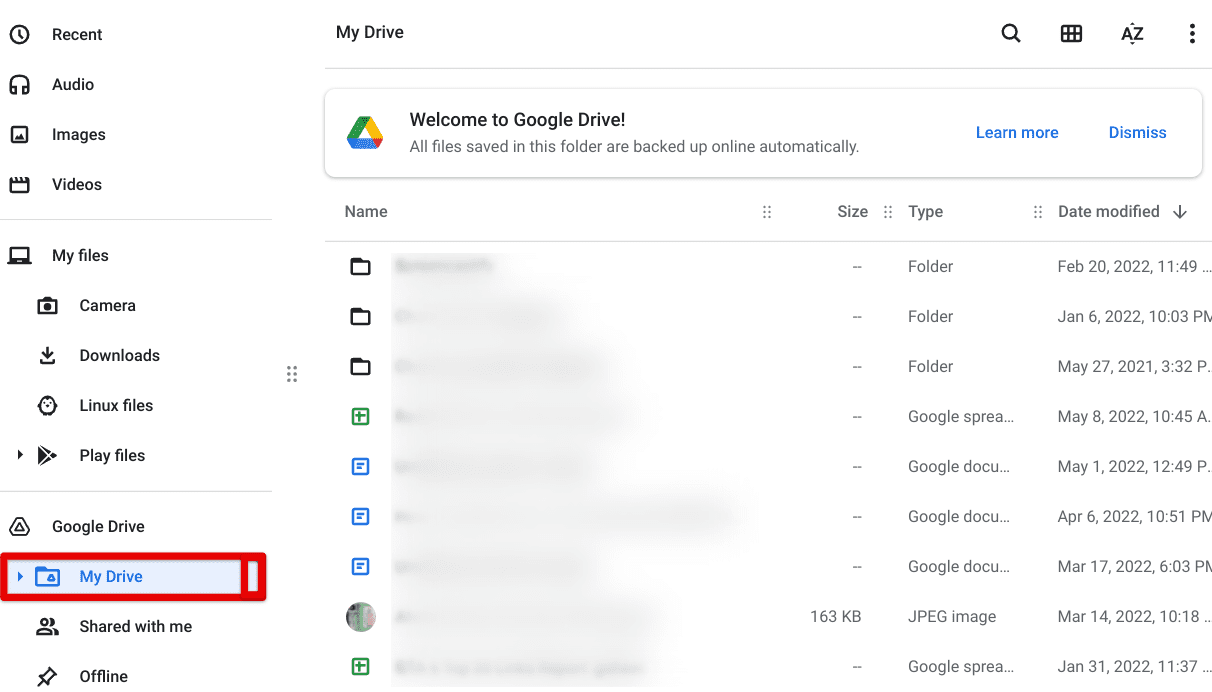
Pasting the file to Google Drive
That’s about it! You’ve successfully learned how to harness Google’s tip-top cloud storage service on your Chromebook, thereby transferring files in a broader sense. If you’d like a step-by-step tutorial that goes into even more detail regarding the matter at hand, check out our full tutorial on transferring files from Google Drive.
4. Benefitting from WhatsApp Web
Another way that you can transfer files on a Chromebook is WhatsApp Web. There’s no need to install the Play Store version of the world’s most popular chat messenger application. Visit the desktop client, use your mobile phone to scan the QR code of WhatsApp, and send files to your particular contacts by clicking on the “Attachments” button as shown below.
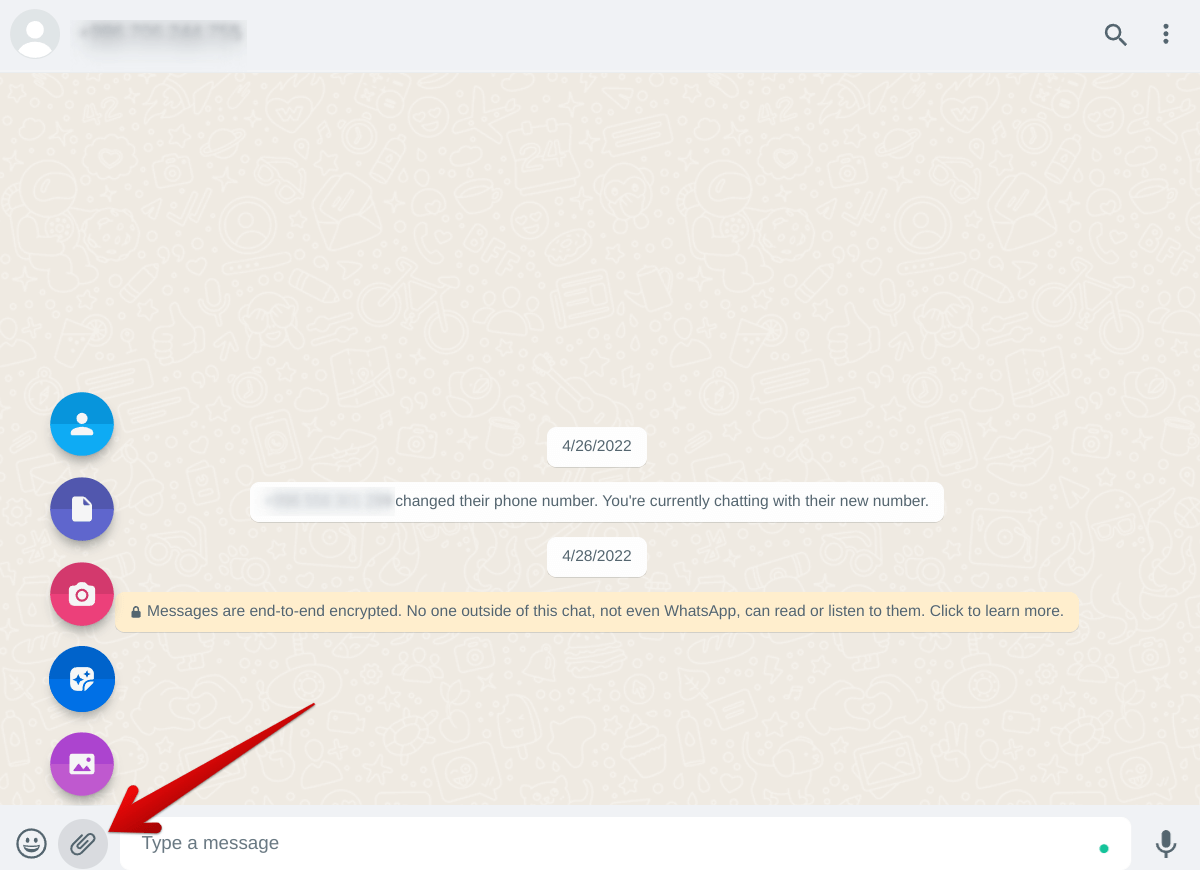
Clicking on the ‘Attachments” button
Clicking on the “Attachments” button will reveal plenty of more options on the screen for you. In descending order, you can share your saved contacts, send files, use the Chromebook webcam to take snapshots on the fly, send stickers, and share photos from your gallery. It’s pretty much effortless from there on out and a reliable way of transferring files from one end to the other.
5. Transfering through Gmail
Gmail is Google’s free-to-operate email application that Chromebook users can quickly access via a dedicated web app sitting in the Launcher section. Transferring a file through email is one of the world’s most common means of digital communication, and Chromebook users shouldn’t be exempt from it.
Therefore, press the “Search” button on your keyboard to pop open the dedicated Launcher area of Chrome OS. Type in Gmail, and you should be able to open the web application of the emailing service relatively painlessly.

Opening Gmail through the all-new Chrome Launcher
On a side note, though, the screenshot you see above is of the brand-new Productivity Launcher of Chrome OS. Check out this in-depth tutorial to give your Chromebook a new look with similar tweaks.
After opening the Gmail web app, compose a new email by clicking on the relevant button, as shown in the screenshot below. Once done, a window should appear on the screen, taking you through the email sending process. To add a file so you can transfer it on the Chromebook, click on the “Attach” button to bring up the device’s local storage.
Select the files you want to send over, and that’ll be it. Finish your email by adding in the recipient, the subject, and the body if you wish. Hit the “Send” button when you feel you’ve done to finalize the process.
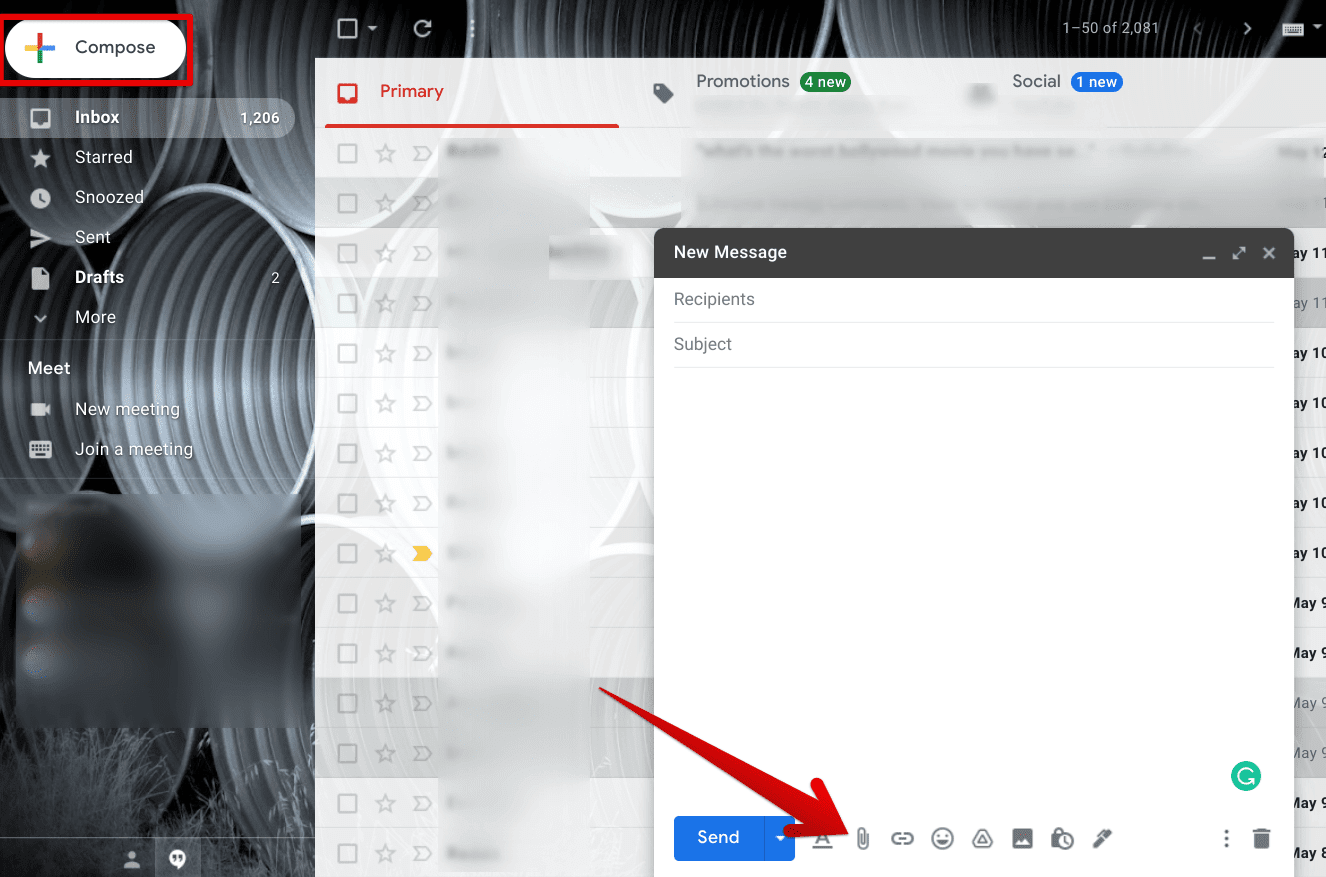
Clicking on the “Attach” button
This was the second last method of transferring files on a Chromebook. Let us shed some light on the final option we now have in this righteous regard.
6. Making the best of Wormhole
A specialized website called Worhome functions on a truly groundbreaking concept. No more having to connect two devices in sync so files can be transferred to and fro. How about streamlining the paradigm with the help of a site that can offer you plain and simple file sharing with private link generation. Get started with this novel piece of tech by heading over to Wormhole and selecting the file you want to transfer on your Chromebook.
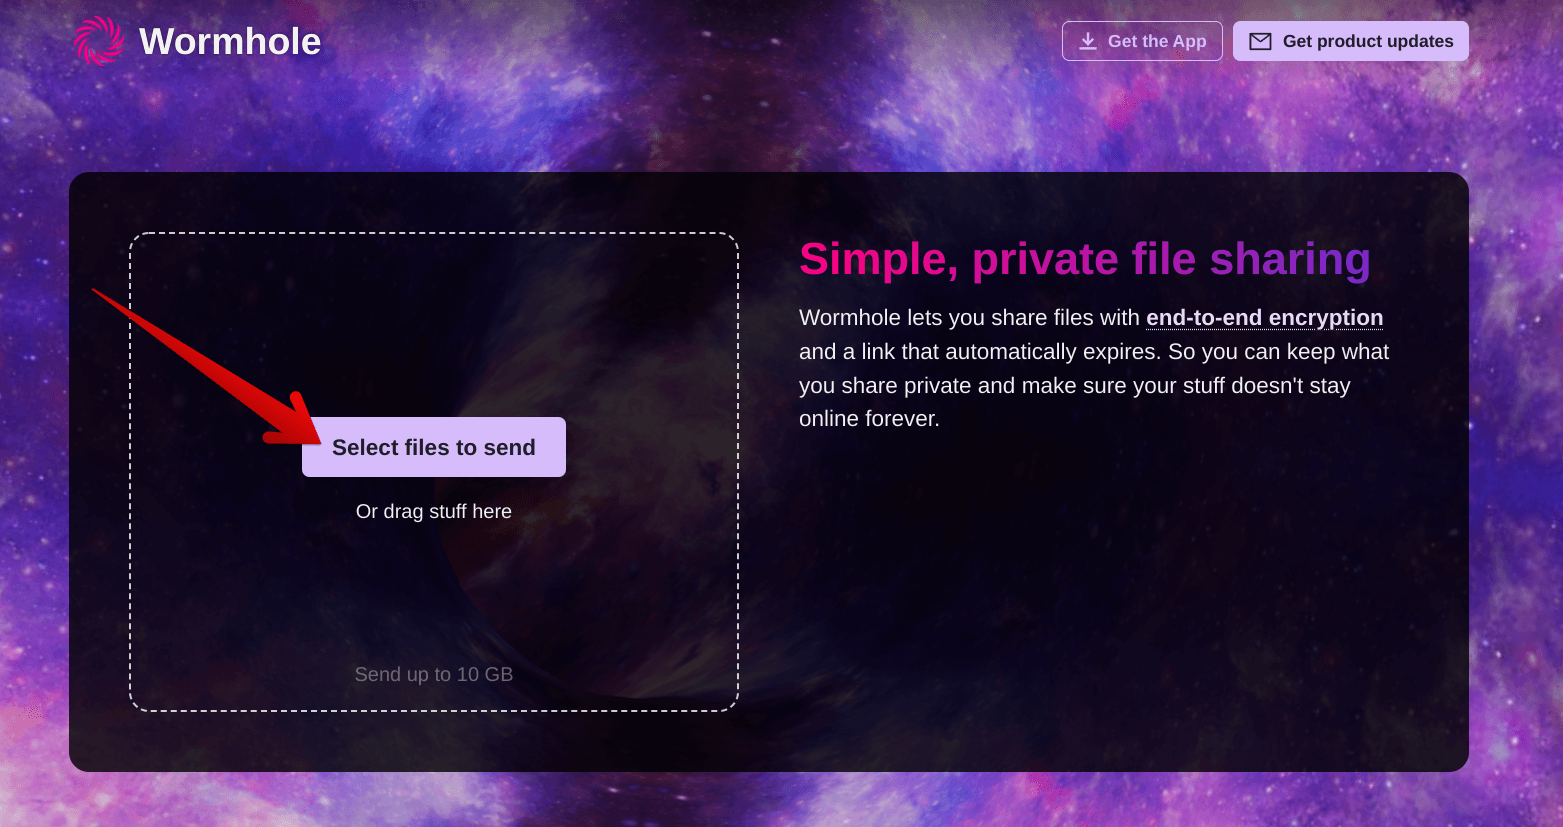
Selecting a file to send through Wormhole
Once you’ve selected the file that you wish to send over, the Wormhole will start processing the data and ready your file in no more than a moment, depending on the size of the file you’ve attached. The website is also generous because it allows you to send up to 10 GB of files, so that’s a beneficent plus point.
As soon as your file is ready to share, feel free to copy its link and send it over to the person you want the file to have. You can also replicate the process if you’re going to share your uploaded file or document to another device of yours. The possibilities are outright numerous.
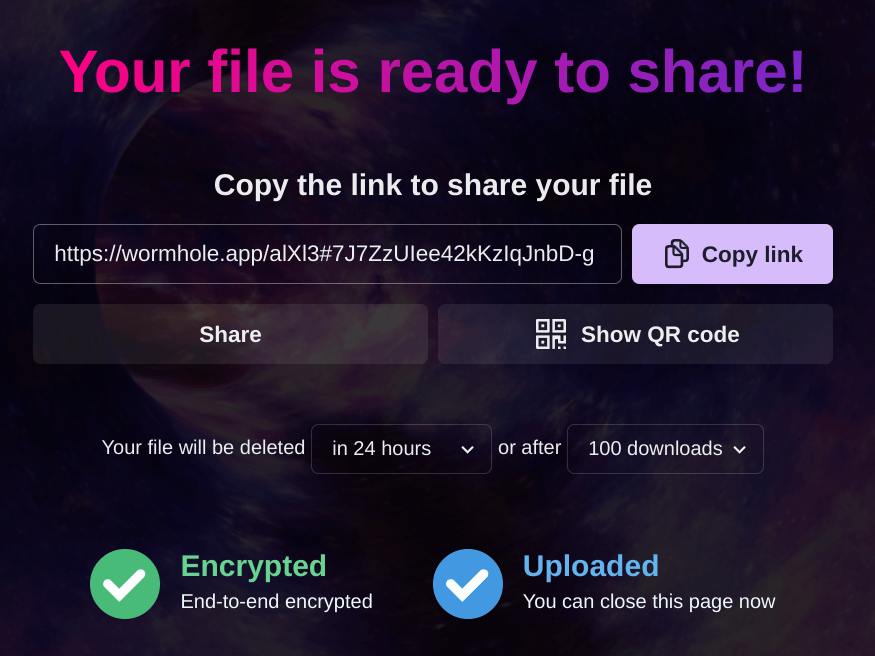
Wormhole file prepared
That’s about it for knowing how to transfer files on a Chromebook. We hope that by the time you’re done reading this write-up, you won’t ever have to Google this topic on Chrome OS for the years to come.
Conclusion
Transferring files is an everyday affair in the tech-forward age we live in today. Corporate individuals, working businessmen, and teachers in educational institutes always go back and forth with important data on different devices. And if someone owns a Chromebook, then it’s worth knowing your different options when it boils down to moving or copying files from one platform to the other.
That is precisely what we’ve catered to in this comprehensive guide. You should now be aware of all the best ways to be utilized heartily for transferring files on a Chromebook. If Nearby Share doesn’t work out for you, try wireless with a cloud storage option. If even that doesn’t sound workable, manifest a no-strings-attached approach by trying out Wormhole.
- Also read: How to use Gboard’s emoji kitchen on Chromebook.
