Even in this tech-forward age of 2021, Chromebooks are widely misconceived. The ultra-fast operating system that Chromebooks sport is a result of constant, gradual improvements. It might comfort you to acknowledge the fact that Chrome OS has never been hit with ransomware. When it boils down to security, Chromebooks raise the bar with their isolated sandbox isolation security measures, self-checking verified boot and a ton of other like-minded features that you can read all about here.
- The internet can be a cruel, unforgiving place to be in at times. You’re going to need all the help you can get to double down on Chrome OS’s already excellent security system and steer clear of all the dangers that await you online. Find out how to do that in this article.
We could go on and on about Chromebooks attributing to a phenomenal user experience day in day out, but it’s time we start cutting to the chase. The functionality of Linux has lent Chrome OS the ability to install powerful desktop-grade software effortlessly. So no matter if it’s about running another operating system or installing something as corporate as WordPress, the potential has increased tenfold here. Chromebooks even make it possible to operate your 3D printer and delve into the concept of additive manufacturing.
To do that, therefore, you will need a specialized software called slicer that converts 3D models and designs into a format that your 3D printer can understand. Speaking of which, PrusaSlicer is one of the best slicer software out there with a horde of features to help you get by and 3D print. If you own a Chromebook and have been wondering how to install PrusaSlicer on your Chromebook, you’ve come to the right place since, in this write-up, we’ll be showing you how to do just that. So let’s get started then without any further ado.
PrusaSlicer features
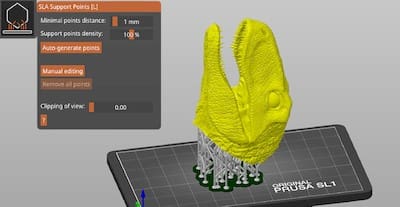
Prusaslicer
Free, open-source slicer
PrusaSlicer is completely free for use and is thoroughly open-source, meaning that you can add your own array of customizations as you see fit and worthy. It’s based on the iconic Slic3r program, a free STL file slicer software, filling in the purpose of generating G-code instructions from a CAD file. PrusaSlicer boasts a vast community, and creators are constantly working hard to better it as the days go by. You can even follow their progress on GitHub, which happens to be the world’s largest open-source Git repository for software creation. Prusa Research is a praiseworthy 3D printer manufacturer that’s famous for its line-up of high-quality printers. To accommodate their machines more profoundly, they have made their own slicer software.
Automatically updating print profiles
A convenient PrusaSlicer feature is its auto-updating print profiles. The team of Prusa Research is busy testing and developing pre-configured profiles and presets for more than 150 thermoplastic filaments and liquid resins, both of which are 3D printing materials for FDM and SLA 3D printers, respectively. Newer profiles are getting added to PrusaSlicer consistently, not to mention the growing support for popular materials by notable brands and manufacturers. As soon as a finished new profile drops, you will get it automatically through PrusaSlicer’s auto-updating feature without breaking a 3D printed sweat.
In-built firmware flasher
Flashing, changing, or updating the firmware of any 3D printer is a hassle that can involve many complications if attempted to be done the basic way. Programmers already know how one line of code can comprise multiple errors, and you can only imagine the scale of work needed if there are hundreds and thousands of lines of code. All that aside, enter a world of ease and comfort with PrusaSlicer. This program makes it unchallenging to update the firmware of your 3D printer with a simple USB connection. The courtesy here is due to the PrusaSlicer’s in-built firmware flasher. However, there is one limitation here, and that is this feature only works for the Original Prusa i3 3D printers for now. But, if you’ve luckily got one, it’s smooth sailing for you!
Color Change and Paint-on Seam
Within the interface of the PrusaSlicer, there are a plethora of features, both basic and advanced, to help you take your printing right up to the next level. One of those includes a color-changing technique. Using this tool, you can test and find out how your prints will look using different colors directly in PrusaSlicer so that you can make your filament purchasing decision accordingly. To get this color-changing functionality to work on your model, you will have to use the “pause for filament change” code at the layers parameter. The option of doing that appears in the print preview screen, so don’t worry about not being able to find it.
Right after that, you will see a preview with your chosen color in PrusaSlicer. Another admirable feature is called Pain-on Seam, and it is directed towards those who want picture-perfect 3D printed parts. Pain-on Seam lets you decide where the layer change seam will be located on your model with the help of a basic paint tool. When used appropriately, you can make your part look dazzling with this feature with minimal imperfections.
Print time analysis
In case you didn’t know already, 3D printing takes time. People are often trying to tweak their settings and orient their parts to take less time to finish up. This is because the average time for a model to complete printing is somewhere around 2-3 hours, depending on the size, infill, layer height, line width, and other defining parameters of your part. Sure, the possibility of finishing up prints lesser than that is also there, and to help you achieve prospects such as this, PrusaSlicer has a Print Time or Feature Analysis feature that gives you a breakdown and tells you how each of your dialed-in settings will affect the total time taken to 3D print. You can tweak and play around here to get the desired amount of time for your object.
Multi-language support
PrusaSlicer is available in a wide variety of languages and not just English. This is so users from all across the spectrum can natively enjoy the benefits of the slicer and not fall victim to onerous language barriers. The supported languages include English, French, Italian, German, Spanish, Czech, Polish, Ukrainian, Korean, Chinese (Simplified), and more.
Installing PrusaSlicer on Chrome OS
The following is a step-by-step guide that will show you the whole process of getting PrusaSlicer on your Chromebook. Follow them carefully to install the software with success.
1) The first step is to fire up your Linux Terminal and make sure it’s ready to go. If you find yourself unable to set it up or update the Terminal, check out this guide to get started with Linux.
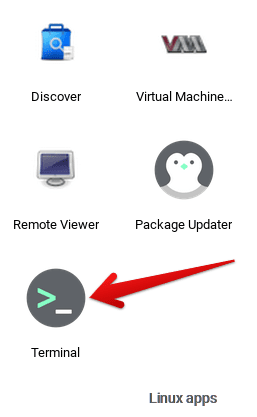
Opening the Linux Terminal
2) Once you have the Terminal prepared, it’s time to grab the PrusaSlicer AppImage that our Linux Terminal can execute and install the software. Click on this direct link to get to Prusa 3D”s GitHub and select the AppImage file as shown in the screenshot below. Doing so will begin the download, so wait a few minutes to let it finish.

Downloading PrusaSlicer AppImage
3) As soon as the PrusaSlicer AppImage downloads on your Chromebook, you’ll give it a look in your “Files” system application. What we mean is that you will have to rename the PrusaSlicer AppImage to a more straightforward title. This will lend us ease and convenience when working with the AppImage later on in the PrusaSlicer installation process. A good way to rename the downloaded file is to do so according to the version you’ve downloaded. The latest stable release for PrusaSlicer right now is 2.3.3, so the next step is to rename your file to “PrusaSlicer2.3.3.AppImage.” After doing that, you will move the file to the “Linux files” folder present to the left of the “Files” application.
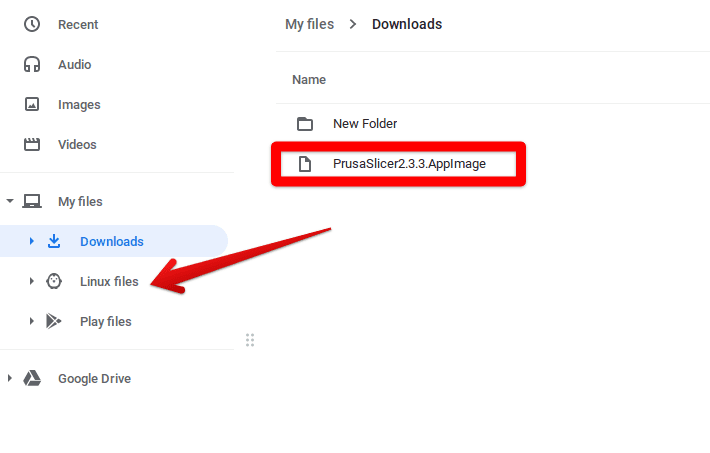
Renaming the AppImage and moving it to the “Linux files” folder
4) After you’ve moved the PrusaSlicer AppImage to the “Linux files” folder, we’ll hop back on our Linux Terminal and use the following command to begin the installation of PrusaSlicer. Note that the latter part of the command is the same as the name of your AppImage. This step is to enable modifications for Linux to the PrusaSlicer AppImage and make it executable.
chmod a+x PrusaSlicer2.3.3.AppImage

Making the PrusaSlicer AppImage executable
5) As soon as you press the “Enter” key, you will see your username popping up back on your Terminal window. This indicates that the command you’ve entered was successful. Next, all that’s left is to run the following command to execute the PrusaSlicer AppImage and install the slicer software on your Chromebook.
./PrusaSlicer2.3.3.AppImage

Installing PrusaSlicer on Chromebook
6) Right after that, the installation process will begin for the PrusaSlicer software, and it’s going to take a few minutes. When you see your username on the Terminal window again, and you also don’t notice any error messages, it’s a good sign that PrusaSlicer has been installed on your Chromebook. Once it does, it will launch automatically, so you don’t have to worry about launching it on your own or finding it anywhere. However, there is one gripe that many people have here. Unlike other Linux applications, the PrusaSlicer software does not have a dedicated app icon in the “Linux apps” folder. So, to relaunch the application, you’ll have to use the same command you entered above.
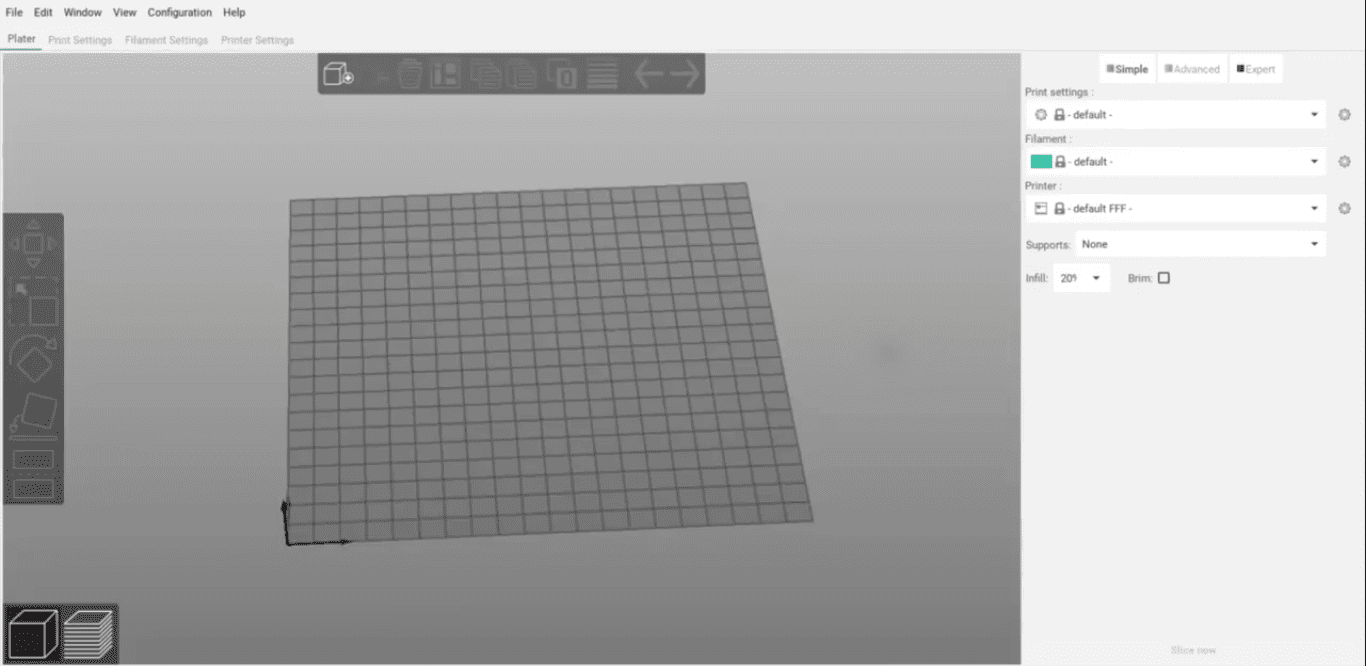
PrusaSlicer installed on Chrome OS
PrusaSlicer working
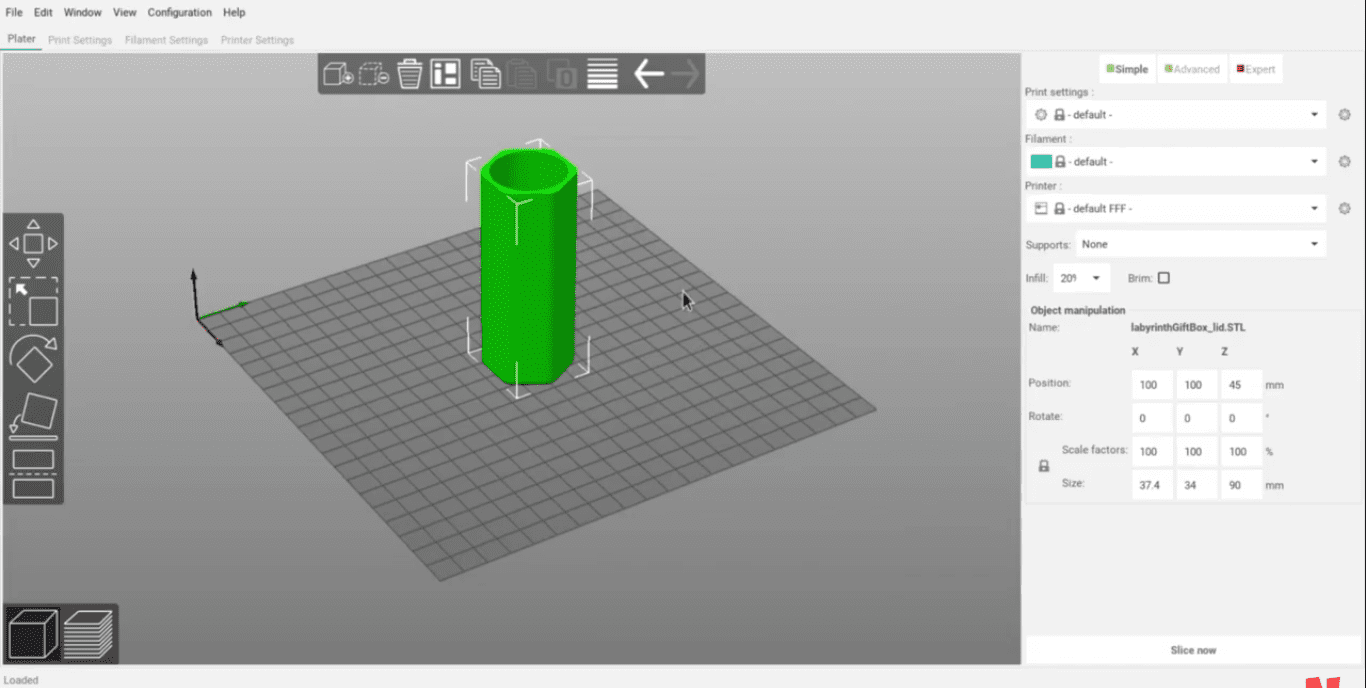
PrusaSlicer in the flesh
The PrusaSlicer slicer software is a high-functioning solution for all your 3D printing requirements, now allowing a Chromebook owner to run their 3D printers painlessly. Being desktop-grade, the application will do a number on your device, however. Still, if you’re sporting something as capable as the Lenovo Chromebook Yoga C630, you can expect sublime performance from the slicer. When you first launch the application, you’ll observe how PrusaSlicer has a fresh interface that’s loaded to the brim with features. Different types of tools are scattered all across the interface, and there are also shortcut key combinations that you can use to control the slicer. As soon as you start using it, you’ll be greeted by PrusaSlicer’s setup assistant. It’s a handy utilitarian that will guide you in choosing your 3D printer and your preferred materials. After going through the basics, all of your selected settings will be visible in the interface. Operating PrusaSlicer is uncomplicated for the most part. On the main screen, you will see a 3D-built platform that can be rotated.
Here, you can easily import your downloaded model by clicking on the “Add” icon in the toolbar present at the top of the main screen. Once you do that, the model will manifest on the build plate. Here, it’s outright effortless to get a better view of this model in any way you want. You can click and drag any point on the screen to change the view. Furthermore, you can rotate your model with keyboard shortcuts or by simply using the features appearing in the interface after you load your model. Then, there’s also the option of adding supports to your model. This feature lets you print complex objects with overhangs in them, which is basically a part of the model that protrudes out and does not have a base to be built upon. After going through all the above, you can hit “Preview” to slice the model and export it to your 3D printer. There’s a lot more to explore in this software if you’re willing to give it the attention and time it deserves. 3D printing is an expansive field that can get exceedingly complex at times, so it’s best advised to equip yourself with the right knowledge before any printing-related calamity.
How to uninstall PrusaSlicer
If for any reason, you’d like to get rid of PrusaSlicer from your system or would like to uninstall it so you could install it again sometime shortly, you can do that easily through the Linux Terminal. Type in the following command to uninstall PrusaSlicer.
sudo apt-get remove ./PrusaSlicer2.3.3.AppImage

Uninstalling PrusaSlicer on Chromebook
Conclusion
3D printing has amassed its fair share of attention over the last bunch of years, although the phenomenon has been around since the 1990s. Due to its surge in popularity and arrival in the mainstream media, more and more people have started to pick 3D printing up as a hobby while others have become experts in this field. Whatever the case, we all know that one cannot make successful 3D prints without the company of proficient slicer software, and when things come down to that, there’s PrusaSlicer to look forward to.
The latter is a high-powered application installed on Chromebooks, so Chrome OS enthusiasts can painlessly operate the slicer and have their way with 3D printers. It comprises a boatload of features, some of which you’ve seen above, and is simply a top-tier package all in all that’s ready to be utilized without breaking a sweat. We hope that this article has been helpful for your cause. Chrome Ready wishes you good luck!

5 comments
I’m getting an error “Cannot execute binary file: Exec format error”. I’m using the x64 version of the file and my chromebook linux version is Debian GNU/Linux 11 with arm64 architecture. What am I doing wrong?
Hey there. At what step are you getting this error?
At the very last step before it starts downloading.
Really great article, thanks a lot.
From prusaslicer github I took the GTK3 (there was also a GTK2 though).
during installation I had one issue with missing libGLU.so.1.
I followed one of the comment from : https://forum.prusa3d.com/forum/prusaslicer/how-to-install-and-run-prusaslicer-on-chromebook-with-linux-support/ to install the lib, and it worked out great !
Once I insert this code (./PrusaSlicer-2.5.0+linux.AppImage) I’m getting an error. Cannot execute binary file: Exec format error