Windows laptops or PCs, being merely electronic devices, aren’t made to run like a dream forever. You realize this specifically if you own a dated Windows computer that once performed up to speed but is now a painful slowpoke. This happens because Microsoft likes to keep Windows fully functional at all times. In doing so, implements updates to the OS that brings newer features, more functionality, security updates, and a lot more.
In that case, your old computer does not have enough horsepower under the hood to keep running Windows optimally. Furthermore, now that a newer, more tip-top version of the famed operating system is due to make landfall later this year, there’s a chance that your current Windows PC also won’t make the cut in terms of receiving the upgrade. So what do you do with such a PC, then? Good question.
Enter Neverware’s CloudReady – a highly efficient operating system that resembles Chrome OS in many ways. That is because CloudReady and Chrome OS are both built upon the same source code, which comes from Chromium OS. As a result, the two share similarities and differences with each other, and if you want to find out more about that, do give this article a read.
That said, an old Windows PC that cannot keep delivering a solid performance day in day out anymore seems like the perfect host for an operating system that’s as lightweight and speedy as CloudReady. Many people currently employ the same technique and report great results. Therefore, in this article, we’ll be covering how to install CloudReady on your Windows laptop in a simple and undemanding way, so let’s get right into it by discussing some of this operating system’s most prominent features.
CloudReady features
Automatic updates and security fixes
If you’re an avid Chrome OS user, you acknowledge how that swift operating system is an absolute charmer when it comes to updates. It handles the tasks all on its own and applies the downloaded update whenever you restart your Chromebook – all without having to indulge in the activity yourself. CloudReady will similarly transform your Windows PC, making it possible to bide your time elsewhere and keep getting automatic updates effortlessly. The consistency in this regard deems Chrome OS one of the best-operating systems out there, and now, CloudReady synonymously too.
Simple interface
One of the best reasons you should download CloudReady on your old Windows PC isn’t just about breathing new life into it—it’s about the massive overhaul you’re incorporating into your computer interface-wise. Since Chrome OS and CloudReady share the same root, the latter boasts a highly refined GUI that’s outright simple and uncomplicated to navigate and use – no hassles involved.
By scaling down everything with utter convenience in mind, CloudReady will have you getting work done more productively, and this is something that we all genuinely want. Windows is a high-powered operating system that’s capable of downloading powerful software without a doubt. Still, it can appear to be complex to beginners, and CloudReady does short work of all that.
Minimal hardware usage
The CloudReady operating system tends to be easy on the device it’s running. That is why most Chromebooks—although the spectrum is now broadly changing with the onset of Chrome OS laptops like the Acer Chromebook Spin 514—don’t comprise highly intensive specifications because the operating system running on them doesn’t need all that extra pizzazz. CloudReady, therefore, is more than fit to revitalize your Windows laptop and allow you to use it decently again. This makes the time and effort invested into installing the OS on your Windows PC definitely worth it.
Cloud-based management
While CloudReady can be installed for free on your Windows device, there are premium plans available that can take your experience to the next level. In addition, CloudReady is big on enterprise-level settings, where the operating system is made to provide its functionality to businesses and organizations.
Some of those enterprise-grade features include cloud-based management and mass deployment options, both of which are fully supported by Chrome Management and Google Admin consoles. This makes it straightforward in controlling and managing CloudReady devices right alongside Chromebooks as well.
Installing CloudReady on a Windows laptop
Installing CloudReady on a Windows laptop is nowhere near difficult. We will now cover how you can do just that in easy-to-follow steps, so be sure to follow them carefully to avoid running into any issues.
First things first, you’re going to need the following for this process, so let us just lay it out here beforehand.
- A USB drive that has 8 GB or more of free space
- A PC, Mac, or Chrome OS laptop for creating the CloudReady installation file
- The computer you want to install CloudReady on (obviously)
1) To begin the process, you first have to download the Home Edition of the CloudReady installation file. We can do that easily by heading over to Neverware’s official website using this direct link. When you’re there, scroll down a little and find the “Download USB Maker” button. Click on it to download this wizard-based tool that will take through the process step-by-step.
- The USB creation part can be done on any computer, including Chromebooks, and not just the one you intend to install CloudReady on.
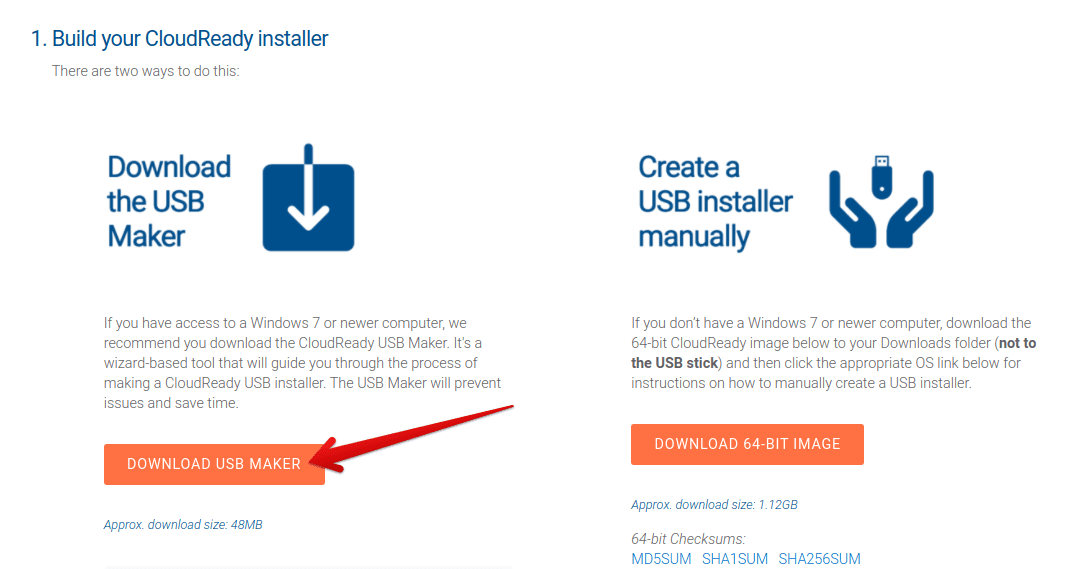
Downloading the USB Maker wizard
2) After downloading the USB Maker, you will launch it on your Windows PC. From here on out, you will be going through a step-by-step installer. The first screen will welcome you to the CloudReady USB Creation Utility, so take in the warm embrace and click on “Next” to continue.
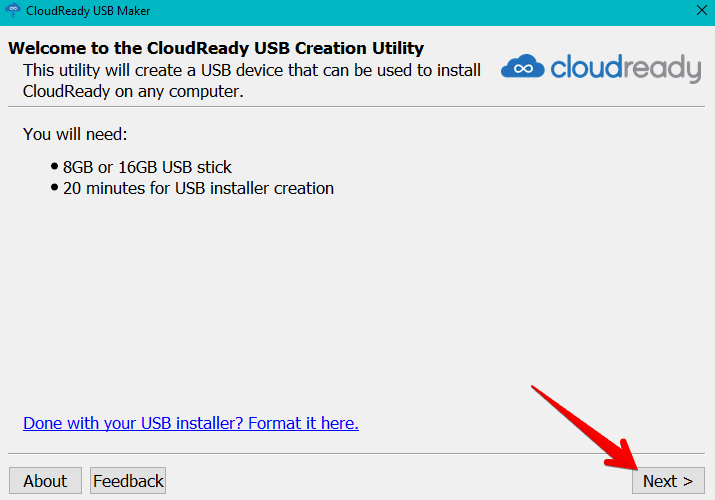
Proceeding with the CloudReady installer
3) The next screen is just going to say that Sandisk USBs are not recommended for some reason. If you don’t have a USB other than Sandisk, the process will still work, so fire away and click on “Next.”
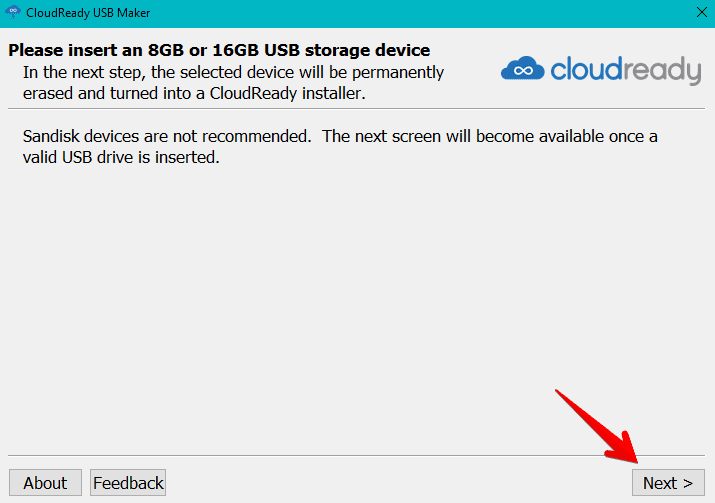
Proceeding with the CloudReady installer
4) Now, you will have to insert your USB drive inside your computer so that the CloudReady installer can detect it and begin the installation. If you have two USB drives, select the one you want to install CloudReady on. Do note that your drive will be completely erased during the process, so be sure to back up everything on it to avoid data loss.
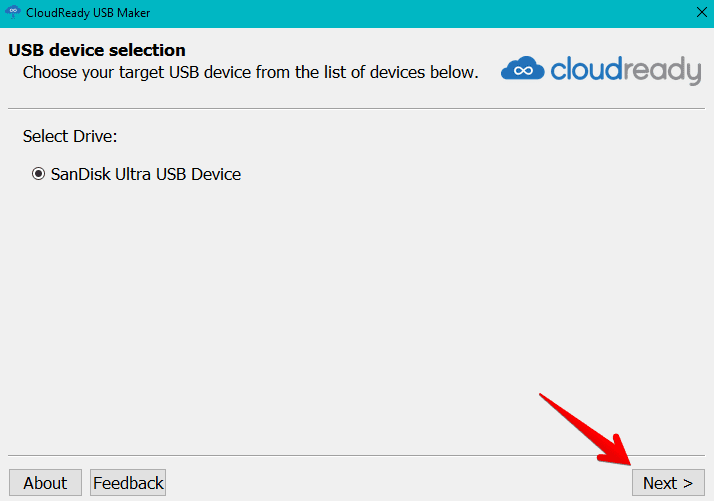
5) Once you’ve clicked on “Next,” the installation will commence. As mentioned earlier by the wizard-based tool, this will take around 20 minutes, so sit back, relax, and order some pizza.
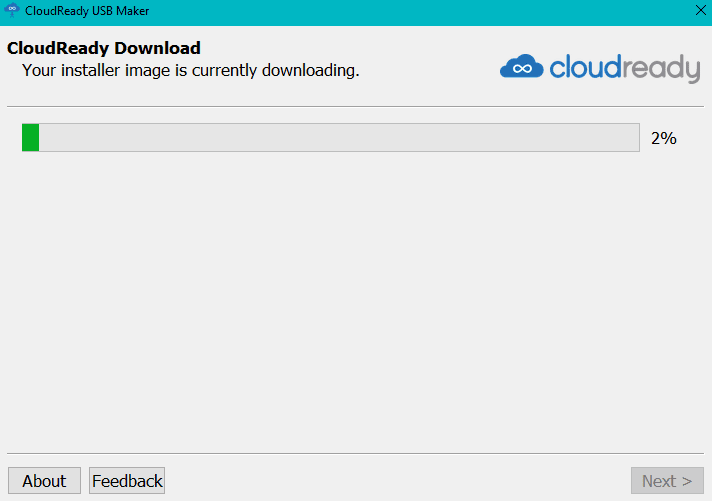
CloudReady installation begins
6) After the installation concludes and you’ve clicked on “Next’ to finalize the utility tool, your USB drive is all set to boot your Windows laptop of choice to CloudReady. Without any further delay then, hook the USB to the device you want CloudReady on. Make sure the computer has been fully shut down before you do that, however. Once done, turn on the device to be welcomed by the CloudReady operating system and go through the initial set-up that includes connecting the device to a Wi-Fi network and logging in with your Gmail account to start using it on your Windows laptop.
- You will be booted into CloudReady automatically when you turn on your computer after plugging in the USB. If you do that and see your old operating system again, you need to alter your boot order.

CloudReady
That’s it! You’ve successfully installed CloudReady on your Windows laptop, and all there’s left is to use it to your heart’s content and watch how your once-lifeless device is turned into a modern speedster.
Important pointers
However, do bear in mind that the method above does not permanently install CloudReady on your Windows laptop. When you do not have the USB stick plugged in on your computer, you will be reverted to your Windows operating system. Another con of using CloudReady temporarily this way is that you won’t get automatic updates.
To install CloudReady permanently, all you have to do is head over to the “Status Tray” area, where the clock can be seen and click on it. This will bring up a bunch of options for you, revealing “Install CloudReady.” Select it and painlessly go through the set-up process – it shouldn’t take long. Of course, when CloudReady has been permanently installed, you won’t be needing that USB drive anymore. Good riddance!
That said, replacing your current OS with CloudReady means that all of the files, data, and saved information will be erased permanently, and you won’t be getting that back, so do take this plunge with a grain of thought and back up everything that holds any significance before permanently installing CloudReady.
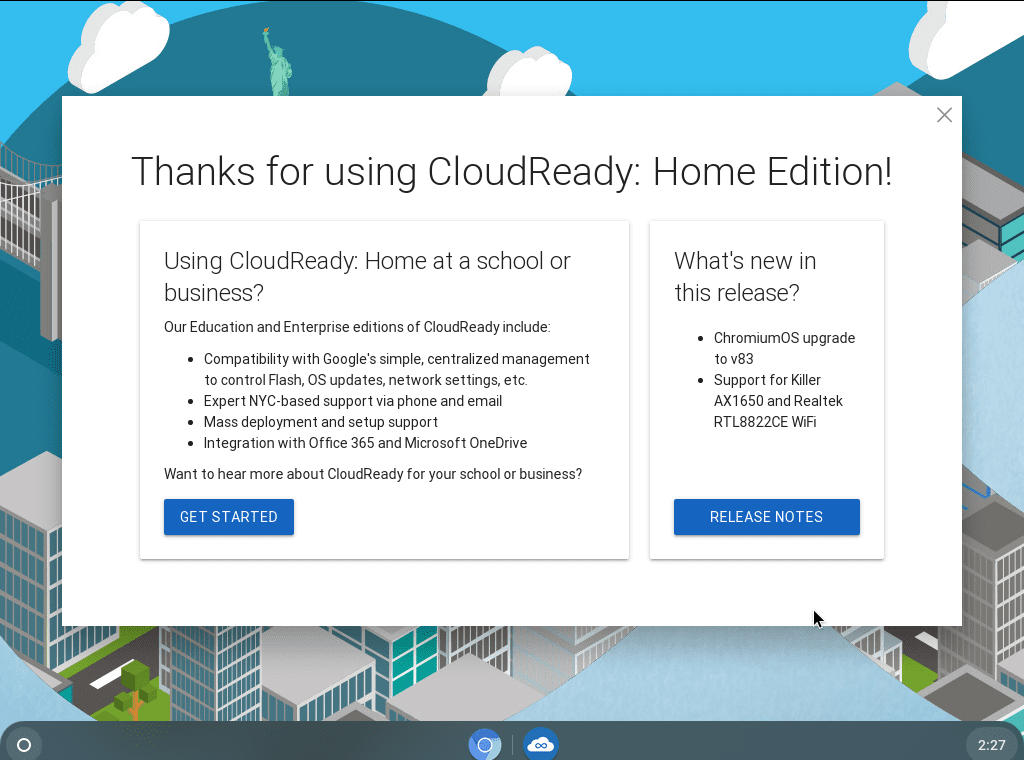
CloudReady Desktop window
Conclusion
Your old Windows laptop doesn’t have to stay useless anymore if you know anything about the efficacy of CloudReady. Even if you have gotten a new device for your personal use, installing CloudReady on your once-glorious laptop is a great way to obtain a secondary device that’s ready when you are. After all, CloudReady is based on Chromium OS, which fuels the speed, security, and simplicity of Chrome OS, so the latter and CloudReady are no less than high-performance siblings.
Both of these are simply top-of-the-line for browsing the web and getting work done without breaking a sweat. Therefore, we highly advise that you try CloudReady if you have something outdated lying around. Still, please keep in mind that if your computer suffers from an underlying hardware issue, installing a new operating system won’t magically fix everything. Still, CloudReady is worth a shot, and in this article, we have covered the whole process. We really hope that you’ll like CloudReady once it starts reinvigorating your Windows laptop. Good luck!
