Chromebooks are no slouch when it comes to programming and writing code. We’ve written this master guide to prove exactly that, as there is a bevy of ways you can use to start coding on your Chrome OS right away. This sleek and simple operating system doesn’t look much capable of pulling off something like this, but few people know how wayward that notorious belief truly is.
Linux has bumped up an average Chromebook’s functionality tenfold, as you can install powerful software and desktop-oriented applications without breaking a sweat and make your device more functional. Then, there’s also the Google Play Store at hand, readily available to make app downloading a through-and-through painless process.
Several programmers who end up having a Chromebook frequently ask whether Java programming is possible on these slick laptops. We’re here to tell you that it definitely is, but certain steps are required to kickstart coding in Java on Chrome OS. Therefore, this article will talk about all there is to this topic and show you how to program in the Java language on a Chromebook. Without any further ado, then, let’s jump straight into this.
How to program in Java on a Chromebook
To start writing code in Java, you will need to have the Linux Terminal enabled on your Chrome OS. If you’re unsure what that is or how to turn it on, please refer to this article for a complete tutorial.
The next step after having your Terminal fully set up and ready to go is to ensure that it’s up to date, so we don’t run into any potential problems in future installations.
With the initial disclaimer out of the way, let’s now focus on getting Java on your Chromebook.
Preparing the Linux Terminal and installing the Java development kit
The first phase of this tutorial is to prepare the Linux Terminal to accommodate installations without giving you any trouble. In addition, we’ll also be installing the Java dev kit on the Terminal. The following steps are going to take it from here.
1) Begin by opening the Linux Terminal on your Chromebook.
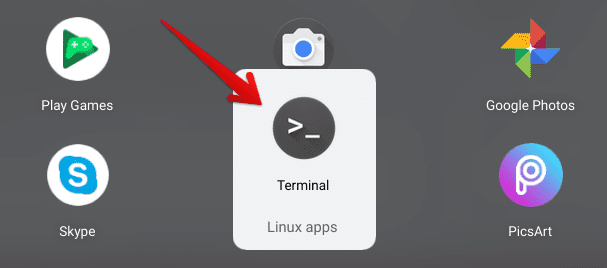
Opening the Linux Terminal
2) Next, type in the following command into the Terminal to ensure our Linux is updated with all the latest packages and repositories.
sudo apt-get update

Updating the Linux Terminal
3) When that’s done, we’ll want to make sure of the upgrades by entering another command. Use the following and press the “Enter” key to continue. Note: If, for instance, the command doesn’t work and shows you the error, “E: dpkg was interrupted, you must manually run ‘sudo dpkg –configure -a’ to correct the problem,” you’ll simply enter said command and press the “Enter” key again. All this is illustrated in the following screenshot.
sudo apt-get upgrade

Upgrading Linux
4) You’ve now prepared your Terminal to handle all the processes that are about to come, either sooner or later. The next thing we have to do is to install the Java development kit. We’ll do that by entering the following command in the Terminal and letting it run.
sudo apt-get install default-jdk
Installing the Java Development Kit
5) You’ll shortly be asked for confirmation regarding the installation. Press the “Enter” key to continue the process.

Confirming the Installation
The Terminal is now going to take a while to finalize the Java development kit installation. When your Terminal username appears back in place, you can input another command to check whether the Java dev kit has been appropriately installed or not. Enter the following in your Terminal window and press the “Enter” key.
java -version

Checking Java version
With all that dealt with, we can get started on the next crucial step – installing Microsoft Visual Studio Code.
Installing Microsoft Visual Studio Code for Java programming
Microsoft Visual Studio Code is a feature-rich coding platform that offers unrivaled convenience and easy availability on Chrome OS for programmers all across the spectrum. Having Linux enabled and ready on your device paves the way to a comfortable Visual Studio Code installation that will have you writing code in no time. While this software has many other computing languages at its disposal, Visual Studio Code is what we’ll be using for Java programming on a Chromebook.
Fortunately for you, we have covered this whole topic extensively in another one of our articles here. You can give it a quick read to find out what features this software packs, and of course, how it’s installed on Chrome OS. Once you’ve gone through that whole and have installed Visual Studio Code, come back to this guide and keep reading to get Java on your Chromebook.
Getting Java extensions on Visual Studio Code
The process is almost at its conclusion now. All that’s left to do is install the proper Java extensions to code in the Java programming language on your Chromebook. We are going to explain how you can do that in the steps given below.
1) Star by opening Microsoft Visual Studio Code on your device. The app icon is bound to be in the “Terminal apps” folder in your Chromebook’s Launcher.
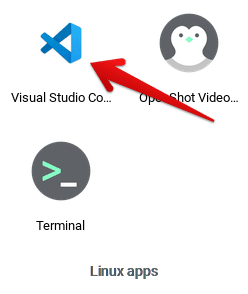
Visual Studio Code installed
2) Having the interface opened, click on the “View” section in the Taskbar above. The drop-down menu will reveal several options, and you’ll have to select “Extensions” out of the bunch. Alternatively, you can also press the “CTRL + Shift + X” shortcut key combination to open the Extensions area right off the bat.

Opening “Extensions” on Visual Studio Code
3) After doing that, the various extensions of Visual Studio Code will begin to appear on the left-hand side in a columnized manner. There will be just too many of them to scroll down and find the one we need for Java programming, so what we’ll do is use the search bar allocated at the top of the column and search for “Java Extension Pack.” The developer of this extension is Microsoft, so make sure you’re clicking on the right one. At the time of writing, this extension has also been starred by Visual Studio Code – something to help you look for the extension accurately.
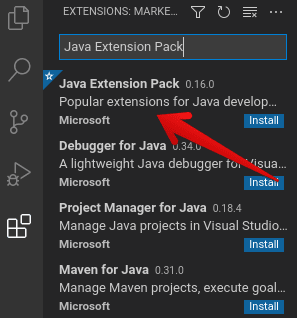
Searching for “Java Extension Pack
4) After clicking on “Java Extension Pack,” you’ll be directed to the official page of the extension, which is lauded with an overwhelming number of downloads and positive ratings. There, you will also find a small-scale “Install” button. Click on it to begin installing this extension. This bundle includes Maven for Java, Visual Studio IntelliCode, Langauge Support for Java, Java Test Runner, Debugger for Java, and Project Manager for Java – a total of six applications that will help you find your way with Java programming on Chromebook.

Installing Java Extension Pack
5) After the six applications have been downloaded, you are now all set to start writing Java code on Chrome OS. You can either restart the application now or return to the home page to find the option to create a new Java project. Click on it to begin your programming journey.

Creating Java Project on Visual Studio Code
That’s it for this tutorial! You’ve successfully learned how to prepare your Linux Terminal, install the Java development kit, get Microsoft Visual Studio Code on your Chromebook, and finally, install all those useful Java extensions for writing code. Not the most straightforward of methods, we know, but going the extra mile always pays off. That said, let us now briefly help you get started with Java.
How to start Java programming in Visual Studio Code
Now that you’ve done everything you can to get Java on your Chromebook, it’s finally time to reap the benefits of all your hard work. Use the following steps to create a Java project in Visual Studio Code.
1) At the Visual Studio Code home screen, click on “File” in the Taskbar above to expand the area. Next, click on “Open Folder” to get to the folders section. Alternatively, you can also press the”CTRL + O” shortcut key combination as specified below to do this step quickly.
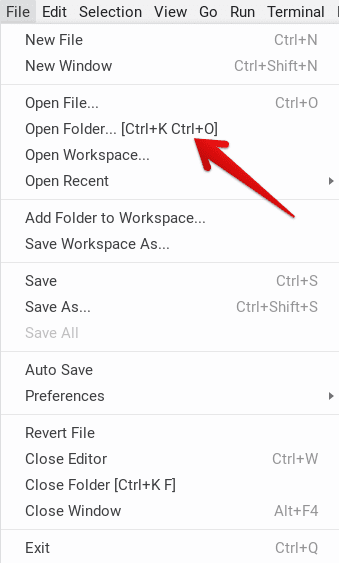
Accessing folders in Visual Studio Code
2) You’ll now be taken to a specific area where all your folders can be accessed. When you’re there, click on the distinctive icon in the top-right corner to create a new folder.

Creating a new folder
3) Next, you’ll have to name your folder. For reference, we’ll be naming our folder “ChromeReady.” You can continue with whatever you choose to, and click on “Create” to finalize.

Naming the folder
4) After you’ve created your folder, you’ll now be directed back to the Visual Studio Code interface. When you’re there, look for your newly-made folder on the left and hover your cursor over it. As soon as you do that, multiple icons beside the folder will appear. Click on the first one to create a file type that’ll host this folder. You’ll now have to name this file with anything you’d like to, but be sure to add “.java” at the end so you can write code using this programming language. The following screenshot will clear up this step for you.
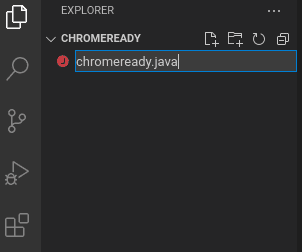
Creating Java File Type
5) That’s all there is to setting up Java on your Chromebook. After you complete the previous step, a specialized Java editor will appear on the Visual Studio Code interface. Furthermore, there’s going to be a separate “Java” section on the right as well, sporting tutorials, extensions, and a lot more if you’re willing to look into it.
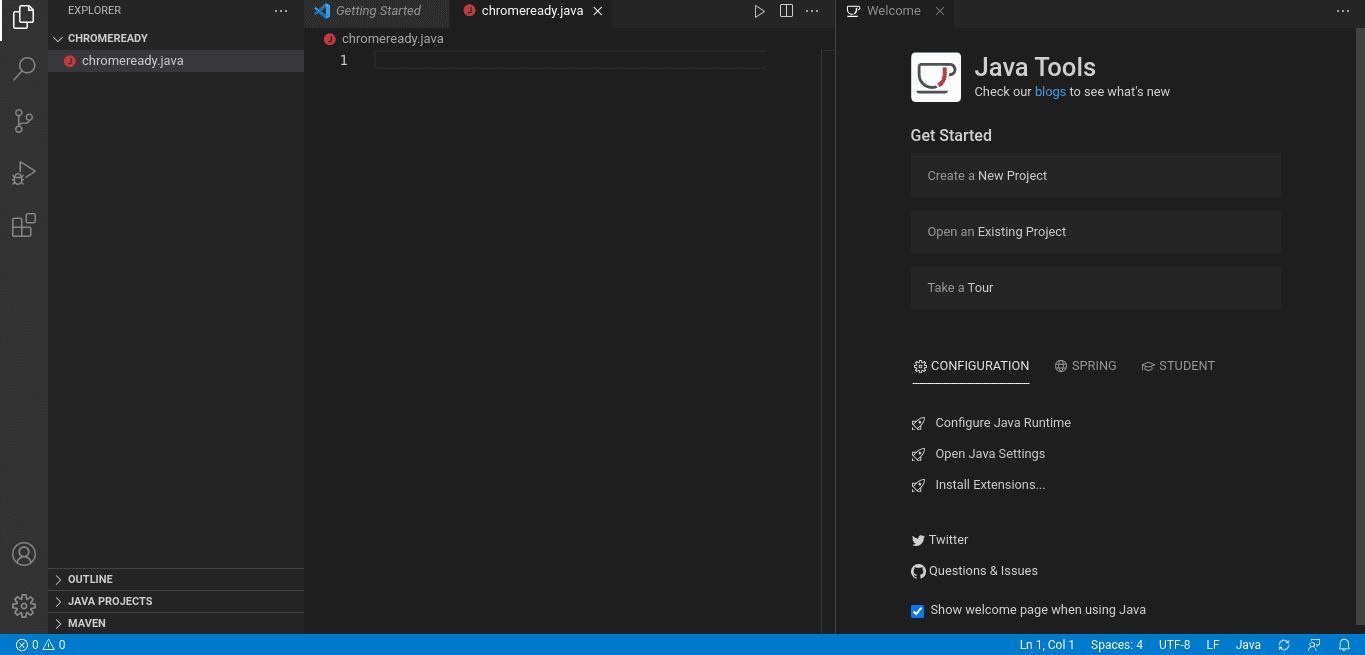
Java programming on Chromebook
Bonus method: Use web-based IDE’s for Java programming on a Chromebook
Microsoft Visual Studio Code might be your best bet to write code using Java on Chrome OS, but it’s definitely not the only one. In our master guide, we’ve listed all the ways you can start programming on your Chromebook. There are many browser-based Independent Development Environments (IDEs) out there—both paid and free ones—that offer full-stacked programming for an exhaustive array of coding languages. It’s a good idea to give these a try and see if they are suitable enough for you. We have a few recommendations to point you in the right direction.
StackBlitz
A deserving Independent Development Environment (IDE) that houses a ton of functionality is StackBlitz. It is an online code editor labeled as “The fastest, most secure dev environment on the planet.” We can’t say for sure how that turns out, but there’s no doubt IDE’s top-tier capability when it comes to programming. StackBlitz allows you to create, edit comfortably, and run full-stack applications with appreciable speeds when package installation is underway, not to mention the horde of features to make your work unchallenging. All this happens within a highly secure environment.
If we’re to talk about the front-end frameworks and libraries that StackBltz’s GUI encompasses, we’ve got Angular, React, RXJS, Ionic, SVELTE, and Vue. For starting from scratch, you get JavaScript, TypeScript, and other programming languages to help you get started. StackBlitz also boasts IntelliSense, which is what Visual Studio Code users are quite fondly familiar with. Lastly, you can expect trouble-free import speeds and offline functionality as well.
Check out StackBlitz here.
JDoodle
It doesn’t get as simple as JDoodle, a no-nonsense, bare-bones-type online Java compiler that’s easy to use and has a fast, fluid interface. This web application has support for over 72 programming languages and 2 separate databases as well. You can also get it to work in fullscreen mode, which caters to a distraction-free writing environment. A dark theme can be slapped on to suit the mood, and there’s even a function to embed code directly from JDoodle straight to your domain.
Give JDoodle a try to see if it can handle your Java-coding requirements for you. Click here to get right to their website.
Conclusion
Chromebooks seem fitter than ever now in 2021 to handle anything the internet has to throw at PCs and laptops. You’ve got magnificent devices like the Google Pixelbook Go and the ASUS Chromebook CX5 to back up that statement. Coding or programming isn’t the most hardware-centric process out there, and that is all the more reason that Chrome OS is equipped enough to sport code writing and everything of the like. The major reason being Linux and how it has reinvigorated the way Chromebooks are looked at. In this article, we’ve jotted down everything there is about Java programming on Chromebook. If you follow the listed steps carefully, you’re sure to start writing code in Java within the hour. Anyhow, we truly hope that this has been helpful for your cause. Chrome Ready wishes you happy programming!

3 comments
thank you so much it was very clear
it keeps telling me i have unmet dependencies
thank you so much for this step