Every web developer willing to jump into the tech market should have a good understanding of WordPress. It is one of the most popular Content Management Systems (CMS) we have today. Even if you are well-versed with various web languages like PHP, advanced CSS, Javascript, ReactJS, etc., knowing how to develop a website with WordPress would put you ahead of many. As of 2020, WordPress powers 37% of the websites available on the internet.
However, have you ever wondered how you could run WordPress locally on your Chromebook? If yes, then you are at the right place. To run WordPress on ChromeOS, we will use the Linux feature recently introduced by Google. Then, we will install all the necessary packages, and dependencies required and run WordPress like you would on your Ubuntu, Fedora, or Arch Linux system.
Installing WordPress on Chromebook
Tip: You don’t require a powerful Chromebook (i5 and above) to run WordPress. For this post, I will install WordPress on the Acer Chromebook C740 series, dual-core, running on 4GB RAM and 16GB SSD. I also have other developer apps like VS Code installed and running smoothly.
Why run WordPress locally?
You might be wondering – why should you run WordPress locally when you can buy a domain and hosting services then proceed to install WordPress on the CPanel? Well, that’s a good idea, but you are limited to three main things here: A domain, hosting services, and access to the internet. Without any of these and especially an active internet connection, you will not access your WordPress site.
When running WordPress locally, you don’t require a domain or an active internet connection. All you need is hosting, which is already provided by your Localhost server. Other advantages include:
- You will have a playground to test out various plugins and themes.
- With Code editors like VS Code installed, you can edit these plugins and themes to work as you would wish.
- You can continue developing your website anywhere without the need for an internet connection.
That said and done, let’s proceed to install WordPress on our Chromebook.
Step 1: Enable Linux on your system
As stated above, we will install WordPress through the Linux feature. By default, Linux is not installed, and you will need to install it. We already did a post on this – How to install and configure Linux Apps on Chrome OS. However, it’s not a tedious process.
Launch the Settings window and on the left panel, click on the Linux (Beta). You will see a window with the option to Turn On Linux on Chrome OS. Click Turn On, as shown in the image below.
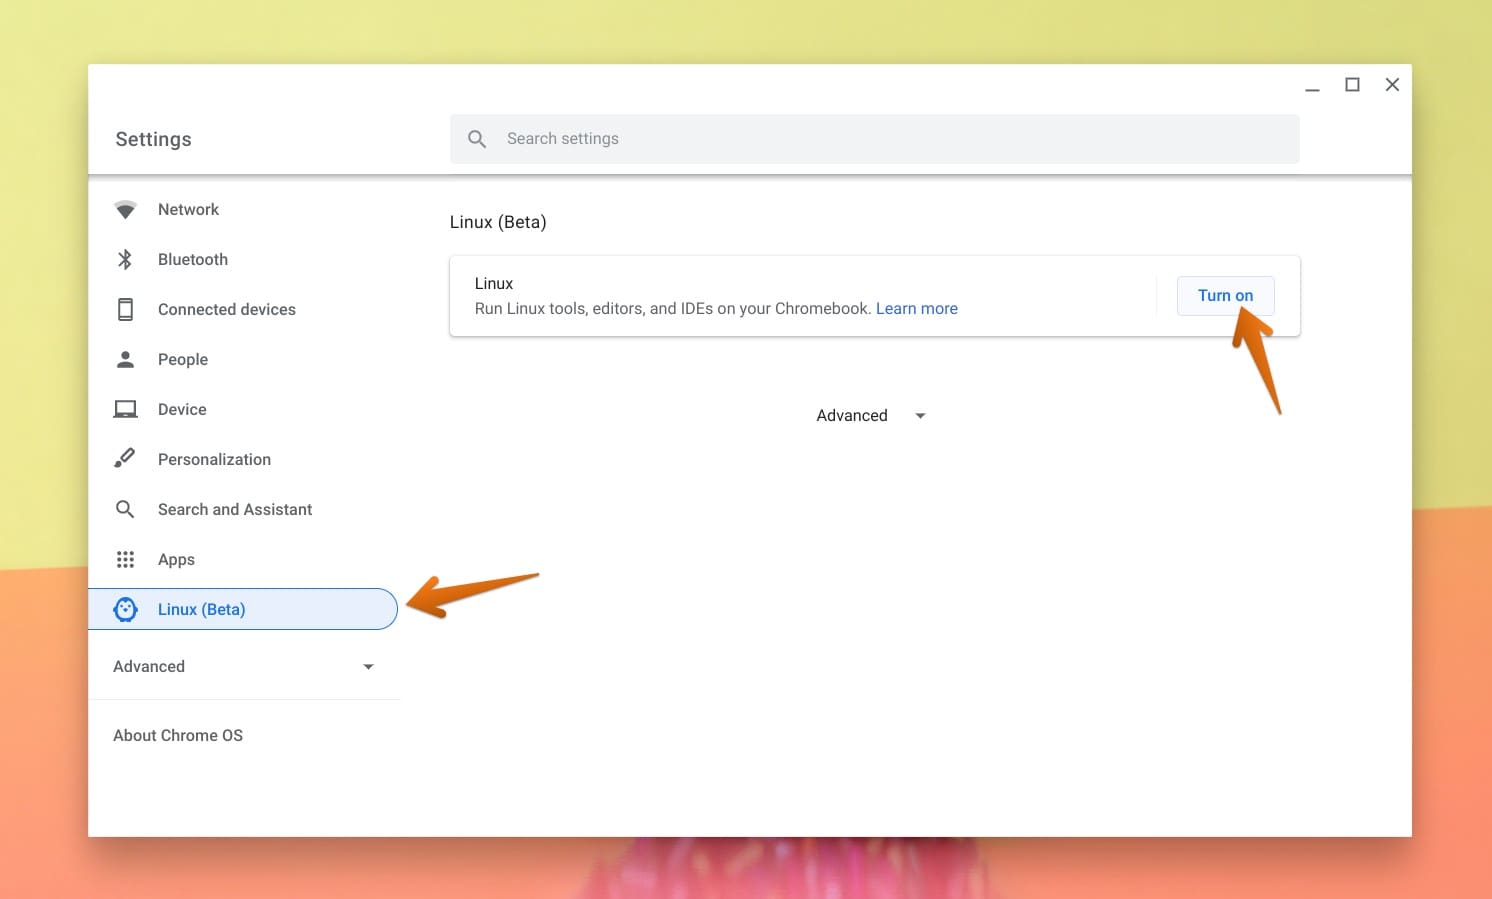
Settings – Linux Apps
After successfully installing Linux, launch the Terminal and execute the commands below. We will start by updating the system and then install the nano editor.
sudo apt update
sudo apt upgrade
sudo apt install nano

install nano
Step 2: Install MariaDB (Database)
Likewise, we also have a post on How to install MariaDB on your ChromeOS. However, in this post, we will perform further configurations necessary to hold a WordPress installation.First, launchh the Terminal and install MariaDB with the command below.
sudo apt install mariadb-server mariadb-client -y
After a successful installation, proceed to start MariaDB with the command below.
sudo systemctl start mariadb
You can check whether MariaDB is started using the status command below.
systemctl status mariadb

Start MariaDB
Now, we need to log in to our newly installed database. We will log in as root, which doesn’t require a password. Use the command below.
sudo mysql
After a successful login, we will proceed to:First, createe a database called wp_db.
- Create a user with the name wpuser.
- Setup the password as wpsecret
- Assign all wp_db database privileges to wpuser.
Execute the commands below:
create database wp_db;
create user wpuser@'%' identified by 'wpsecret';
grant all on wp_db.* to wpuser;
exit
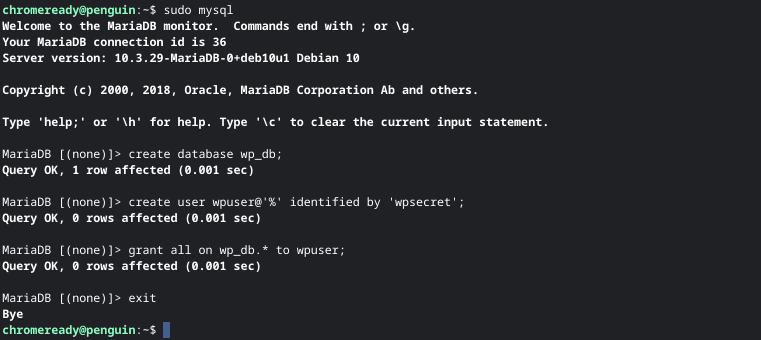
create database
To test whether our new user (wpuser) has access to the database, let’s try logging in with the user into the database as shown below.
mysql -u wpuser --password=wpsecret
use wp_db;
show tables;
exit
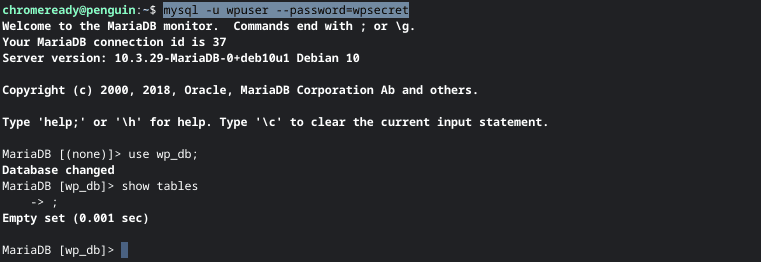
login with WordPress user
You can see our new WordPress user has access to the new wp_db database from the image above. Currently, our database is empty and has no tables. We are through with installing and configuring the database; let’s proceed and install a web server (Apache).
Step 3: Install Apache Web Server
To launch and view our WordPress site on the browser, we will require a web server. Some of the most common web servers we have today include Nginx and Apache. For this tutorial, we will proceed to install the Apache webserver. Open the Terminal and execute the command below to install Apache.
sudo apt install apache2 -y
After a successful installation, start the Apache server. You can also check whether it’s running with the status commands as shown below.
sudo systemctl start apache2
sudo systemctl status apache2
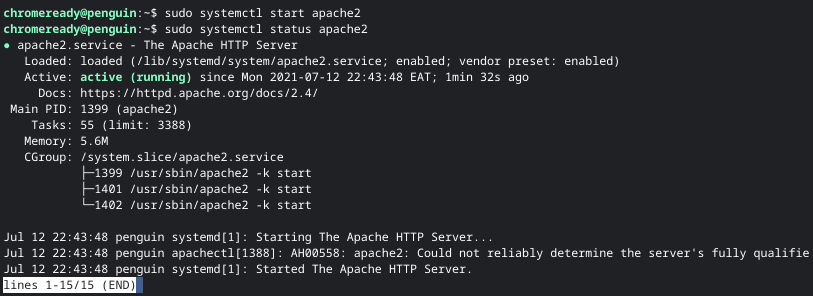
start apache
By default, the configured user for Apache is www. To avoid permission issues, we need to change the user to our Linux user. This is the user you see in our Terminal prompt. From the screenshots above, my user is chromeready. Execute the command below to edit the configuration file envvars with the nano editor.
sudo nano /etc/apache2/envvars
Scroll and find these two lines below:
export APACHE_RUN_USER=www-data
export APACHE_RUN_GROUP=www-data
Change the user “www-data” to your Linux username. In m case, I will change these two values to chromeready, as shown below.
export APACHE_RUN_USER=chromeready
export APACHE_RUN_GROUP=chromeready

change apache user
Save the file (Ctrl + O, then Enter) and Exit (Ctrl + X).
To wind up this update, we need to change the Apache document root folder owner’s owner to our Linux username. As stated above, the Linux user is the name you see at the start of your Terminal prompt. Use the syntax below:
sudo chown <your user>:<your user> /var/www/html/ -R
In my case, where the user is chromeready, I will execute the command below.
sudo chown chromeready:chromeready /var/www/html/ -R

change apache root folder owner
To stop the warning message presented on the status of the Apache server, we will inert the line ServerName penguin.linux.test in the apache2.conf file. Execute the command below to edit the file with nano editor.
sudo nano /etc/apache2/apache2.conf
Insert the line Server Name penguin.linux.test anywhere at the top between the comments as shown below.

apache server name
Save the file and exit. Now, we need to add this line to our /etc/hosts file. Open the file with nano editor
sudo nano /etc/hosts
Add the line penguin.linux.test in front of localhost, as shown in the image below.

edit hosts file
Save the file (Ctrl + S) and Exit (Ctrl + X). Restart Apache server with the command below.
sudo systemctl restart apache2
That’s it! We are done configuring the Apache server. To test whether it’s working, type the URL http://penguin.linux.test on your browser. You should see the Apache default page, as shown in the image below.
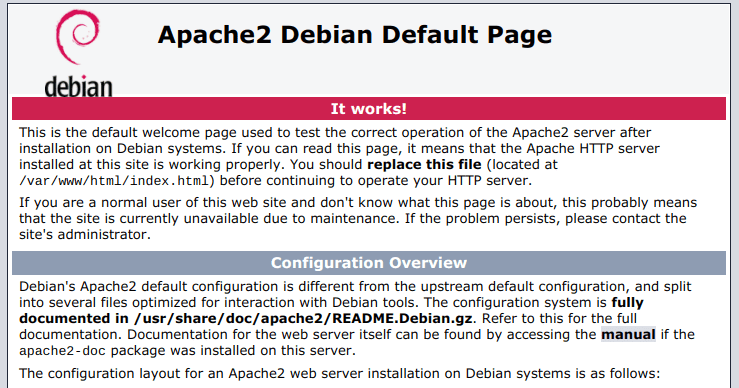
Apache default page
Step 4: Install PHP
The last item we need to install to get WordPress running on ChromeOS is PHP. As of writing this post, the latest available PHP version for Linux on Chromebooks is PHP 7.3. If there is a new version (PHP 7.4), please replace it on the command below. To install PHP, execute the long command below.
sudo apt install -y php7.3 libapache2-mod-php7.3 php7.3-mysql php-common php7.3-cli php7.3-common php7.3-json php7.3-opcache php7.3-readline php7.3-dom php7.3-gd php7.3-mbstring php7.3-curl

install php
To configure PHP to work with our web server, restart the Apache service.
sudo systemctl restart apache2
You can check the installed version of PHP with the command:
php --version
To confirm that PHP is working fine with the Apache web server, we will create a PHP info file in the webroot using the command below.
echo "<?php phpinfo(); ?>" > /var/www/html/phpinfo.php
On your browser, enter the URL http://penguin.linux.test/phpinfo.php, and you should see the server PHP info as shown below.
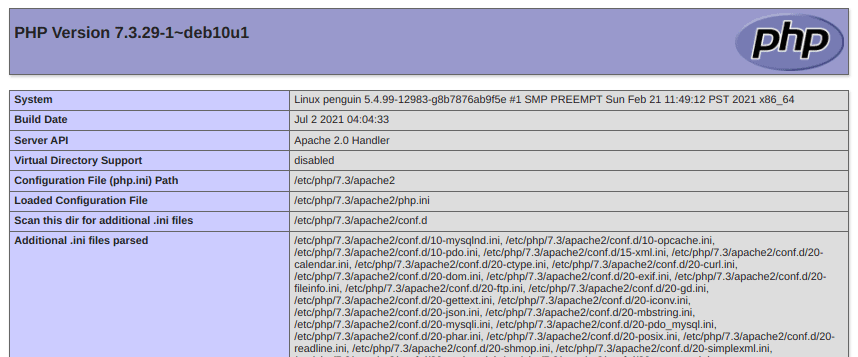
php info
Note: If you were working on a production server, leaving this PHP information publicly available on the webserver can be a security risk. Luckily, there is no need to worry since we will be running the server locally in our case. Up to this point, we have all the requirements installed and configured. Let’s proceed and install WordPress.
Step 5: Install WordPress
Instead of downloading WordPress and later copying it to our web server, we will make work easier using the wget command. First, create a name for your website in the /var/www/html directory. This can be anything. I will name mine – FashionWebsite. Use the command below and replace “FashionWebsite” with the name of your website.
sudo mkdir /var/www/html/FashionWebsite
Once you have created your new directory, use the cd command to navigate into that directory, as shown below.
cd /var/www/html/FashionWebsite
Now, navigate t the official WordPress download page. Right-click on the Download WordPress button and copy the link. Back to your Terminal, write the command wget and paste the link you just copied.

download WordPress
Alternatively, use the link below to download the latest version of WordPress.
sudo wget https://wordpress.org/latest.zip

download WordPress
After the download is complete, execute the ls command to see the name of your downloaded file. In m case, it’s, Latest.zip. To unzip the zipped file, use the command below.
sudo unzip latest.zip

unzip WordPress
After extracting, you will see a new folder called wordpress. We need to move the contents of this folder to our main directory –FashionWebsite and delete the wordpress folder. That reduces the length of the URL you use to access WordPress on the browser. Execute the commands below, replacing “FashionWebsite” with the name of your site.
sudo cp -R /var/www/html/FashionWebsite/wordpress/* /var/www/html/FashionWebsite/
sudo rm -R /var/www/html/FashionWebsite/wordpress

install WordPress
Open your browser and enter the URL http://penguin.linux.test/FashionWebsite/wp-admin/. Remember to replace “FashionWebsite” with the name of your site. You will see the setup page where you will be required to enter the database name, username, and password. Use the details you used when creating a new user in MariaDB; however, leave the Database host as localhost.
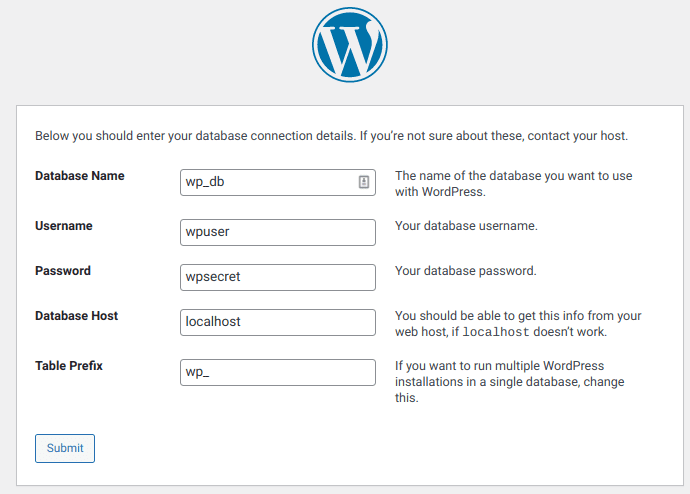
setup wordpress
When done with the setup process, you will get to the WordPress dashboard, and you can start building your website.
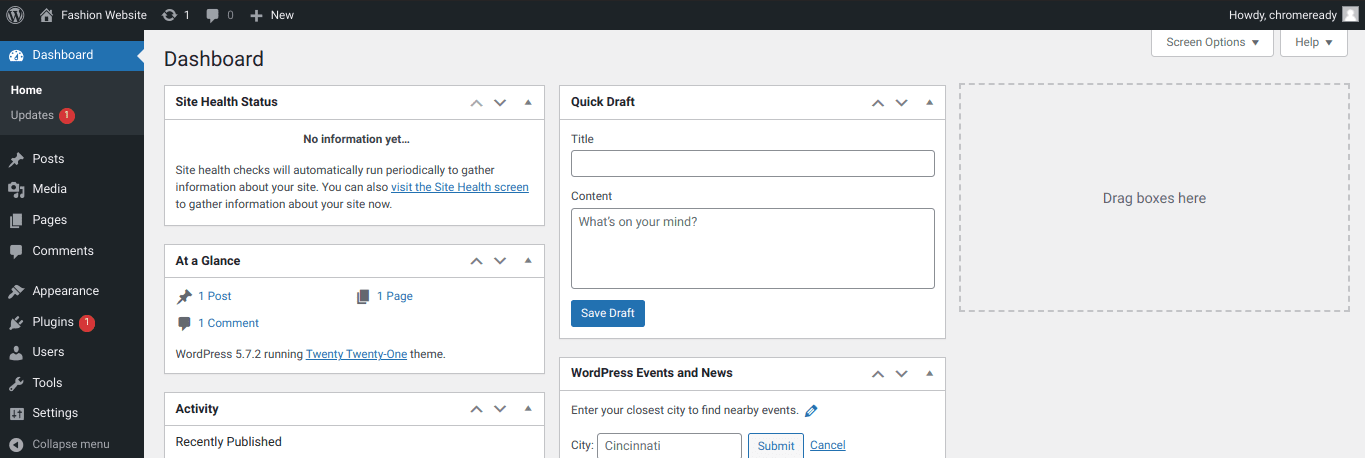
wordpress
Conclusion
I believe you now have WordPress running on your Chromebook. Did you face any issues or errors? Feel free to ask in the comments below, and we will guide you accordingly.

12 comments
After all that, wait for the next faulty Google chromeOS-update, that kills Linux on your device.
MySql should be mysql
Hi there, i done everything until i enter the database details but when i submit i get this error :
Unable to write to wp-config.php file
You can create the wp-config.php file manually and paste the following text into it.
<?php
/**
* The base configuration for WordPress
*
* The wp-config.php creation script uses this file during the installation.
* You don't have to use the web site, you can copy this file to "wp-config.php"
* and fill in the values.
*
* This file contains the following configurations:
*
* * MySQL settings
* * Secret keys
* * Database table prefix
* * ABSPATH
*
* @link https://wordpress.org/support/article/editing-wp-config-php/
*
* @package WordPress
*/
// ** MySQL settings – You can get this info from your web host ** //
/** The name of the database for WordPress */
define( 'DB_NAME', 'wp_db' );
/** MySQL database username */
define( 'DB_USER', 'wpuser' );
/** MySQL database password */
define( 'DB_PASSWORD', 'wpsecret' );
/** MySQL hostname */
define( 'DB_HOST', 'localhost' );
/** Database charset to use in creating database tables. */
define( 'DB_CHARSET', 'utf8mb4' );
/** The database collate type. Don't change this if in doubt. */
define( 'DB_COLLATE', '' );
/**#@+
* Authentication unique keys and salts.
*
* Change these to different unique phrases! You can generate these using
* the {@link https://api.wordpress.org/secret-key/1.1/salt/ WordPress.org secret-key service}.
*
* You can change these at any point in time to invalidate all existing cookies.
* This will force all users to have to log in again.
*
* @since 2.6.0
*/
define( 'AUTH_KEY', 'ErDU@79=4Y-uUCHoRlW^Dt0Og-Anf8dm.^.D/N}K)l]|Lz`J)kidyBrk)!bb1A$,' );
define( 'SECURE_AUTH_KEY', 'aKQCE)*]%r/9g}6fES]CzJ<,k7<-&w(ts]NLfm5[H5+s^+(6@)An)FoyXb7[96rJ' );
define( 'LOGGED_IN_KEY', 'llsU!qT%0~f’ );
define( ‘AUTH_SALT’, ‘7h_6u/*;l;B{!%y]IS;2];vX3_d#quXUrK>olyTF@7zY $x3VE^m0A,$)+ya8S<?' );
define( 'SECURE_AUTH_SALT', 'W_VtDgLh~v-RK-X7kml4K-35!msg6l9NCakH!o;V#YO-g’ );
define( ‘LOGGED_IN_SALT’, ‘r,CS%C9Y?GHq,B;z&EwA+`~jHGO%.#TEO{/Uej)?X,pV< ^qpoqDcXB!*!y-X8m~' );
define( 'NONCE_SALT', '?ro(iK!)}AyzGCAr!uWW’ );
/**#@-*/
/**
* WordPress database table prefix.
*
* You can have multiple installations in one database if you give each
* a unique prefix. Only numbers, letters, and underscores please!
*/
$table_prefix = ‘wp_’;
/**
* For developers: WordPress debugging mode.
*
* Change this to true to enable the display of notices during development.
* It is strongly recommended that plugin and theme developers use WP_DEBUG
* in their development environments.
*
* For information on other constants that can be used for debugging,
* visit the documentation.
*
* @link https://wordpress.org/support/article/debugging-in-wordpress/
*/
define( ‘WP_DEBUG’, false );
/* Add any custom values between this line and the “stop editing” line. */
/* That’s all, stop editing! Happy publishing. */
/** Absolute path to the WordPress directory. */
if ( ! defined( ‘ABSPATH’ ) ) {
define( ‘ABSPATH’, __DIR__ . ‘/’ );
}
/** Sets up WordPress vars and included files. */
require_once ABSPATH . ‘wp-settings.php’;
The problem is i don’t know how to get to the wordpress folder. Thanks. Luca
Ciao Luca hai risolto? Anche io ho eseguito tutto, dunque ho creato un file con txt salvandolo con estensione .php nei file di linux dove si è salvato il file zip di wordpress e mariadb. detto ciò clicco su installa e non succede nulla, cerco di aprire il file zip ma non è supportato dal sistema, sul terminal di linux non mi risulta aver scaricato il software. Spero tu abbia buone notizie per me
L’unico problema che ho riscontrato seguendo tutti i passaggi è l’installazione di MySQL al quale mi sono affidata all’app RemoteDB ma aprendo il database non risulta nulla su di esso. Aspetto tue novità. Grazie. Simona
i just bought a new chroomebook and my wish was to finally have a good laptop for work on word press, a nightmare discover chroomebook doesnt support it. i follow you still the check of mariadb status but the next step to tap “sudo MySQL” doesnt works cause the command wasnt find. i dont know how to procede. please can i have a support by you….? i dont want to need to ask everytime someone how can i use my new laptop, i start to think i havent enought competence to use this kind of. hope in a your answer or i think i could throught it from the window.
I got through installing the apache data base and when i went to the test sight it says it failed, how do i fix this?
SAme here!! Help PLEASE!
Great instructions, worked perfectly for me, thank you!
Just one more thing missing: How do I access this server via FTP?
(Needed to install plugins, e.g.)
From my side, too – GREAT instructions!!! But – as I did expect, without Linux-knowledge it’s sometimes hard work. But it’s also clear that you CANNOT have to explain Linux because of installing WORDPRESS ;-) / look @ LUCA SGARIGLIA / I’ve got the same “bug” – You should add the solution about php – i think. Thanx 4 all you work!
PHP – it’s easy!!! – have fun!
https://wordpress.org/support/article/editing-wp-config-php/I followed all the steps and everything has been completed properly, but the link “http://penguin.linux.test/FashionWebsite/wp-admin/” takes me to the script version. I didn’t change the site name since I don’t have a site yet.
I have followed your step by step wordpress installation procedure for chromebook, however, ai have been receiving the following error:
Your PHP installation appears to be missing the MySql extension which is required by WordPress.
Please suggest a fix.
Thanks Gaurav!