Chromebooks have sublimely welcomed the world of Android applications into their sleek yet simple operating system. The integration that first appeared in 2017 has now seamlessly become a norm in Chrome OS, making it possible to install and run apps right from the Google Play Store. It’s not just the latter that ameliorates the capabilities of a Chromebook.
You’ve got the highly practical Linux Terminal embedded in the architecture of these minimalistic devices, waiting to be enabled and used effectively. In addition, Linux allows you to install a bevy of powerful applications, including those that can act as a solid substitute for famous desktop-based software.
- Check out 20 of the best Linux applications to install on Chromebooks here.
Casting a lens on the Play Store again, Chromebooks use a specific version of Android. However, we must put it out here that it is not updated as frequently as Chrome OS itself since all it does is power the Play Store for Chromebooks and nothing else. On the contrary, smartphones depend on the Android version they use for the whole of their interface, features, and other crucial settings.
If you’ve meant to check out the Android version of your Chromebook, this article is going to be a sure-fire tutorial to get you going the right way. Without any further ado then, let’s jump right into it.
Checking Out the Android Version of Chromebooks
The following steps are going to take it from here.
1) Begin by making haste to your device’s “Settings.”
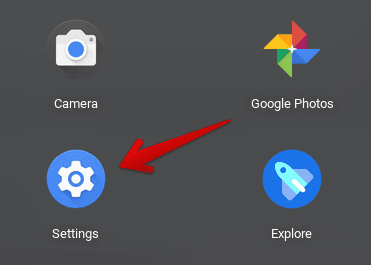
Opening “Settings”
2) After you’re there, click on “Apps” in the left column. You’ll shortly be directed to the “Apps” section of the settings. Click on the arrow beside “Google Play Store” to continue. Take a look at the screenshot below for reference.
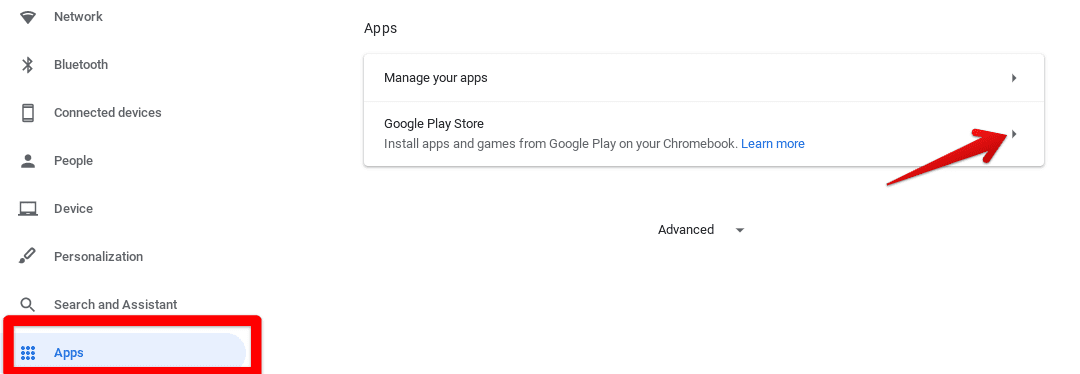
Accessing Play Store Settings
3) Next, click on “Manage Android preferences” on the page that opens up subsequently. Another window is going to open after you make the click.

Clicking on Manage Android Preferences
4) This is where you’re going to gain access to the Android portion of your Chromebook. As you’ll see, there are going to be multiple settings to tweak here, but you’ll tread down to “System” and click on it to continue.
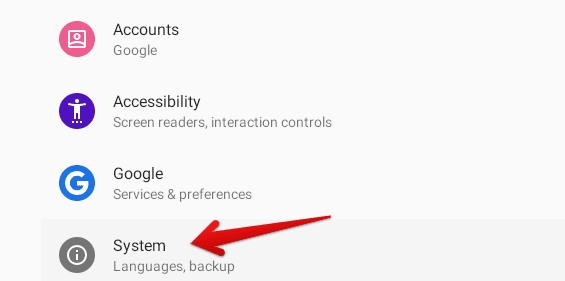
Clicking on Android System Settings
5) In “System” settings, you’ll proceed by clicking on “About device.” You’re almost at the end now.
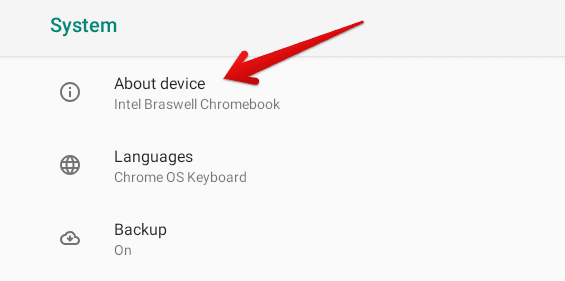
Clicking on “About Device”
6) There you have it! After you click on “About device,” information related to your Android system will appear right in front of you. The Android version will also be among the displayed information.
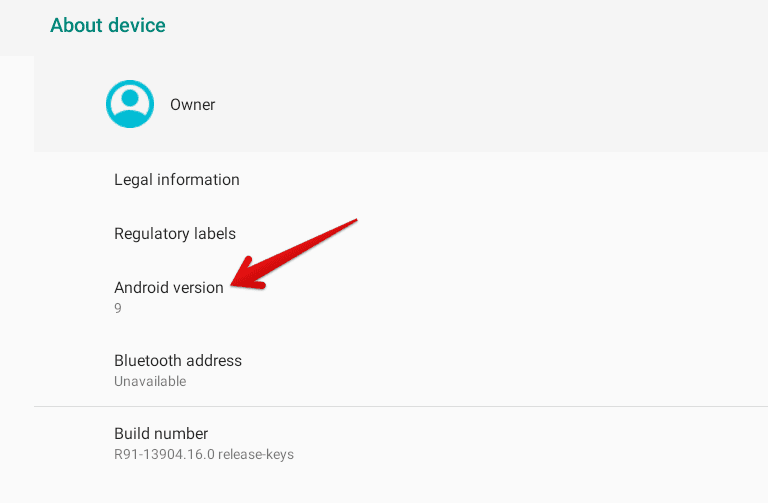
Android Version of Chromebook
Congratulations on successfully following the provided instructions! It’s good to keep internals like these in check and know what your system comprises. With that being said, a Chromebook’s Android version is going to be the last thing you should ever have to worry about. More importantly, you can keep track of your device’s Auto Update Expiration (AUE) date when your Chromebook stops receiving system updates from Google. In that case, there’s plenty of things to do. Read about them all in this article here.

1 comment
Thanks! Your solution was the only one that worked! MJF 12/1/22