Chromebook users who write for a living should be aware of the broad capability of their devices if they want to maintain consistency and stay at the top of their game. Thankfully, ChromeOS employs a range of tools to help us out on this front, both first-party and external options that are sure to drive your productivity on a day-to-day basis.
In this article, therefore, we’ll be focusing on just that, telling you all the different ways you can increase your work efficiency as a writer using a Chromebook. It isn’t necessary to get a top-level device to guarantee performance, and the write-up ahead will prove just that. Make sure to read until the end for the best results.
Best tips and tricks for writers on ChromeOS
The following subtitles contain all the information you need in order to get the most out of your Chromebook as a writer starting today. We’ve compiled tips and tricks of every manner, so here’s hoping that you’ll turn out to be a more productive writer by the time you’re done reading the article.
1. Use Chrome extensions that make your work easier
First things first, if you’re not using specialized Google Chrome extensions to upscale your level of work, you’re making a bad mistake. Thanks to the availability of the Chrome Web Store, it’s possible to download add-ons for the Chrome browser that make it faster, more effective, and solution-oriented for writers out there.
Grammarly is a glaring example
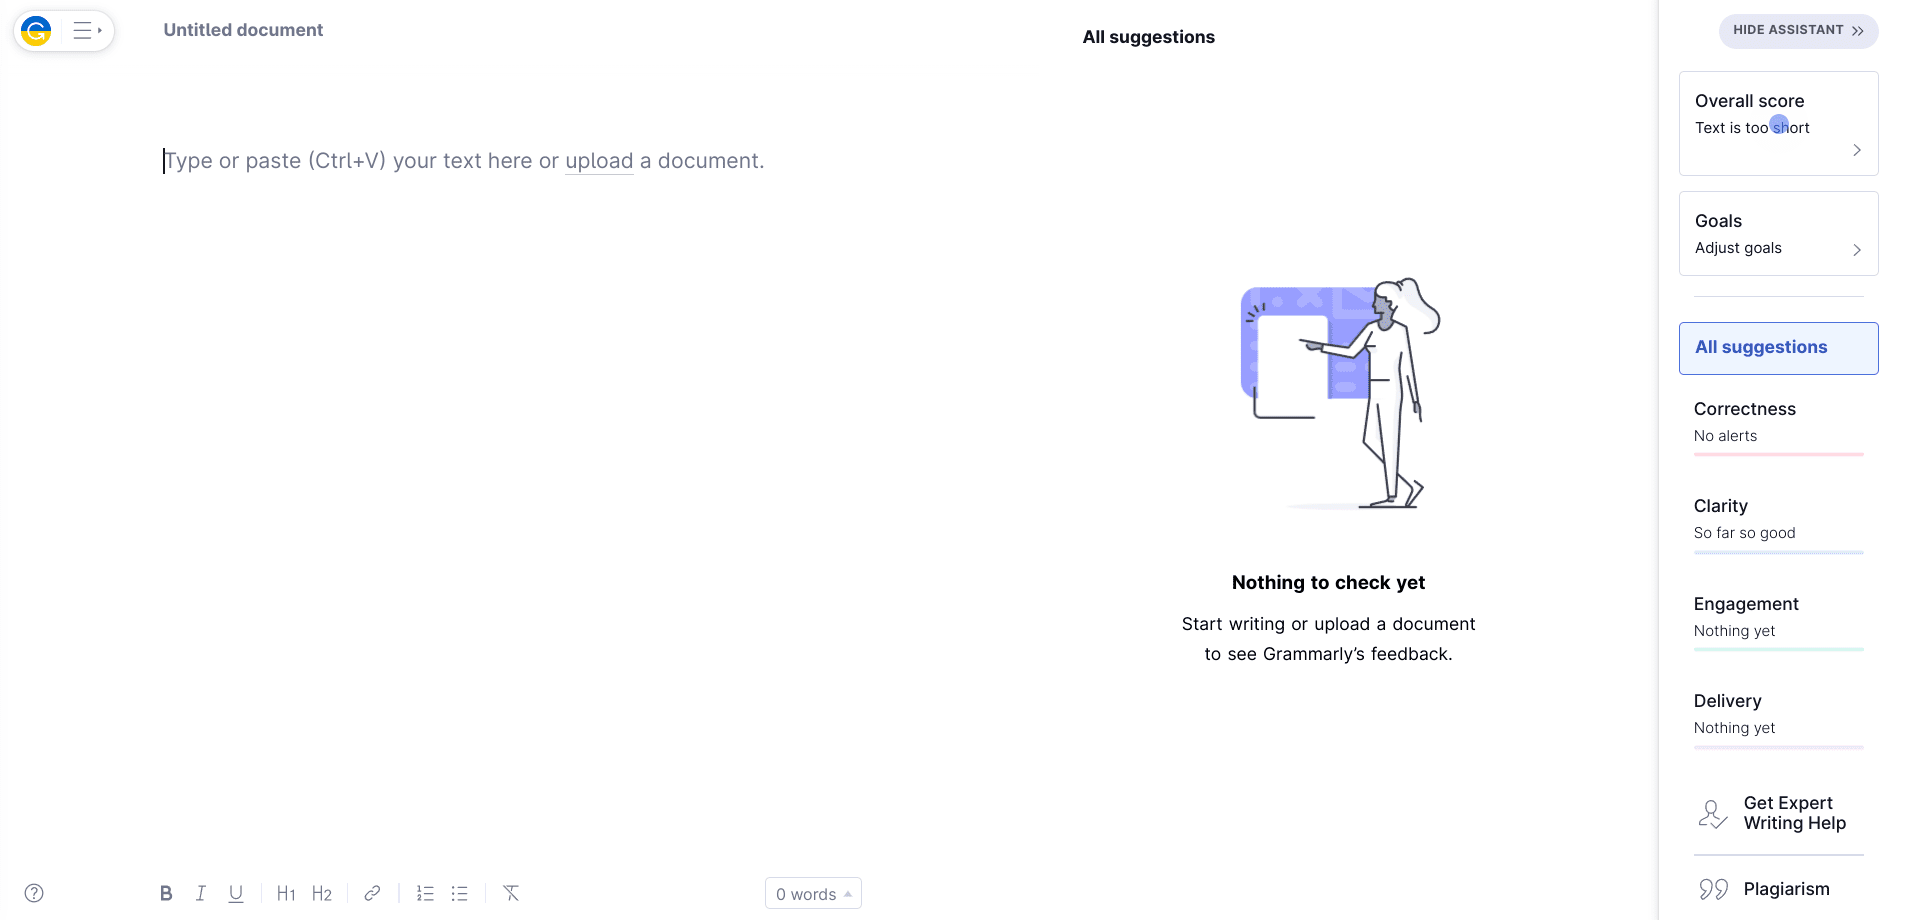
Grammarly on the Chrome browser
To kick things off, the top-ranking Chrome extension that we recommend to every writer out there is Grammarly. This particular tool makes changes to your draft on the fly while teaching you right from wrong in terms of basic edits, punctuation, grammar, and spelling as well.
A paid subscription called Grammarly Premium is also available for those who’d like to receive more advanced, curated writing suggestions, such as tonal recommendations that would shape your writing just the way you want it to sound. Outside of that, the basic version is free-to-use, and there’s even a web-based editor for users to write directly into.
- Get Grammarly.
Pocket is a must-try as well

Pocket’s interface is easy to navigate
Labeled one of the best extensions in the business for freelance writers and editors, Pocket is a must-have add-on for Chromebook users who are looking to stay ahead of the game while staying all caught up with the stories that matter to them. Oftentimes, we come across write-ups on the internet that are of due interest, but we forget to save their instance somewhere.
This leads to a major dent in productivity, considering that you now have to find the story that you lost. With Pocket, every hassle in this manner is a thing of the past—the extension in question brings forth an easy-to-use method for saving sought-after stories in just one tap. Make sure to register for a Pocket account before you get started for the best results.
For more details and a step-by-step installation guide, here’s how you can install and use Pocket on a Chromebook.
- Get Pocket.
And don’t forget OneTab for elevated performance
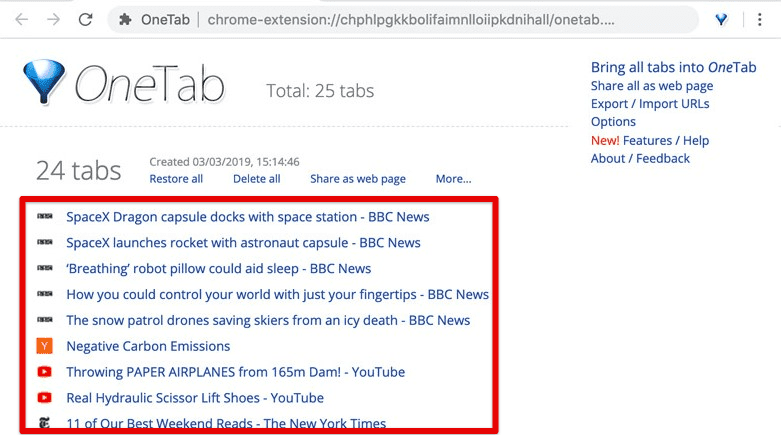
Reducing memory usage with OneTab
OneTab is an exceptionally thoughtful Chrome extension. Instead of keeping your tabs idle on a Chromebook where they are constantly hogging memory, OneTab can suspend unused Chrome tabs for you, thereby freeing up precious system resources that can otherwise be spent on the primary tasks that you’re focusing on.
Therefore, if you’re using a Chromebook that’s not as specced as out some of the latest, top-end models out in the market, you can effectively free up RAM on your end and increase your device’s performance, which automatically leads to a boost in overall productivity. Lastly, there’s a quick restore method as well that wakes up inactive tabs painlessly.
- Get OneTab.
2. Utilize Chromebook shortcuts to navigate faster
It’s a shame to talk about productivity and not mention shortcuts in the same breath. Fortunately for you, ChromeOS is filled to the brim with keyboard shortcuts, and we’re not just talking about general system shortcuts here that help you navigate the user interface quickly—other software such as Google Maps and Google Calendar are factored in as well.
Best time-saving shortcuts to use on ChromeOS
In another one of our write-ups, we’ve compiled a list of some of the best shortcuts that one can employ on their end and benefit from a massive speed boost in terms of sheer usability. To talk about some of them here, there’s first the swath of Google Chrome shortcuts that get you from point A to B unconventionally and super fast.
Chrome timesavers
Google Chrome is where I spend most of my time on a Chromebook, and if you’re anything like me, you’re going to want to know about Chrome’s best shortcuts as well. First off, there’s the ability to switch between one tab and the other on the fly by simply swiping three fingers on your trackpad in the left or right direction, depending on the tab you wish to switch to.
The latter alone is genuinely a practical measure that adds up in the long run, but we will still urge you to look into all the time-saving shortcuts the Chrome browser supports to push productivity levels like never before.
- Ctrl + N: Opens a new window
- Ctrl + T: Opens a new Chrome tab (works inside Linux too)
- Ctrl + W: Shuts down a window immediately
- Ctrl + L: Takes the text cursor straight to Chrome’s address bar
- Ctrl + C: Copies text, images, documents, and other items
- Ctrl + V: Pastes the copied item
- Alt + Enter: Opens links in another tab when used instead of loading them in the same tab
Shortcuts for the omnibox
The omnibox is your Chrome browser’s URL bar that is located at the top of the internet browser’s user interface, and it’s more powerful than you think it is. For starters, if you wish to access the bar quickly and start typing into it without using the cursor, press “Ctrl” and “L together and that should highlight your current page’s URL for you.
Next, you can use the omnibox as a calculator if you want to, followed by unit conversion, and making it function as a timer as well. All that, along with a bunch of other high-quality shortcuts are discussed in our detailed omnibox guide, so make sure to check that out for more helpful content, including the fan-favorite Site Shortcut functionality.
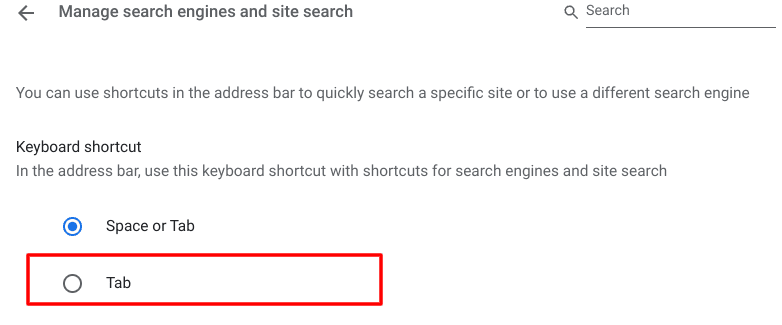
Using the right keyboard shortcut for the “SIte search” feature
3. Try using a mouse for a change
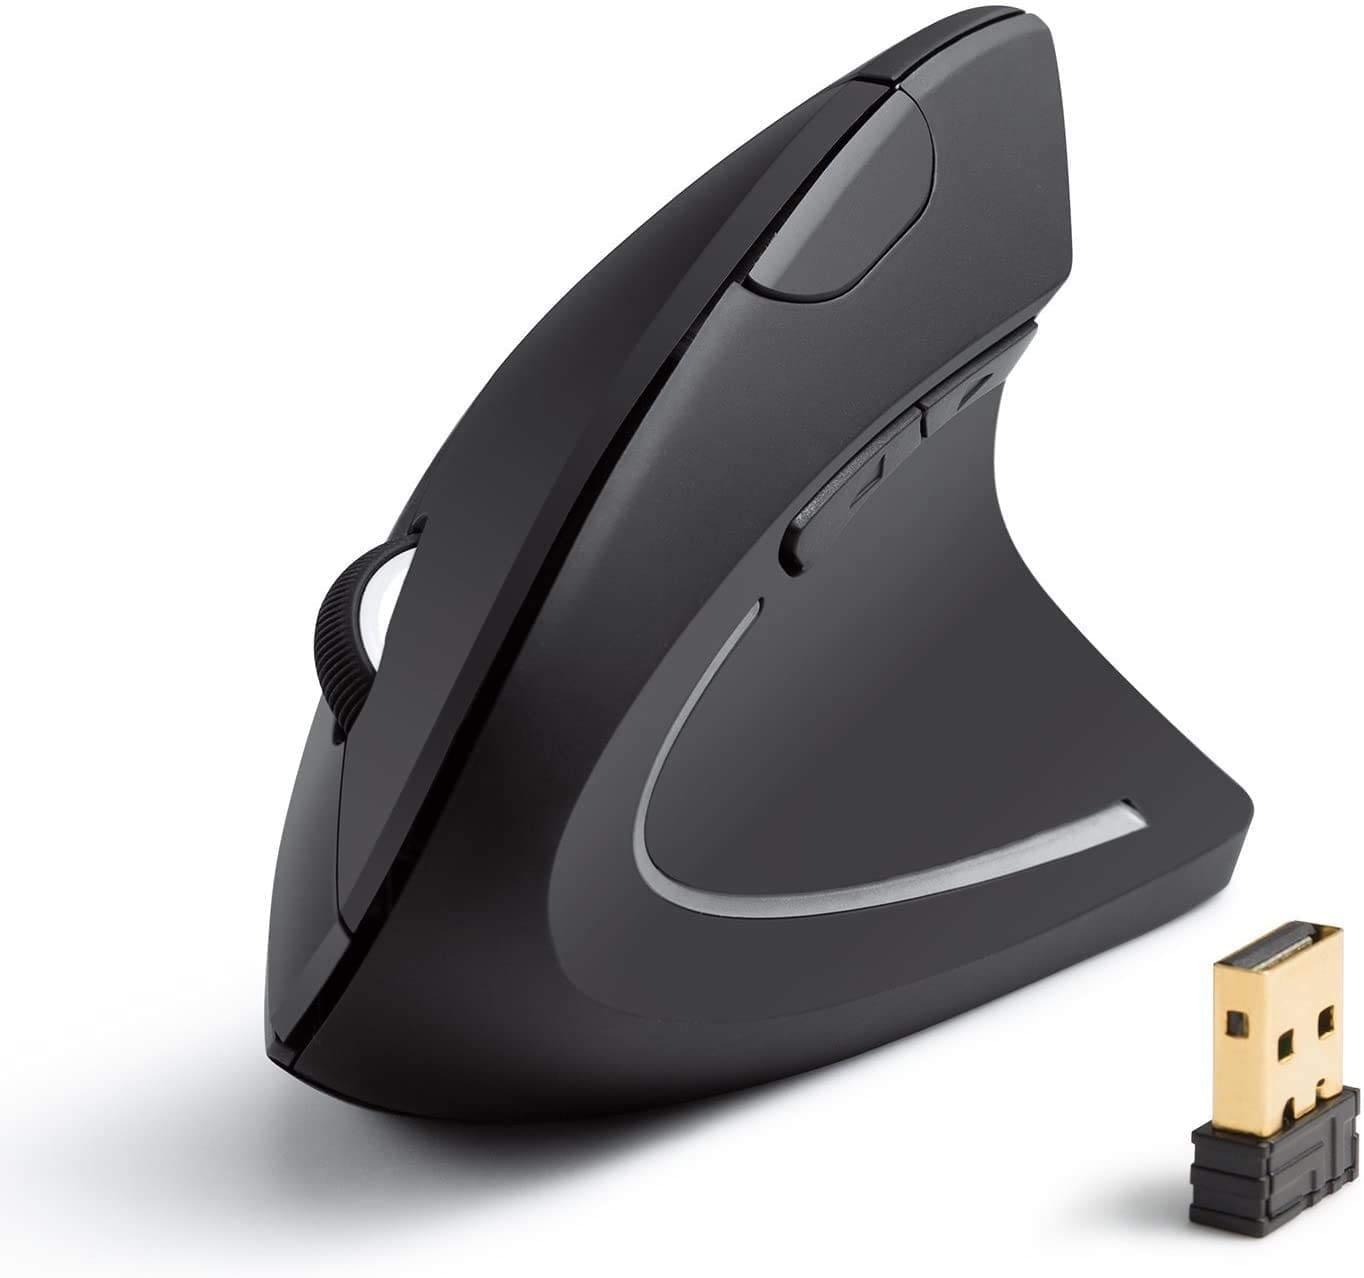
The Anker 2.4G Wireless Ergonomic Optical Mouse
Another piece of advise for Chromebook users wanting to increase their work rate by a fair margin revolves around using a mouse. Instead of relying on a trackpad, try what a mouse can do for you for a change, where you’ll quickly come to the realization that taking up the efficiency of a mouse will get more done susbtantially as compared to a trackpad.
Many Chromebooks have top-tier trackpads but a mouse is still more productive
That is why we’ve compiled this list of the best external mouse options available for Chromebook users that you can look into purchasing. The higher the quality of the peripheral, the better the experience for you. Choose wisely, and when you do, make sure to know how to connect it to your Chromebook wirelessly.
4. Hook up your Chromebook to an external display
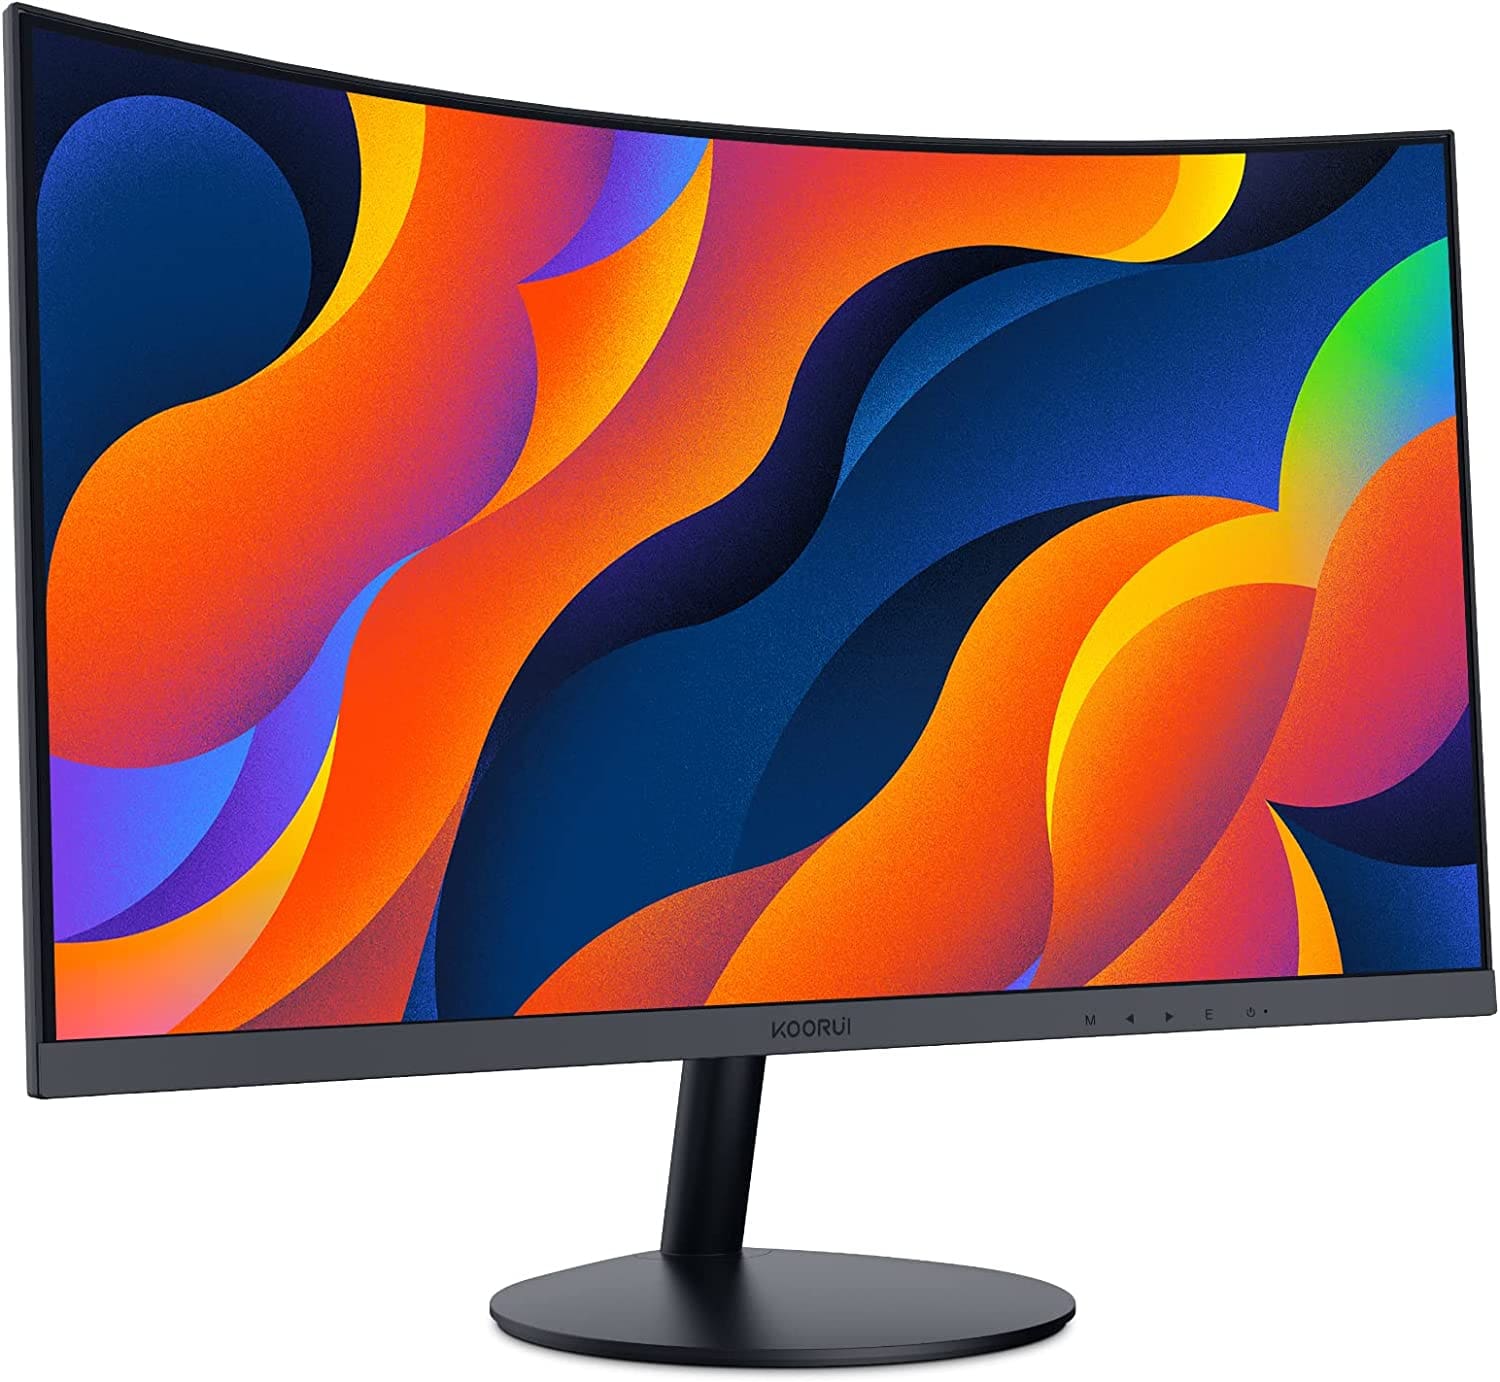
The KOORUI 24-Inch Curved Computer Monitor
Looking to work on a bigger screen for more work efficiency? That’s easily manageable for a Chromebook. Get yourself a high-quality external display first and then hook it up to ChromeOS, so you can enjoy the same unrivaled speed of the operating system on another display source, one that preferably ticks more boxes for you work-wise.
An HDMI-ready Chromebook is even better
You know what the cherry on top would be here? A Chromebook that comes with an HDMI port for a high-quality connection to an external monitor. Thankfully, there are plenty of these that go around, so you won’t be hard-pressed to find a machine tailored to your interests.
Gaming is on the rise for Chromebooks
Having an external display for your Chromebook also fuels the potential for top-shelf gaming on ChromeOS, now more than ever especially. In case you’re not aware of what’s going on in this particular realm, Google has partnered with various manufacturers to push out dedicated gaming machines, such as the Acer Chromebook 516 GE, in an attempt to push the horizons for Chromebooks more than ever in this regard.
5. Take your work offline whenever you want
I’ll be honest with you—working on my Chromebook offline has been the biggest game-changer for me ever since I discovered the feature, so you should certainly give it a go on your end as well. In instances such as air travel when there’s minimal internet connectivity, having things set up ahead of time can help you bide your time constructively and make you more productive.
How does one take their Chromebook offline then?
It’s simple. We’ll be utilizing Google’s desktop suite of productivity applications for the matter at hand since it comes with powerful tools to help you accommodate your work objectives. Google Docs, Google Sheets, and Google Slides all can be made to work offline, therefore. To get started, simply head to your Google Drive account using this direct link and pop open the “Settings” section there.

Opening the “Settings” app
Checking the “Offline” box
It’s cake from here on out. Simply scroll down under the “General” tab inside the settings area and find the “Offline” functionality. Click the checkbox that says, “Create, open, and edit your recent Google Docs, Sheets, and Slides files on this device while offline.” That should do the trick. For more details though, this guide should kick things up a notch.
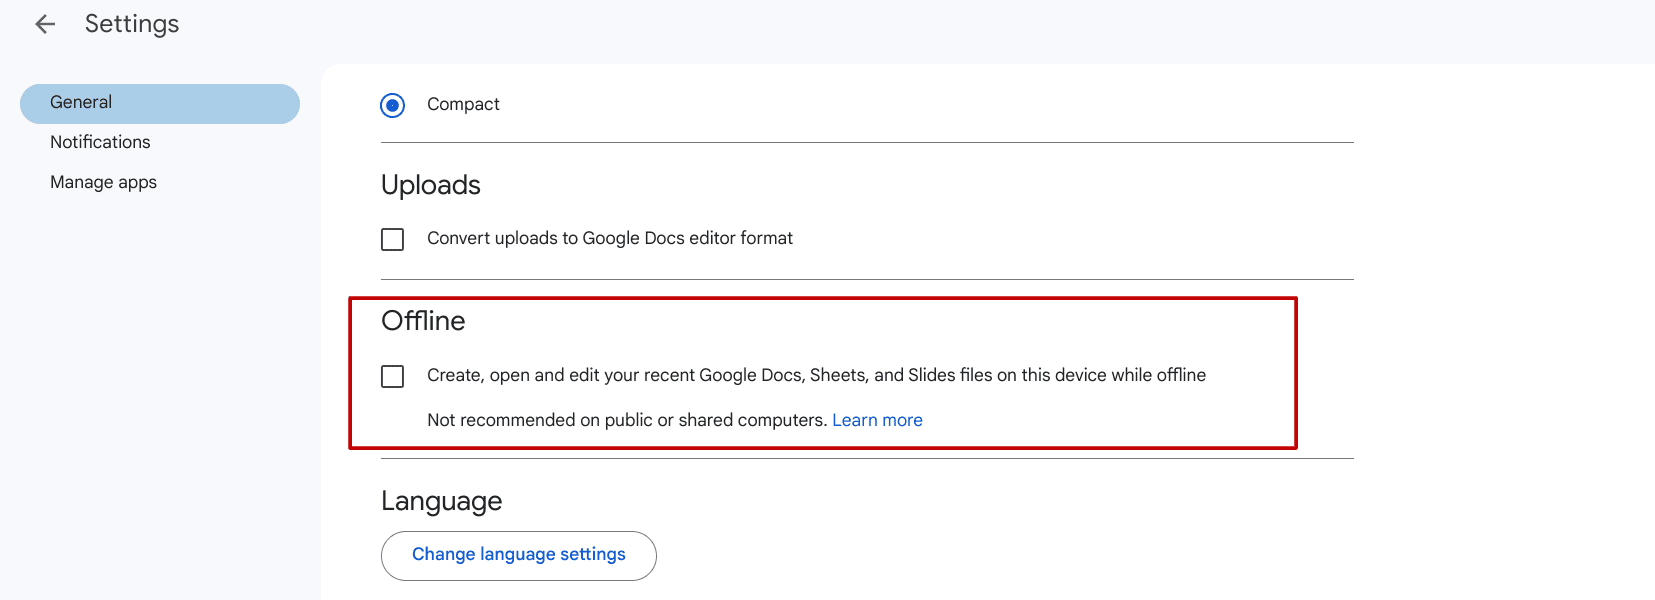
Enabling offline access on ChromeOS
6. Employ the convenience of virtual desks
Virtual desks on ChromeOS are a great way to keep things organized and clutter-free. For every manner of work you have, you can group your Chrome tabs and other applications in different sections and label them altogether, so it gets easier to switch between one task and the other seamlessly.
Utterly convenient; easy to use
Think of a virtual desk as a desktop. Hence, creating another virtual desk different from your primary one would translate to creating another desktop, so now you’ve got two of them. Just to clear things up, you can name one of them “Work” while the other can be labeled “Entertainment.” One desk would be all serious and no monkey business; the other full of fun.
Creating virtual desks on ChromeOS
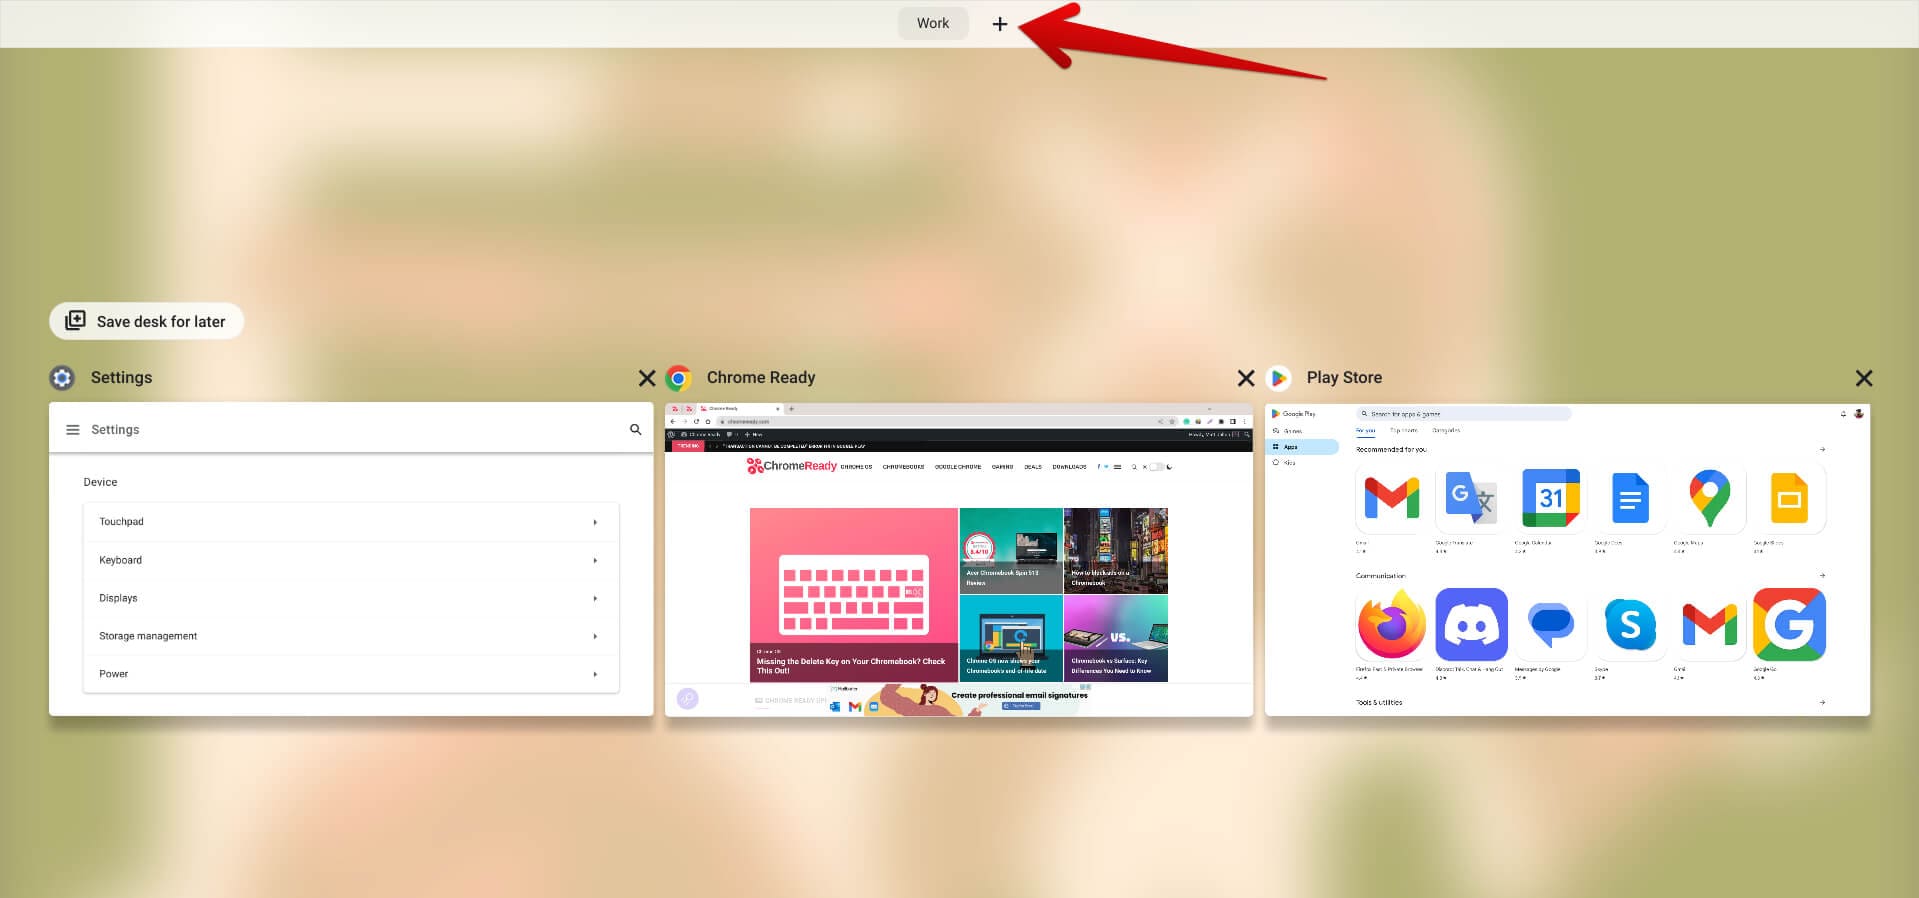
Creating a new virtual desktop in ChromeOS
Virtual desks have been around on ChromeOS for a while now, but it’s surprising how many are missing the feature from their day-to-day use still. To create a new desk on your Chromebook, the easiest way would be to swipe three fingers up on the trackpad to bring up the interface overview. Click the “+” icon at the top, next, and name the desk to finish up.
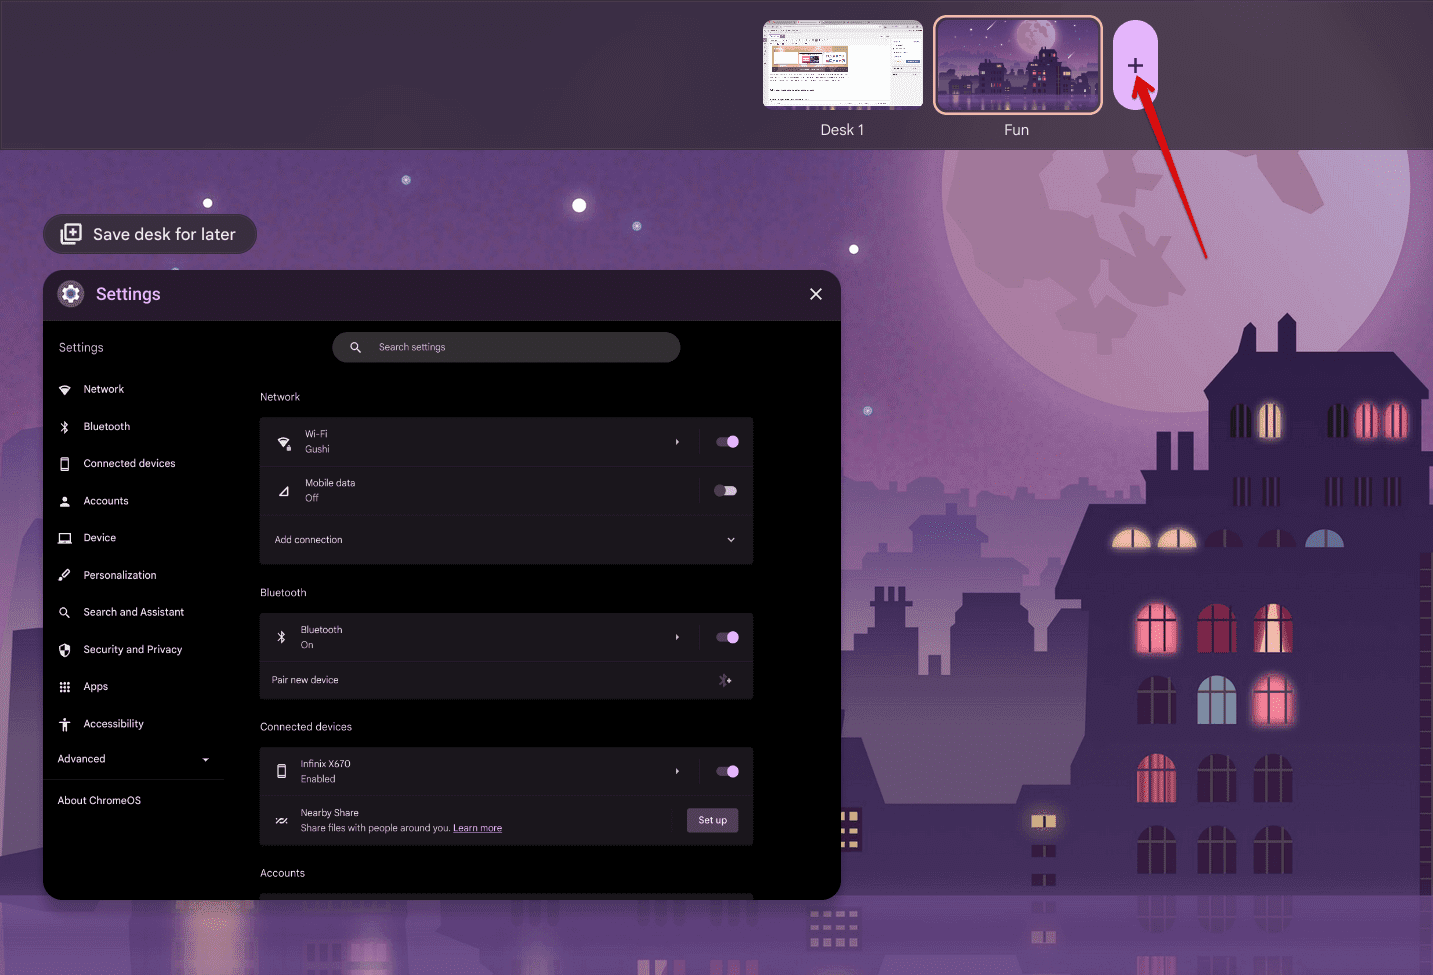
Creating a new virtual desk on ChromeOS
Nice job! You can now use this new virtual desk and pump it full of applications, Chrome tabs, and other programs, so all of it is separate from your previous desktop.
7. Pin your most-used apps for easier access
Tired of opening the same app on your Chromebook every day by heading to the launcher area first? If you know you have a set of programs that you have to use consistently, why not pin them to the ChromeOS shelf for easier access? The bottom half of your Chromebook’s interface has an arrangement of apps that will stay present no matter what window you open.
How to pin apps on ChromeOS

The ChromeOS shelf
That area is known as the shelf, right in between the launcher button and the status area buttons. Now, to pin applications here, simply head to the launcher area by clicking on the “Search” key on your keyboard, and right-click on the software of your choice (a right-click on ChromeOS is performed by tapping on the trackpad with two fingers at the same time).
That should reveal multiple options on the screen, with “Pin to shelf” being one of them. Click on it and that should take care of business for you. From now on, opening your most-used applications is going to be fast and easy.
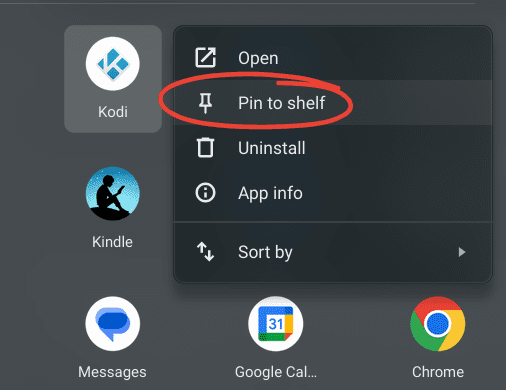
Pinning an app to the shelf on ChromeOS
8. Get your phone to join in on the work
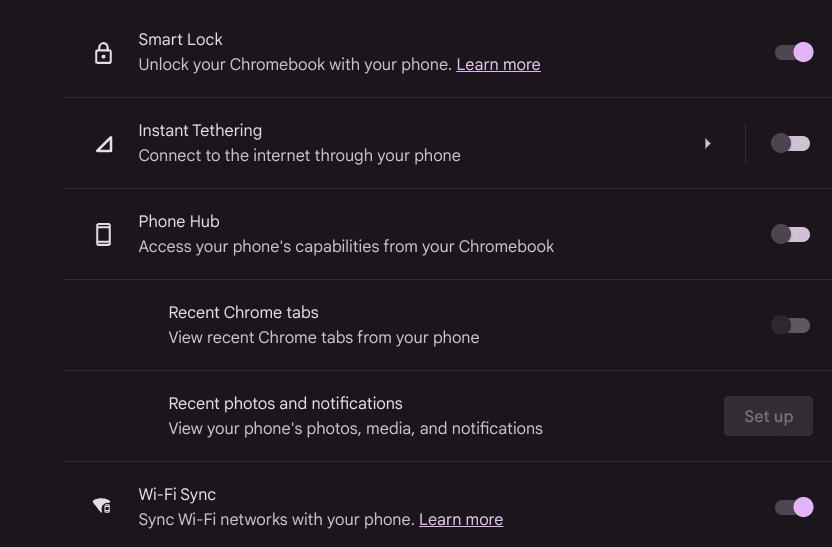
Having a connected phone unlocks many features for ChromeOS
Did you know that it’s possible to connect your phone to your Chromebook and enjoy several benefits by doing so? Previously, advanced features such as being able to check your phone’s notifications from ChromeOS and view the recent Chrome tabs that you opened on your phone weren’t possible, but that has changed as well in recent times.
Linking ChromeOS to your phone
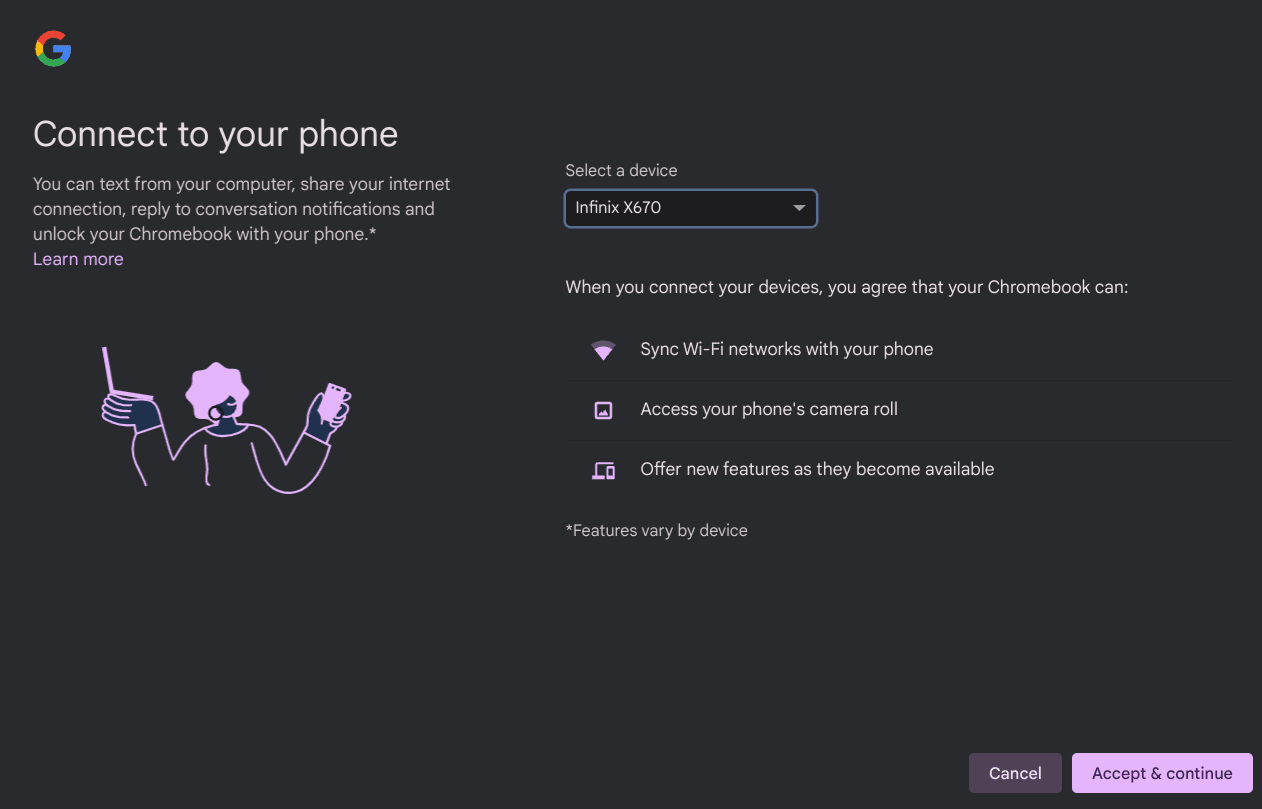
Linking the phone and ChromeOS together
That is why we highly recommend linking both devices together, so you can benefit from high-yield results going forward. To get started, head over to the “Connected devices” section in your Chromebook’s “Settings,” followed by clicking on the “Set up” button right alongside the “Android phone” feature. The only other option here will be “Nearby Share.” Ignore it for now.
Follow on-screen instructions
You should now do exactly what the subsequently appearing window on your Chromebook tells you to, which is nothing more than toggling the Bluetooth on, followed by connecting ChromeOS and the Android phone together. Once the process finishes up, you can make the best of convenient new features such as Smart Lock and Phone Hub.
9. Keep your Chromebook’s performance in check
Your productivity is as good as the performance of your Chromebook, so make sure to keep the device’s primal systems running strong and in check. One of the ways you can ensure smooth and stable performance on ChromeOS is to first be wary of the Task Manager, which is a built-in utility that monitors system resources.
Use the Task Manager to kill unwanted processes
The Task Manager makes it real simple to monitor system performance on the device. To get going with it, press the “Search” and “Esc” keys to pop open the system program. Once done, look through the different processes running on the device, and take special note of the amount of resources they occupy.
Select those that take up too much RAM, CPU, or storage usage and click on the “End process” afterward to remove it from the operating system. If there were a number of similar, resource-hogging entries, killing them should allow you to feel a difference.

Ending a process with task manager
It may be time for an upgrade to a higher-end device
While employing the Task Manager can be helpful to a certain extent, it can only do so much if your Chromebook is in dire need of an upgrade. Here are the best Chromebooks of 2023 that you can look into purchasing.
10. Know that the Guest mode is available for use
The Guest mode is a fantastic feature if sometimes, you have to use someone else’s Chromebook, but don’t want to get in the way of their setup or leave any traces of your work behind. The functionality does not save browser history, nor does it remember your downloads. It’s a highly portable way to use your Chromebook that you should know of.
11. Take screenshots the effortless way
Taking screenshots can be a hefty endeavor, but only if you’re not playing your cards right. You’ve got external options such as Lightshot and Monosnap, but the most convenient method is to use your Chromebook’s native screenshot tool by pressing the “Shift,” “Ctrl,” and “Show Windows” keys together, with the latter being in place of the F6 key.
For more details and step-by-step instructions, learn how to take screenshots on a Chromebook. This ultimate guide covers every nook and cranny with regard to capturing the screen on the operating system, so make sure to check it out for some secret tips and tricks.
12. Make the best of cloud storage
Last but not least, we cannot help but drive productivity enthusiasts toward cloud storage on ChromeOS. It’s really easy to get started with, and you’ve basically got nothing to lose, well, except for a few bucks if you plan on buying extra storage. Outside of the out there, Google Drive has the potential to be your best bet.
Why Drive instead of, say, pCloud or OneDrive?
First and foremost, Drive integrates with ChromeOS natively. There’s literally a folder for it embedded within the “Files” app that lets you access your Drive files on the fly, and transfer data back and forth quite painlessly as well. It’s super secure and highly accessible, and the overall ease of use is nothing but appreciated.
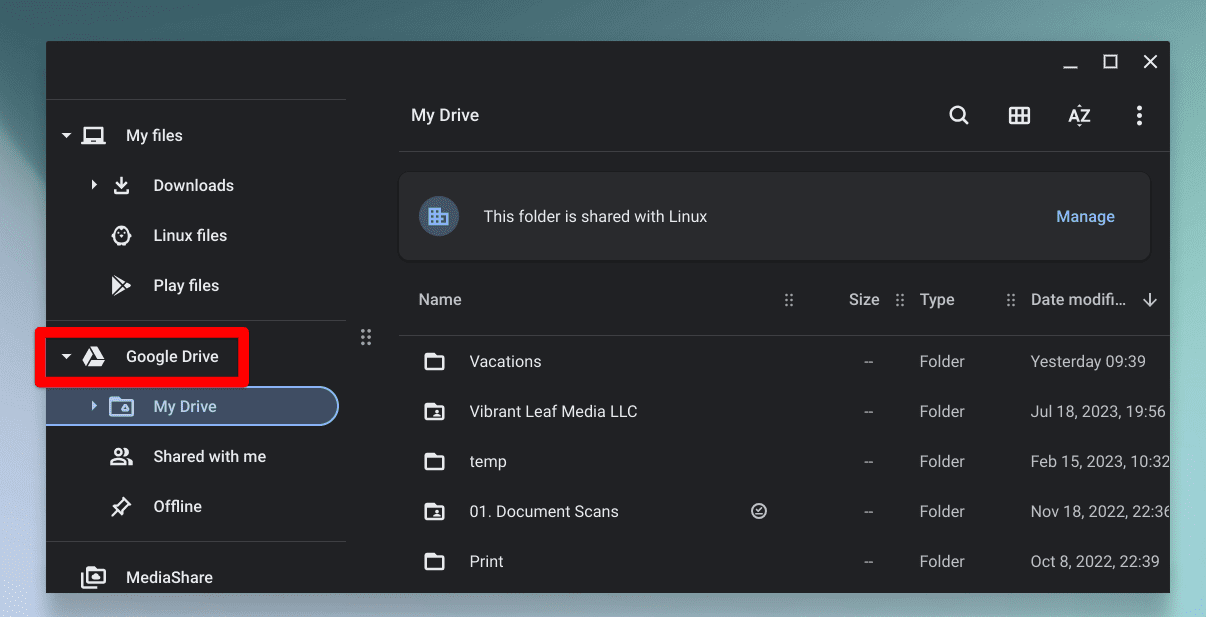
The Google Drive folder in the Files app
You should definitely check out this write-up on Google Drive’s integration with Chromebook to learn the ins and outs of the functionality.
Conclusion
From being able to speed up the Chrome browser using just a handful of tips to these curated Chromebook guidelines for senior citizens, ChromeOS is an all-inclusive platform that accommodates most types of users out there, including those who write. It’s fast, simple, and secure—all that one could ever need from an operating system.
In this article, we’ve taken an in-depth look into some easy-to-approach ways that can make your writing experience substantially better. I personally love the flexibility to work offline on my Chromebook, especially when I have to travel and be away from my home Wi-Fi connection.
Let us know in the comments ahead and tell us what works best for you. Chrome Ready wishes you good luck!
