Productivity is a sought-after construct in modern times. The race to succeed in life is as populated as ever in 2023, and everyone is trying to find ways to boost their work rate on the fly. Thankfully, Chromebook owners have something to look forward to in this regard, and that “something” goes by the name of a virtual desktop or simply a virtual desk.
In this guide, we’ll learn how to employ a virtual desktop on a Chromebook, not just using the built-in functionality. In addition, another option will be made a part of this guide to facilitate your work routine. Read ahead to find out what that is and how you can get the most out of your Chromebook in this way.
Let’s get started with no further ado.
- Recommended read: How to install ChromeOS on VirtualBox.
Using virtual desks on ChromeOS
Virtual desktops are individual containers that comprise the operating system’s base functional mechanism. The windows, apps, and almost every other process you’re opening and using on your Chromebook are all occurring inside a virtual desktop.
On ChromeOS, you have the freedom to create multiple virtual desktops, so it’s easier for you to sort your workspace and focus on multiple projects at once. That is the idea of virtual desktops, so users can become more productive, organize themselves, and frequently cater to a heightened working routine.
Now, you can utilize the convenience of a virtual desktop or virtual desk in two ways. One relates to one of the many native tools of ChromeOS, while the other is more of a third-party option. We’ll go over them one by one to better understand how things operate from here on out.
Option #1. Utilizing the in-built virtual desk functionality in Chromebooks
Back in 2019, ChromeOS 79 came out and brought forth something novel. The idea of virtual desktops sounded great on paper, and upon its actual realization, things worked out to be even better. Fast-forward to 2023, the developers have rolled out update after update for the virtual desktop functionality and have made it stand out on ChromeOS.
You can, therefore, use it to the best of your advantage and benefit from the feature like never before. The cherry on top is that Chromebooks make it easy for people to get into virtual desktops. There are two different ways to get started here. (There are three, but we’ll reserve the last method for later).
For starters, you can press the “Show Windows” key on your Chromebook’s keyboard, which is shaped like a rectangle with three two vertical lines spaced together in tandem and is in place of F5 on ChromeOS. Instead of all this, you can employ a trackpad gesture by swiping three fingers upward on the trackpad.
Whether you use the first technique or the second, the result you get is the same. Once done, you should see all concurrently opened windows on your Chromebook’s screen. From this area, it’s easy enough to close windows, create new desks, and organize your additions accordingly.
After transitioning to the “Overview’ mode on ChromeOS, you should see the following on your screen. All your launched windows will surface here, followed by more options at the top. Use the “+” icon there to create a new desk. It should be plain and simple.
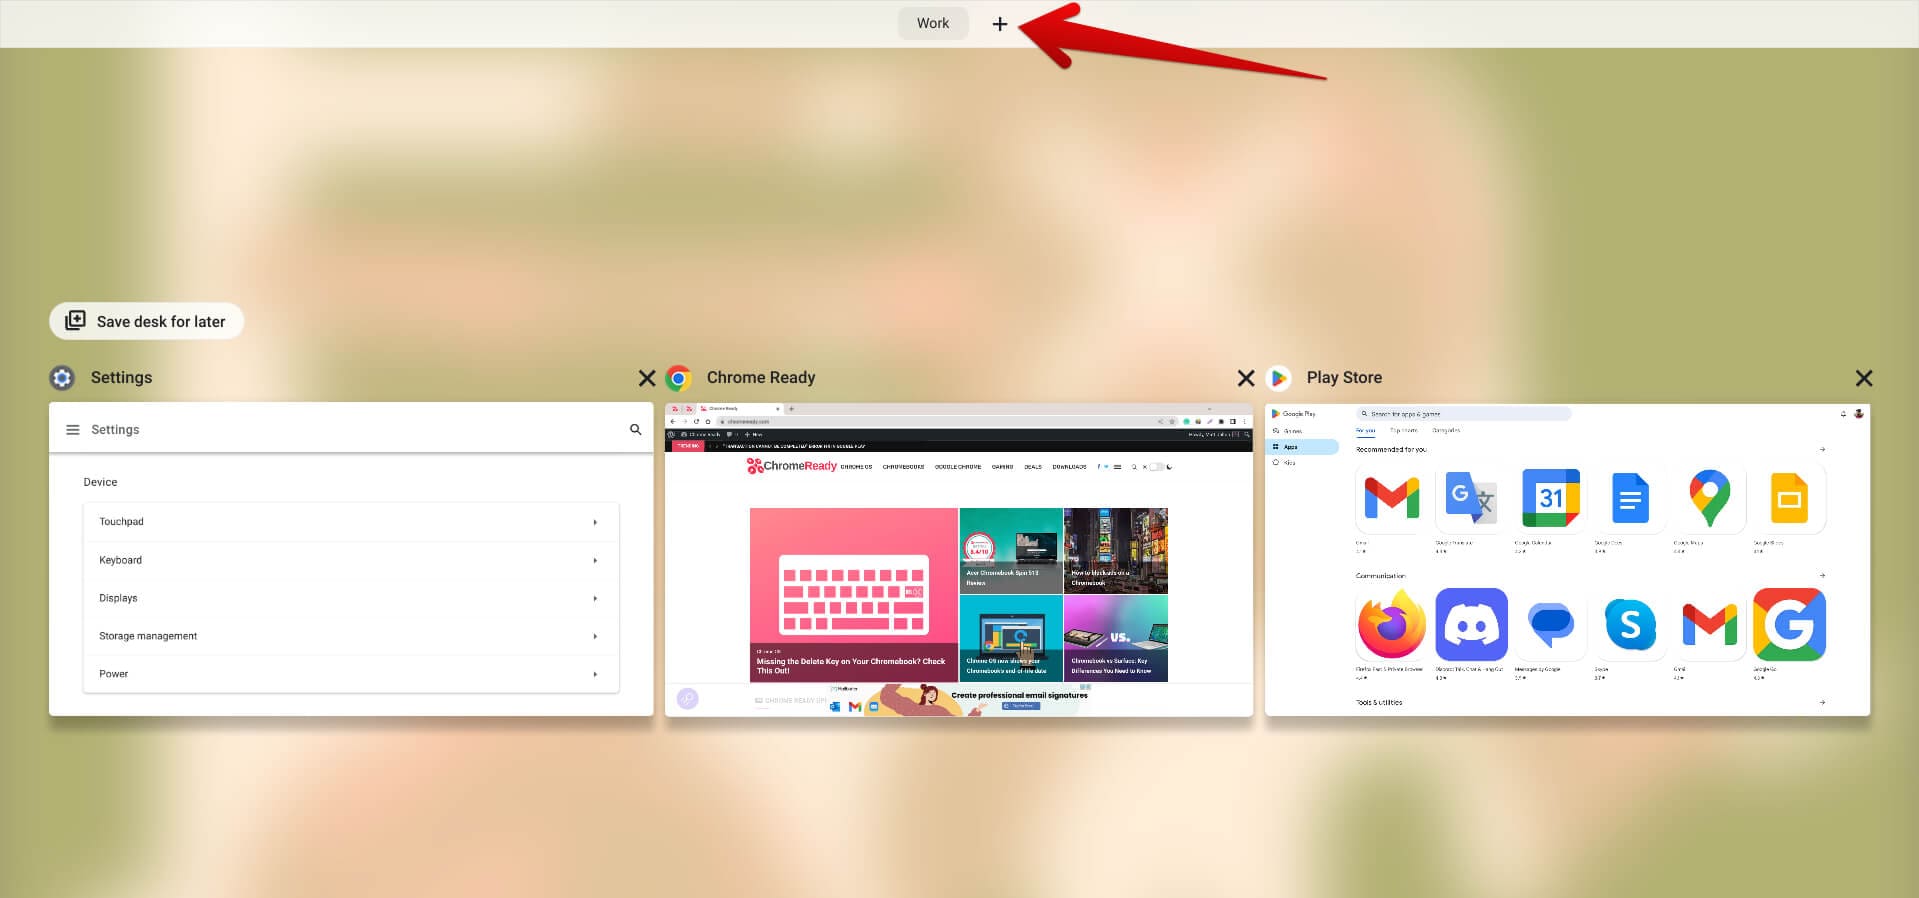
Creating a new virtual desktop in ChromeOS
The vividly apparent “Plus” button will help you create more virtual desktops on your Chromebook, making it possible for you to have more workspaces to your name. This is the primary benefit of the virtual desk feature. As soon as you finish the previous step, your next task will be to give a name to your virtual desk.
Type in what you want and press the “Enter” key to proceed. We recommend naming the desk something helpful. For instance, designating one virtual desktop for work and the other for entertainment sounds promising for an up-to-the-mark work-life balance.
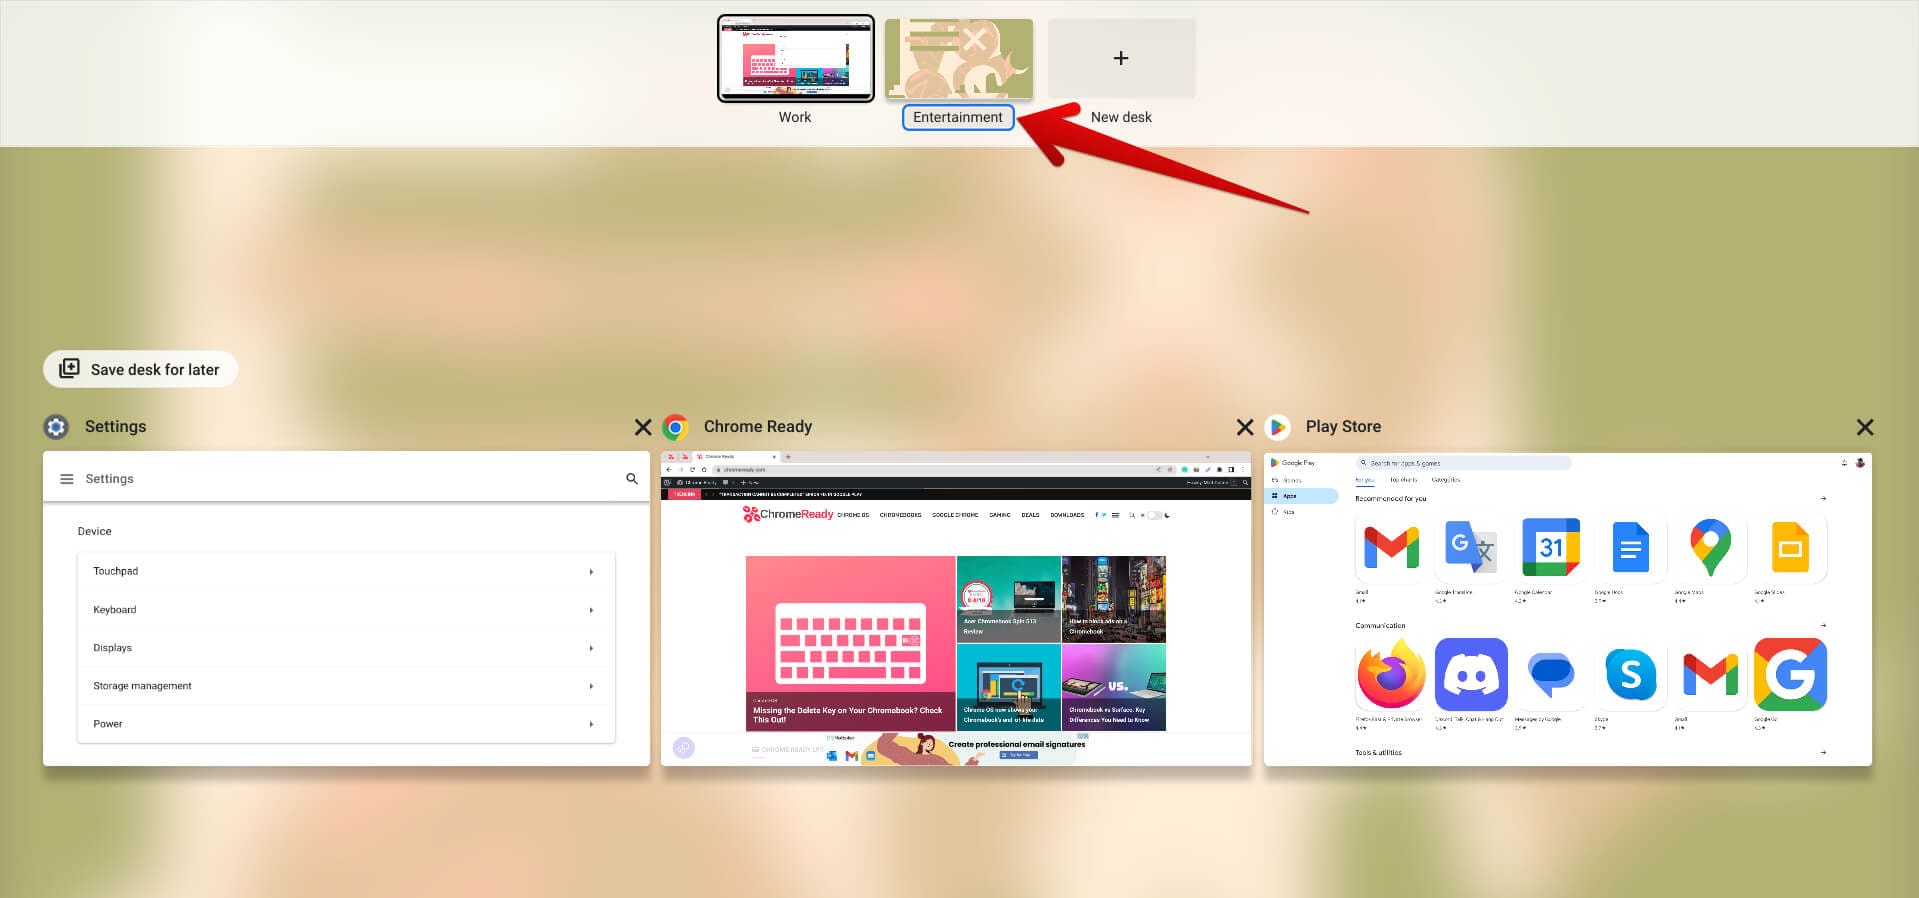
Naming the virtual desk
After creating a new virtual desk, you may as well open your favorite apps and organize your new workspace. In this manner, you can create as many virtual desktops on your Chromebook, each dedicated to serving a particular purpose.
Before we top this section off, though, there are a couple of additional features that we have to take into account. You can instantly click the “X” mark to shut down any virtual desk. On the contrary, you can click the “Combine with” button to merge two desktops. Again, this is another recurring feature of the tool in question.
Moreover, you can also utilize the “Save desk for later” functionality to reserve a whole virtual desk for yourself on a Chromebook. If you don’t intend for a desk to hog your system resources, you can make it go dormant. Then, when you’re ready for that desk, you can switch to it instantly using the Overview mode in ChromeOS.
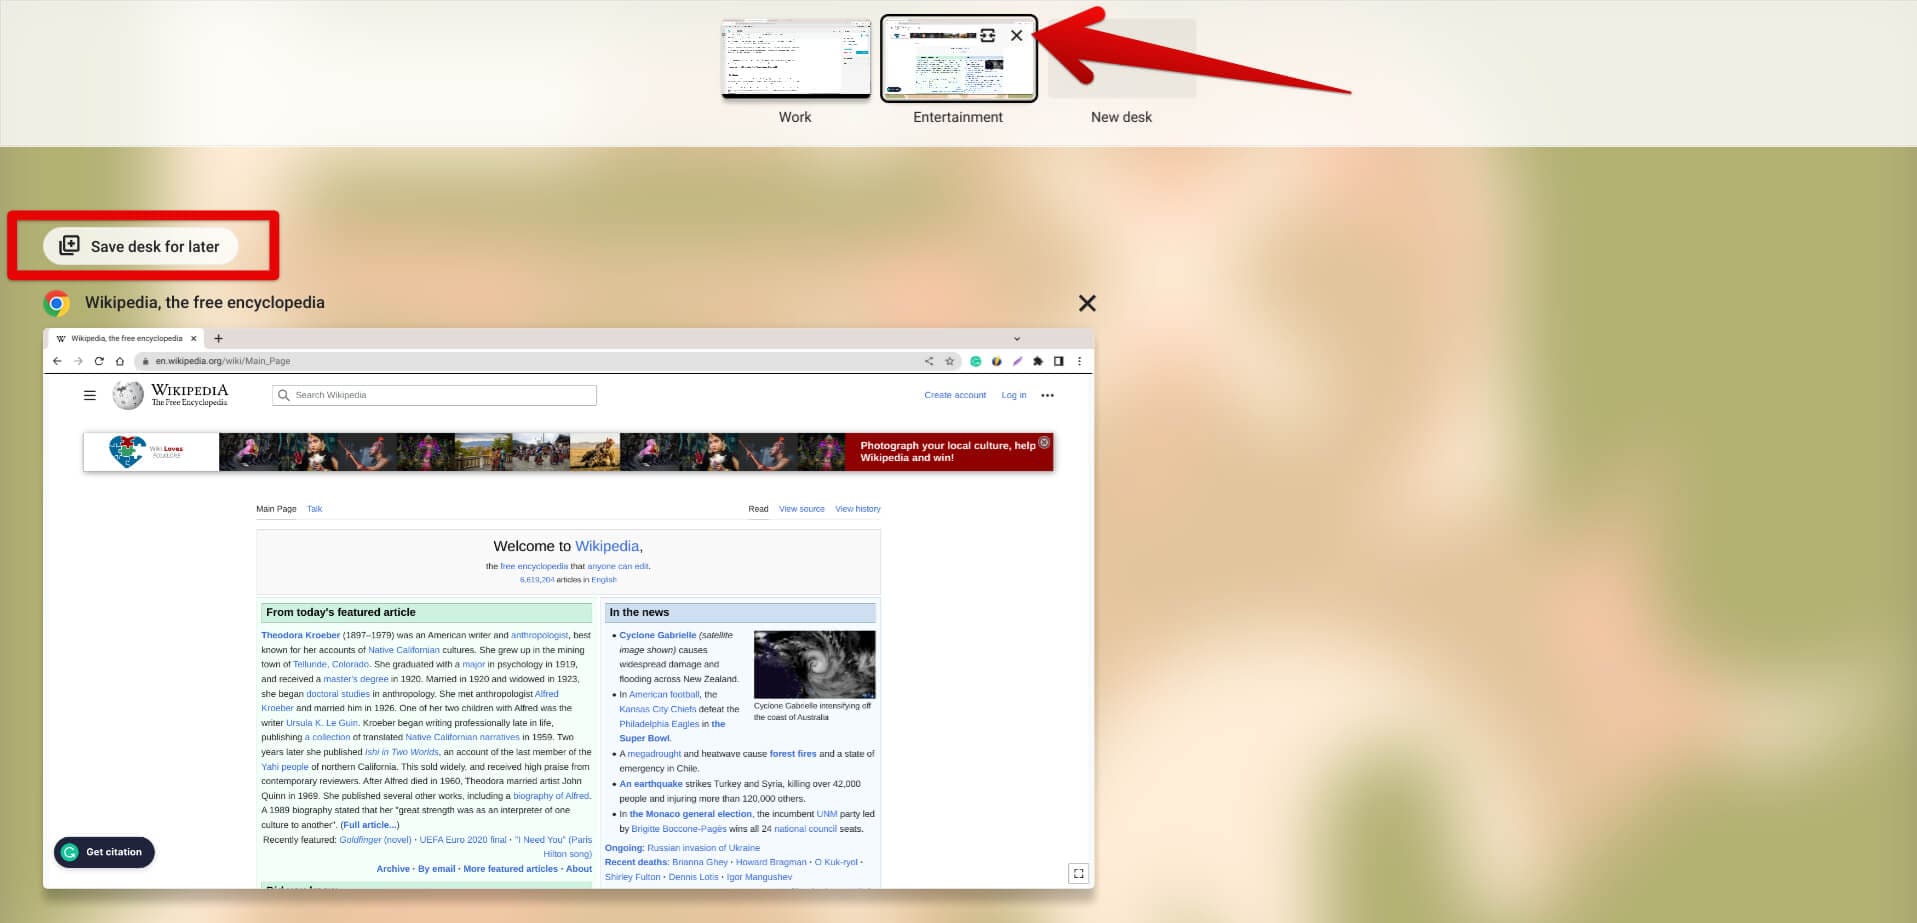
Additional virtual desk features
Saving a desk for later will allot a specific symbol to the desk in the “Overview” mode, indicating that it’s been reserved. Depending on how long after you open the desk, the windows and apps in the saved desk can require themselves to load again. Therefore, you’re better off saving your progress before logging off.

Desk saved for later
Some tips about working with the in-built virtual desktops on ChromeOS will be discussed. You can quickly switch from one virtual desk to the other with a trackpad gesture. Swipe four fingers left or right to transition to the relevant virtual desk.
Two, you can make a dedicated “Overview” button appear in the bottom-right corner of the ChromeOS interface, where it quickly becomes possible to make all your desks appear on the screen with just a single click. To make this special button appear, paste the following address into your Chrome browser’s URL bar. Then, press the “Enter” key right after.
chrome://flags#ash-overview-button
You should now see a new window on your Chromebook’s screen called Flags. This dedicated section lets you get into some of your Chromebook’s experimental features, such as Calendar View. Click on the toggle right beside the “Overview button at the status area” and then choose “Enabled” to make the flag functional on your device.

Enabling the “Overview” button for the status bar
You will next be required to restart your device to apply the changes made. Use the subsequent prompt at the bottom of the “Flags” window to reboot the Chromebook immediately.
As soon as the device boots back on, you’ll observe the Overview button now appearing in the bottom-right corner of the ChromeOS interface.
Tap the button to make your Chromebook’s “Overview” appear. Feel free to employ the functionality per your requirement for the best results.

The “Overview” button alongside the Chrome OS status bar
That’s about it for using the built-in virtual desktop feature on a Chromebook. Let’s now look at another alternative you can employ for positive results.
Option #2. Installing and using VirtualBox on ChromeOS
If the in-built virtual desktop feature of Chromebooks does not quite cut it for you, there is another way to try out the convenience of virtual desks in ChromeOS. Being one of the best Linux apps to download on a Chromebook to run virtual machines, you can quickly get Oracle VM VirtualBox on these smart devices.
This virtualization software’s core purpose is to enable people to run virtual machines on it. Think of a virtual machine as a separate container that can run programs, apps, and even operating systems like Windows for you. There’s no better way to get a higher quality virtual desktop experience than grabbing VirtualBox on ChromeOS.
Its installation is pretty straightforward and warrants incorporating a couple of commands in the Linux terminal after you’ve ensured that the container is updated and upgraded. Once that is done, type in the relevant commands, and the download will commence accordingly for VirtualBox.
- Do make sure that your particular device supports Linux in the first place and that Linux apps are configured ahead of time for the best results.
An even easier way to get the software is to download its Debian package file from the official Oracle VM VirtualBox website. Then, choose Debian 11 to install the program’s latest version on your Chromebook.
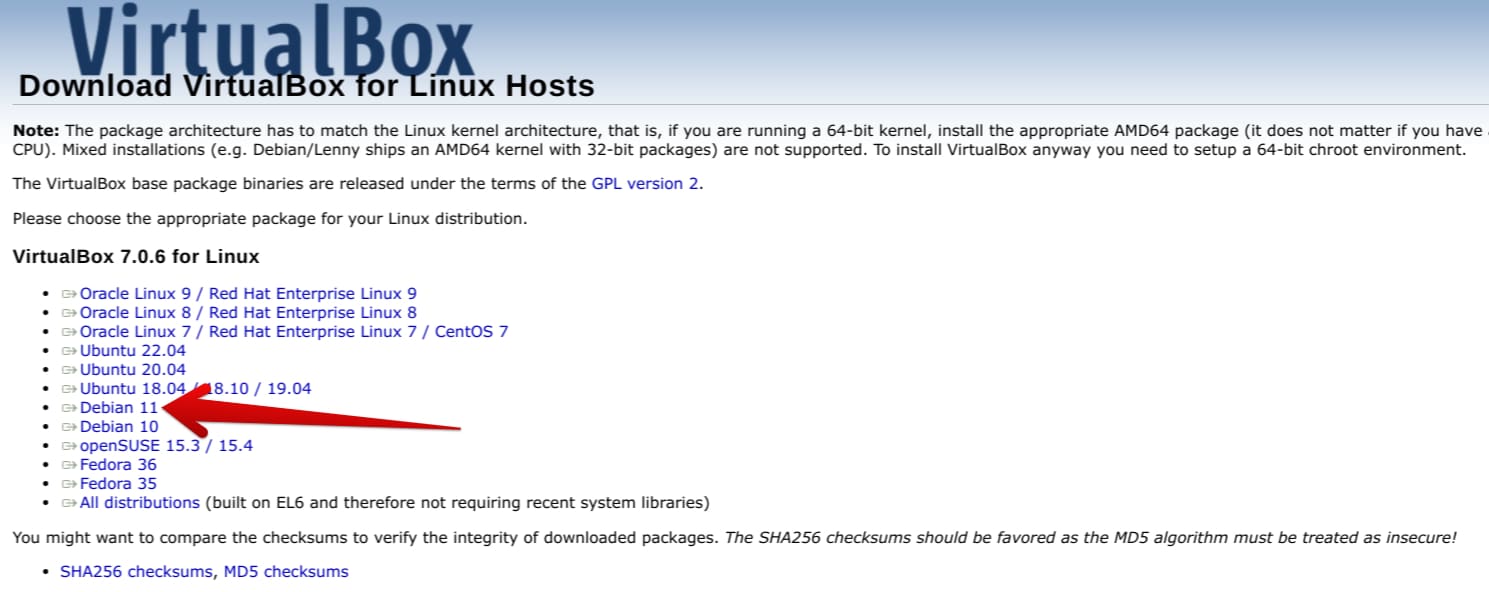
Choosing the relevant Debian file
After downloading the Debian package on your Chromebook, go to the “Files” app and right-click on the downloaded file. Choose “Install with Linux” to bring up the Linux installer and proceed with the download.

Installing VirtualBox with Linux
Follow the on-screen instructions to install VirtualBox painlessly on your Chromebook. It shouldn’t be any difficult.
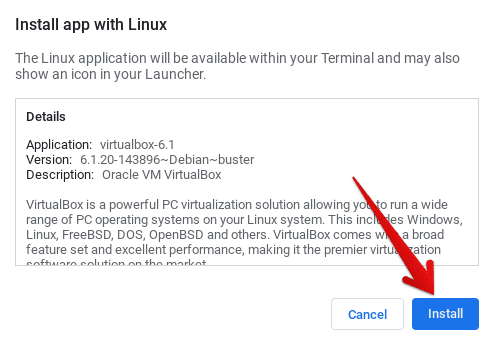
Installing VirtualBox
After following the installer window, VirtualBox will be installed on your Chromebook. Fire it up from the launcher area, and you’ll be shortly taken to its user interface.
Speaking of which, the UI of the program comprises large-sized buttons and a detailed how-to guide as well, so you can get right into the software without having to hop onto YouTube for further learning.
From here on out, you can effortlessly install a virtual machine inside the Oracle VM VirtualBox, tweak your preferences, and enjoy a brand-spanking-new virtual desktop right within the base operating system of your Chromebook.
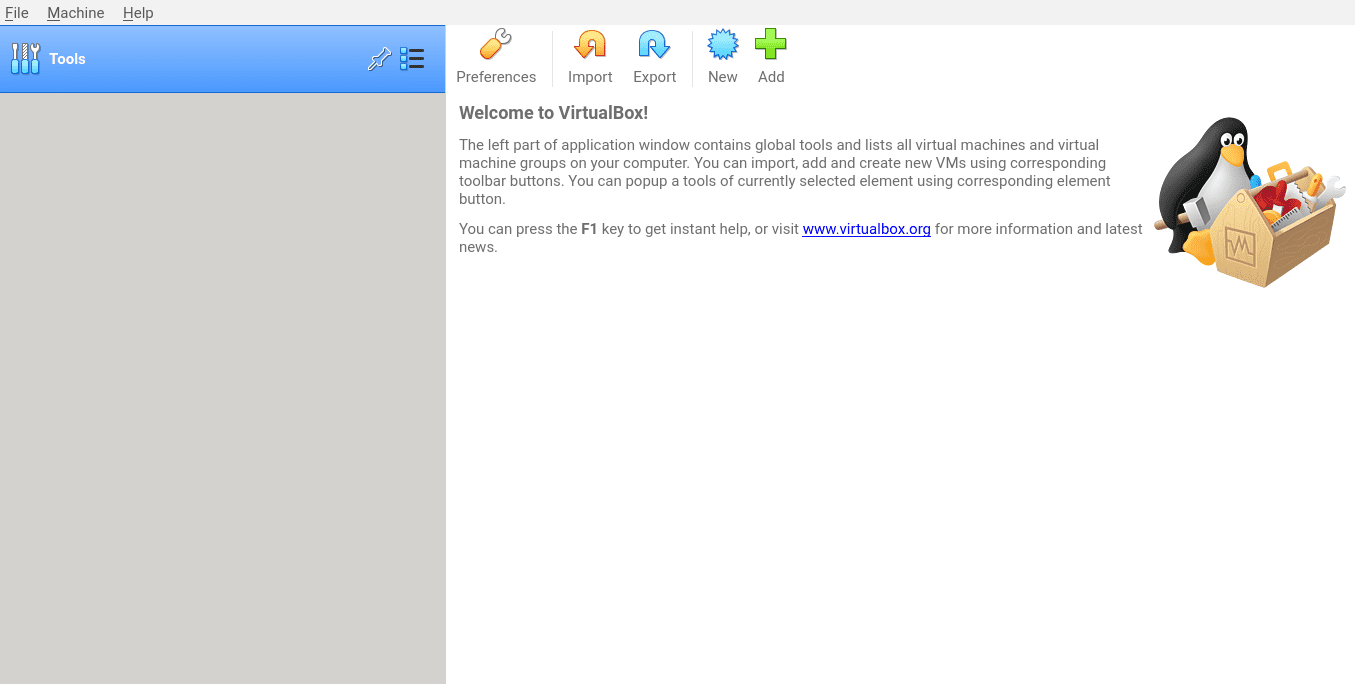
VirtualBox on ChromeOS
That’s about it for using virtual desktops on a Chromebook. The time is nigh to conclude the article.
- For a more detailed guide on installing VirtualBox on ChromeOS and setting it up the right way, check out our full tutorial.
Conclusion
ChromeOS has been subject to constant evolution over time. The operating system started small with little to no extra features but drastically improved its stance as more and more general updates rolled out. Today in 2023, Chromebooks are reasonably capable devices with a strong emphasis on speed, security, and stability.
In this guide, we’ve highlighted a portion of a Chromebook’s functionality that lets it multitask and allows users the creative freedom to get more work done in less time. We’ve also enlisted a third-party option for interested individuals to explore. Do let us know in the comments section whether you found the tutorial helpful.
Chrome Ready wishes you good luck!

1 comment
ChromeOS 114 seems to be a punishment for Virtual Desks. The Persistent Desk Bar feature (was a flag) was silently removed, along with any way to replace its functionality. If you were unaware of it, it added a 3-dot menu allowing you keep the desk bar always open, or touch the top of the screen to open when hidden.
The overview button flag was also removed, taking away that feature. It is puzzling why they remove popular features that add valuable functionality