Chromebooks have never been the same since 2016. This was the year when Google decided to integrate these sleek devices with the world of Android applications while also managing to fit in a Crostini Linux terminal inside the ChromeOS mainframe somehow. Following the arrival of these two functionalities, ChromeOS development has only gone uphill.
To talk about a relatively recently arriving Linux utility, Chromebooks will allow you to connect to remote servers using SSH or Secure Shell. Standing right by the principles of ChromeOS, this functionality too is simple to operate and easy to understand.
If you’d like to know more, keep reading for a detailed guide on forming an SSH connection on ChromeOS. Let’s dive right into this guide with no further ado.
- Recommended read: How to install and use Unity on Chromebook.
Why should you connect to remote servers with SSH?
Remote servers are all the rage these days. These essentially power up cloud-based storage solutions across the spectrum, including ChromeOS, which comes across as a cloud-first operating system. Big names such as Dropbox, Google Drive, and pCloud all utilize remote server technology to form the basis of their functional capacity.
However, to speak outside the realm of ChromeOS, remote servers essentially form a gateway between them and a singular, central server for individuals to access their files, data, and other important stuff for work or business purposes. But, of course, don’t take this in the wrong sense.
Remote servers are the entities that allow IT, experts to address their clients’ issues from afar without needing to be physically present on-site. Processes are regulated, and permission is sought before a remote server connection can be established.
Some of the significant benefits of remote servers include minimal downtime issues, not to mention robust security and support from the connection providers who make the whole affair cost-efficient in the grand scheme of things. With all that said and done, you might wonder: Where does SSH tie in here, considering the scenario?
SSH — or otherwise called Secure Shell — is one of the network protocols that the field of remote server connections utilizes. With the help of an established client-server model, SSH is one of the most reliable means of using remote servers, primarily because of its consistent updates, maintenance, overall security, and ease of use.
If you’re an IT professional who needs to employ remote connections services or just an enthusiastic tinkerer looking to learn something new on their Chromebook, read ahead for more details. We’ll cover how to connect to remote servers using SSH on ChromeOS.
What are the requirements for connecting to remote servers via SSH on a Chromebook?
The requirements in this respect aren’t all that challenging; rather obvious, we’d say. You need your Chromebook’s Linux terminal to be up and ready, and that, to be fair, is nothing but a painless procedure.
Before we can move forward with anything, it’s certainly worth establishing that the Linux terminal must be enabled for users to connect to remote servers using SSH.
The feature might not be supported if you’re using an outdated Chromebook manufactured before 2018 and haven’t used the Crostini Linux terminal.
- Here’s how to check your Chromebook’s model, should you require it.
Please look at our guide on Chromebooks that run Android and Linux apps to clear away any suspicion. If you’ve confirmed that Linux is available to work with on your end, proceed toward installing and configuring the Terminal. The process is short and warrants a couple of easy-to-follow steps—that’s all.
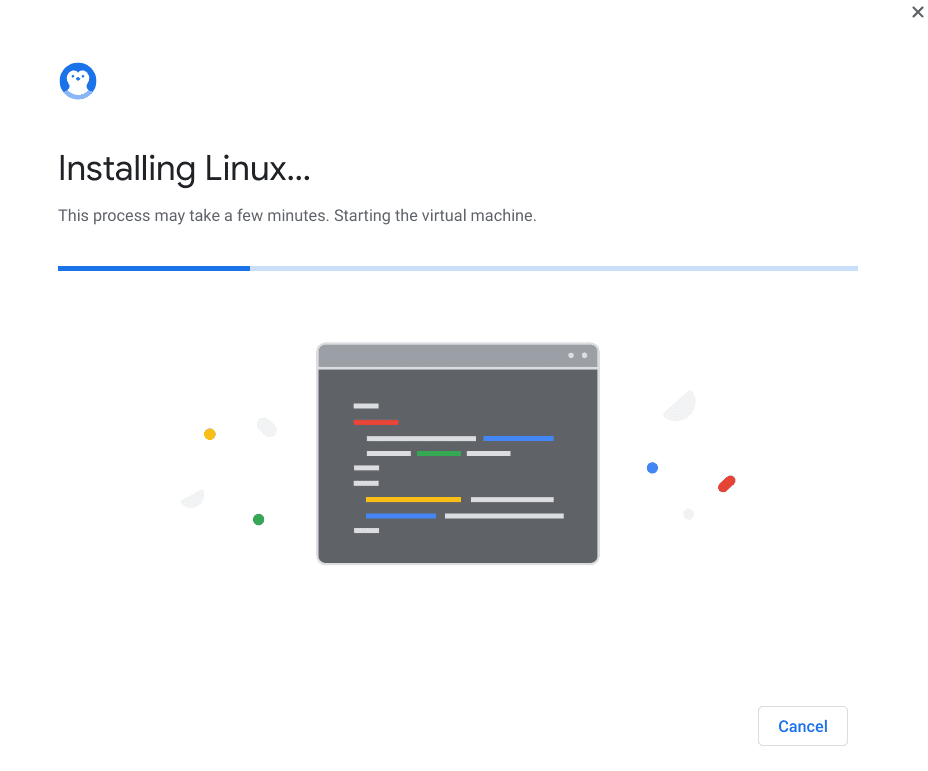
Installing Linux
When you have Linux set up, ensure your Chromebook is also up-to-date. The SSH feature was only introduced to ChromeOS not too long ago, so it’s pretty much imperative for you to get your Chromebook on the latest available release.
Last but not least, this goes without saying that you need a remote server to connect to. Details of the server, such as its username and IP address, also have to be known. This is all that you should take care of before proceeding ahead.
Using Linux to connect to remote servers via SSH on ChromeOS
Now that we’ve taken care of the most important stuff before we began let’s focus on the raison d’etre now. The following steps will go deep into connecting to a remote server on your Chromebook using SSH. Make sure to follow the instructions verbatim for the best results.
1. The first step is to fire up the Linux terminal on your Chromebook via the launcher. The latter can be accessed by clicking on the circle-shaped icon at the bottom-left corner of the ChromeOS interface.
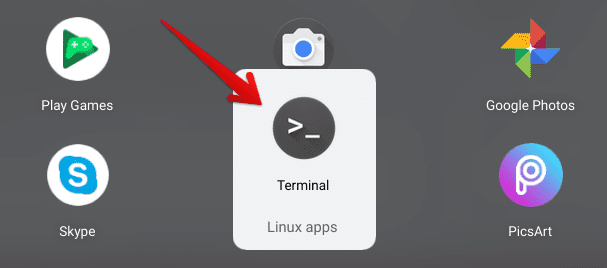
Opening the Linux Terminal
2. As soon as the Terminal window appears, click on the “Add SSH” button accompanied by a plus sign.
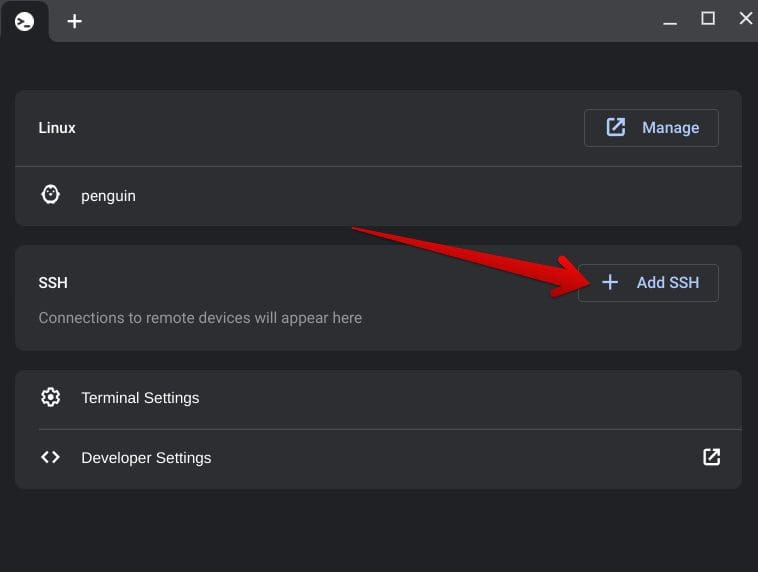
Clicking on “Add SSH” in the Linux terminal
3. After completing the previous step, a window should pop up on your end, allowing you to enter the details of the SSH connection. Now, this is a part where you have to pay attention. The first parameter you’ll visualize on the window is “Command.”
This entity’s layout, for example, is “ssh username@hostname -p <port> -R 1234:localhost: 5678.” To size that down in complexity, you can only focus on the “username” and the “hostname” part for now. “Username,” as the name implies, is the username of the server that you want to connect to.
“Hostname,” instead of the server’s IP address, is the server’s host’s identity in the ChromeOS Linux terminal case. Furthermore, if the server utilizes a specific port for establishing a Secure Shell connection, you might need to add more to the “Command” space, such as designating a port for it.
In the grand scheme of things, this is something that you will need to figure out on your own, depending on the cloud server that you’re trying to connect to. As for the rest of the two perceivable parameters, “Identity” is for using a password-less SSH, while “SSH relay server options” is for when you need to connect to a remote server with the help of another server.
“Identity” and “SSH relay server options” can be left out. Click on the “Save” button as soon as you’re done to get to the next step.
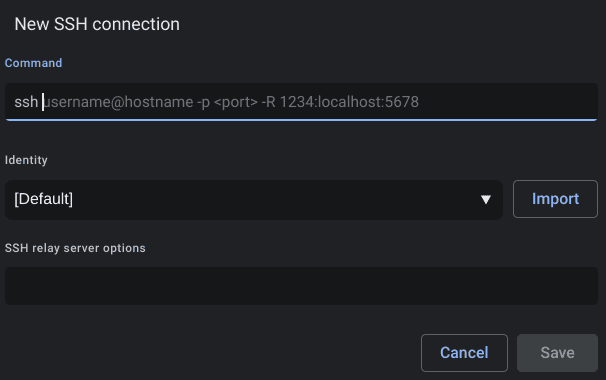
Filling in the required credentials
4. As you create an SSH remote server now, click on the created entry within the main Linux menu to start forming a connection. It’s going to be a cakewalk from here on out.
- The following SSH remote servers command visible in the screenshot simply serves an illustrative purpose.
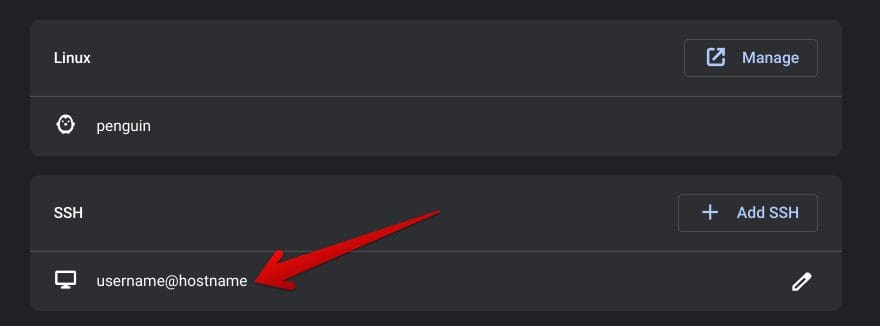
Accessing the SSH remote server through Linux
5. As you click on your newly created SSH server, a new tab will open in the terminal, allowing you to take things forward and proceed with the SSH remote connection. If it’s your first time doing this, you might be asked for a password that the user of the remote server sets. Input the credential correctly and press the “Enter” key to get to the next step.
6. Having replicated all of the previous instructions correctly, you should now be able to connect to an SSH remote server on your Chromebook. The procedure was as painless as that, thanks to how ChromeOS prioritized simplicity above everything else.
It’s also possible at a later time to edit your SSH remote server configuration. Click on the pencil-shaped icon next to your remote server entry, and the same window as before should appear, allowing you to import an “Identity” and input any “SSH server relay options.”

Editing the SSH remote server
Good going so far! The process above will enable you to access the remote server from the comfort of ChromeOS, so you should be all set in this operation. On a side note, though, here’s how to install Linux separately on your Chromebook, in case you desire to either dual-boot Linux or transform the device into a full-fledged Linux machine.
Conclusion
Chromebooks are machines that are seemingly fueled with functionality. From being able to dish out some of the most important accessibility tools and features to running some of the best Google Play Store apps effortlessly, ChromeOS has evolved as an operating system significantly in the past years.
In this guide, we’ve cast a lens on a highly convenient Linux feature, an innovative ChromeOS functionality. The instructions for connecting to a remote server have been laid out in the guide, so you should be able to follow through with the process painlessly moving forward.
Do let us know in the comments section ahead whether you found the write-up useful for your cause. As always, Chrome Ready wishes you good luck!
- Before you go: Top 6 Blender alternatives for Chromebook.

1 comment
So we have to type the password each time we connect again?