If you’ve been meaning to find out how to install and use MX Player on Chromebook, you’re certainly not wrong to try out one of the best video players. This guide will explain how you can get MX Player on ChromeOS without breaking a sweat, just like downloading and using VLC Media Player on a Chromebook.
Chromebooks have come a long way from their humble beginnings; today, these devices are some of the world’s preferable PCs. This happened because of Chromebooks’ integration with Linux and Google Play Store.
For now, though, we’ll focus on MX Player while detailing its prominent features and explaining how to install it on ChromeOS. So let’s get started with no further ado.
- Recommended read: How to install LumaFusion on Chromebook
MX Player’s best features
The following is our round-up of some of the best features MX Player users enjoy across the globe. On a side note, though, there are over 1 billion downloads from the Google Play Store alone for the application in question. It’s reviewed to be well-established and is a sure-fire winner among the hearts of Android users.
Hardware acceleration supported
MX Player is one of the very few editors on Chromebooks that comes with advanced features, such as hardware acceleration. Like Chrome can utilize GPU acceleration whenever needed, MX Player uses a new HW+ decoder to implement hardware acceleration on videos painlessly.
This, in turn, allows one to receive a generous output of high-quality videos. To shed some light on this feature — hardware acceleration — a little bit, think of the functionality as a means of offloading particular tasks and processes to other hardware components of your Chromebook to benefit from a boost in overall performance.
Taking advantage of this, MX Player works and behaves like a highly dedicated software that feels like a lot of thought was put into developing it. The smooth optimization for ChromeOS that follows in the wake of this has won us over, and there’s no other video player we’d use instead of MX Player.
Multi-core decoding interface
As iterated earlier, MX Player comes with a swath of added functionality. Apart from support for hardware acceleration, you can also dive into the video player with multi-core decoding. Surprisingly, the program in question is the first Android video player to be compatible with multi-core decoding.
According to the developer’s notes, it’s been stated that applications that show support for multi-core decoding perform at a 70% higher rate than apps that do not. This added plus will surely benefit you in the grand scheme of things. And if you own a high-end Chromebook, consider the best results coming your way.
Touchscreen mechanics
MX Player has been optimized to work with Chromebooks, and we cannot emphasize this enough. It works exceptionally well even with a touchscreen Chromebook and features touch controls and relevant mechanics to make you feel like you’re handling a native program.
You can zoom in and out of the video player’s interface at will and enjoy the sleekness of the transition. Moreover, you can swipe across the screen to access other controls, not to mention panning the interface, which is available via an option within MX Player. It’s truly a versatile video player at the end of the day.
- Recommended follow-up read: Should you purchase touchscreen Chromebooks? (Spoiler alert – absolutely!)
Easy shareability
Out of all the different video players in the world, one facet of MX Player sets it apart from the competition. The application features terrific shareability functionality that allows it to get files around faster and easier than ever before.
You can even share files without utilizing your mobile data usage if you’ve got a SIM card plugged into your Chromebook. Thanks to its powerful share-centric capacities, the player can instantly share your music, video files, photos, and other files.
- So that you know: How to share files with devices using Nearby Share in Chrome OS
Gesture support for subtitles
Many of us prefer captions on videos, and MX Player thoroughly respects that. In light of this, the video player features gestures for interacting with subtitles if you have a touch-enabled display. Feel free to swipe right or left to move to the next or previous text, respectively.
In addition, you can scroll up and down to move the text accordingly. Last but not least, the zoom features also apply to the subtitles portion. If you wish to enlarge the text, pinch the captions outward, and you’ll have that served to you on a plate in a second. Do the opposite if a small text size suits your preferences the best.
Kid-friendly
Lastly, parents concerned with setting up Chromebooks for their child or children will undoubtedly appreciate MX Player’s kid-friendly features. It exhibits a “Kid Lock” functionality where the player ceases to display playback controls on the screen, such as fast-forward, pause/play, next video, previous video, and others.
That way, if you’re worried that your little one will wander off to other applications or press the wrong buttons and essentially shut the player down, that’s not going to be a possibility. It’s one of the best features MX Player offers to parents across the globe.
Installing MX Player on ChromeOS
Now that we’re well aware of some of the most prominent highlights of the MX Player, it’s high time we talk about its installation steps. First, we’ll need to utilize the Google Play Store for the task at hand. If you don’t have it activated, now is the best time to kick things into motion.
- In other news, if you haven’t used Google Play before and your Chromebook is a somewhat dated model, there is a chance that Android apps might be supported on the device you have. Check out our guide on Chromebooks that run Android and Linux apps for the full memo.
Let’s talk about how to install MX Player on a Chromebook with that out of the way. The following steps are going to take it from here. Please replicate them until the end for the best results.
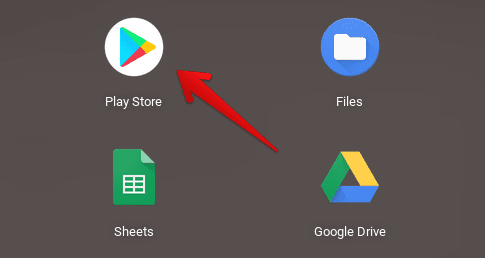
1. The first step is to fire up the Google Play Store app on your Chromebook. This should be pretty painless to follow through with, given the presence of the search bar that can quickly help you dig up apps of interest.

Opening the “Google Play Store”
2. As soon as the Play Store opens up, go ahead and search for “MX Player” using the in-app search bar. You will receive multiple suggestions as you type in the keyword, but pressing the “Enter” key will do just fine.

Searching for MX Player on Google Play
3. Completing the previous step is bound to take you to the installation page of the MX Player app on your Chromebook’s Google Play Store. You will click the “Install” button, which will sort things out for you right ahead. Wait for the download to finish before you can finally use the video player.

Installing MX Player on ChromeOS
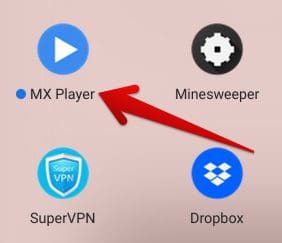
4. When you are notified that MX Player has been installed on your Chromebook, feel free to head to the launcher area to find the program installed there. You should see an app icon similar to what you see in the screenshot.
Note that you can also open downloaded apps from the Play Store by staying on their installation page and waiting until the download concludes. Afterward, you can click on “Open.”

MX Player installed
That’s about it for the installation of MX Player on a Chromebook. Let’s take it for a spin and see how it holds up.
How to use MX Player on a Chromebook

MX Player’s interface on a Chromebook
There’s no modicum of doubt that MX Player should deserve some native spot in the mainframe of ChromeOS. It’s optimized extremely well and poses the benefit of tip-top performance to Chromebook users. The developers have indeed worked to replicate the Android version of the app for ChromeOS.
It’s reliable, speedy, lightweight, and incredibly easy to use, so it’s not an understatement when we say that no other video player even comes close to what MX Player has got going for itself. Importing video clips is facile, not to mention the swath of playback options that appear afterward.
You can even employ keyboard shortcuts to get around the program’s user interface, such as all the arrow keys that let you painlessly control the scrubber bar in videos. However, when you first boot up MX Player, you’ll need to hand it specific permissions to operate in full flight. None of them are going to be privacy-invasive, so don’t fret.
From the crisp and responsive user interface to the bundle of features that MX Player comes with, those looking for a video player on ChromeOS certainly can’t miss out on something as efficient as this one. We now leave the rest of the matter up to you to explore and enjoy.
Conclusion
Chromebooks are blessed with overall functionality thanks to the best Google Play Store apps in the business. Not only that, but facilitating the user experience of ChromeOS further are two other highly established platforms—the Chrome Web Store and the in-built Crostini Linux terminal. In this guide, we have discussed installing a quality video player that’s on par with VLC Media Player and even better in certain aspects. MX Player is the application you need to sort out all your playback requirements on ChromeOS. Do let us know in the comments section ahead whether you found this guide helpful for your cause.
As always, Chrome Ready wishes you good luck!
- Read next: Top 12 accessories for your Chromebook.
