If you’ve been meaning to learn how to install and use Blender on ChromeOS but didn’t think it was possible before, we got news for you, and it isn’t bad. There is a perfectly working way of getting Blender to run on a Chromebook, provided that the minimum requirements for installing the software are met, and you’re inputting the proper commands.
ChromeOS has received consistent updates, feature additions, and enhancements. In 2016, the operating system integrated with the Google Play Store and Crostini Linux terminal to make its functionality far-stretched and capable enough to tackle its counterparts. The rest has been history ever since.
With no further ado, let’s talk about Blender, its significant features for Chromebooks, and, of course, how you can get the software on your end.
- Recommended read: How to 3D print using Chromebooks.
What is Blender?
Being one of the world’s most highly established 3D graphics and model creation programs, Blender is recognized as a free and open-source tool for manifesting your digital artistic spirit. It traces its initial release way back to 2002 when a start-up called Blender Foundation came up with the novel idea of developing a Blender-like software.
It’s outright invaluable for people looking to make their imagination come to life, given how Blender provides a whole suite of tools necessary to make this happen. After Blender Foundation arrived at the forefront of the digital world in 2007, Blender Institute, and ever since then, that company has been nurturing Blender with consistent updates and features.
Blender is free to use and is also deemed fully open-source, so should you contribute to the software from a developing perspective, feel free to delve into that. In addition, open-source software vastly brings more to the table than closed-source ones in terms of their working functionality.
Some of the most robust features of Blender revolve around modeling, sculpting, rendering, animation, and rigging, VFX—which is an industry-grade standard for unique effect creation and manipulation—and video editing. Let’s look better at Blender’s overall capability in the following section.
Best features of Blender
What we have ahead is a breakdown of some of the most prominent highlights of Blender that millions of people are enjoying on a day-to-day basis.
Model creation and sculpture core feature
One of the primary features of Blender pertains to the creation of 3D models. You’re opening the deep crevices of your mind and letting all of your imagination come out with the software in question. If you can think of it, you can make it in Blender. The program offers powerful tools for 3D model creation and to develop, further with tasteful sculpting.
The best part is that Blender has continued to receive a swath of updates throughout its live service. Ever since it dawned upon the world. The 3D model creator and developer have been adorned with excess functionality. One of the recent versions of Blender allows people to switch back and forth between modeling and sculpting with a single tap.
Whether it’s mesh editing or engrossing yourself in the extensive sculpting tools, Blender is effortlessly offering its core functionality. Moreover, you’ll find that the program at hand features different forms of model creation, such as curve-based and mesh-based modeling, that you can delve into without breaking a sweat.
Textured drawing
Hobbyists and enthusiasts looking to transcend to the next level of model creation will love all Blender has to offer. When you’re done creating your first model, you can either put it to use or step into an advanced domain and dive into the textured drawing.
Thanks to Blender’s robust graphical engine, the possibilities are endless in this regard. There are seemingly infinite ways you can create semblances of your model to draw and fill in. In addition, certain materials and textures will kick in, allowing you to develop your model further and tweak it with your preferences.
Animation
Animation and rigging are other significant proponents of Blender’s unparalleled functionality. This allows a 3D model to pose a certain way and become full of life for your viewership. To make it easier for its user base, Blender makes it possible to employ stop-motion methods within the model creator’s timeline.
These further lets models act and instill a notion of actual modeling, so if you want, you can make your model pose just the way it’s required. However, this is a reasonably advanced space, and you will need to dive into the full potential of Blender’s rigging features to make all that a reality.
With that said, automation is still making things easier for you, no matter the complexity of the work involved. This allows Blender to stand out and serve as the most feature-rich 3D model creator.
Video editing
Blender goes out of its way to function like a high-quality video editor, which can help out Chromebook users first-hand. Although there’s no shortage of high-class video editing programs on ChromeOS, such as WeVideo, Power Director, KineMaster, OpenShot, and other iMovie alternatives, Blender brings its unique touch to the table.
Expect best-in-class visual effects and other tools to help create the most stunning videos that align with your passion. By getting Blender for your Chromebook, you’re opting for a platform that does it all: animation, model creation, video editing, sculpting, and a host of other advanced functionalities.
Installing Blender on ChromeOS
Although Blender is a full-fledged desktop-level application that warrants a fair bit of resources, there are ways to get the program to work on ChromeOS. We will discuss the easiest of them all for this guide, which pertains to the Linux terminal in Chromebooks. Thanks to this in-built feature, Chromebooks have been made tenfold capable.
Therefore, all we need to do here is fire up Linux on your Chromebook, input the proper commands, and Blender will be installed in no more than a moment’s time. First, however, we have to address the elephant in the room here, and it’s all about Blender’s functioning capacity on ChromeOS.
To make it simple for you to understand the notion here, Blender should work great on Chromebook that are packing the following specifications. Those owning one of the many budget Chromebooks should read with caution, while people with high-end Chromebooks, such as the Asus CX9, can probably sit back, relax, and continue with the installation steps.
Note that these are currently the minimum requirements to run the latest version of Blender on ChromeOS.
- CPU: 64-bit quad-core CPU with SSE2 support
- RAM: 8 GB
- Display: Full HD (FHD)
- Peripherals: Mouse, trackpad or pen, tablet
- GPU: Graphics card with 2 GB RAM, OpenGL 4.3
- Model: Less than ten years old
With that out, let’s now talk about installing Blender on a Chromebook with the following steps.
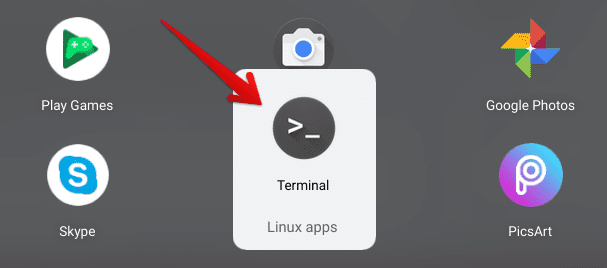
1. The first step is to fire up the Linux terminal. If you haven’t toggled on the feature already, check out how to install and configure Linux apps on ChromeOS for the full memo. However, if you’re already well-versed with Linux on your device, launch it to continue to the next step.

Opening the Linux Terminal
2. After opening the Linux terminal, the first thing that you’ll need to do is to check it for updates and upgrades as well. Oh, and beware of the fact that Blender is best installed on Linux terminals that are sporting the Debian Bullseye iteration. If you’re unsure about that, check out this tutorial and learn how to update your Chromebook’s Linux to Bullseye.
Use the following command to check for further updates in Linux. Copy it from here, paste it into your terminal’s command-line interface, and press the “Enter” key to continue.
sudo apt-get update && sudo apt-get dist-upgrade
Updating and upgrading Linux on ChromeOS
3. As soon as you’re done with the initial part of your Linux terminal’s update, let’s finally move forward with Blender’s installation. Commence the process by using the following command.
sudo apt-get install blender

Installing Blender on ChromeOS
4. Completing the previous step will jumpstart the Blender installation on your Chromebook. However, once the terminal has run the relevant checks, you will be asked for confirmation before proceeding with the installation. Press the “Enter” key, and the download of the 3D model creator will begin. You may need to wait for a fair bit now.

Confirming the installation of Blender
5. While the software installation can take a long time because of its substantial file size and depending on your internet connection, it will wrap up sooner or later, so rest assured.
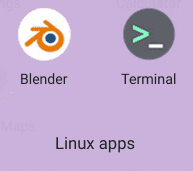
When you see your Linux username popping up on the screen again, head to your Chromebook launcher section and find the Linux “apps” folder.
The software should be ready to go from there. The following screenshot represents what the Blender app icon looks like on ChromeOS.

Blender app installed
That’s about it! Upon following the guidelines outlined above, you should have the Blender app successfully installed on your Chromebook now. Take it for a spin and observe how it plays out on this sleek operating system.
Using Blender on ChromeOS

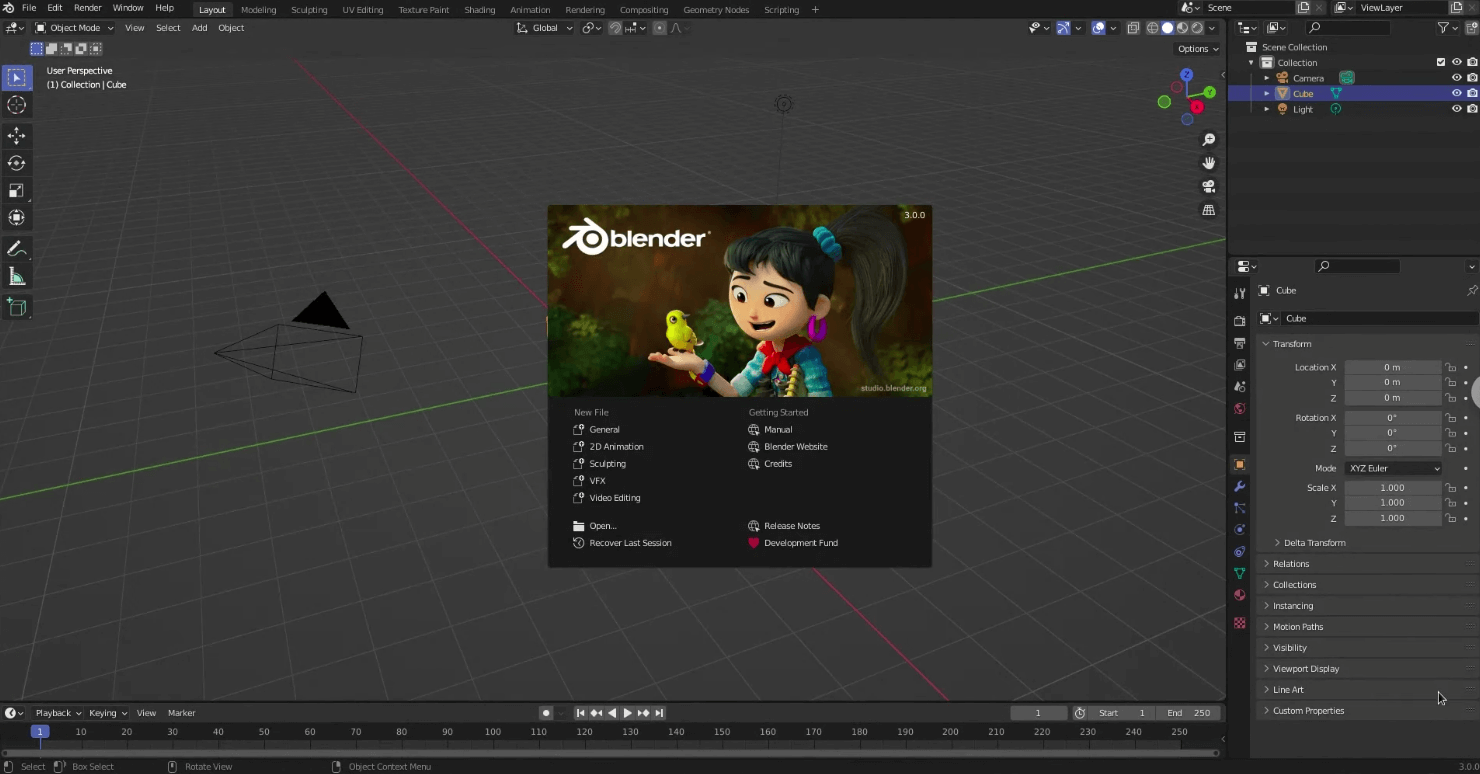
Blender’s user interface on ChromeOS
As soon as you start up Blender on your Chromebook, the screen that you see above is what you’ll be visualizing on your screen. The introductory prompt will show you the various capabilities of Blender at a glance so that you can get into the niche of your preference right away.
The following are the program’s core features in question that you can start working away with immediately after starting it up.
- General
- 2D Animation
- Sculpting
- VFX
- Video Editing
There’s one crucial point to note here. All files you wish to upload to Blender must first be transferred to the “Linux files” folder on your Chromebook. Otherwise, the app won’t detect uploadable files from your local storage.
Other than that, Blender is easy to get into. Although the base purpose of the software goes pretty in-depth, the program’s user interface is a cut above the regular ideology. It even features a tutorial system that teaches and familiarizes new users with the whole environment that Blender creates for people.
Now that you’re well aware of Blender’s installation on ChromeOS, you can hop online and search for tutorials on how to get better at using Blender if you’re a novice in this field. Reach us in the comments section and discuss your expertise with the software. We’ll now be concluding this expansive write-up.
Conclusion
Chromebooks are no slowpoke when it boils down to compatibility with top-tier software, such as WordPress, Kali Linux, OpenShot Video Editor, LumaFusion, and Lightworks. The courtesy here is the in-built Linux terminal that makes it possible for all these programs and apps to be installed on Chromebooks.
- If you have a hard time finding Linux apps to install on ChromeOS, check out our guide on installing a Linux app store on a Chromebook for the best results.
In this guide, we’ve discussed the installation and use case of a top-rated 3D model creation software called Blender, recognized worldwide as the go-to solution for the domain in question. Do let us know in the comments section ahead if this article managed to help you out. As always, Chrome Ready wishes you good luck!
- Before you go: How to install Arduino on Chromebook.
