Chromebooks are loaded to the brim with non-pareil functionality, sporting the likes of the Google Play Store, Linux, and, of course, the Chrome Web Store for an array of top-tier Chrome extensions. If you require video editing software on ChromeOS, look no further than the guide about installing Kdenlive on ChromeOS.
Being one of the most popular operating systems in the world at the moment, ChromeOS is famous for its sturdy founding principles of speed, security, and stability. Yet, Chromebooks — devices that come with pre-installed ChromeOS — are entities that have been hit with ransomware. That says a lot about the overall standard that Chromebooks have upheld.
For now, though, let’s go over all things Kdenlive, including its most prominent features and how to install the program on your Chromebook. In the meantime, though, here’s our in-depth tutorial on OpenShot Video Editor—a competitor of Kdenlive.
- Don’t miss: How to use video stabilization in Google Photos.
Best features of Kdenlive
Kdenlive is labeled as one of the top 20 Linux apps to install on a Chromebook. Of course, such a claim isn’t made without due reason. Multiple aspects of Kdenlive allow the software to stand out and set itself apart from the rest of its competition. Let’s get into all of that now.
Completely free, open-source editor
First, its open-source build makes Kdenlive one of the best video editors out there. This means that any developer who’d like to contribute to the software’s source code would be welcome with open arms in this regard. Moreover, Kdenlive is free to download, install, and use across various platforms.
When any application is open-source, it automatically signals the creative freedom that the app in question would sport for its users. Kdenlive is rich in this respect, allowing individuals to tweak the program in any way they’d desire.
Moreover, the framework that the video editor employs also happens to be open-source, and the proprietary software that the latter further relies on is also open-source. Quite the charming scenario here, isn’t it? Built with simplicity in mind, Kdenlive is best for casual users and experts alike, provided how feature-rich it is in the grand scheme of things.
- Would you like to know what else is open-source? STM32CubeIDE. Find out how to get it in the interlinked guide.
Format flexibility
The developers state on the official Kdenlive website that the software is built off FFmpeg libraries. This allows the video editor to support the majority of audio and video formats, thereby making the whole affair seamless for the person on the other end.
Moreover, due to the presence of these potent libraries, end users do not have to delve into re-encoding footage or even converting clips from one format to the other. Kdenlive tends to make things easier for individuals to upload and download videos in the format of their preferences, similar to how VLC Media Player does its job.
Highly customizable user interface
Next up, we’ve got the customizability facet of Kdenlive to talk about here, and this is where things get remarkably interesting. It’s possible to arrange the layout of the whole graphical user interface of the video editing software on your end, so you can experience Kdenlive just the way your preferences want you to.
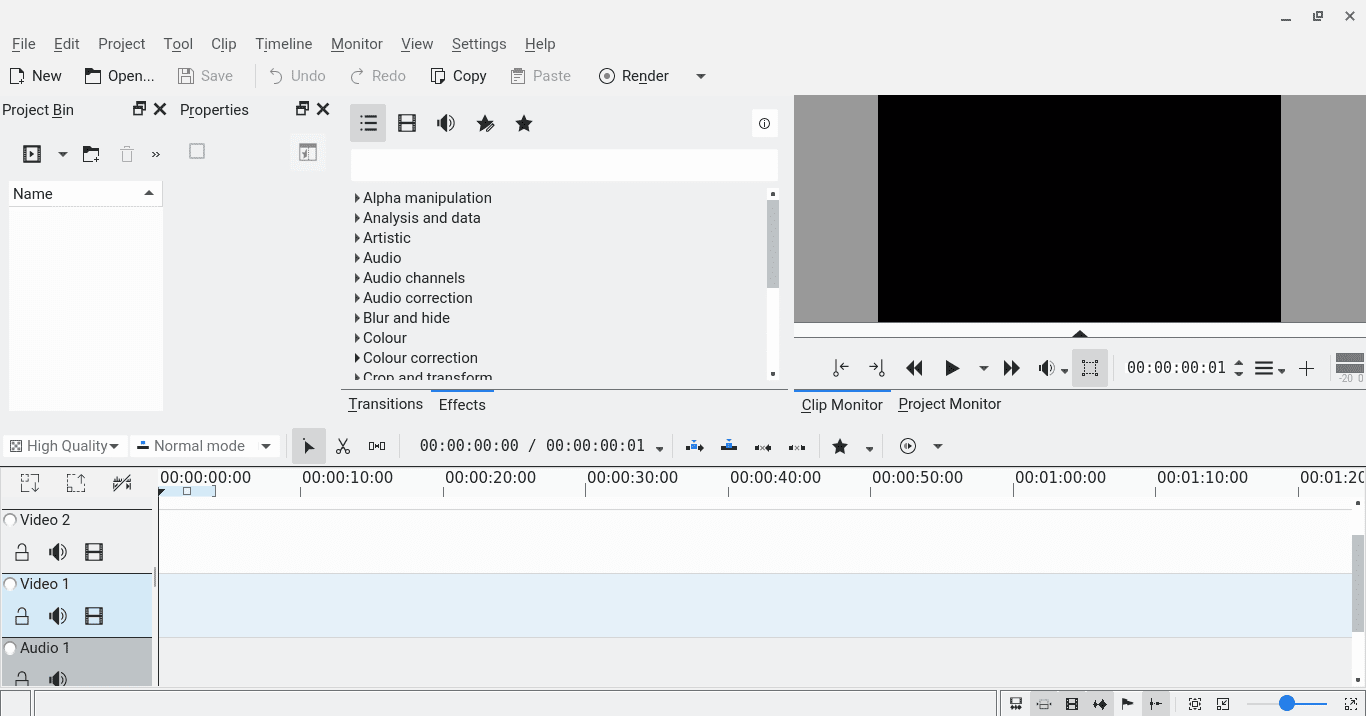
Feel free to make the program adapt to the nuances of your workflow by heading over to the “View” tab in the main menu of Kdenlive. Once done, you can effortlessly change how the whole interface is laid out to something that suits your style the most. It’s easy to tweak and relatively undemanding to follow through with.
Depending on your preferences, there’s even the added ability to switch on dark and light themes in Kdenlive. The theming engine of the software makes the extra effort a possibility for users of the software.
Time-saving shortcuts
Similar to how ChromeOS benefits from the best keyboard shortcuts, Kdenlive features its array of time-cutting shortcuts too, such as “Go to Clip Start,” “Go to Clip End,” “Group Clips,” and even “Go to Next Snap Point.” The best part is that you can create keyboard shortcuts to form your unique method of due convenience.
In-depth title creator
We’re not entirely done yet with what Kdenlive is capable of here. If you’re editing YouTube videos for your channel or working on a freelance project for someone else, you will undoubtedly need titles for your footage. Thankfully, the program in question comes loaded to the brim regarding titles and their versatility.
Feel free to add images to your title using a Unicode decoder, template support, various design features, outlines, colors, shadows, line spacing, letter spacing, alignment, distribution, and text animation features. The sky is the limit when Kdenlive is in question, and there’s no doubt about it moving forward.
Painless backup automation
If you struggle with timely backups or anything like that, Kdenlive offers a straightforward solution to your otherwise trivial worries. Perhaps this is one of the best features of the video editor in question. Like Microsoft Word — a part of Microsoft Office — Kdenlive backs up your progress after every other moment or so.
This paves the way for never losing work progress during all the time spent brainstorming on a particular project. The thoughtful functionality is miles ahead of Kdenlive’s counterparts, and we urge you to try it.
A wide array of effects
Lastly, from thematic effects and color corrections to audio adjustment and standard transform methods, Kdenlive is generous in stylizing your videos. Not just that, but there’s the added inclusion of keyframing, too, whose effects can be applied to change the metrics of your video over time.
Installing Kdenlive on a Chromebook
Kdenlive can be installed on ChromeOS with the help of the in-built Linux terminal. If you haven’t tried this functionality on your Chromebook before, you may need to set up and configure Linux apps beforehand. However, there’s a slim chance that Linux and Play Store might not support your particular device.
- Check out our guide on Chromebooks that run Android and Linux apps for full disclosure.
With that out of the way, let’s move on to the installation steps of Kdenlive, which will walk you through the whole process. We advise following the guidelines until the end for the most favorable results.
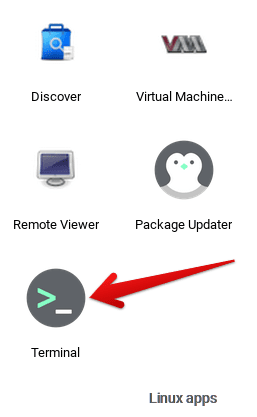
1. The first step is to open up the Linux app on your Chromebook. This can be done from the launcher section or with the help of the “Search” feature within the ChromeOS interface.

Opening the Linux Terminal
2. As soon as you’ve launched the terminal app, the very first thing that we advise doing is checking for updates. Type in the following command to update your Linux terminal. You will be asked for confirmation halfway along the process, do press the “Enter” key to let this step go by swimmingly.
sudo apt-get update

Updating the Linux terminal
3. We believe now would be an excellent time to initiate the installation of Kdenlive on your Chromebook now that you have the Linux terminal up to speed. Use the following command to commence the download. Do note that, similar to the previous step, you will be required to confirm the installation.
sudo apt-get install kdenlive

Installing Kdenlive
4. Kdenlive is a reasonably substantial application in the context of the file size, so it might take a while before Linux fully installs it on your Chromebook. However, when it’s done, you should see the following app icon in the Linux apps folder. This is your cue to acknowledge that the app has been successfully installed on the device.

Kdenlive installed
That’s about it! You should now be able to fire up Kdenlive on your device effortlessly. Simply click on the app icon as you see it in the image above to get the video editor to start its working operations.

Kdenlive on ChromeOS
Conclusion
Chromebooks are home to some of the best Google Play Store apps in the business, allowing ChromeOS users to indulge in a world of convenience and not miss out on anything substantial. Not only that but thanks to the presence of the Crostini Linux terminal, it’s now possible to get desktop-grade programs on Chromebooks with zero extra hassle.
In this guide, we’ve taken a close, hard look at Kdenlive, its most stand-out features, and how to get it to work on a Chromebook. Do let us know in the comments section ahead whether you got the top-shelf video editor to work on your end. As always, Chrome Ready wishes you good luck!
- Next up: The 5 best video players for Chromebook.
