From the best wireless keyboards to high-quality mouse options to hook up your Chromebook, the sky is the limit when it boils down to the accessibility features prevalent in ChromeOS. It’s practically possible to use ChromeOS with several other external devices, including headphones, cameras, monitors, and other essentials.
Now, if you’re looking to create shortcuts on external keys on Chromebook specifically for the keyboard that you’ve connected to the device wirelessly, you’re definitely in the right place. The process is quick and easy and warrants simple steps to follow. We’ll walk you through the necessary guidelines, so you won’t have to struggle with the process.
Let’s get started right away.
- In the meantime: How to create animated GIFs and movies in Google Photos.
Creating shortcuts on external keys on a Chromebook
To begin, you must have your Chromebook connected to an external keyboard. This can be done wirelessly with Bluetooth or by a wired connection—whatever fits the scenario more. As soon as you’re past the initial step, your next task is to open the “Settings” section. The latter can be found in your launcher area and on the shelf.
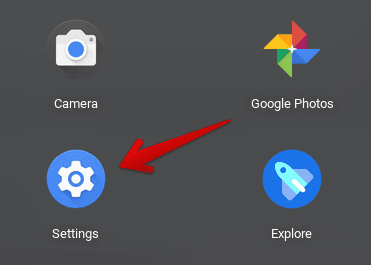
Opening “Settings”
After opening the “Settings” app, click on the “Device” tab in the side panel and follow it up by selecting “Keyboard.” You should be able to get this done with the help of the following screenshot.

Accessing the keyboard section
After getting into the “Keyboard” section, you will be taken to a section where it’ll be possible to assign your external keyboard’s keys to different vital functions. The most important key you will need to tweak the function pertains to the “Search” key. Using a Windows keyboard, you’ll find the Windows key instead of “Search.”
Therefore, you can map the Windows key to perform another function instead of making it useless. Use the “Keyboard” section within your Chromebook’s settings to assign the “Search” key to another function, such as Caps Lock. Besides, the latter isn’t present on a regular keyboard Chromebook.
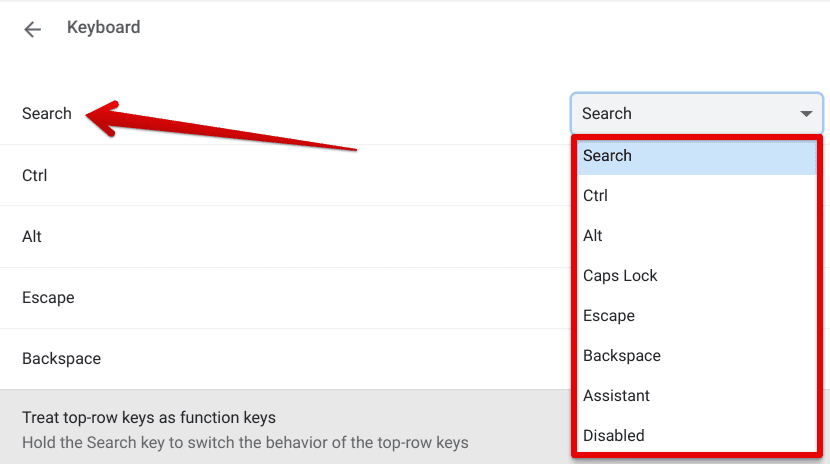
Assigning a different key function to the external keyboard
Feel free to switch up the key for another function out of the available ones. As you can comprehend from the screenshot below, there is a total of 7 keys that you can map your external keyboard’s keys to. These are:
- Search
- Ctrl
- Alt
- Caps Lock
- Escape
- Backspace
- Assistant
In addition, it is also possible to leave a particular key disabled on your end, so it doesn’t interfere with your working routine. However, we doubt anyone will leave a key as good as nothing when it can be utilized to make life easier using a Chromebook.
Go through the possibilities of this multi-faceted key designation, and don’t hesitate to experiment with different key functions to determine what works best for you. When you’re done, exit the window and continue using your quality keyboard effortlessly.
Before we conclude the article, it’s worth talking about another potential method that you can use to utilize your external keyboard and create shortcuts for it in the context of Google Chrome extensions. Let’s take a look at it in the next section.
Creating shortcuts on external keys for Chrome extensions
Your internal and external keyboard can be used for a highly convenient purpose if we take a look at Google Chrome extensions for a moment or two. It turns out that there’s a distinct section within the “Extensions manager” area of Chrome that allows you to create shortcuts for opening and working with the various Chrome add-ons.
To learn how to proceed from here on out, open Google Chrome on your end, click on the “Customize and control Google Chrome button,” hover over the “More tools” button, and finally click on “Extensions.”
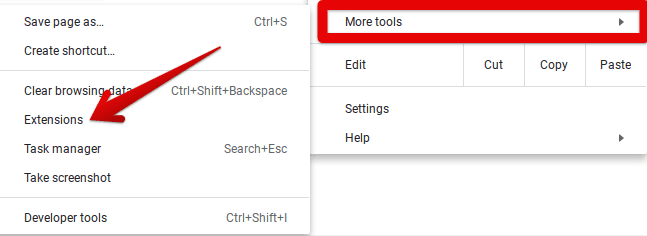
Clicking on “Extensions”
Once done, you will be taken straight to the main extensions page on your Chrome browser. Here, the aim is to click on the hamburger icon in the page’s top-left corner and proceed by clicking on “Keyboard shortcuts.”
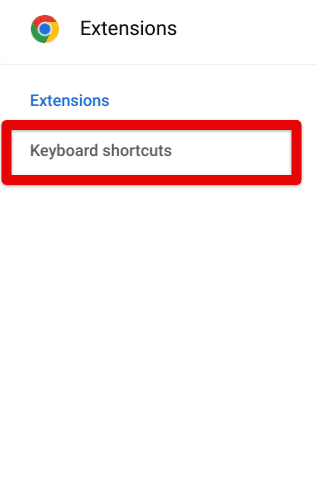
Clicking on “Keyboard shortcuts”
After completing the last step, you can painlessly create keyboard shortcuts on external keys on your Chromebook for Chrome extensions. A page will appear on the screen, allowing you to tweak the various shortcuts associated with all of your Google Chrome extensions.
Take a look at the following screenshot to clear this instance up with the help of an example. The extension at hand is Clipboard History Pro — one of the 5 best Chromebook clipboard managers to maximize productivity –, and it allows us to assign shortcuts on our external keyboard for many of its tools and features.
For instance, we can set the “Lock Now” functionality to “Ctrl” and “O,” and that would do the trick for us in terms of restricting access to the contents of the clipboard. Please feel free to take a close, hard look at other options and determine the best ways to utilize this keyboard creation convenience yourself.
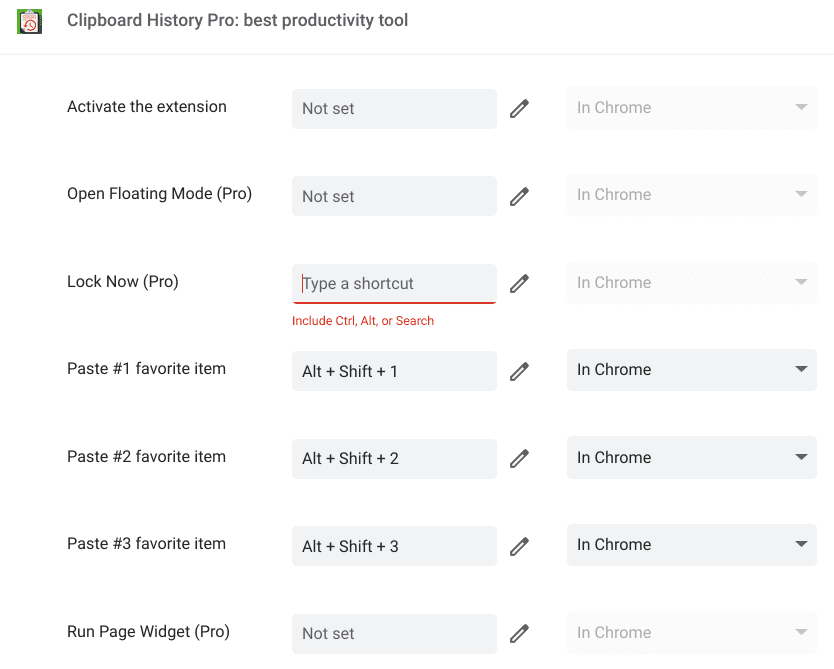
Creating a shortcut on external keys
That’s all there is to know about creating shortcuts on external keys on Chromebook.
Conclusion
Chromebooks allow users to make the best of the operating system by giving them a ton of Google Play Store apps and Linux software to work with. Today in 2022, ChromeOS can run WordPress, Kali Linux, a high-quality video editor called OpenShot, and much more.
Moreover, the rich abundance of specially curated shortcuts on Chromebooks allows users to get around the user interface more quickly and smoothly. Now that you’ve learned how to create shortcuts on external keys on a Chromebook let us know your thoughts in the comments section.
Like always, Chrome Ready wishes you good luck!
- Before you go: Top 5 USB Piano keyboards for Chromebook.
