Caps Lock is a useful feature that can help you type in all capital letters, but it can be confusing to turn on and off on a Chromebook. In this guide, we’ll show you how to enable and disable Caps Lock on your Chromebook, so you can easily switch between lowercase and uppercase letters.
Understanding the Chromebook keyboard
Before we get into the nitty-gritty of Caps Lock, it’s important to appreciate the unique layout of the ChromeOS keyboard. Unlike traditional keyboards, Chromebooks often skip the Caps Lock key in favor of a search or launcher key. At first, I found this design choice baffling. However, I’ve grown to appreciate the cleaner, more streamlined keyboard that prioritizes web navigation and Google Assistant.
How to Turn On Caps Lock on a Chromebook
Now, for the moment you’ve been waiting for: turning on Caps Lock. It’s surprisingly simple once you know the secret handshake. Okay, it’s not a handshake, but it’s just as easy:
- Press and hold the
Altkey. - Tap the
SearchorLauncherkey (the one with the magnifying glass or circle icon).

Turning on CAPS Lock on Chromebook
Voilà! You’re now in Caps Lock mode. Go ahead, type an emphatic EMAIL or draft a strongly worded tweet; your Chromebook is ready for your all-caps needs.
Turning Off Caps Lock
All good things must come to an end, including your need for continuous capitalization. To turn off Caps Lock:
- Simply tap the
SearchorLauncherkey again.
Yes, it’s that easy. Your Chromebook will return to its default state, ready to handle all your typing needs, capital or otherwise.
Why I love (and sometimes dislike) this feature
As someone who appreciates minimalism in design and function, the Chromebook’s approach to Caps Lock grew on me. It’s a testament to Chrome OS’s commitment to providing a streamlined, web-first user experience. However, I must say, the absence of a dedicated Caps Lock key threw me off initially. It felt like a break from tradition, a small yet noticeable shift in how I interact with my device.
But after some time, this feature became second nature. It’s just one of many Chromebook quirks that I’ve come to love. That said, I understand why it might be frustrating for new users or those who rely heavily on keyboard shortcuts.
Customizing your own keyboard shortcuts
One of the joys of using a Chromebook is the ability to tailor it to your personal needs and preferences, including the creation of your own keyboard shortcuts. This feature adds a layer of personalization that can enhance your productivity and make your device feel truly yours. Let’s break down how you can customize your own keyboard shortcuts on a Chromebook:
Accessing the Keyboard Settings
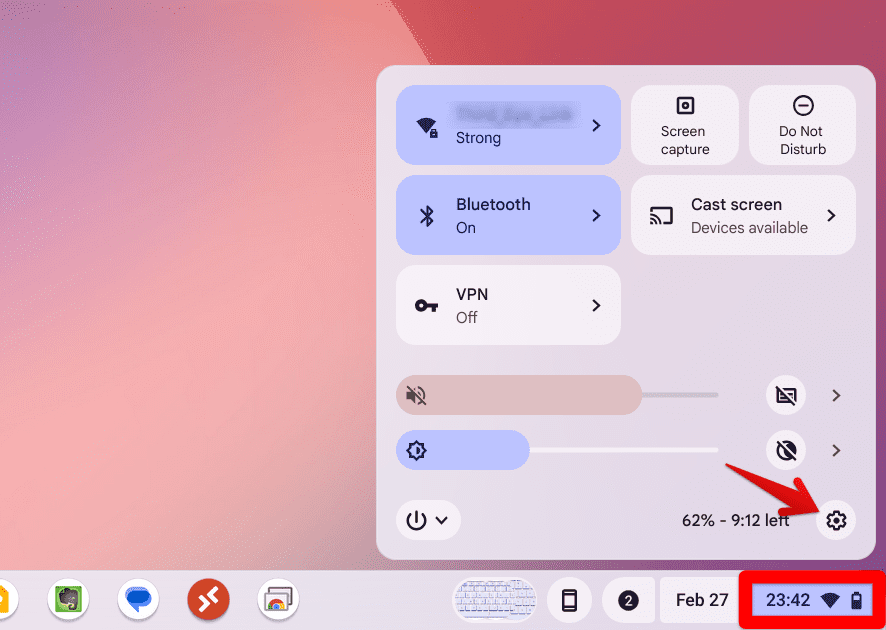
- Open your Chromebook’s settings: Click on the time in the bottom right corner to open the system menu, then click on the gear icon to open Settings.

Launching ChromeOS Settings
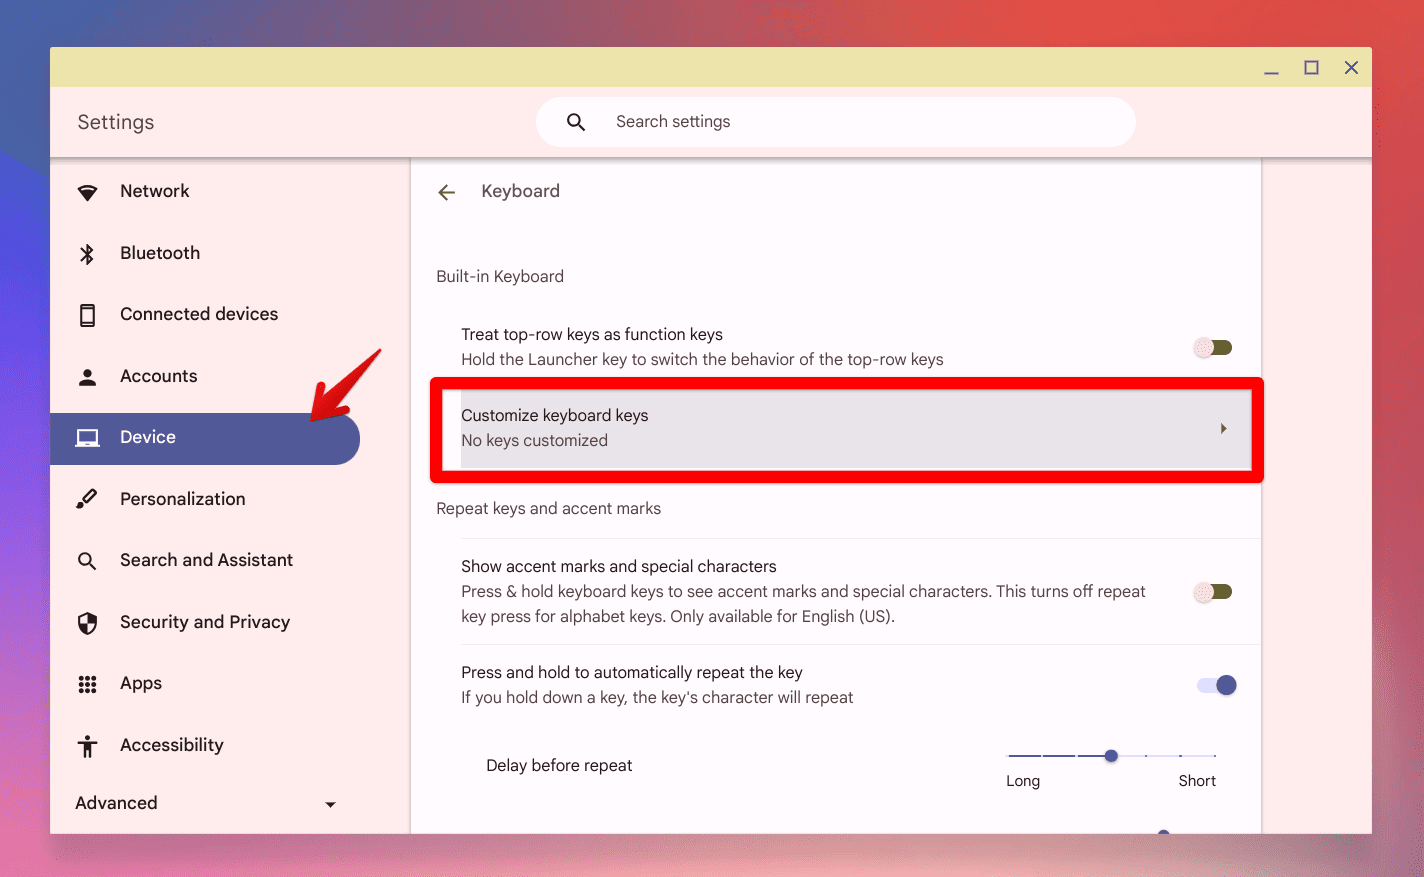
- Navigate to Device settings: In the Settings menu, look for the “Device” section and click on it.
- Find the Keyboard settings: Under “Device,” you should see an option for “Keyboard.” Click on this to access the keyboard customization options.
Creating Custom Shortcuts
Once you’re in the Keyboard settings:
- Look for the ‘Customize keyboard keys’ or ‘Keyboard shortcuts’ option: Depending on your Chromebook’s OS version, you might see a section dedicated to customizing or creating new shortcuts. Click on it.
Customizing keyboard keys on ChromeOS
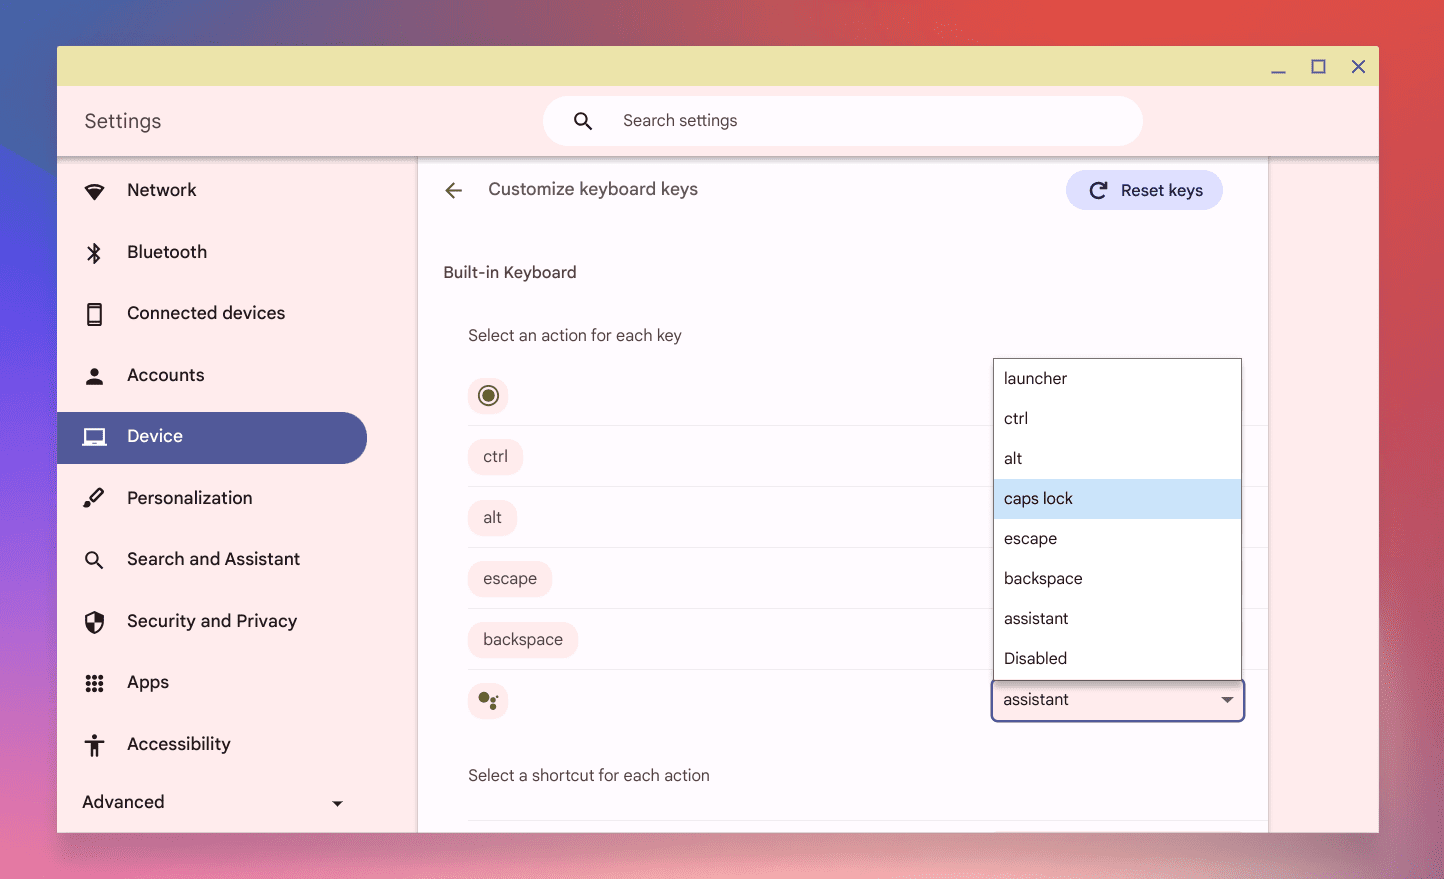
- Enter customization mode: Here, you can assign new functions to existing keys or modify shortcuts for different actions.
- Choose your action: Choose any key that you may wish to forego its functionality and set it as Caps Lock. From the image below, you can see I have set the “Google Assistant” key as Cap lock.
Customizing ChromeOS keyboard keys to apply Caps lock
- Save your shortcut: After choosing your key, exit the settings.
Test Your New Shortcut
- Try it out: Once you’ve set up your new shortcut, give it a test to ensure it works as expected. If it doesn’t, revisit the Keyboard settings to adjust it or check for any conflicts with existing shortcuts.
Why I Find This Feature Invaluable
Customizing keyboard shortcuts on my Chromebook has been a game-changer for me. It allows me to streamline my workflow and access my most-used functions with ease. Whether it’s launching my favorite writing app or opening a new browser window, these shortcuts save me time and keep me focused on my tasks. Plus, the process of setting them up is straightforward and user-friendly, making it accessible even for those who aren’t tech-savvy.
Conclusion
Enabling and disabling Caps Lock on a Chromebook is a simple process that can be done in just a few steps. By following the instructions provided in this guide, you can easily switch between lowercase and uppercase letters, making it easy to type in all capital letters when needed. Additionally, by understanding how to use Caps Lock effectively, you can improve your typing speed and accuracy.