The Crostini Linux terminal is one of the most functional parts of ChromeOS, providing developers with a fully integrated programming environment and a depth of functionality for multi-faceted use cases. However, if your work revolves around Linux on ChromeOS, you better know your available backup options.
That is to say, things do not take long to go south when you’re coding and trying an experimental new program. Crashing is imminent in the field of writing software, and sooner or later, you’re going to have to taste this dish. However, if you’re already cautious about such moments of misfortune ahead of time, you might never have to go in loss.
Keep reading to discover an easy-to-understand approach to backing up a Crostini Linux installation on your Chromebook. In the meantime, consider checking out how to customize the Linux terminal on a Chromebook for added results.
- More from Chrome Ready: Top 20 Linux commands to learn and use on your Chromebook.
Why should you back up a Crostini Linux installation?
Linux is one of the most desirable features ever to grace ChromeOS. It is now possible to work with the best Linux apps, run WordPress, install Kali Linux, and utilize high-quality software such as OpenShot to your heart’s content.
In short, you can do various things with Linux now that the containerized feature has earned a spot at the forefront of Chromebooks. Its installation is almost painless—warranting you to make a couple of clicks—while running the whole thing is even easier.
That said, when you’ve ventured beyond the limits of Crostini Linux on your Chromebook and are now running some of the best Linux distros instead, one of the first things you should be wary of is its backup functionality. Simply put, you never know when a crash might disrupt your working environment and make you lose your hard-developed progress.
Additionally, dual-booting GalliumOS with the help of the command-line installer chrx can often lead to issues where it simply might become a matter of necessity to have your operating system fully backed up. Therefore, now that you have a clear idea of what we’re trying to achieve here let’s get on with the raison d’etre of the guide in question.
Backing up a Linux installation on Chrome OS – Simply explained
Thankfully, ChromeOS being the simplistic operating system, makes the affair quite effortless to approach in terms of backing up a Crostini Linux installation. All you need to do is head over to your “Settings” section, find the “Developers” button on the side panel, enter Linux’s settings, and proceed to back your stuff up.
To help make things easier to grasp, let’s break down these guidelines into the following steps, so you can duplicate them on your end without breaking a sweat.
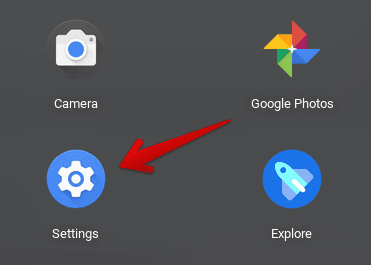
1. The first step is to open the “Settings” system utility on your Chromebook.

Opening “Settings”
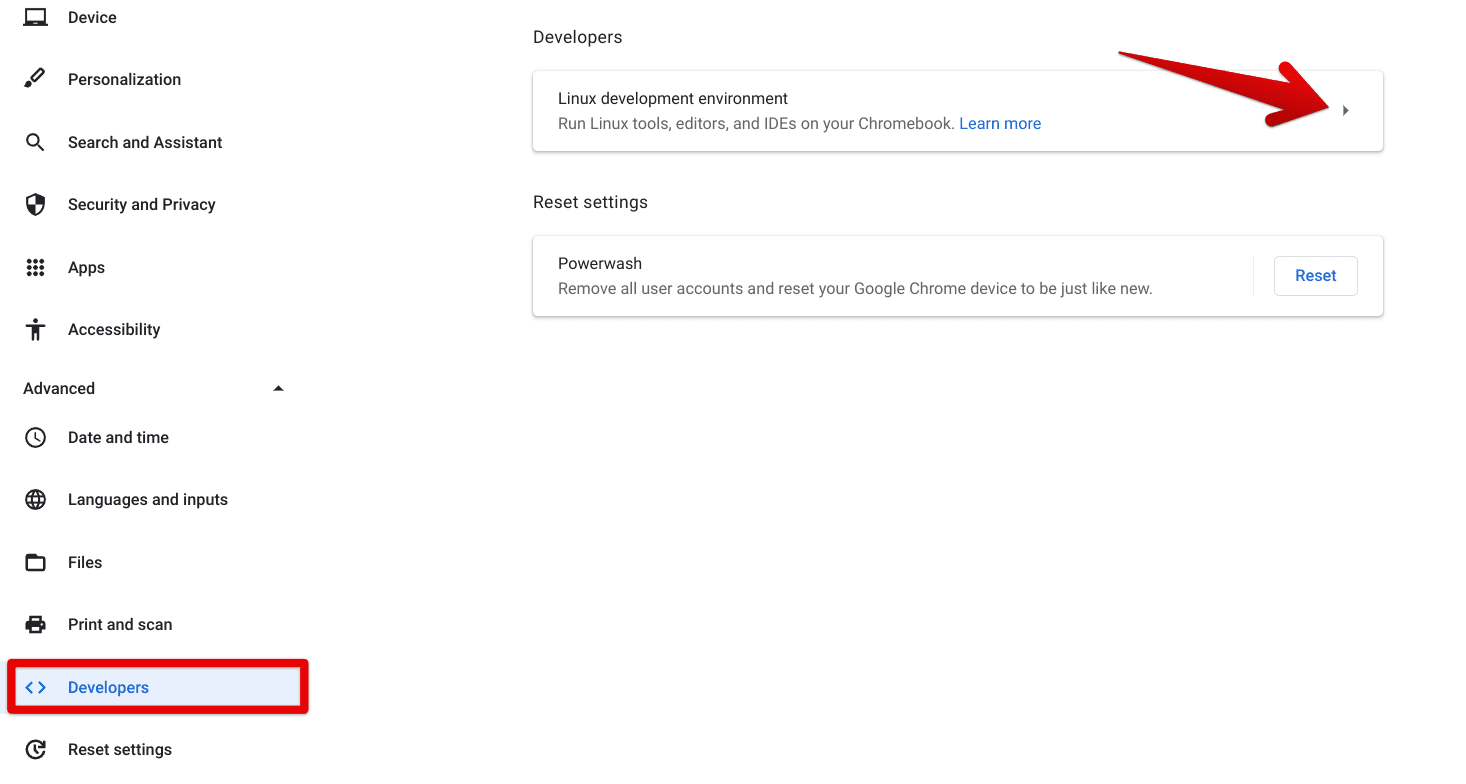
2. After that, you must click on the “Developers” section in the side panel. The latter will only be available after you select the “Advanced” drop-down button. Clicking on it will lead you straight to the section in question. Finally, click on the “Linux development environment” space to get to the next step. Check out the following screenshot for a visual explanation of how to get all of this done.
Please note that the “Linux development environment” option will only appear when you have installed the Linux container. If not, check out our guide on installing and configuring Linux apps for an in-depth tutorial.

Entering the Linux section
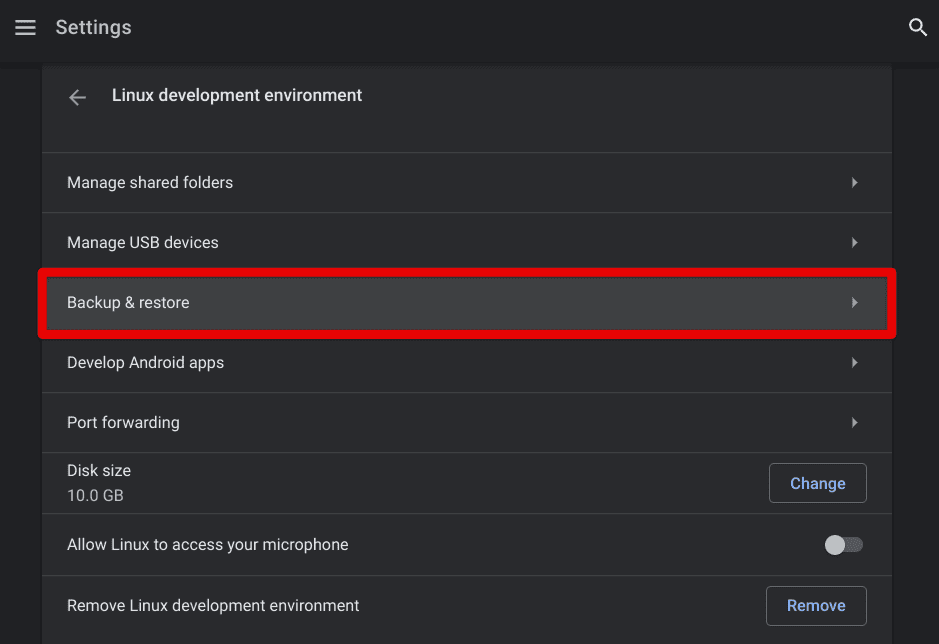
3. Next, you will need to click the “Backup and restore” button to continue to the next step.

Clicking on “Backup and restore”
4. Once done, the option to “backup” your Linux apps and files will be vividly apparent. Click on the button mentioned above, therefore, to get to the next step.

Clicking on the “Backup” option
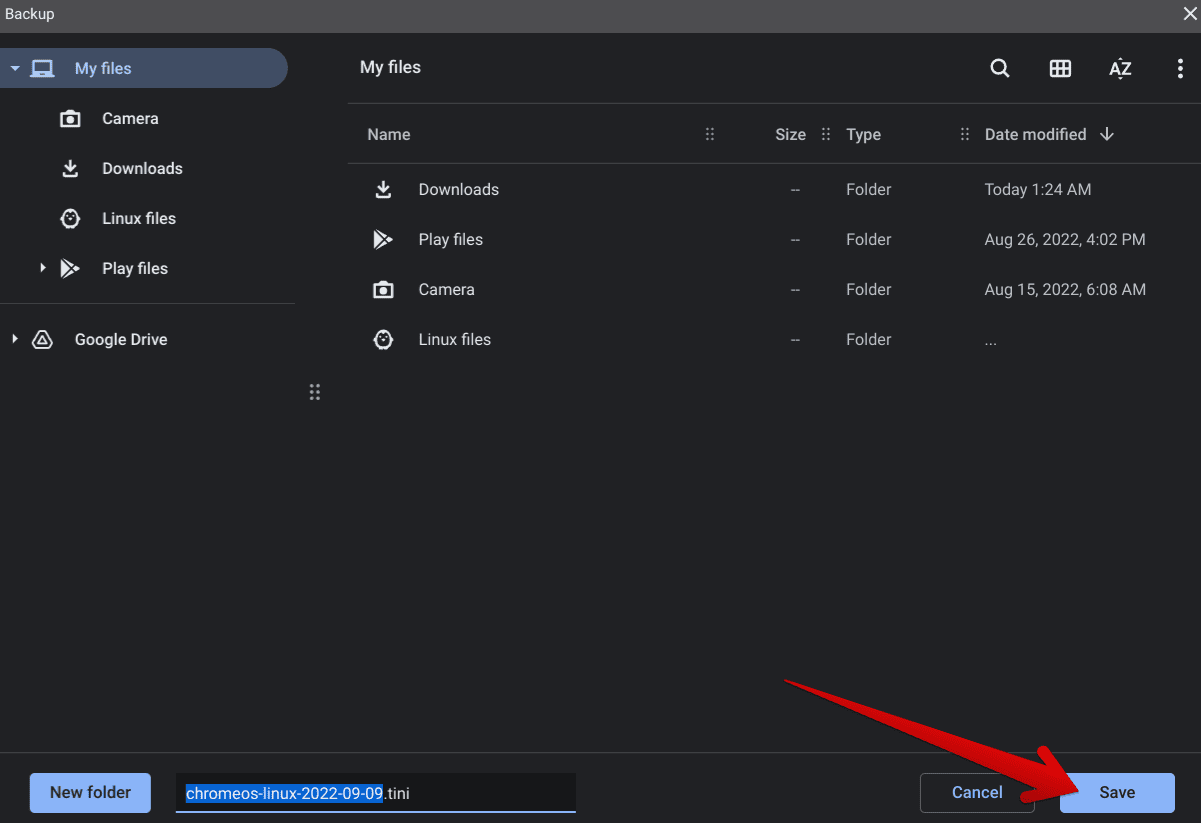
5. Clicking on “Backup” will open a window on your end where you will have to choose the destination folder for the Linux apps and files backup. Go ahead with whatever location suits you, and click “Save” to commence the backup.

Choosing the download location
6. After clicking on “Save,” a progress tracker will appear on the screen, taking you through the backup process. Depending on the backup size, you might need to wait a few minutes.
Linux apps and files backup progress tracker
7. As soon as you’ve been notified that the backup process was completed, open up the “Files” system app to look for your stored Crostini image file. It’s bound to be at the destination you picked before the backup.

Backup complete
That’s all about knowing how to back up a Crostini Linux installation on your Chromebook. The time is nigh to conclude the article.
Conclusion
As iterated in a distinct section in the guide above, the best method to mitigate a disaster is to prevent it. By acknowledging how to back up your Crostini Linux installation on a Chromebook, you can breathe easier while maneuvering in Linux while knowing that you’ve already taken care of the worst-case scenario.
The developer makes it relatively easy to back up your progress and save it to your Chromebook locally, or on Google Drive, so you can restore it anytime you need. Please let us know in the comments section below whether you found the write-up useful for your cause. As always, Chrome Ready wishes you good luck!
- In a parallel universe: How to use a Linux computer to recover your Chromebook.
