If you’ve been meaning to learn how to see USB drives in Linux on Chromebook, you’ve landed on the right web page. You’ll find it odd that Chromebooks don’t usually let the in-built Linux container recognize your external devices right from the get-go. Today, however, we’ll shortly be learning how to change that.
One of the top reasons to run Linux on ChromeOS resides with security. Due to an enhanced layer of protection, the famous sub-operating system working within Chromebooks negates the thought of a USB drive. After all, this highly dependable platform we’re talking about takes no chances in compromising security.
That said if we’ve learned anything from the top 20 Linux commands to use on your Chromebook. It’s definitely how Linux is a flexible operating system that can be navigated and altered at will. With no further ado, let’s dive into the guide and talk about USB detection in a Linux environment.
- More from Chrome Ready: How to set up and configure Linux on a Chromebook.
Make Linux on Chromebook detect the USB drive
For the Linux container on your Chromebook to be able to recognize USB drives and allow you to work with the inclusive files, the feature needs to be turned on first. That is to say, Linux doesn’t come pre-installed on ChromeOS. You must get to the “Developers” section of your “Settings” and install the container from there.
Once you’ve done that, you’ll plug in the USB drive you wish Linux to see on your Chromebook. After this step, you’ll flip a particular switch in your “Files” system app, and that’ll just be it. You can see your USB drive in Linux on ChromeOS effortlessly.
To help you grasp the matter more proficiently, we’ll break these instructions down into a three-step tutorial. Follow the forthcoming guidelines, and you’ll be all good to go. In the meantime, consider checking out a similarly styled guide called “How to enable mic for Linux apps on Chromebook.
Step 1. Installing Linux on the Chromebook
The first step to help us get to the bottom of the procedure is installing the Linux container on your Chromebook. Before we start, it bears noticing that not all Chromebooks made before 2018 are supported with the Linux feature right out the gate.
If you haven’t used the functionality on your particular device before, it might not be supported in the first place. Therefore, we have to nudge you toward those Chromebooks that run Android and Linux apps to confirm the suspicion.
If you do not have a Linux-compatible Chromebook, take things into your own hands and learn how to set up Linux manually. For now, though, follow the steps to learn how to toggle on Linux on a modern-day Chromebook.
1. Fire up the “Settings” system app to get started. Then, use the Chromebook Launcher to search for the utility if it isn’t pinned to the ChromeOS shelf already.
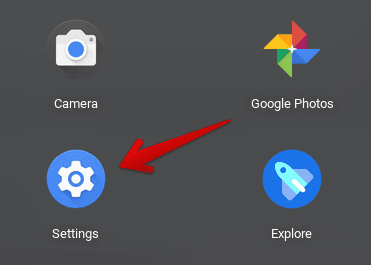
Opening “Settings”
2. The next step is to click on the “Developers” section from the side panel and select the “Linux development environment” option from the middle of the screen. Doing so should help you get going in the right direction.
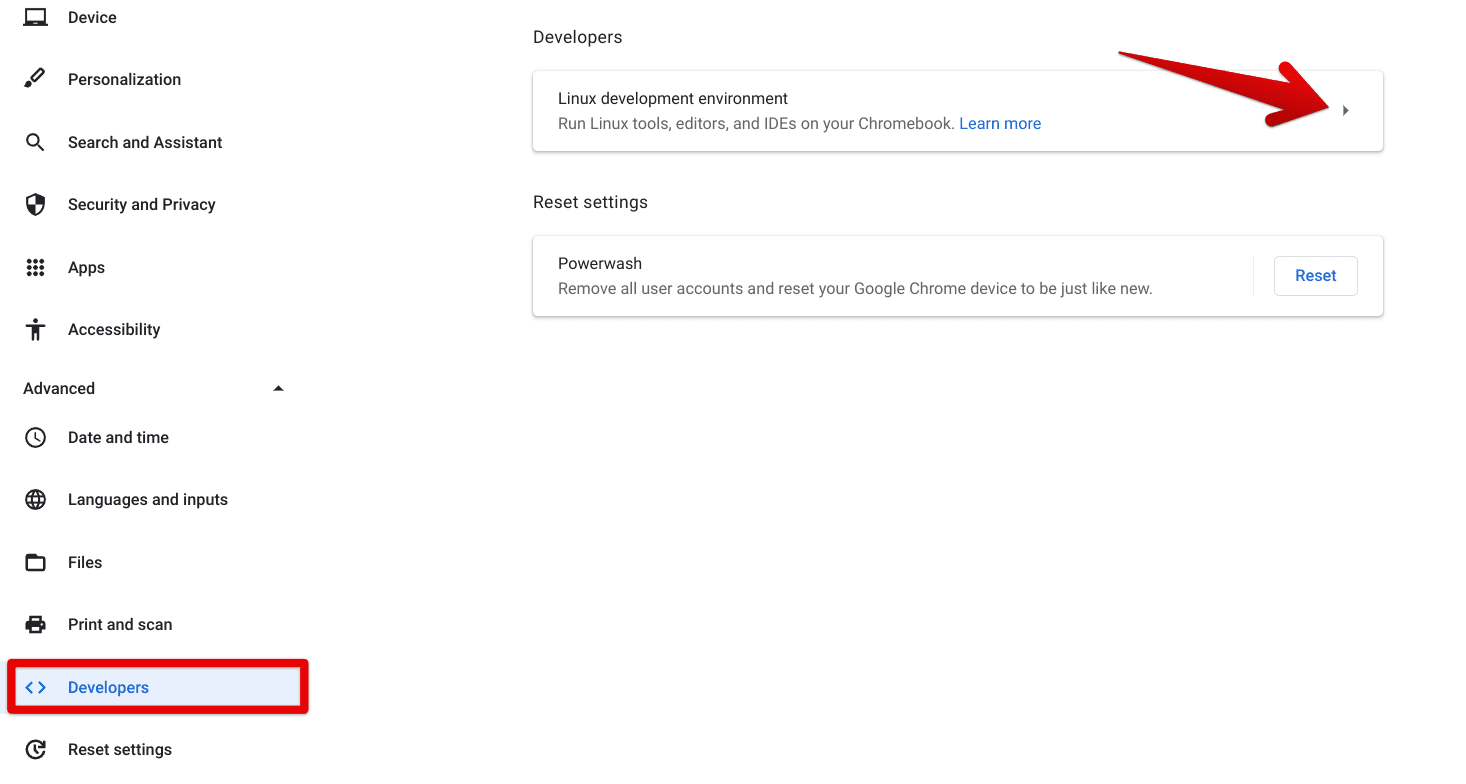
Entering the Linux section
3. After the last step, you should see a separate window surface on your end for installing the Linux terminal. Click on “Next” to get started here.

Clicking on the “Next” button
4. You now have to specify some parameters concerning installing the Linux terminal on your Chromebook. You’ll mainly be setting your username and allotting the disk space for the container. Choose whatever you prefer and click on the “Install” button to finally commence the installation.
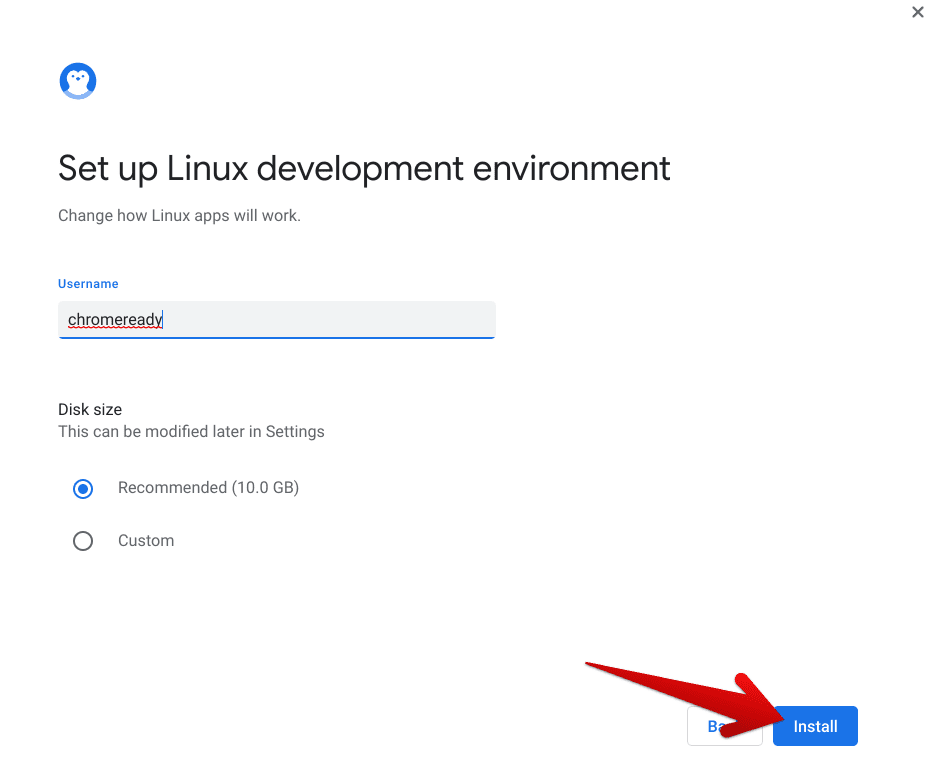
Tweaking the installation parameters
5. A progress bar will now appear, allowing you to track the installation of the Linux container. The process should conclude in no more than a couple of minutes.
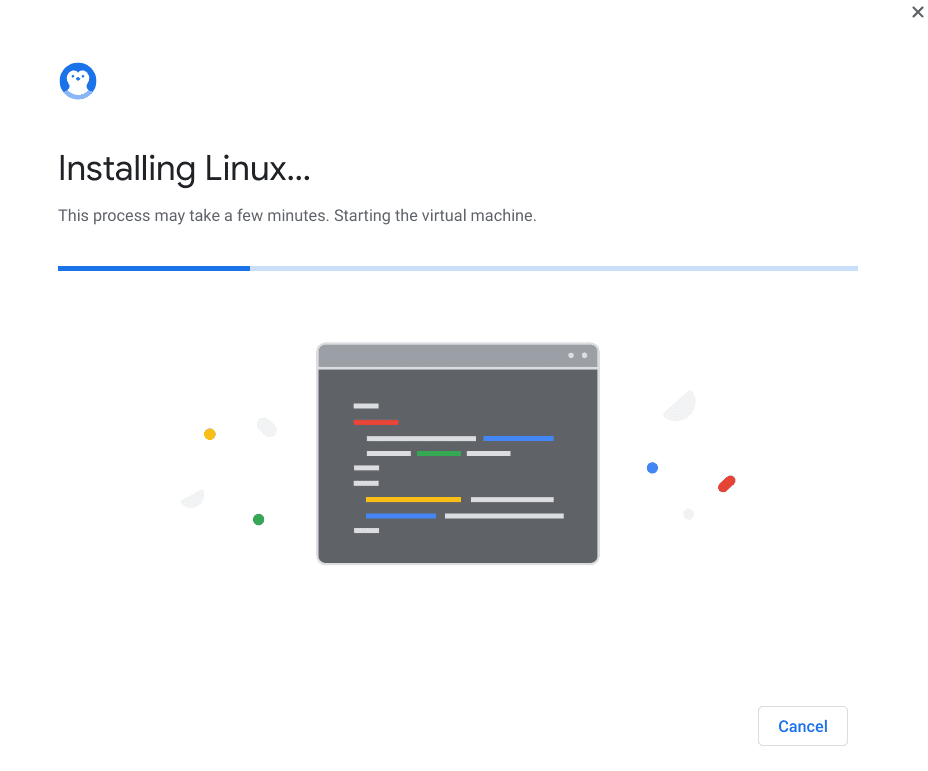
Installing Linux
That’s about it as far as the installation of this substantial Chromebook feature is concerned. To start on the right foot, we recommend updating and upgrading the Linux terminal before moving further.
Step 2. Getting the USB drive ready for Linux
After you’ve enabled the Linux terminal on your Chromebook, your next step should be to plug in the USB drive you wish to see from the perspective of the Linux container. Once you get that done, a prompt will appear from the screen’s bottom-right corner, affirming that ChromeOS has detected a removable device.
This isn’t where step number two ends, though. You now have to move forward and open the “Files” system app on your Chromebook. Once done, look for your recognized USB device in the side panel to the left of the screen, hover over it, and perform a double-tap on your trackpad to reveal more options. You should now be able to click on “Share with Linux.”
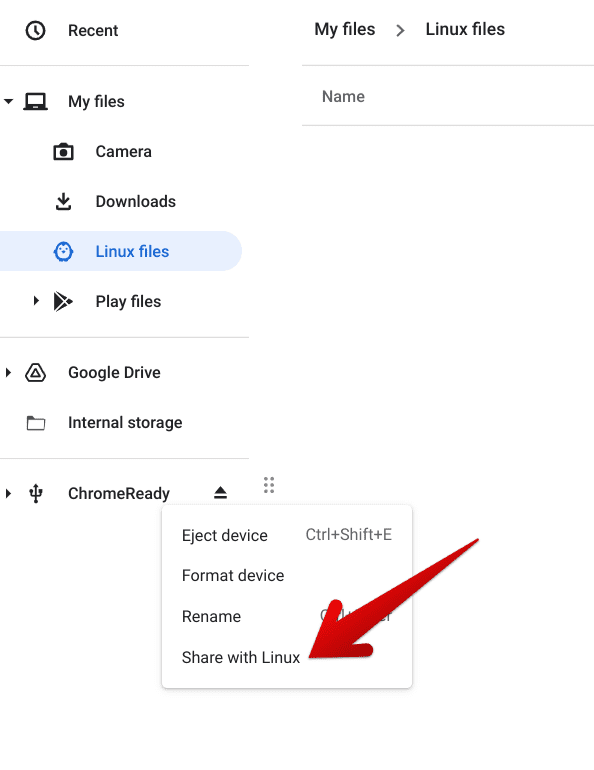
Sharing the USB with Linux
That’s about it for the second major step of the procedure. You should now be able to get your Linux container to recognize the USB drive that you’ve just plugged in. However, we are far from done yet. Let’s check what the following subsection has to inform us about.
Step 3. Share
You must do this critical step for most Linux apps, such as Etcher, GIMP, FileZilla, etc., to recognize the USB flash drive you plugged into your Chromebook.
Open the “Files” app, right-click on the USB flash drive and click “Share with Linux.”
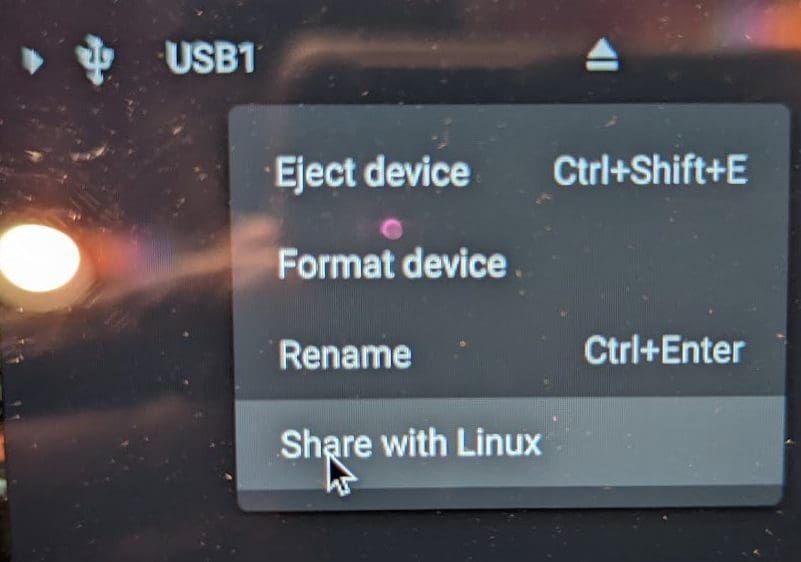
Share with Linux
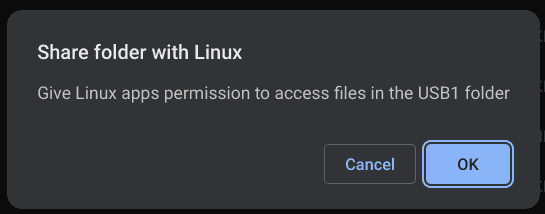
Share folder with Linux prompt
Go to “Settings” > “Developers” > “Linux development environment > Manage USB devices, and enable the USB drive.
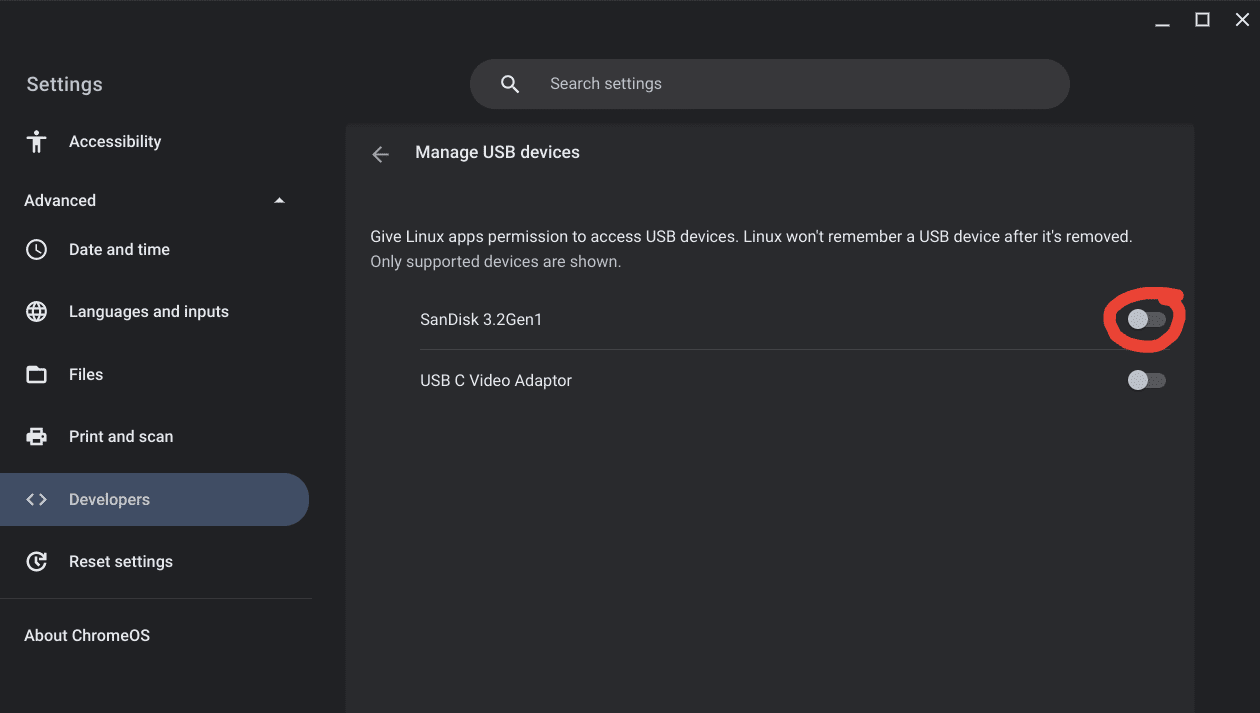
Manage USB devices on Linux
Step 4. Inputting commands in Linux to access the USB
Now that you’ve taken care of the most part, it is time to access the inserted USB through the Linux terminal. Follow the instructions outlined ahead verbatim for nothing but the best results.
1. The first step is evident and is all about opening up the Linux terminal. Go to your Chromebook Launcher and find the “Terminal” app to proceed.
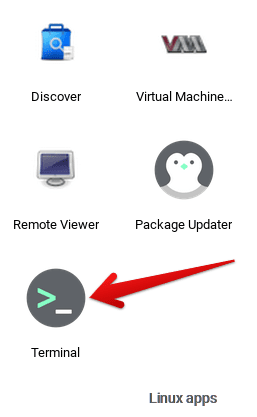
Opening the Linux terminal
2. From here on out, all you’ll be doing is inputting commands in the Linux terminal to access your USB. Get started by typing in the following and pressing the “Enter” key. We’ll first change the container’s directory toward our mounted external device.
cd /mnt/chromeos

Digging out the USB path in Linux
3. Right after that, we’ll try accessing the contents of the mounted device with the “ls” command. Type it in and press the “Enter” key. The terminal should return you with the directory “removable” in blue syntax highlighting.
ls
Using the “ls” command
4. We’ll now be changing our mainline directory to “removable.” Get this done quickly with the help of the following command.
cd removable/

Changing the directory to “removable”
5. After the last step, you should be within the “removable” directory. We’ll now be listing the contents of the directory, which should be able to point us right toward the USB drive.
Accessing the USB drive folder
6. The next step is simple. Just type in the command “cd” along with the name of your USB that you should see displayed on the terminal after the last terminal. In our case, it’s “ChromeReady,” so we’ll be typing in just that. You’ll shortly be able to start working with your USB drive that way.
cd "name of your external device"

Changing the directory to the USB drive folder
7. Finally, use the “ls” command for the final time, and you should be able to see your USB drive all opened up in the Linux terminal.
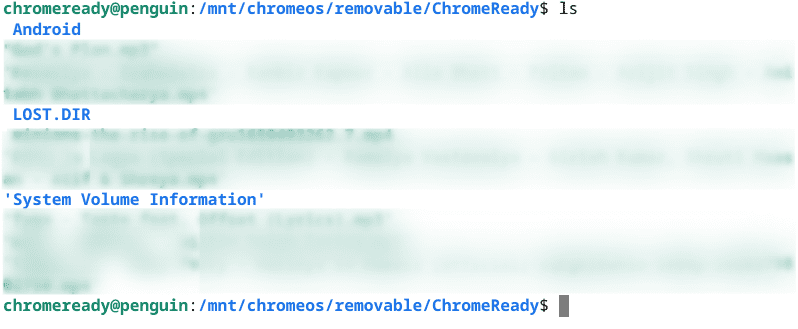
Seeing the USB drive in Linux on a Chromebook
That’s about it! You’ve successfully learned how to see a USB drive in Linux on a Chromebook. You can repeat the process with any external device you want if supported and enter its name accordingly at the right step.
That said, let us take a look at the following section. It talks about a nifty little tip for those users who can’t get the procedure outlined above to work on their end, despite following the instructions carefully.
What to do if the process doesn’t work?
We’ve found a trick to help you negate any problems you would be experiencing with this process on your Chromebook. There’s a particular Chrome flag that you can enable and allow the process in the previous section to work like wonders on your Chromebook.
The flag’s name is “Crostini GPU support,” which helps you work with even unsupported external devices on your Chromebook. To get started with it, type in the following in the address bar of the Chrome browser and press the “Enter” key. When you’re at the flag, click on the toggle beside it and choose “Enabled.”
chrome://flags/#crostini-gpu-support

Enabling Crostini GPU support for ChromeOS
After you switch on the flag, you will need to restart your Chromebook for the changes to apply. Take care of this whenever possible to move forward.

Restarting the device
Now that you’ve enabled the Crostini GPU support flag, please try the process again on your Chromebook. There’s a strong likelihood that you will be able to manifest favorable results now.
Conclusion
Linux is a helpful feature on Chromebooks that allows these sleek devices to try out desktop-grade programs and apps, such as the ever-fantastic OpenShot Video Editor and GIMP. Since there’s no proper storefront for installing the best Linux apps around, users may find the potential of the container reasonably limited.
However, that is not the case here. Installing a dedicated Linux app store is possible, given that you understand your way around with Linux commands. Now that you know how to see USB drives in Linux on Chromebook, do let us know in the comments section whether you like the ChromeOS Linux feature.
As always, Chrome Ready wishes you good luck!
