If you’ve been meaning to learn how to live stream to YouTube and Twitch from a Chromebook, you’ve come to the right place. This article will cover all the essentials you need to read up on before putting yourself out there and becoming a vibrant part of the live streaming community. Keep on reading for detailed information that this write-up thoroughly entails.
YouTube and Twitch are two of the biggest platforms for content creators to explore and relish. It offers a gateway for individuals to showcase their talent and exhibit themselves for millions of other people to watch and draw inspiration from. If you’ve thought it out to go down this path, you’ll need to know how to get started. The latter happens to be the focus of this article.
We’ll go over the best and most straightforward way to live stream to YouTube and Twitch from a Chromebook in the guide in question, so keep reading to find out how it’s done.
- Currently trending: How to install GIMP on a Chromebook.
Live streaming to YouTube and Twitch – Explained
Live streaming to YouTube and Twitch is pretty straightforward, even if you’re on a Chromebook. The latter, however, gets a bit complicated since you need to download Twitch’s first-party software called Twitch Studio to live stream to the world. This is geared toward Windows PCs and macOS and isn’t readily available for Chromebooks.
Fret not, though, since we’ll be dishing out a high-quality working alternative that will let you live stream to Twitch. As for YouTube, it doesn’t matter what platform you’re on. Enabling the live streaming functionality on YouTube is a piece of cake, so expect smooth sailing.
We will break the process down into two different parts, so you’ll find it easier to get to the section of your interest. Let’s start with YouTube first and then work our way to Twitch.
Part 1. How to live stream to YouTube
To live stream to YouTube, head over to the official YouTube website and make sure that you’re signed in with your account.
We don’t presume you’ll have to sign in again using a Chromebook since you already do that when you turn your device on.
As soon as you’re there, focus your attention beside YouTube’s search bar to find the “Create” button. Click on it to get to the next step.

Clicking on the “Create” button
Once done, a couple of options will appear on the screen for you. Proceed to the next step by clicking on “Go live.” Doing that should take you straight to the YouTube Studio.
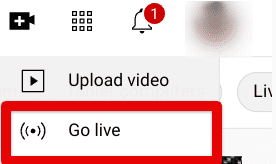
Selecting the “Go live” option
When you’re inside the YouTube Studio, you’ll be shown a prompt saying, “Live streaming isn’t available right now.” Don’t worry. That’s normal. You have to enable it to continue. Therefore, click on the “Enable” button to get to the next step.
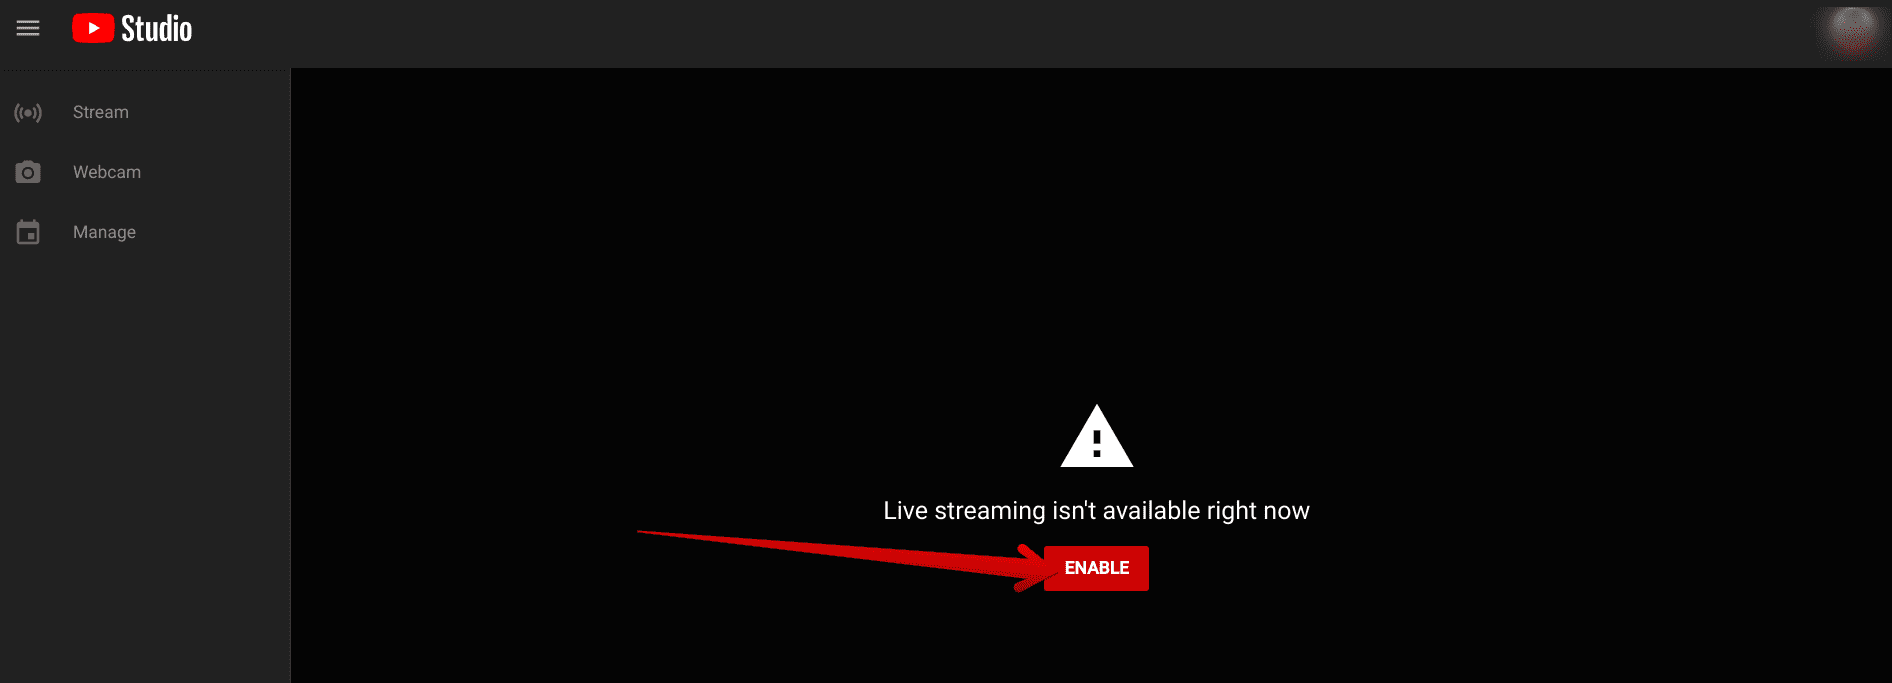
Enabling live streaming in YouTube Studio
YouTube Studio will now ask you to verify your phone number to become a creator on the platform. Click on the “Verify” button to open another window on the Chrome browser. There, fill in the relevant credentials and proceed to authenticate your reachable number.

Verifying the phone number
Once you complete this two-step phone number verification process, you’ll be able to get back to the YouTube Creator Studio tab and go forth with live streaming from there on out.

Phone verification completed
Since this is your first time trying to enable live streaming to YouTube, gaining access to the feature will take up to 24 hours. After the timer concludes, you can start live streaming instantly. You’ll be notified of the exact moment when the timer has run out via email so that you won’t skip any beats in this regard.
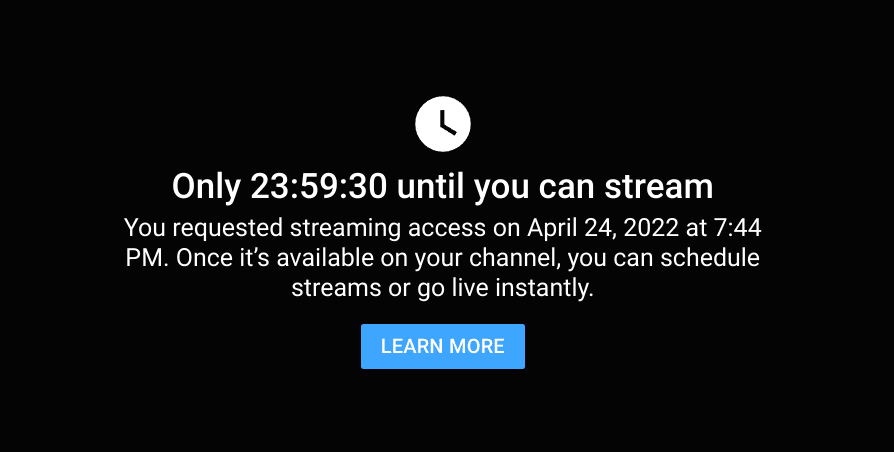
Timer for live streaming to YouTube
That’s about it for learning how to live stream to YouTube on a Chromebook. Return to this area when it’s the right time, and you’ll immediately be able to begin your first-ever live stream. Just make sure that the content you’re streaming respects the community guidelines laid out by the developers of YouTube.
Now that we have one part of the tutorial covered, let’s talk about how you, as a Chromebook user, can start live streaming to Twitch quickly. The following section will take it from here.
- Don’t miss out on How to play Asphalt 9: Legends on Chromebook.
Part 2. How to live stream to Twitch
To live stream to Twitch, we will be approaching a suitable workaround with the help of a dedicated platform called StreamYard. Since Chrome OS cannot download the first-party Twitch streaming software on Windows and macOS, StreamYard will help minimize the gap.
Follow the steps listed ahead to learn how to live stream to Twitch.
1. The first step is to head over to the official StreamYard website and sign in with the account you’ve used to register for Twitch. Enter your email address as shown in the screenshot below and click on “Get started.”

Getting started with StreamYard
2. As soon as you sign into the StreamYard platform, you will be prompted to go through a couple of initial setups to set up your account. You can choose to go forth with that or click on the “Skip” button to continue for now.
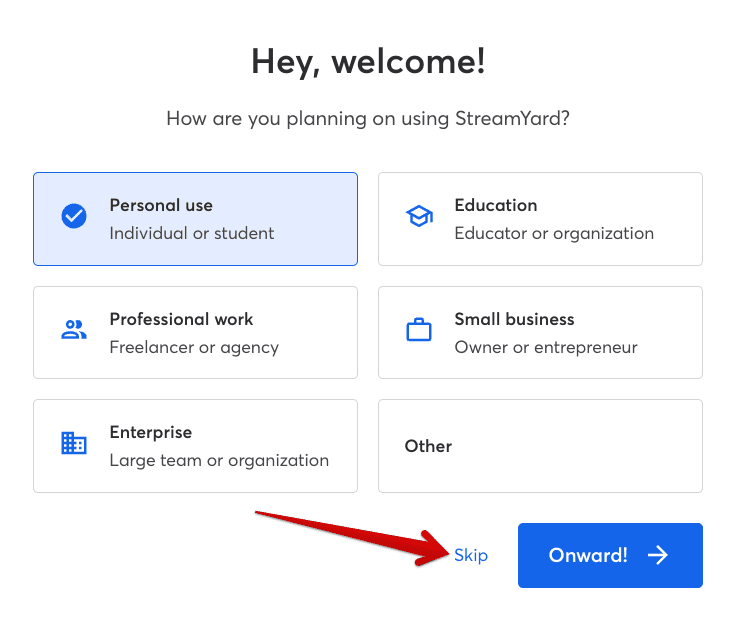
Setting up the StreamYard account
3. After clicking on “Skip,” you’ll be taken to the main StreamYard dashboard. This is where you can control the essentials of your streaming account and add destinations to the live stream. Then, click on “Twitch” from the “Destinations” section.
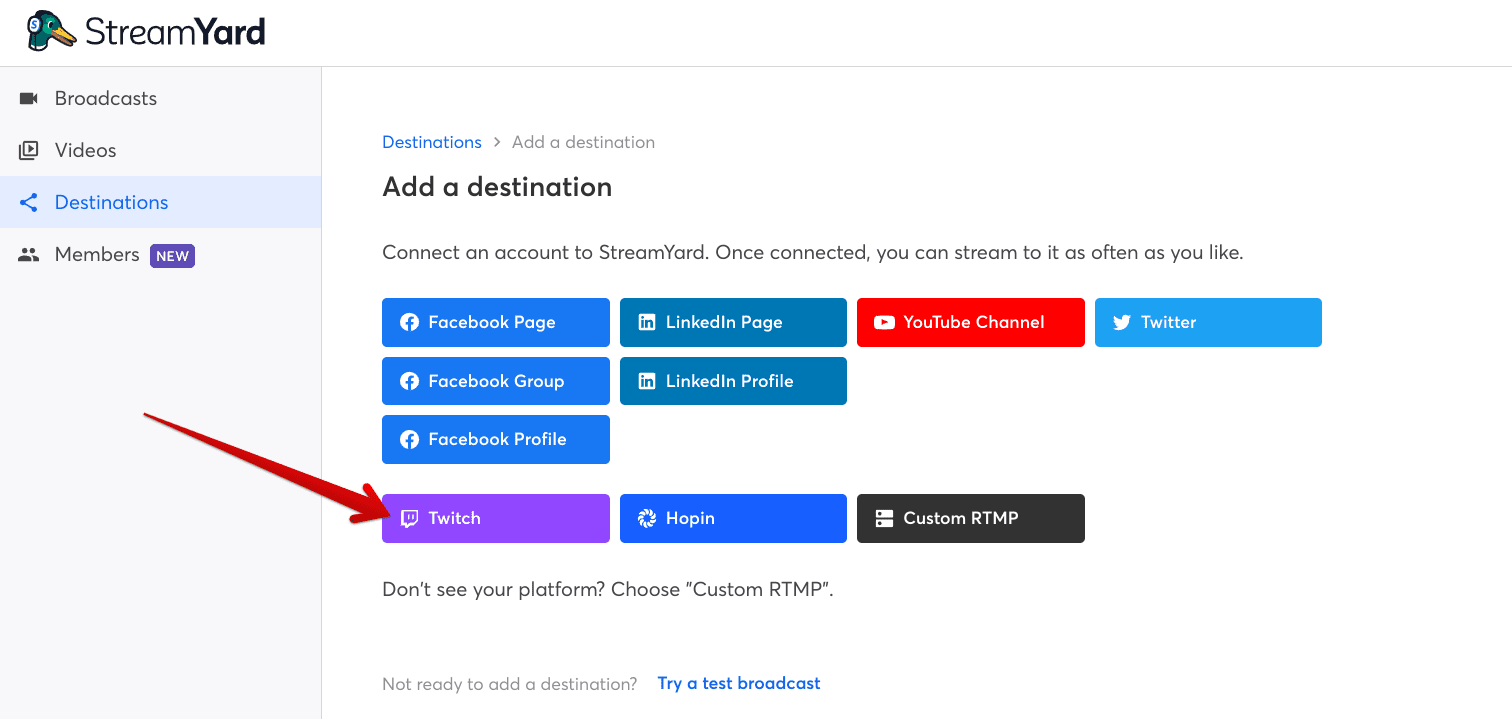
Selecting Twitch as the destination
4. After clicking on “Twitch,” another tab will open, asking you to sign in with your Twitch account. Make haste and sign in with your credentials until you can finally grant StreamYard access to your Twitch account. Click on the “Authorize” button shown in the screenshot below to continue.
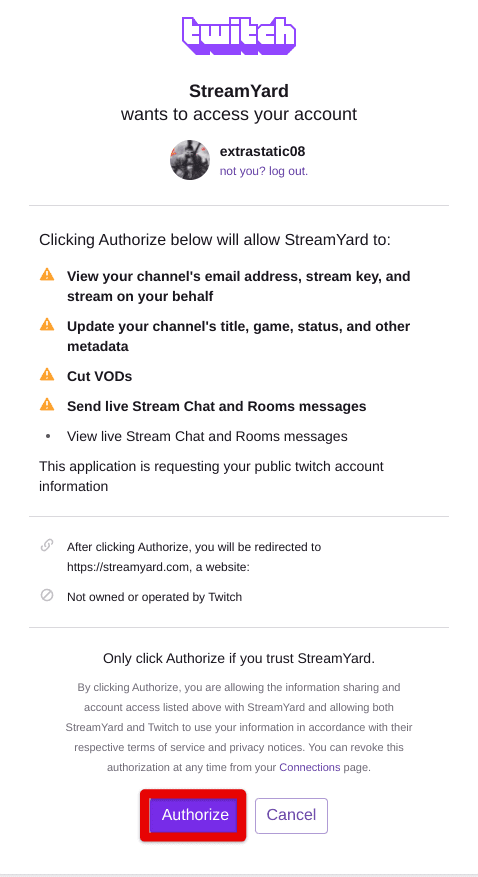
Authorizing the Twitch integration
5. After integrating Twitch and Streamyard, go back to the dashboard area and select “Broadcasts.” Once done, click on “Create a broadcast” and choose “New broadcast.”
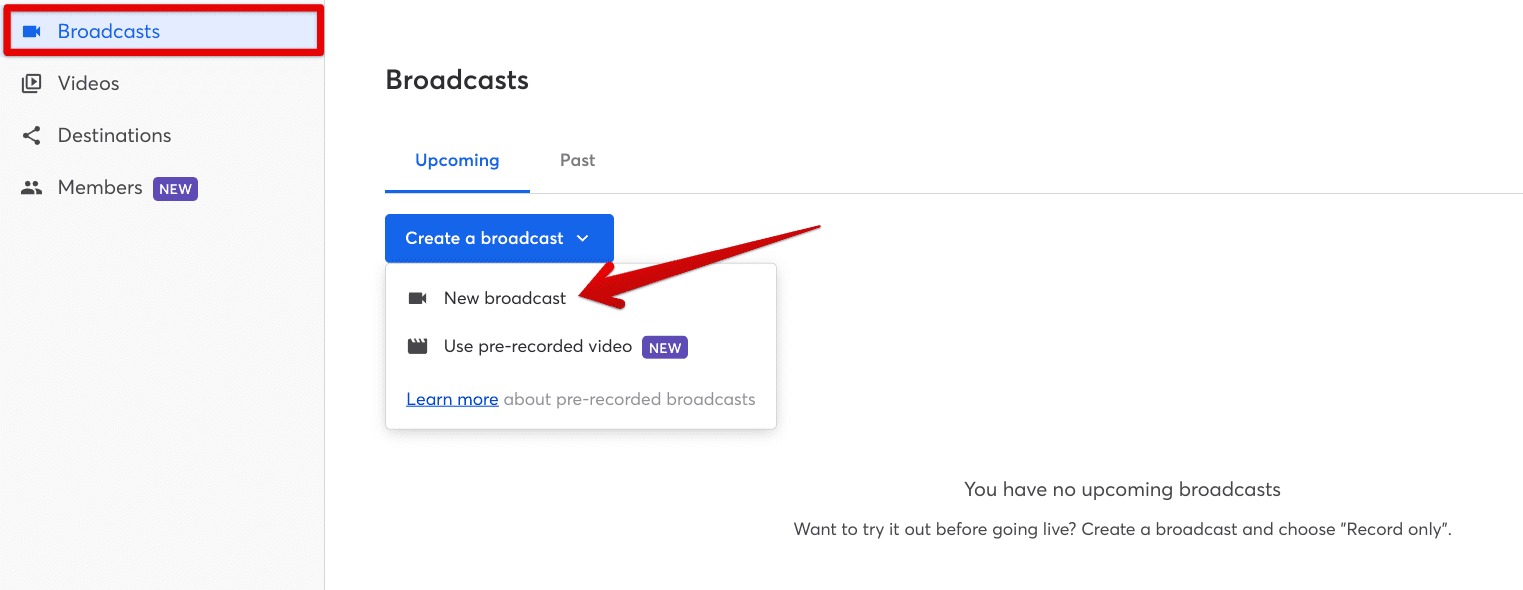
Creating a new broadcast
6. The next step is to choose the account you want to use for live streaming. Select the Twitch account you just connected to StreamYard to get to the next step.
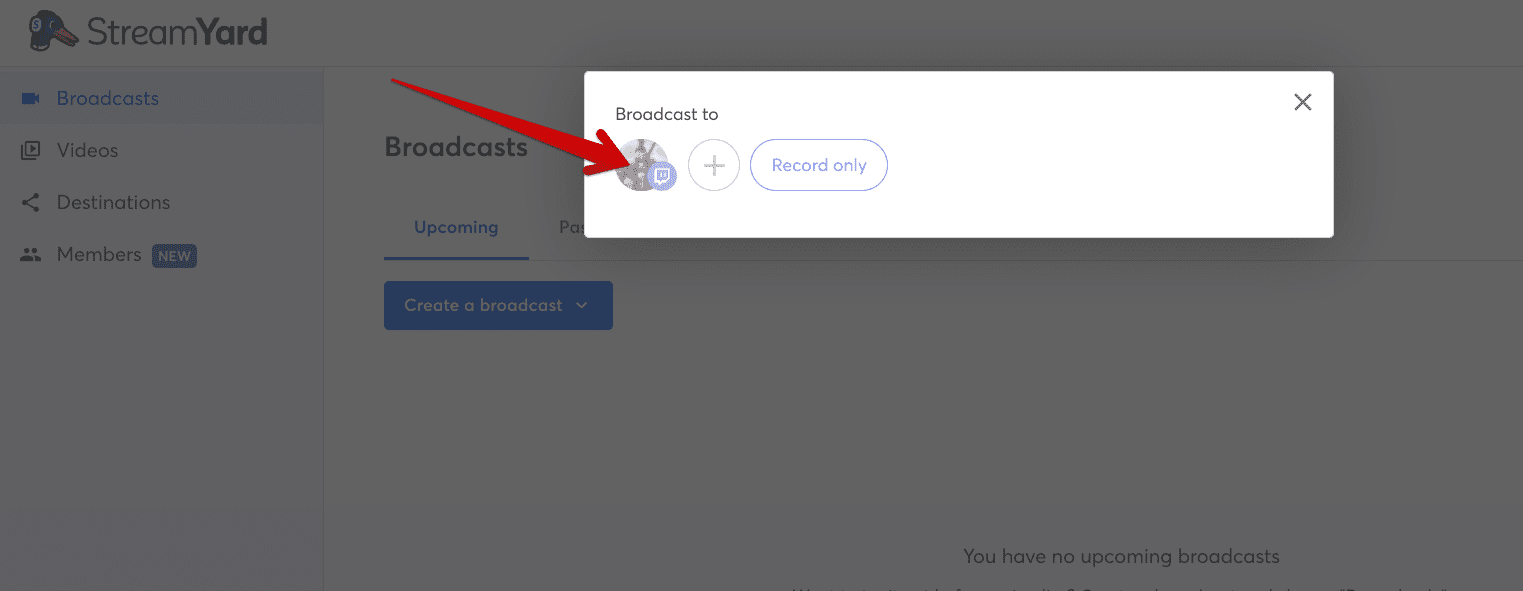
Choosing your Twitch account
7. To proceed, set up your broadcast by entering its title and choosing the category. This should be reasonably easy to do.
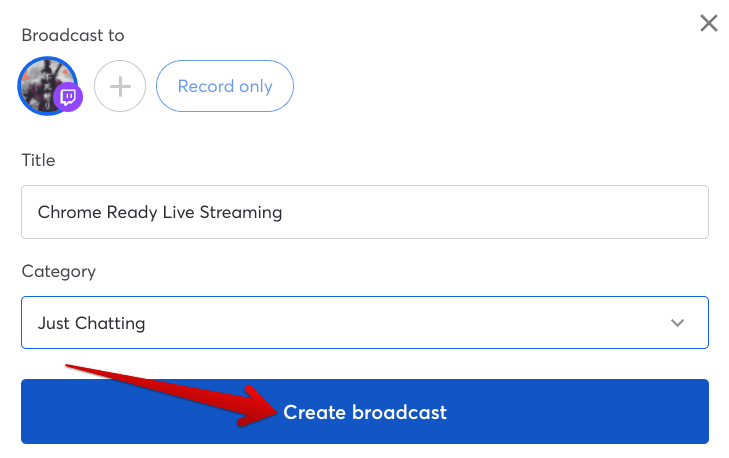
Setting up the broadcast
8. You now have to grant StreamYard access to your microphone and camera to continue. Use the prompts appearing at the top-left corner of the browser window to do this.
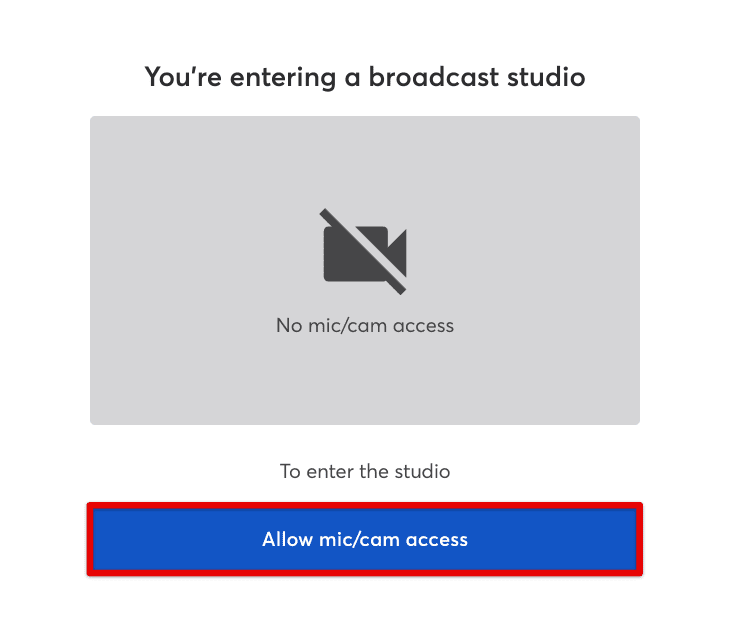
Granting permissions
9. In this second-last step, check whether your camera and mic are working correctly and enter the display name that you want others to see to continue.
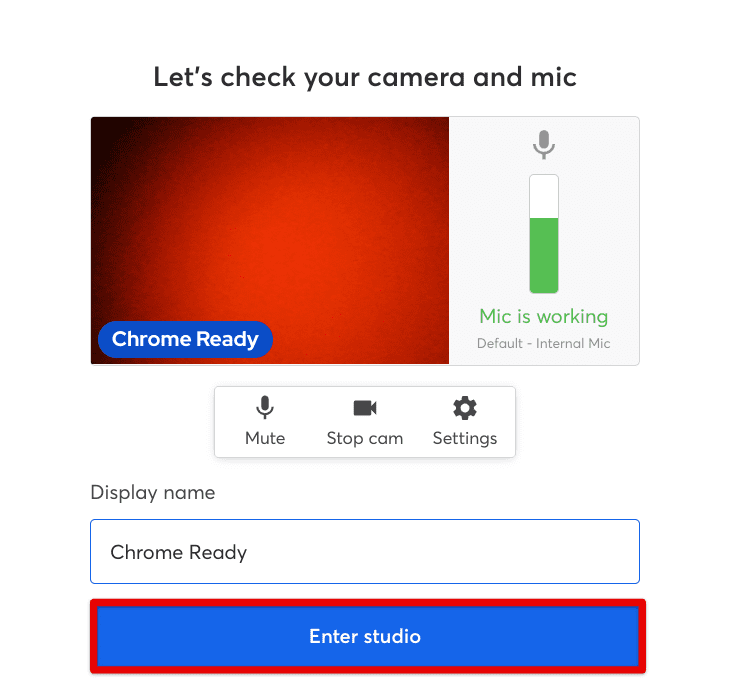
Entering the broadcasting studio
10. In the final step, you have to tap on your username to enter the live stream and start broadcasting to your followers on Twitch. Congratulations! You’ve just started live streaming to Twitch on a Chromebook.
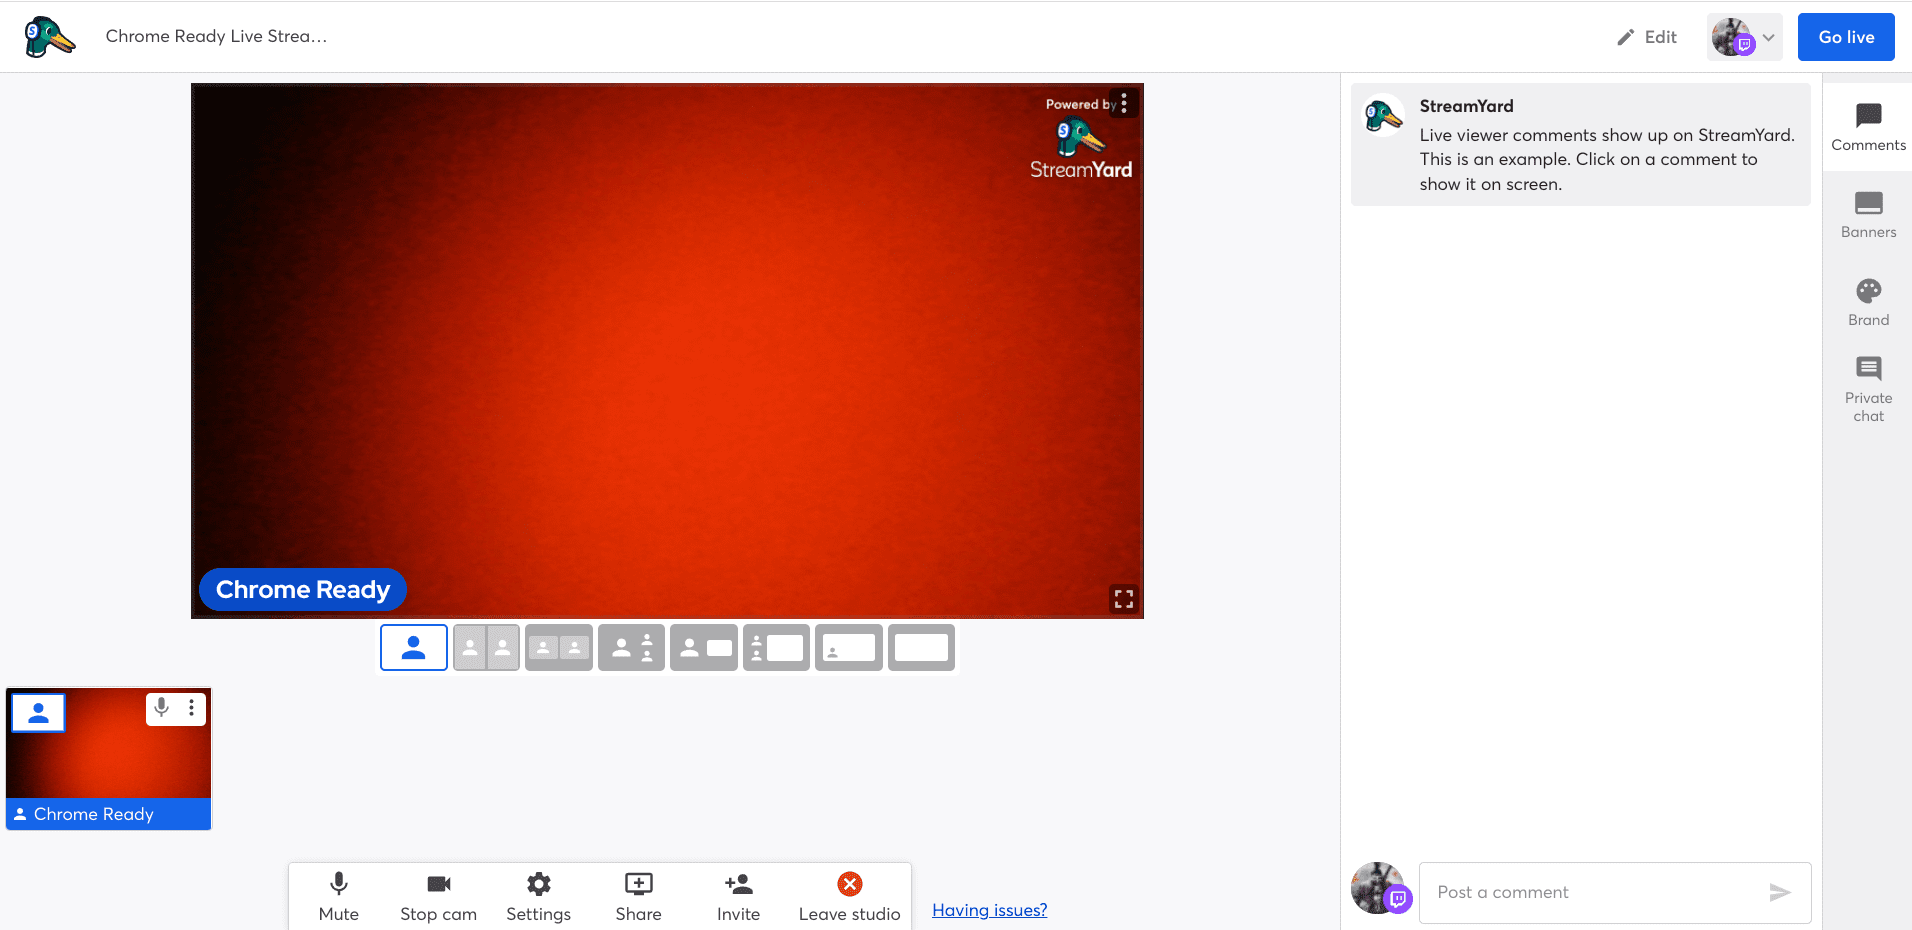
Twitch live streaming started
That’s all about it for learning how to live stream to Twitch and YouTube on Chrome OS!
Conclusion
If you’ve been looking to become a creator on your very own Chromebook, you don’t have to look far to arrive at the right platforms to get started. Twitch and YouTube happen to be the most profound services one can pursue when looking to expand the effectiveness of their online presence and get out into the world more.
In this guide, we’ve talked about how to live stream to Twitch and YouTube on a Chromebook so Chrome OS fans don’t have to be held back by any pertinent limiting factor. We hope that you’ve found this guide helpful for your cause. Chrome Ready wishes you good luck!
- Recommended read: How to install and use Mastodon on Chromebook.
