Accessibility-oriented features of Chrome OS are simply at large in 2022. The developer focuses heavily on Chromebooks to refine their user interface and effortlessly let simplicity prevail. For instance, the latest release for the stable update channel—Chrome OS 100—has brought more dictation-related functionality to the face of this sleek operating system, making it possible to delete words by just saying “backspace” now.
Another like-minded feature that has been around for quite a while now is Nearby Share. This specialized component of mobile operating systems like Android and Chrome OS serves to share files to devices near the host device. It’s an overly convenient feature that can genuinely take away a ton of hassle associated with the more conventional means of transferring files and data.
This guide will cover all there is to know about how to share files with devices near you using Nearby Share in Chrome OS. You’ll be caught on the nitty-gritty of this functionality by the time you’re done reading this write-up. Let’s dive right in without any further ado.
What is Nearby Share in Chrome OS?
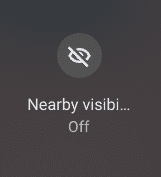
Nearby Share in Chrome OS
Nearby Share arrived at the Chrome OS forefront in the 91st stable release of the operating system. It’s a feature geared toward making sharability fast, easy, and simple between friends, family, and co-workers. The functionality is thriving on Android, but it wasn’t as late as 2020 until the functionality came the mobile platform’s way. Therefore, Nearby Share is relatively new.
When Chrome OS first got this feature, many bugs and glitches needed ironing out. Thankfully, Google took notice of the partially utilized potential of Nearby Share and proceeded to hammer out the pertinent issues. Today, this functionality is highly reliable, secure, and convenient for millions of people who want to get around file sharing without breaking a sweat.
All you have to do is turn on the Bluetooth of the two devices that need to exchange files and use the Nearby Share platform to go through with it. It’s pretty painless to employ, whether you’re sharing from a Chromebook to an Android phone or vice versa or from one Chromebook to another. Without any further delay, let’s catch the working mechanism of this functionality on Chrome OS in the following section.
- Don’t forget to check out: 5 things you need to know about Google Workspace storage.
How to use Nearby Share on a Chromebook
On to the good part now. The quickest way to get to Nearby Share on your Chromebook is through the Status Tray—the handy menu sits in the bottom-right corner of the Chrome OS interface and houses the time, Wi-Fi icon, battery life, and other crucial information system components. Clicking on it will reveal many options for you, and one of them will be Nearby Share. Click on it to proceed.
Clicking on the Nearby Share icon in Status Tray
As soon as you click on the button mentioned above, you’ll be taken straight to the main menu of Nearby Share in your Chromebook’s “Settings” app. Once you’re there, you’ll be prompted with a notification that’ll say that your Chromebook is now appearing visible to other devices in the vicinity. Therefore, Nearby Share on your device has been enabled now.

Nearby-Share enabled
Close the prompt and proceed to the main menu of the feature, where you can tweak multiple settings concerning it. First off, you can set your device’s name to whatever you want. We recommend naming it something that you can easily detect and remember.
Next, you can adjust the visibility of your Chromebook, allowing you to make the device perceptible by all of your contacts around or a specific set of contacts. You can also diminish the visibility of the Chromebook altogether. There’s also a setting that will make your Chromebook visible to everyone for 5 minutes, whether they’re in your list of Google Contacts.
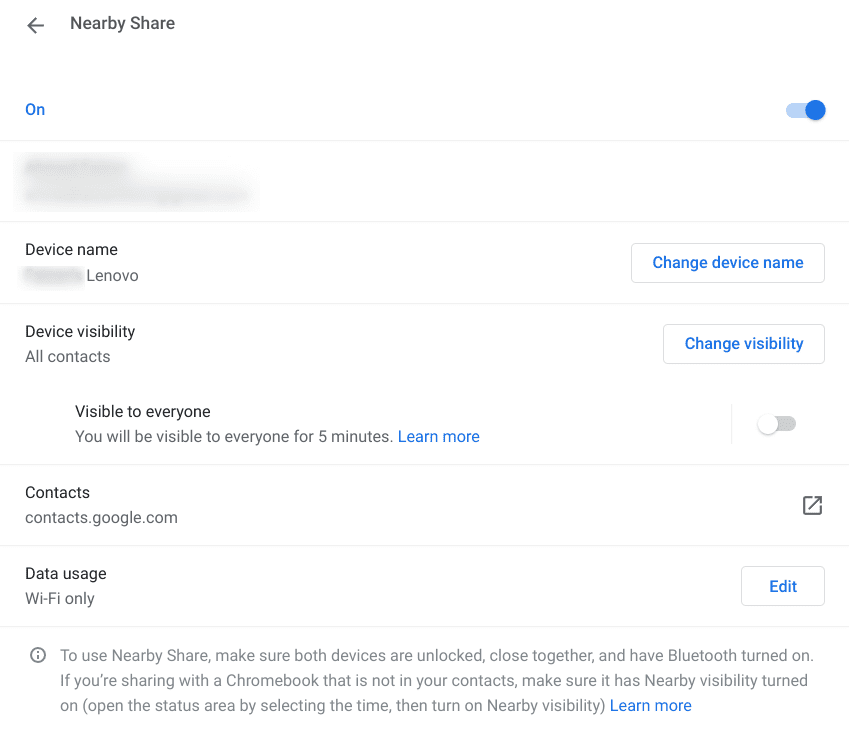
Nearby Share main menu
Now that you’ve turned Nearby Share on and engineered its various settings, the next step is to share some files using this feature.
Go to the “Files” app of your Chromebook and turn on the Bluetooth to get started. When you’re there, select the file, photo, or any other media that you’d like to send to another device using Nearby Share. Next, select the relevant files and click on the “Share” button.
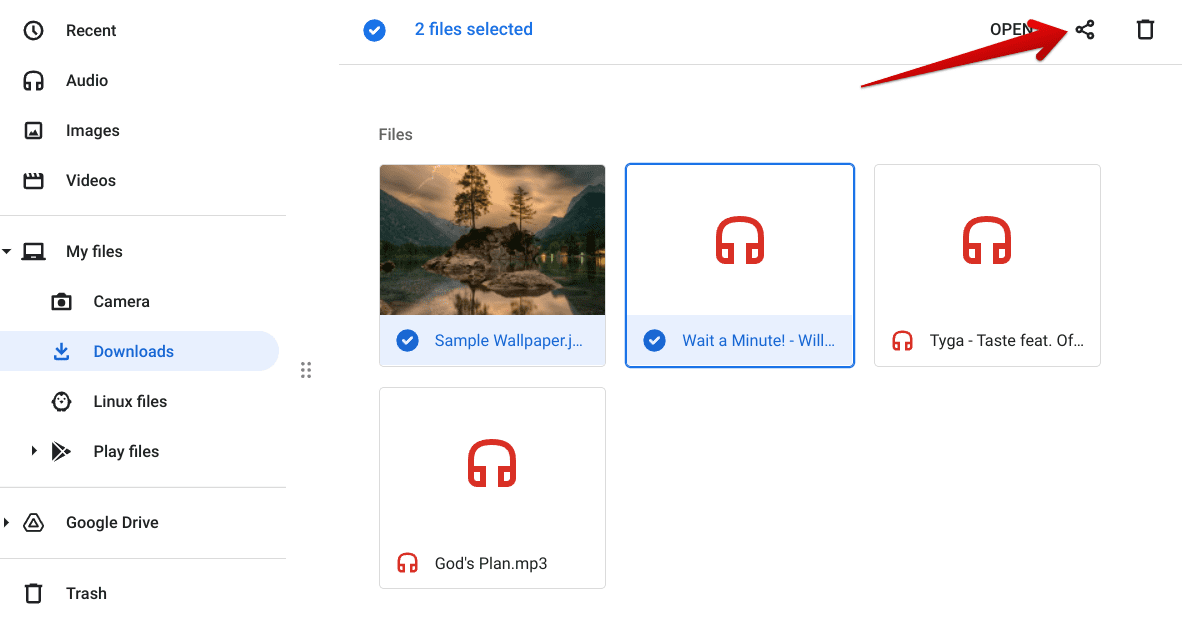
Clicking on the “Share” button
After clicking on the “Share” button, as shown in the screenshot above, a small-scale window will appear, asking you to select how you’d like to share the selected files. Choose “Nearby Share” to get to the next step.
- On a side note, the “Amazon Drive” option that you see below is a high-quality cloud storage platform. Learn all you need to know about it here.
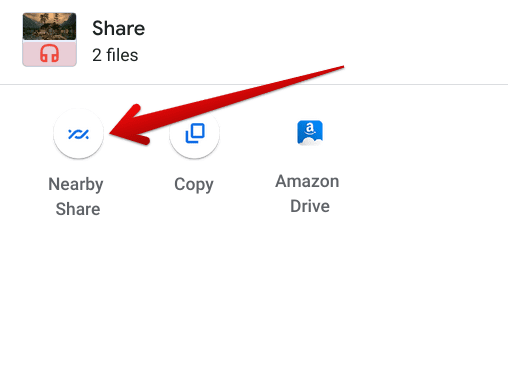
Choosing Nearby Share
Selecting “Nearby Share” will prompt the Chromebook to look for other devices close to the Nearby Feature. At this point, you have to enable the latter on the Android phone or another Chromebook that you’re looking to share the files. Make sure that their Bluetooth is turned on primarily. You might be required to turn on the location of the recipient device as well.
As soon as you’ve prepared the other device, it’s bound to pop up in the menu on your Chromebook’s screen. Select the device and choose “Next,” and you’ll quickly initiate the sharing process.
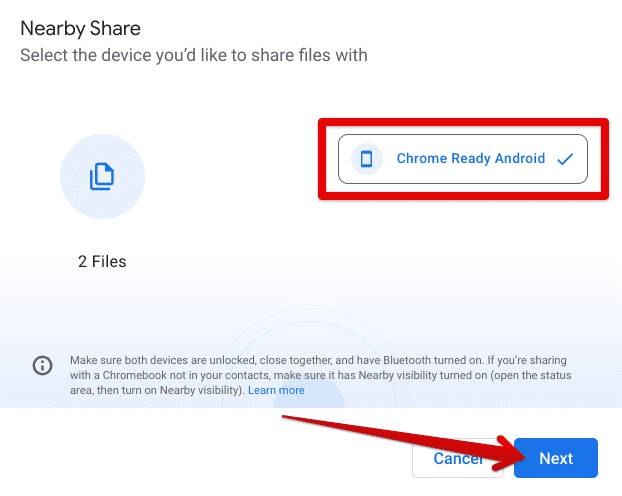
Selecting the device to share files with
Wait it out until Nearby Share finishes the file-sharing for you. You’ll see a progress tracker as well during this stage.
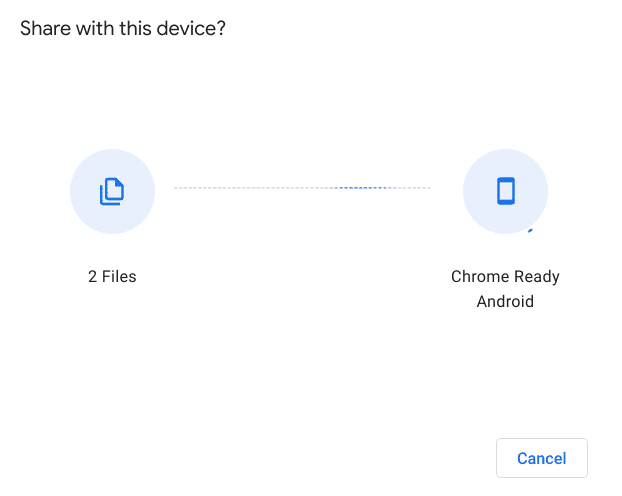
File sharing initiated
A notification will appear near the Status Tray area when the operation concludes. It’ll thereby confirm that the Nearby Share process was a success. That’s all about it.

Nearby Share completed
You’re free to repeat the process as many times as possible. Don’t forget to turn off your visibility if you had set it to “Everyone.” In addition, switch off Bluetooth if you intend to save some battery life.
Moreover, it bears noticing that Nearby Share can also function both ways. You can use it to send files to your Chromebook from an Android device or another Chromebook by switching the guidelines above accordingly.
Conclusion
Nearby Share is an exceptionally convenient feature streamlining lives ever since its release. It was a bit buggy when it first made landfall on Chrome OS, but the functionality has been revamped in recent times and now works better than ever.
It’s undoubtedly a highly reliable way of sharing files instead of the conventional methods of Bluetooth sharing or transferring files from one hard drive to the other.
We’ve shown you how to get the best out of it in this guide, so follow the instructions meticulously. Here’s hoping that you find this helpful write-up for your cause. As always, Chrome Ready wishes you good luck!
- Recommended from Chrome Ready: How to enable the recycle bin in Chrome OS.
