Were you looking forward to downloading the best Play Store applications on your Chromebook but has the prospect been dismally cut short for you? We’re well aware of the issue you’re facing and have been in a similar boat as you. Therefore, this guide will cover how to fix the Google Play Store stuck at “Pending” while installing apps, so you no longer have to put with this irksome bother.
While Chrome OS does a pretty good job at making things seamless and always ready to go, the Android portion of Chromebooks can mess up here and there. The good part is that nothing you encounter will be a pain to resolve, including the Google Play Store stuck at “Pending” while installing apps. Let’s dive right into this error fixing guide without any further chit-chat.
- More From Chrome Ready: How to activate the Google Play Store on Chromebook.
What is the Google Play Store stuck at “Pending” while installing apps?
Before delving into the fixes of this issue, let’s first understand the problem to increase our chances of resolving it. The Google Play Store stuck at “Pending” while installing apps is precisely what its name depicts. You fire up Google Play on your Chromebook, browse for an app or a game to install, click on it, and get to the main app page. Once you’re there, you click on the vividly apparent “Install” button, eager to use it as soon as it finishes installing.
However, as exciting as that sounds, your plans are soon cut short when you notice that the application hasn’t even begun the download process. When the Google Play Store is stuck at “Pending” while installing apps issue occurs, your Chromebook or any other Android device isn’t able to go past the first part of the installation, which is the verification process. Now, this can happen due to a wide variety of reasons.
We’ll have to go through them all one by one, so you can learn the fixes properly and implement them on your end. The following is a visual illustration of this issue surfacing on the Google Play Store of a Chromebook.

App stuck while installing
Rest assured, though, because the forthcoming fixes outlined in this guide are all going to be easy to follow. You’ll be able to get your Play Store up and running appropriately in no time by the time you’re done reading this write-up.
- On a side note, though, we genuinely recommend going through our in-depth Google Play Store guide that discusses everything you need to know about this excellent Android-oriented platform.
Best ways to fix the Google Play Store stuck at “Pending” while installing apps issue
Make sure to follow the given instructions meticulously in the same order for the best results.
1. Check the Play Store for currently installed apps
More often than not, the Google Play Store stuck at “Pending” while installing apps issue is nothing more than a matter of negligence. This is especially true if you have the auto-update feature enabled on the Chromebook or your Android device. It’s worth noting that the higher number of applications that you have installed on the device with auto-updates turned on, the more chances there are for you to be downloading and installing updates most of the time you’re using the device.
If you happen to have ongoing downloads at the moment, the application that you’re trying to install will be pushed further back in the queue, thus the reason for the “Pending” status to appear. Therefore, what we’ll do for the first fix is go into your Play Store’s “My games and apps” section and check if there are any other downloads to be wary of primarily. The following steps are going to take it from here.
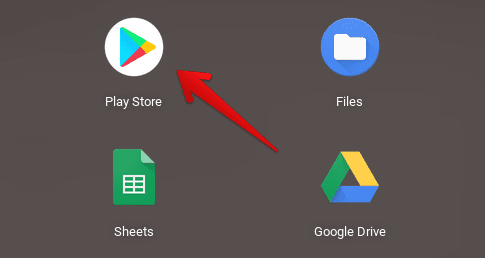
1. The first step is to fire up the Google Play Store on your Chromebook. This can be done quickly through the Chromebook Launcher area or from the shelf if you have it pinned there.
Opening the “Google Play Store”
2. Once the Play Store app has launched on your device, the next step is to click on your profile icon. This will be typically situated in the top-right corner of the app’s interface on a Chromebook. Doing so will make a small-scale section appear on the screen for you while blurring out the background. Then, proceed to the next step.
Clicking on the profile icon
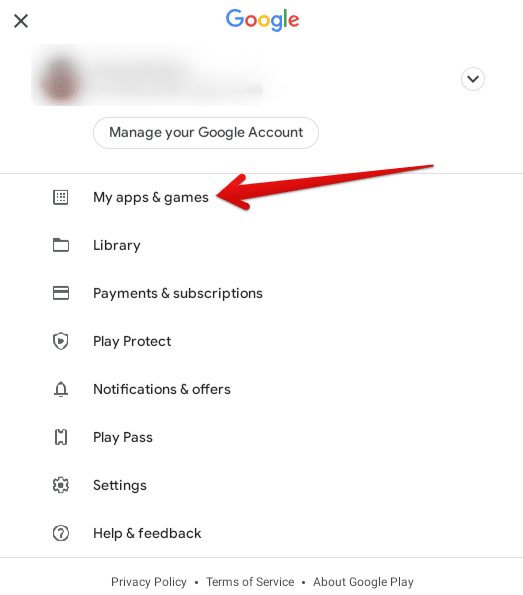
3. As a distinct section appears on the page for you now, click on “My apps and games” to further the process. This will take us right where we need to go.
Clicking on “My apps and games
4. Upon arriving at the “My games and apps” section of the Google Play Store, you will be required to click on the “See details” option right under “Updating apps”. If you don’t see this area on your screen, you can click on “Manage” right beside “Overview” as a working alternative. The following screenshot depicts where to click.

Accessing updating apps
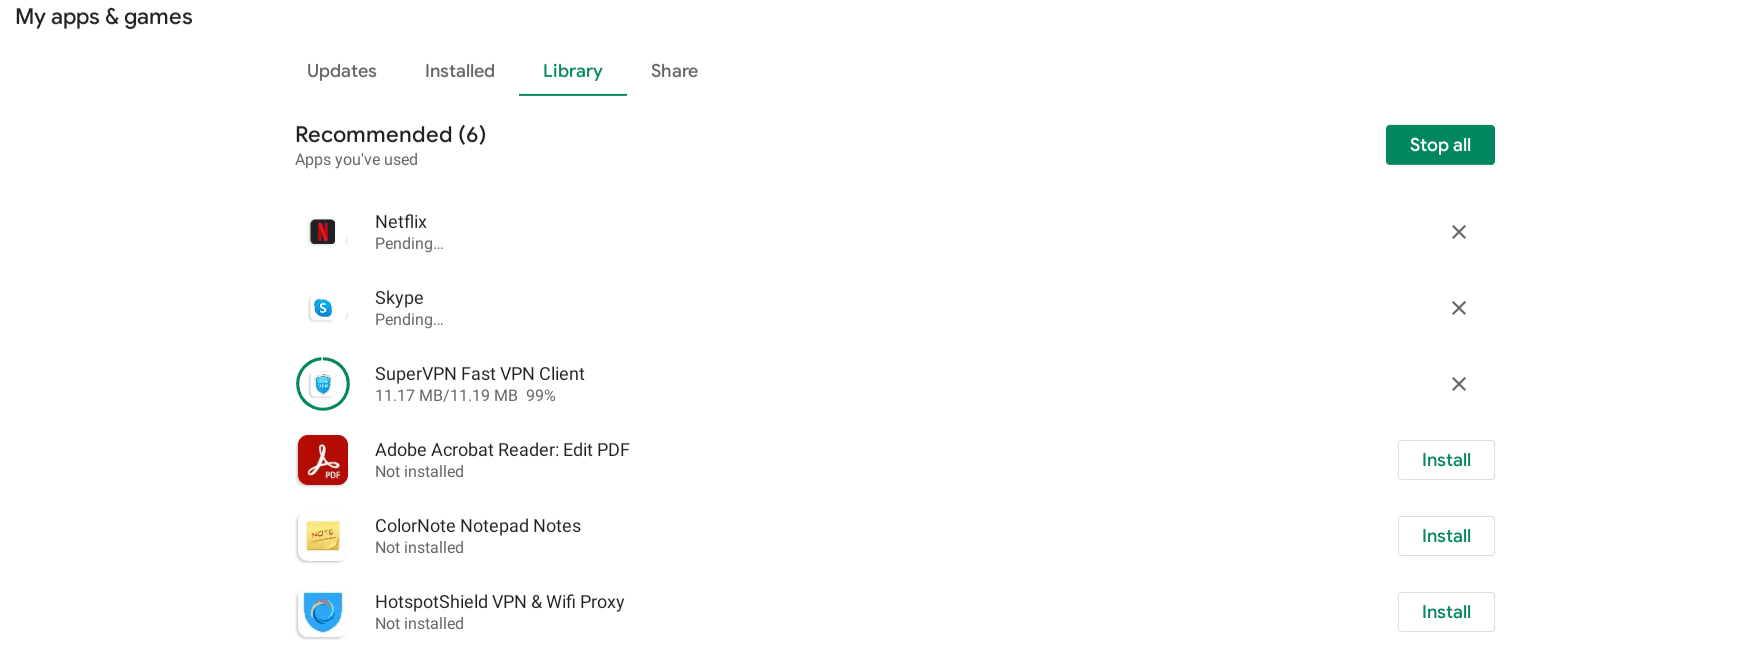
5. As you can comprehend from the screenshot below, there are three applications in total that are currently downloading in waiting in queue for the installation. Out of the three, we just started the download of Netflix, but it isn’t going past the “Pending” status for now. That’s because two applications are currently ongoing installation already, Skype and SuperVPN Fast VPN Client. A similar scenario can be taking place on your end. The application you’re trying to install might just be waiting in a queue, letting the updates or the downloads start before it finishes first.
Pending downloads in Google Play
6. If you’re in a hurry to download a specific application, you can cancel the installation of other ongoing apps by clicking on the “X” section. That way, you will be able to fix the Google Play Store stuck at “Pending” while installing apps issue effortlessly. The following screenshot depicts where to click.

Canceling the download
That’s about it for the first solution to the issue at hand. You should be able to start downloads and go past the “Pending” status quickly now. However, if you’re still unable to do that or didn’t have any pending downloads in the first place, you might want to read on for more ways to fix the problem. Don’t worry just yet.
- Similar Read: How to fix “Google Play Services Keeps Stopping” error.
2. Sign out and Sign in again
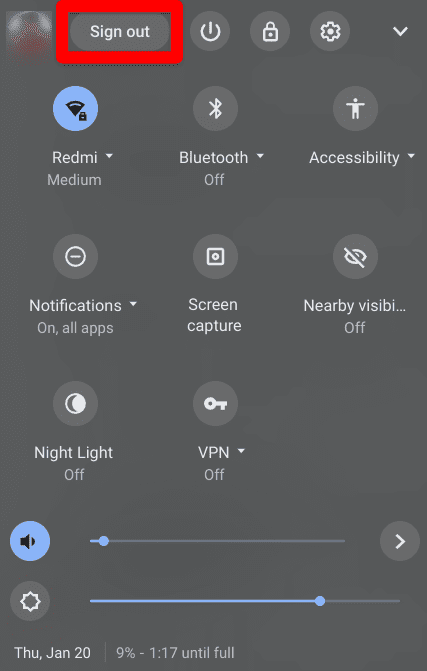
Believe it or not, and as simple as it sounds, this method works for most users. Click on the “Time” and then “Sign out”. Sign in again and check if the app installation issue is fixed.
Signing out of the Chromebook
3. Restart the Chromebook
The next potential solution in line is relatively simple and quite effective most of the time. Restarting your Chromebook is what you must try next.
What will benefit you more in this regard is a hard reset rather than a regular reboot that can be performed by pressing and holding the “Power” key. To perform a hard reset on your Chromebook, all you have to do is press the “Power” key and the “Refresh” key together, which is shaped like a circle with an arrow at one end. Doing so will immediately reboot the Chromebook and refresh its hardware components on the fly.
If you’re not familiar with what keys you have to press for a hard reset, the following image should help you out nicely.
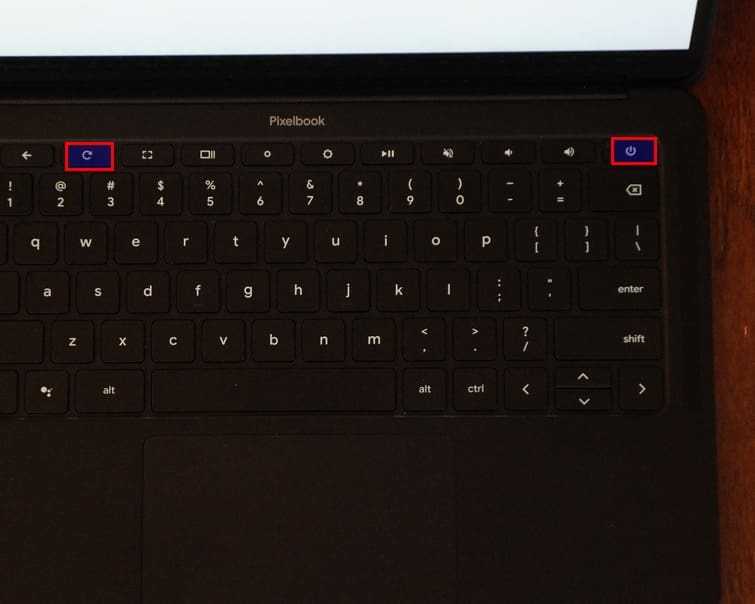
Key combination for a hard reset
After you’ve restarted the device, hover over to the Play Store again and try downloading applications now. If, in the unlikely case that the problem continues to persist, keep on reading for more fixes to try.
4. Clear the storage and cache of the Google Play Store app
If you’ve been using the Google Play Store on your Chromebook for a reasonable amount of time now, the platform may have gathered a ton of cache and data. However, this isn’t anything out of the blue and has been relatively commonplace for users over the years.
However, if there’s one thing that’s due here, it’s diligence. You have to make a habit of checking with the Play Store’s stored cache and ensuring that it keeps getting cleared every once in a while. Doing so will allow you to prevent multiple issues from surfacing in the first place. To speak of the cache, it’s a collection of data that is targeted to enhance user experience.
It manages to do that by fetching data faster for specific processes, so they don’t take as much time as they used to. With that being said, when your cache’s size goes on to increase exponentially in a relative way, the scenario can give birth to a ton of problems, including the one in question. Without any further ado, then, let’s talk about how you can clear both the data and cache of the Google Play Store app on your Chromebook.
1. Get started by opening the “Settings” app on your Chromebook. This can be done quickly through your Chromebook Launcher area or from the shelf if you have it pinned there.
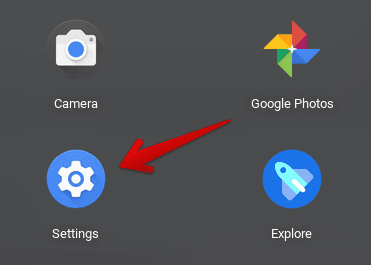
Opening “Settings”
2. After the previous step, you will have a whole new window launched on the Chrome OS interface. This is where you will select “Apps” from the left sidebar.
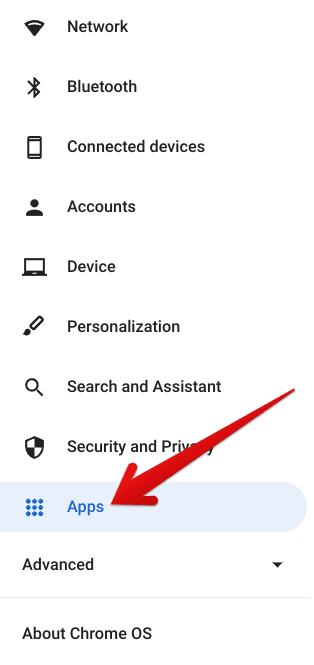
Clicking on the “Apps” button
3. After completing the last step, you’ll be taken straight to the “Apps” section of your device’s settings. Here, you’ll see the “Google Play Store” option. Click on the arrow beside it or anywhere in the relevant area, for that matter, to get to the next step.

Clicking on the “Google Play Store” button
4. Upon completion, you’ll see the screen’s contents appearing differently compared to what they were before. You will now click on the “Manage Android preferences” button in this step, and doing so will launch another window on your Chromebook.

Clicking on “Manage Android preferences”
5. After clicking on “Manage Android preferences,” you will now be within the main control panel of the different Android processes installed on the Chromebook. Click on the “Apps and notifications” button.

Selecting “Apps and notifications”
6. The next step is to click on “See all apps” after clicking on “Apps and notifications.” This will not only allow you to continue but improve the visibility of all the on-display applications.

Expanding the options
7. Good going so far! You’re almost at the end of this fix now. Continue by scrolling down the list of applications until you find the Google Play Store app. Click on it once you find it to get to the second last step.
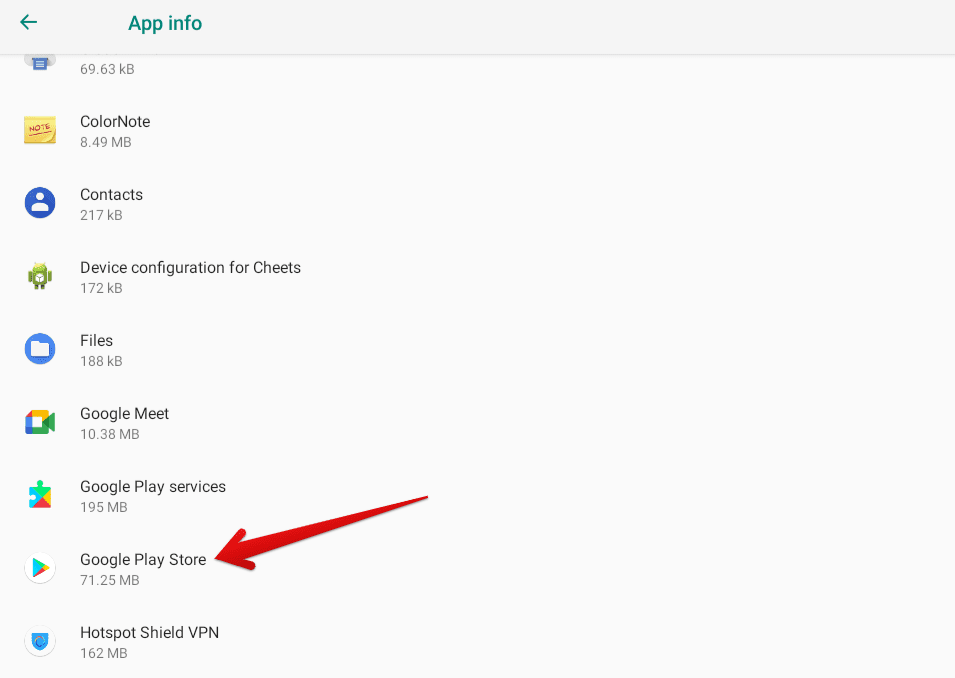
Selecting Google Play Store
8. Bear with us for a little more now as you’re almost nearing the end of this guide. You currently have to click on the “Storage” option. Doing so will take you to the cache and data area so you can clear them quickly.
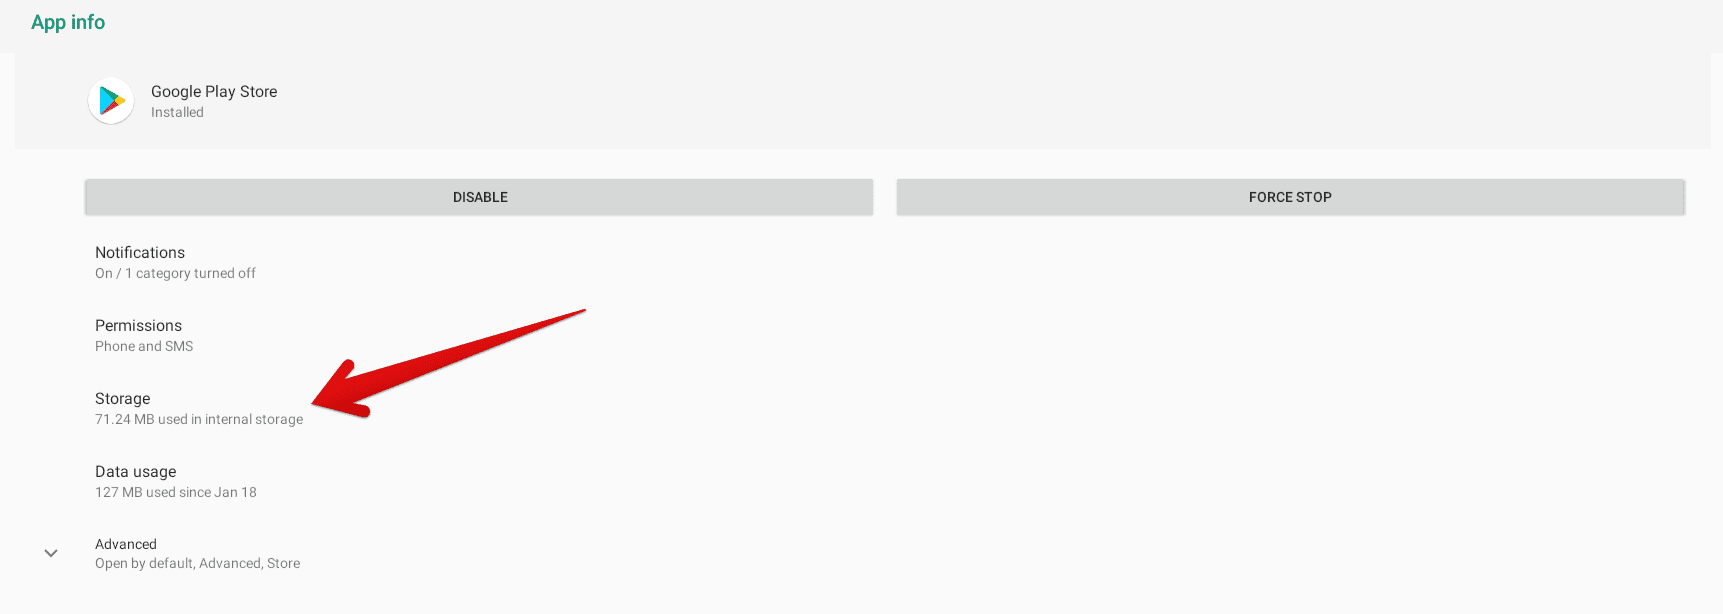
Clicking on “Storage”
9. This is where you will be able to clear the data and cache of the Google Play Store without breaking a sweat. To get started, click on the options that have been highlighted in the screenshot below. It’s preferable if you start by clicking on “Clear cache” first and then following it up by selecting “Clear storage.” Doing so will bring you nothing but the best results. As soon as you have finished, please click on the “X” button in the top-right corner of the opened window to close it down and finalize the process.
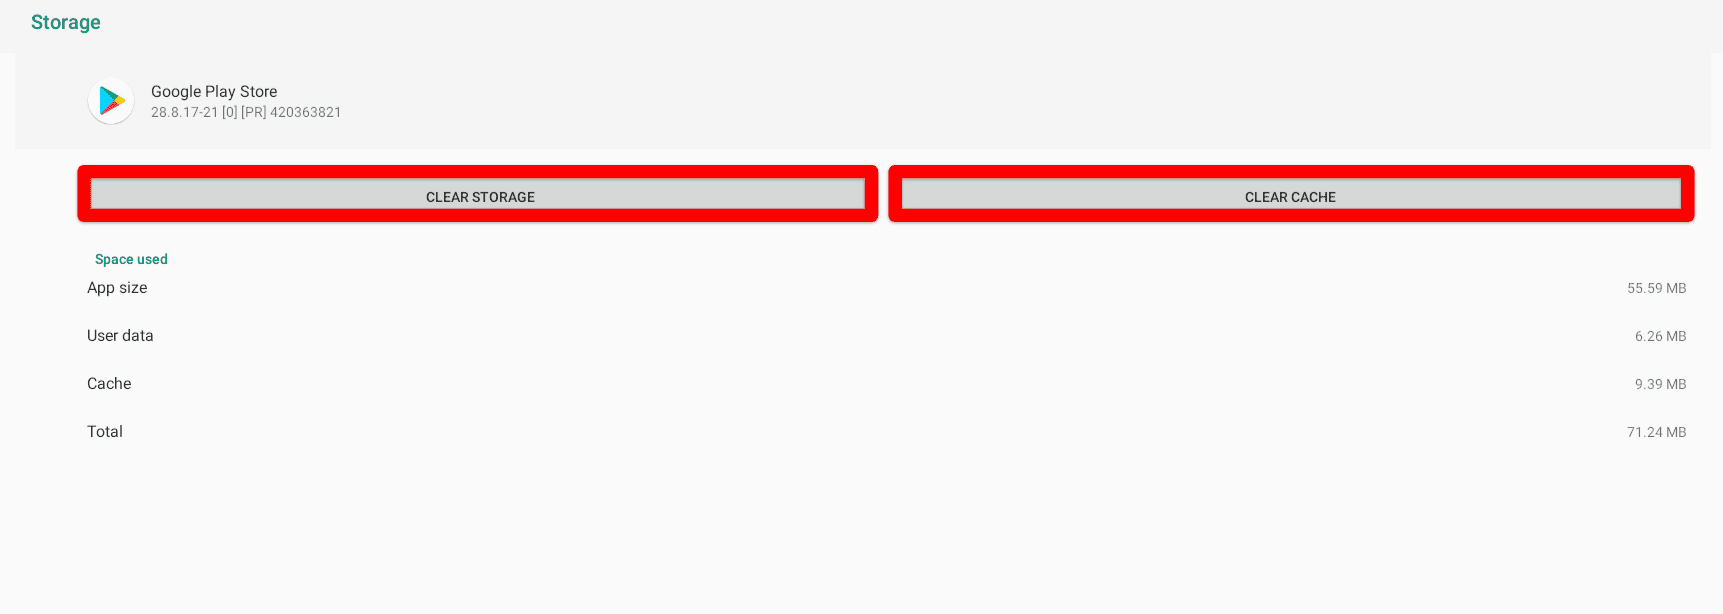
Clearing the storage and cache of Google Play
Once you’ve completed this all, go on and fire up the Google Play Store. Then, continue to download the application you wanted to in the first place.
Hopefully, the download process will shortly begin, and now that you’ve gone through a hefty fix on your device, the Google Play Store stuck at “Pending” while installing apps problem will be resolved. If the issue continues to exist, keep on reading for more solutions.
5. Reinstall the Google Play Store
It’s worth noting right off the bat that this is a Chromebook-exclusive method. So if you’re on any other Android device, please skip this solution and continue reading from the next one. With that said, Chrome OS has the functionality of the Google Play Store available at all times, but this doesn’t mean that you cannot remove the feature from Chromebooks altogether. There’s an option to do this within the device’s settings, allowing you to uninstall Google Play.
For this potential solution, we will try and remove the Google Play Store first and then install it back again on the device. That way, the problem can be fixed if there’s any major configuration file missing from the platform that’s hindering it from performing optimally. This fix has worked for many users in fixing the Google Play Store stuck at “Pending” while installing apps issue so that you can dive right in with your head high.
Uninstalling the Google Play Store
1. The first step is to open the device’s “Settings.”

Opening “Settings”
2. Once done, click on “Apps” in the sidebar and then select “Google Play Store.” Doing so should take you to a different page on the “Settings” window.
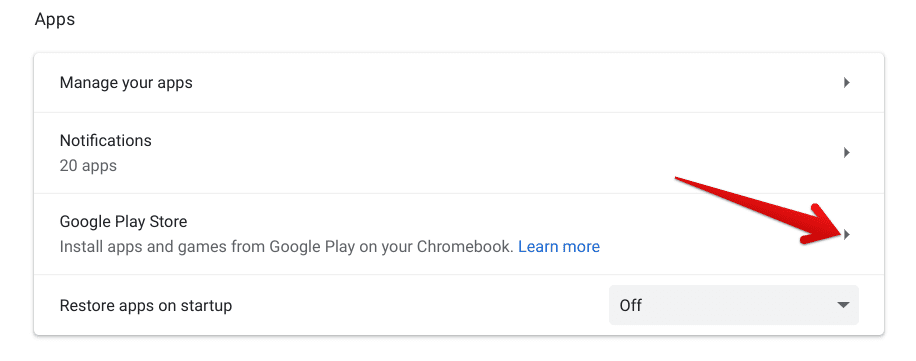
Clicking on the “Google Play Store” button
3. As soon as you’re done with the last step, you’ll see the option of “Remove Google Play Store.” Click on the “Remove” button right beside it to uninstall the platform from your Chromebook.

Removing Google Play Store
4. Perfect! You’ve just completed half of the process. Restart the Chromebook now for the best results. Once done, continue reading below and find out what to do next.
Reinstalling the Google Play Store
1. As soon as you remove the Play Store from the Chromebook, you’ll return to the main “Apps” section of the system’s settings. This is where you can find the option to “turn on” the Google Play Store again. However, if you have restarted your device, you will have to come back to this area, which should be reasonably easy to do now. As soon as you’re back, click on “Turn on,” as shown in the screenshot below, to get to the next step.

Turning on the Google Play Store
2. Once done, a window will appear on your screen, and it will take you through the installation of the Google Play Store on your Chromebook. The first step here will be to accept the “Google Play Terms of Service.” After that, you can read the terms and conditions part of the software for your satisfaction.
There’s also an option to enable a Google Drive backup feature that you might be interested moving forward. This functionality will save your application data, including game progress and saved settings, to Google Drive. It’s your choice to either enable it or keep it disabled. Select the “More” button to get to the next step.

Furthering the installation
3. You will now be taken to the next page of the installation window. Here, you can allow Google Play to use your location when it needs to, especially for those games and applications that require location access. It boils down to you to grant this permission from the get-go or deal with it later when using an app. For now, click on “Accept” to continue.

Clicking on “Accept”
4. Once you click on “Accept,” the setup for Google Play along with its installation will begin. You’ll have to wait a short while for this to finalize. After a brief moment, you should be seeing the following on your screen in this step.

Play Store being installed
Once the installation finalizes, the Play Store application will launch on its own. That’s about it for this potential fix. It’ll take a bit to load up the necessary components at the launch screen, but you’ll shortly be shown the main Play Store interface afterward. Now is a good time, though, to test whether this potential solution has paid off or not. Try downloading the application that you’ve been meaning to and see if the app works on the device or not now.
If the issue still hasn’t been resolved despite the strenuous effort, continue reading for the final fix.
6. Powerwash the Chromebook
If all other resources and methods have failed, there’s one more potential fix to go with. On most Android devices, the phenomenon of wiping everything stored on the unit’s memory and storage and rendering it brand-new again is called a factory reset. Still, on Chrome OS, the process is coined as “Powerwash.” Resetting your device can potentially fix the Google Play Store stuck at “Pending” while installing apps issue.
However, as we’ve iterated, you’re going to be losing all of your locally present data on your device after performing a Powerwash or a factory reset. On a side note, it’s a good idea to opt for the best cloud-storage solutions right now and back up your private data effortlessly. Now that you’ve taken care of the preliminary preparation, it’s time to get into the Powerwash part now.
Check out our in-depth guide that talks about performing a Powerwash on a Chromebook if you want more details. The gist of it is that you have to head over to the “Reset settings” in the Chrome OS “Settings” system app and select the “Powerwash” feature. Once done, you will be prompted to restart the device.

Performing a Powerwash
After the Chromebook boots back on, you will have to go through the initial setup once you wind everything up and return to the main Chrome OS interface, fire up the Google Play Store and start downloading apps just like usual again.
Conclusion
The Google Play Store is a fantastic platform to embrace Android applications in their glory. Not only is it a way to revamp the functionality of your device as a whole, but a method to make your networking experience on Chrome OS a lot more engaging and productive.
For instance, you can grab the best timer apps from Google Play to install on your Chromebook, not to mention the top picks for high-quality screenshot tools. Quite honestly, this is no more than the tip of an iceberg. With that being said, though, the Play Store is known to mess up sometimes.
Plenty of issues can arise when trying to use this hefty platform. In some cases, you’re not even able to launch the app, and in others, no application will go past the “Pending” status when trying to download it. The latter is what we’ve targeted exactly in this guide by discussing what it is and how you can fix the issue in several ways.
With some spell of luck, you’ll now be able to use Google Play on Chrome OS and other Android devices like a charm. Chrome Ready wishes you good luck!
- We’ve written a detailed article on fixing issues with the Google Play Store on a Chromebook that you should check out here.

1 comment
Thank you ever so much! Tip 4 worked ever so well on my new Lenovo.