Do you get irritated by the notifications from your browser that randomly pop up on your computer? Are you trying to turn on updates from your most-visited sites? There is no reason to worry anymore since there is an easy and quick fix to this problem. How you can enable or disable notification pop-ups in Google Chrome is easier than you think. Many people have this issue annoying them in the background while they cannot figure out how to manage it.
In this article, you will understand how to enable, disable, and manage notification pop-ups in Google Chrome. This will make your browser experience a lot smoother and add to your existing knowledge base of running and operating Google Chrome.
Notification pop-ups in Google Chrome
Before we enable or disable these notifications, we need to understand where these notifications are generated. These notifications generally appear in the bottom right corner of your screen and are usually accompanied by a pop-up sound as well. After a few seconds, the new window that appears on your screen will fade away from the display. However, these notifications will start stacking up in the notification panel of Windows. That, too, is accessible on the far right side of your taskbar.
Even though these notification pop-ups may seem harmless at first, they can become frustrating sooner than you think. This is one of the main reasons most Google Chrome users want pop-ups disabled as quickly as possible. In most cases, these notification pop-ups are generated from sites that may appear completely random to the end-user. This also adds to their annoying nature. If a person cannot comprehend the notification’s actual purpose, it becomes challenging to keep up with it. Google itself has acknowledged this issue and is working on resolving it in future updates.
Let us show you why and how these notification pop-ups appear on your computer. Whenever you browse the World Wide Web, you are bound to surf through several web pages, sites, and extensions. In the world of cookies, you leave your digital footprint on all of these platforms, allowing them to add your IP address to their mailing or advertising list. Even if you do not allow the site to use cookies, the mere fact that its notifications are compatible with Chrome notifications will enable it to use this as a stream of media.
After you close the site, this stream remains accessible for the site to push notifications at any time. Usually, well-reputed sites and web pages ask for your permission before bombarding you with these pop-ups. However, there are still ways to get around this and make you see their notifications without signing up for it. This is what makes these notifications seem random and irrelevant. More often than not, these web pages and online platforms make you accept this invitation without your realization. All of this combined makes up for the notorious nature of notification pop-ups in Google Chrome.
Google Chrome notifications also work seamlessly with all Google services and platforms. This makes them appear even when working on an original Google program. Now that we have understood why these notifications are the way they are, the next step is to learn how to disable, enable, or manage them on your browser.
Enabling or disabling all website pop-up notifications
How you can control and manage these notifications also depends on your system. Firstly, we will show you the steps you need to undertake on Windows or Mac.
Step 1: Open Google Chrome on your system.
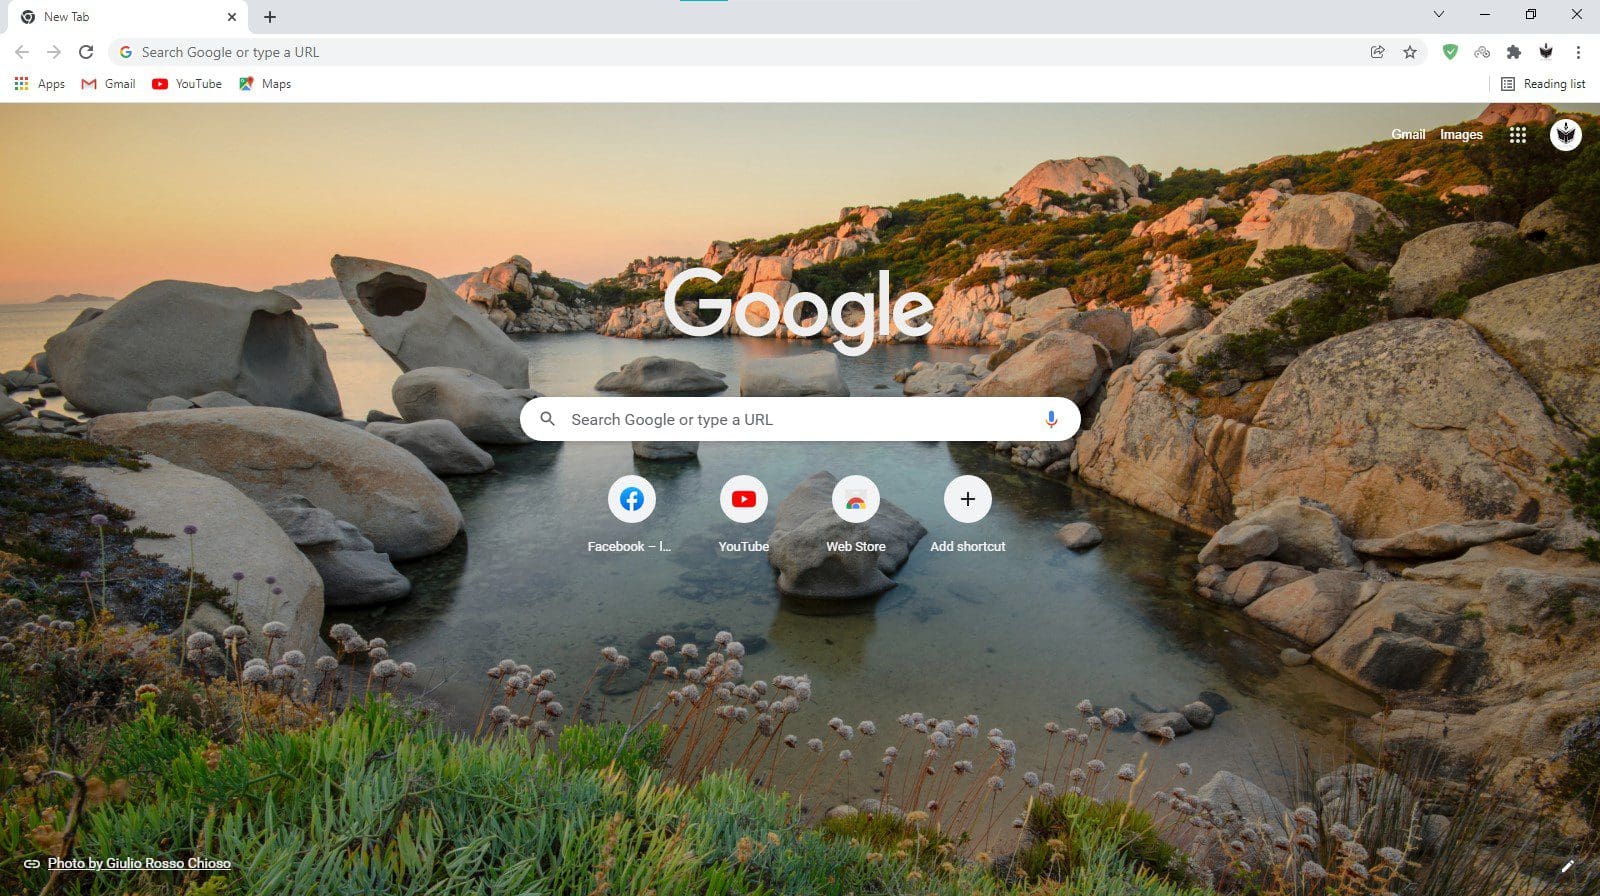
Google Chrome Homepage
Step 2: Open the Chrome menu by clicking on the three vertical dots found in the top right corner of your browser window.
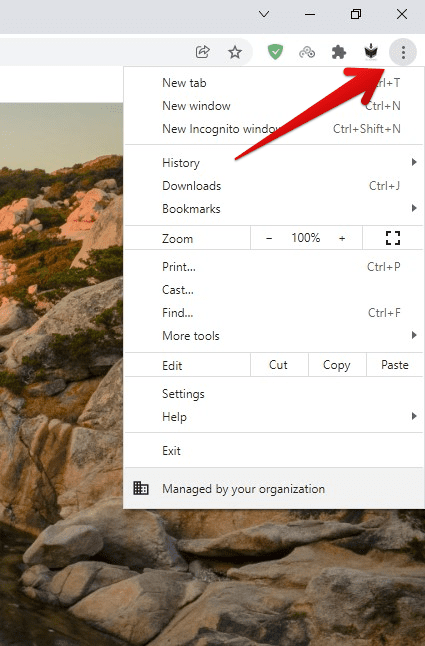
Opening Chrome Menu
Step 3: Go to Settings and open the Security and Privacy tab.
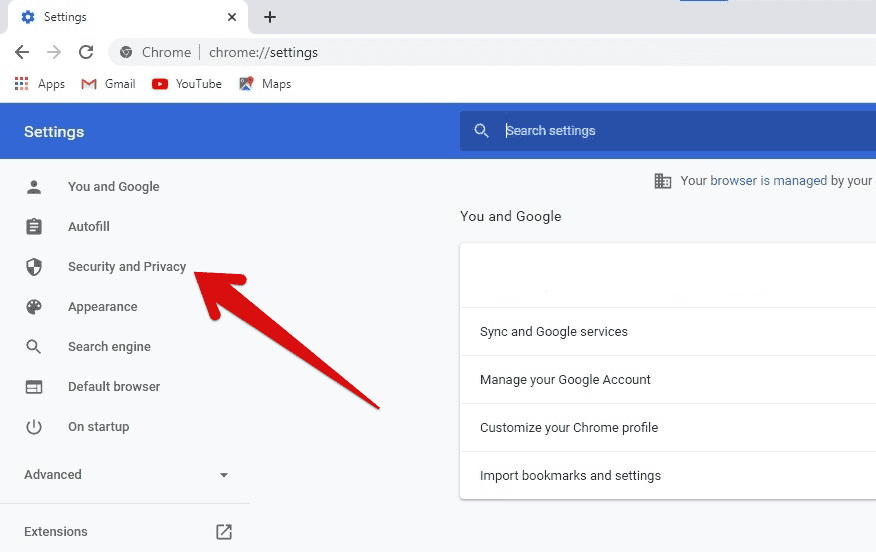
Opening Security And Privacy Tab
Step 4: Inside the Security and Privacy tab, open Site Settings.
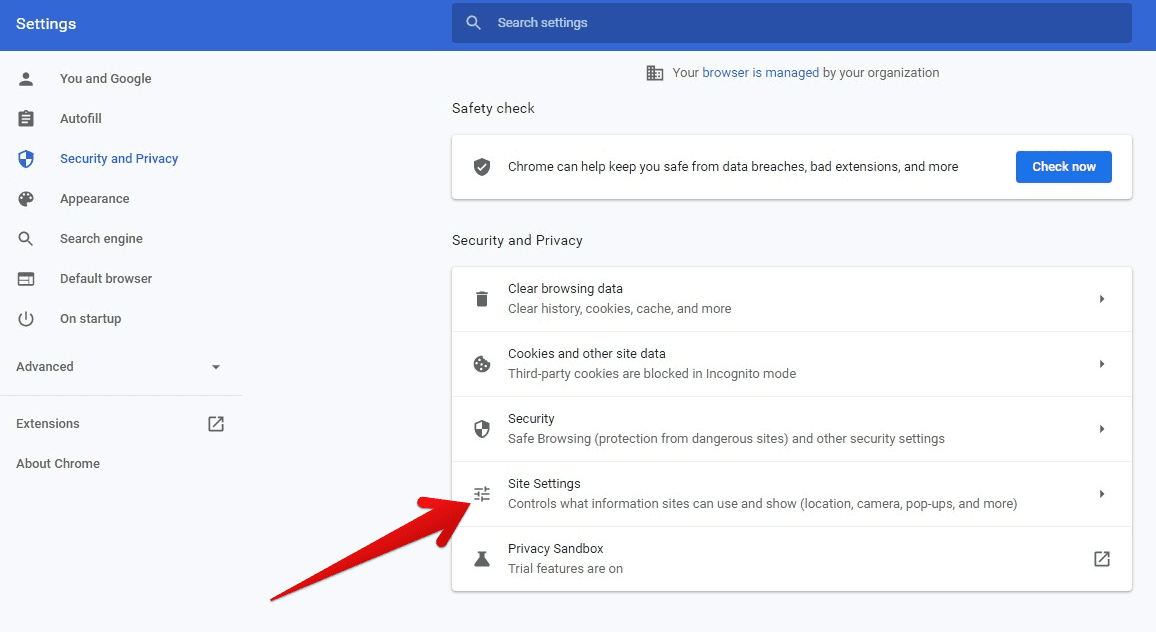
Opening Site Settings
Step 5: Inside the Site Settings, scroll down to find the Notifications tab and open it.
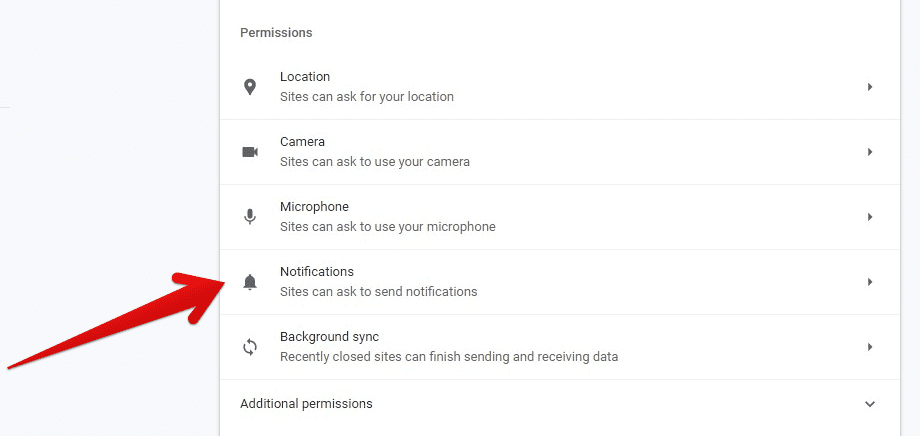
Opening Notifications Tab
Step 6: In the Notifications tab, you will see three options for Default Behavior. These include,
- Sites can ask to send notifications.
- Use quieter messaging (Sites are blocked from interrupting you when they ask to send notifications)
- Don’t allow sites to send notifications (Features that need notifications won’t work)
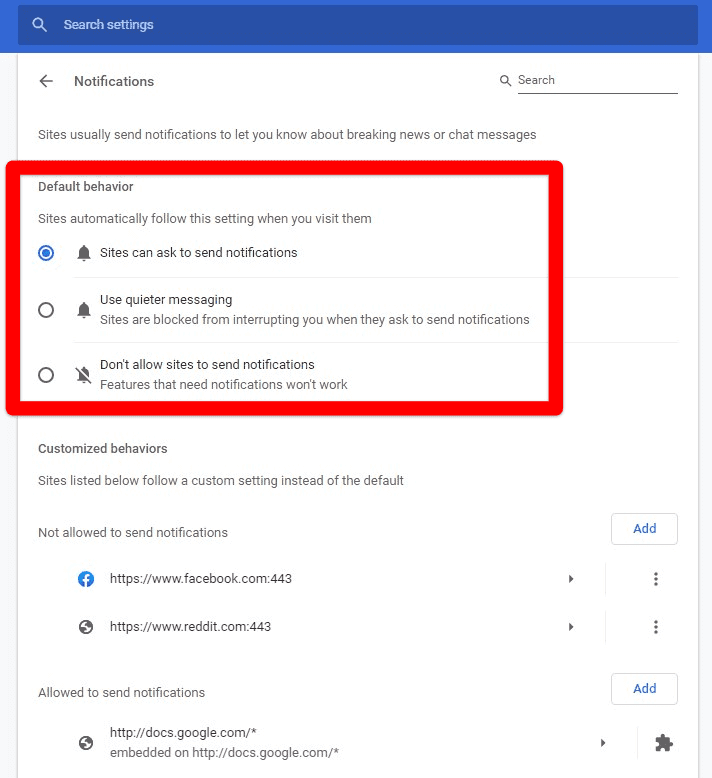
Options For Default Behavior
Step 7: If you want to disable all website notifications altogether, select the third option as Default Behavior.
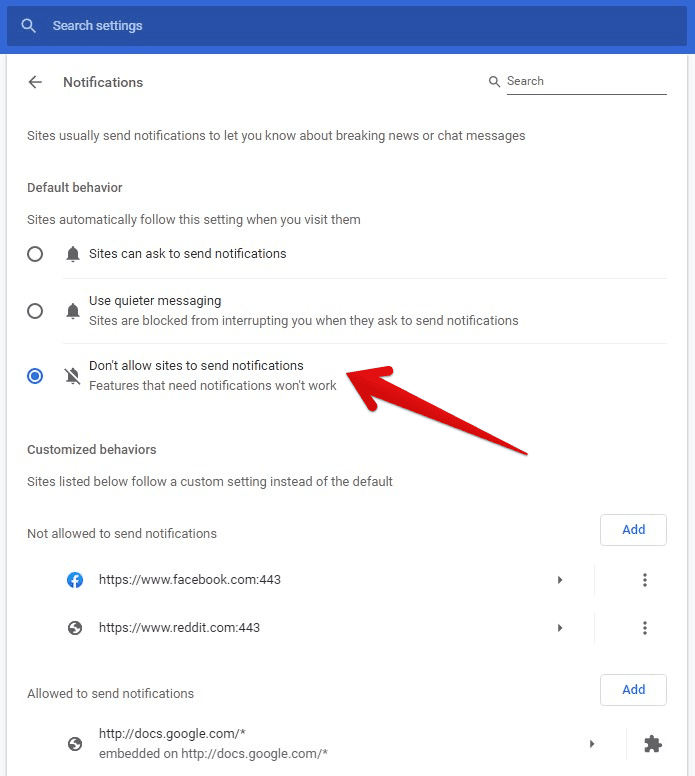
Blocking All Notifications
If you use a Chromebook, you will not have to open the Google Chrome browser to perform the same action. This is because Chrome OS is a browser-based operating system in which you can also manage such operations from the device settings. For this, you will have to go to the Status Area. In the Status Area, open Settings and find the Notifications item from the drop-down menu. By deselecting the box next to the Notifications, all-new website notifications will be disabled.
Managing individual website notifications
If you do not want to treat all website notifications the same way, you will manage them individually. The process for this is relatively easy and similar. Once you have navigated to the Notifications tab in Site Settings, come down to the Customized Behaviors section. Here, you will find the list of sites that can send notifications on your device.
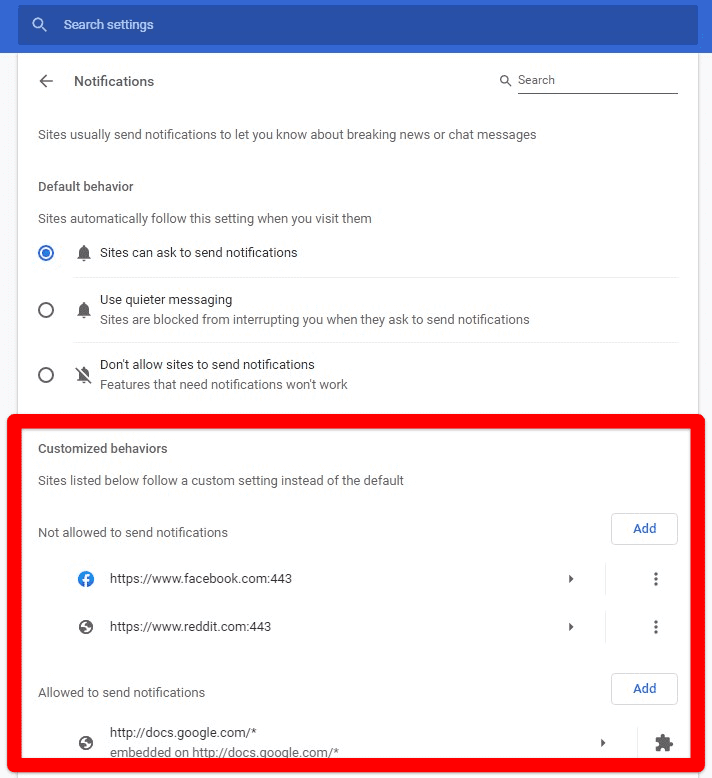
Customized Behaviors Section
Select the website you want to manage from this list of sites and click on the three dots in front of its name. From the drop-down menu, you can choose to block, edit, or remove the site from this list.
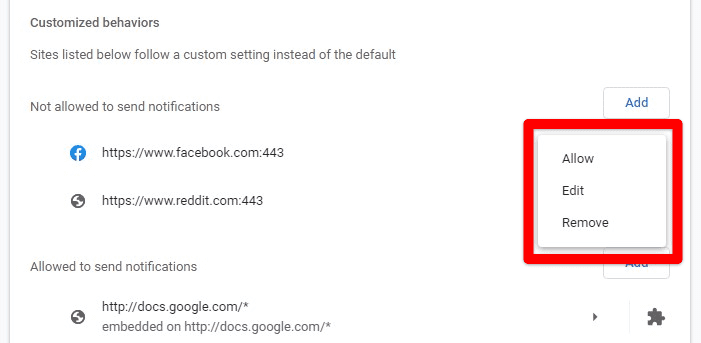
Allow, Edit, or Remove A Website
The Customized Behavior section is divided into two lists. The first one is of sites that are Not Allowed to send notifications, and the second one is of sites that are allowed to send notifications. You can add or remove any website address from both of these lists. To add a website to these lists, all you need to do is click on the Add button and type an asterisk (*) followed by the website’s address.
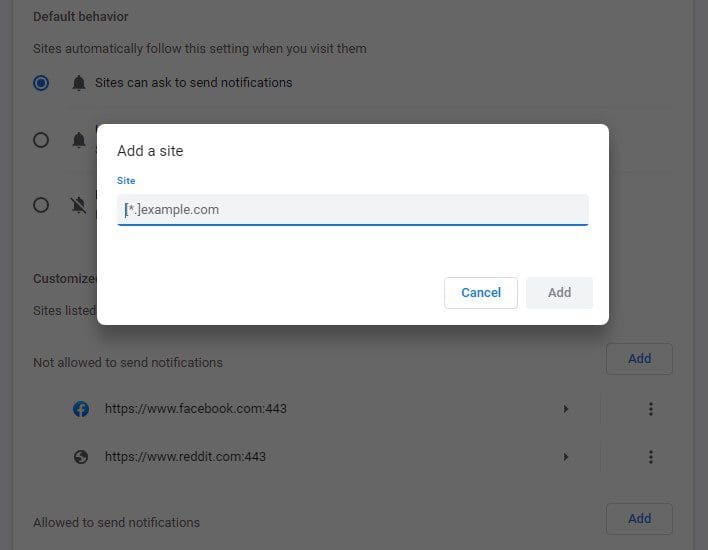
Adding A Web Address To The List
Apart from the domain name, you can also add an IP address on these lists through this method. Remember that these Customized Behaviors are programmed to override Default Behavior. Whenever you visit any site added in Customized Behaviors lists, it will follow the protocol you described in this section instead of the Default Behavior setting.
Managing permissions for a specific website
If you want to tweak things further, you will have to click on the small arrow-shaped icon next to the website address in Customized Behaviors.
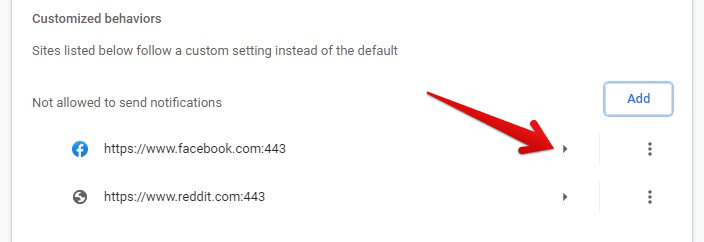
Accessing Permissions Page
This will open up a new page that displays the permissions for that particular website. From here, you can manage each consent individually, allowing you to manage the type of notifications you will receive from that website.
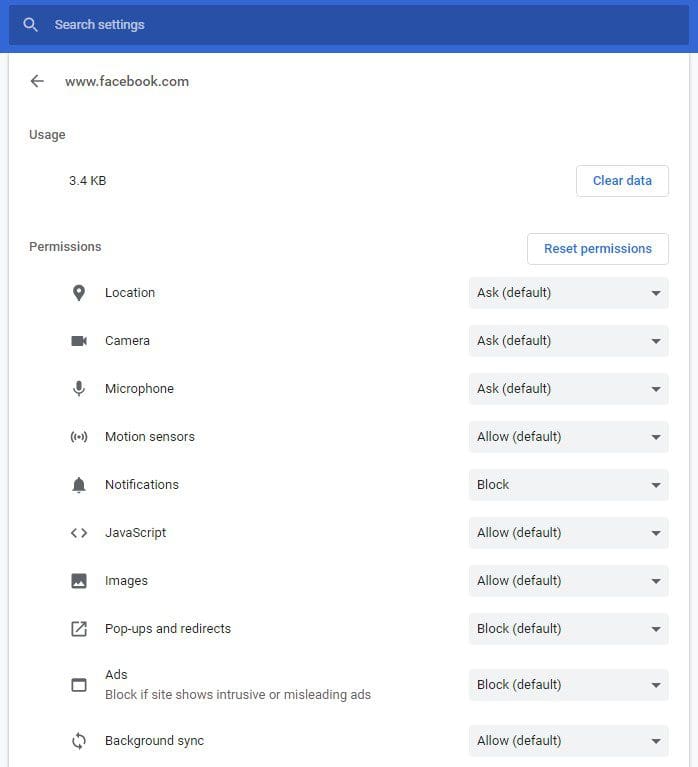
Site Settings & Permissions
This page can also be accessed by clicking on the Lock Icon with the website address in Chrome Search Bar.
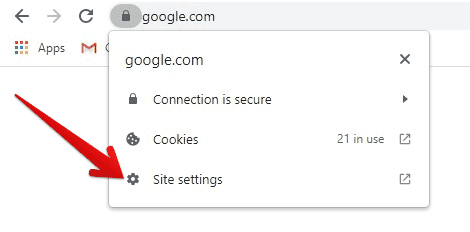
Accessing Site Settings From Search Bar
A click on the Site Settings from the drop-down menu will take you straight to the Permissions page of that website. On this page, you can choose if a particular site has access to your location, microphone, notifications, pop-ups, redirects, automatic downloads, window placement, and more. Unfortunately, managing each permission for every site you visit is not possible. However, the fact that you have access to change and modify these permissions whenever you want is a relief on its own.
Conclusion
Now that you know how to enable, disable, and manage Google Chrome notifications, you must remember that not all notifications are bad. On the contrary, some might prove a lot helpful for you as well. This is the reason why Google has provided you the flexibility to allow and block individual sites so that you can customize your experience to the fullest. Without this added option, it would have been a nightmare for individuals who would require some notifications and not others.
Once you are done with your notifications settings, there will be nothing keeping you from enjoying the most appreciating experience on the internet. If stacked up in large amounts, Pop-ups are also believed to slow down the overall performance of your system. You will not have to go through the annoyance of seeing ads and deals popping up on your display from time to time. It should also go without saying that disabling unwanted notifications will potentially save you from numerous malware and adware threats as well. Moreover, managing Google Chrome notifications is guaranteed to save you a considerable amount of time that you might spend closing pop-ups on your notification panel each day.
