Krita is one of the widely known and used free painting programs. It is available and incorporates a great variety of features and tools. Unlike Photoshop that has lots of features for photo painting, manipulation, and retouching, these features can be confusing, thus causing boredom while learning. However, with Krita, you can still do photo painting, manipulation, and retouching with fewer features. Hence, this makes a digital painter learning curve much manageable.
With minimal distractions and a clean feel and style, Krita has, over the decades, managed to maintain a user-friendly interface. Tools are easily accessible, making them an added advantage for users and learners.
Note: To avoid confusion while learning the Krita application, it is recommended to first understand and familiarize yourself with the tools and features before diving into the painting section.
Krita productivity features
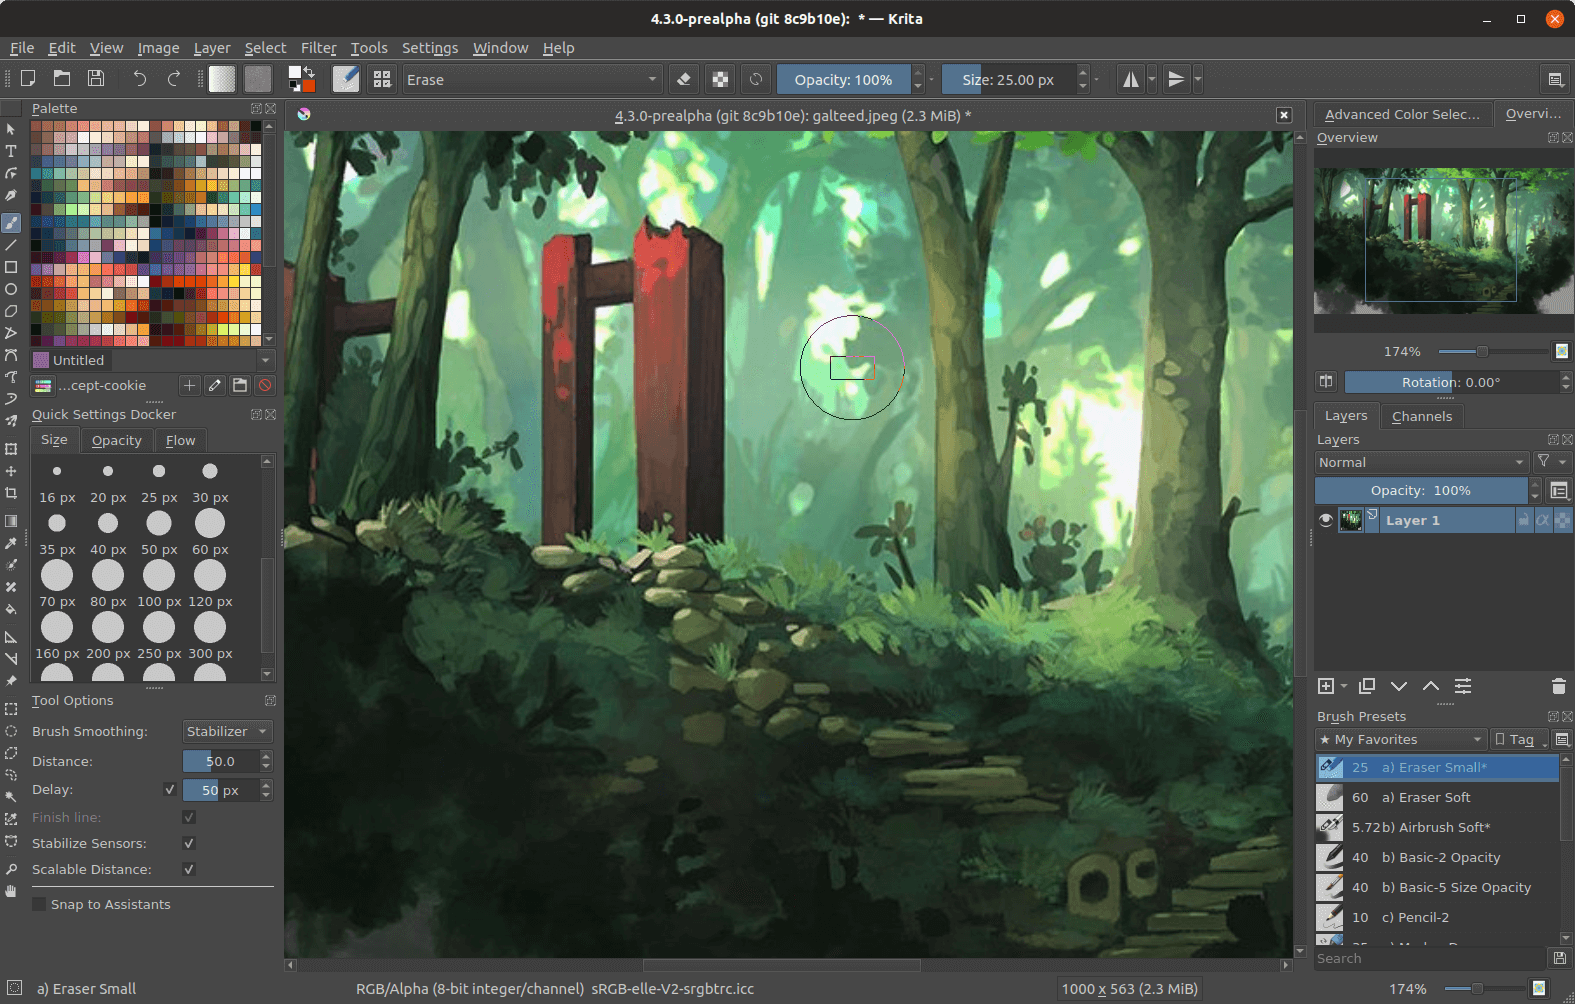
Krita
Layer Management: – Besides painting, Krita comes with filter, group, vector, and file layers. You can order, combine, and flatten layers with the layers management feature. Besides, it helps to organize your artwork.
PSD Support: – With Krita, you can open Photoshop PSD files that even the native Photoshop application might fail to open. Besides, you can save and load your files in PSD format for easier access when taken to different programs.
Full-color management: Krita supports full-color management through OpenColor IO for EXR and LCMS for ICC. This feature allows users to incorporate Krita into the already existing color pipeline. Besides, they can also create a new color management pipeline using the same element. An additional feature is this application comes bundled with various ICC working space profiles that contain a color space browser to explore and visualize the colors.
Drawing assistants: – With the presence of drawing aids, you can get help with straight lines and vanishing points. The drawing assistants contain nine unique sub-assistants that help you design a perfect shape. You can use multiple assistants simultaneously while drawing. The drawing assistants range from drawing the normal ellipses to creating complex curvilinear perspectives.
Select & Transform: – this feature allows us to highlight part of the drawing you are working on. It contains additional features that aid us in adding and removing the highlighted parts from the selection or entire drawing. Additionally, you can feather, paint and invert the selection with the help of a GSM (Global Selection Mask)
OpenGL Enhanced: – For most of its operations, Krita utilizes OpenGL technology. OpenGL allows the users to experience increased zooming and canvas rotation speed.
Training Resources: – Besides the additional educational and training materials easily accessible on the internet, Krita has produced training guides to help its users learn quickly.
HDR Painting: – This is the only application dedicated to helping users open, edit, author, and save Scene-referred and HDR images. Nonetheless, with the OpenEXR and OCIO support, a user can manipulate the view to examine the HDR images further and later use them in more edge-cutting ways for smoother film and visual effects.
Python Scripting: – This is a powerful API bundled with Krita. It helps in creating your widgets. Using your API and PyQt gives you room for many possibilities. For reference purposes, this application also provides users with several plugins.
Installing Krita on Chromebook
Stick to this article guide if you have a Chromebook to learn how to install and use it. There are two distinct methods of installing the Krita application on a Chromebook, as mentioned below:
- Installing Krita from the Play Store
- Installing Krita using the Terminal
Method 1: Installing Krita from the Play Store.
Follow the steps provided herein:
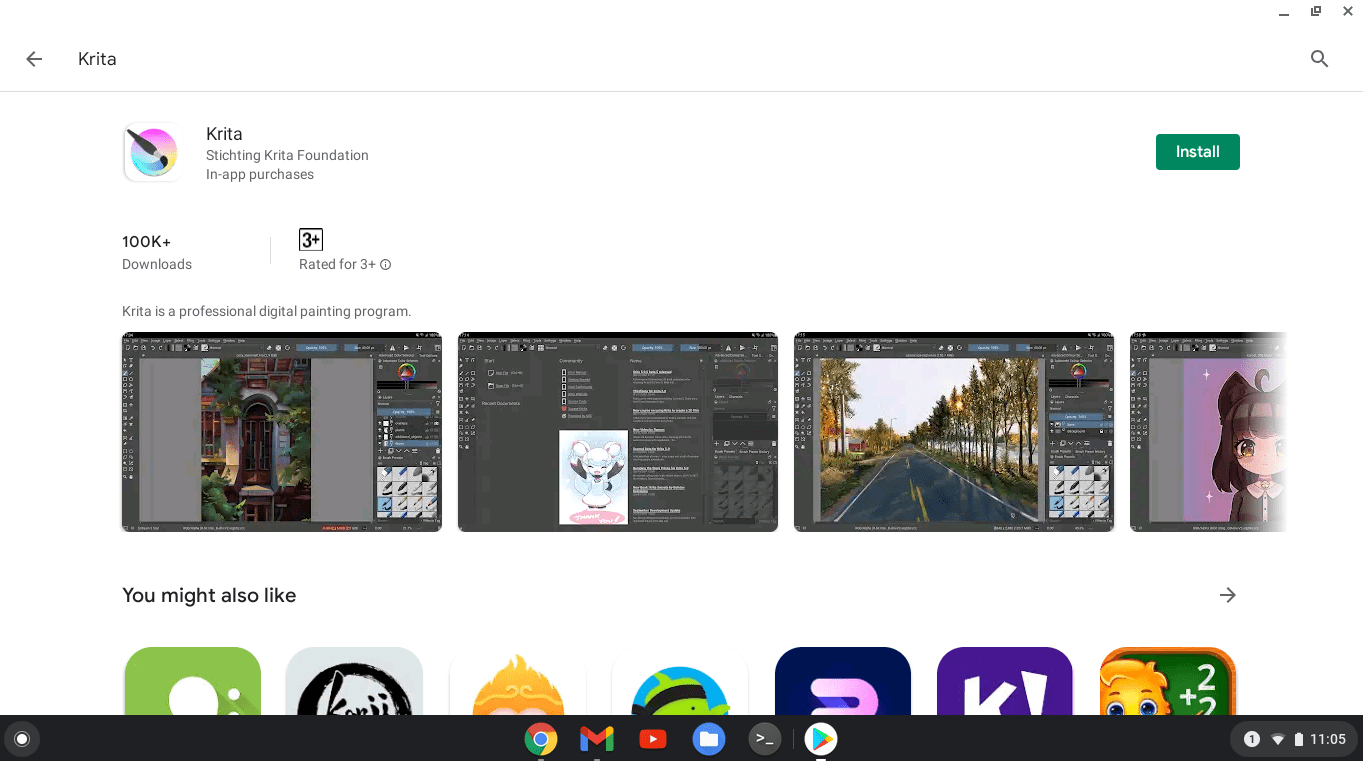
- Launch Play Store
- Search for Krita
- Click the “Install” button

Search for Krita on the Play Store
- Wait for the application to be downloaded and installed
- Once it is complete, launch the application and enjoy using it
Alternatively, click the link below to redirect you to the Krita app on the Play Store:
https://play.google.com/store/apps/details?id=org.krita&hl=en&gl=US
Method 2: Installing Krita using the Terminal
If the previous method did not do the trick for you, try out this method.
We must first enable or turn on the Linux application on our Chromebook to access the Terminal to use this method. Follow the guide provided below to get it done:
- Open “Settings” on your Chromebook
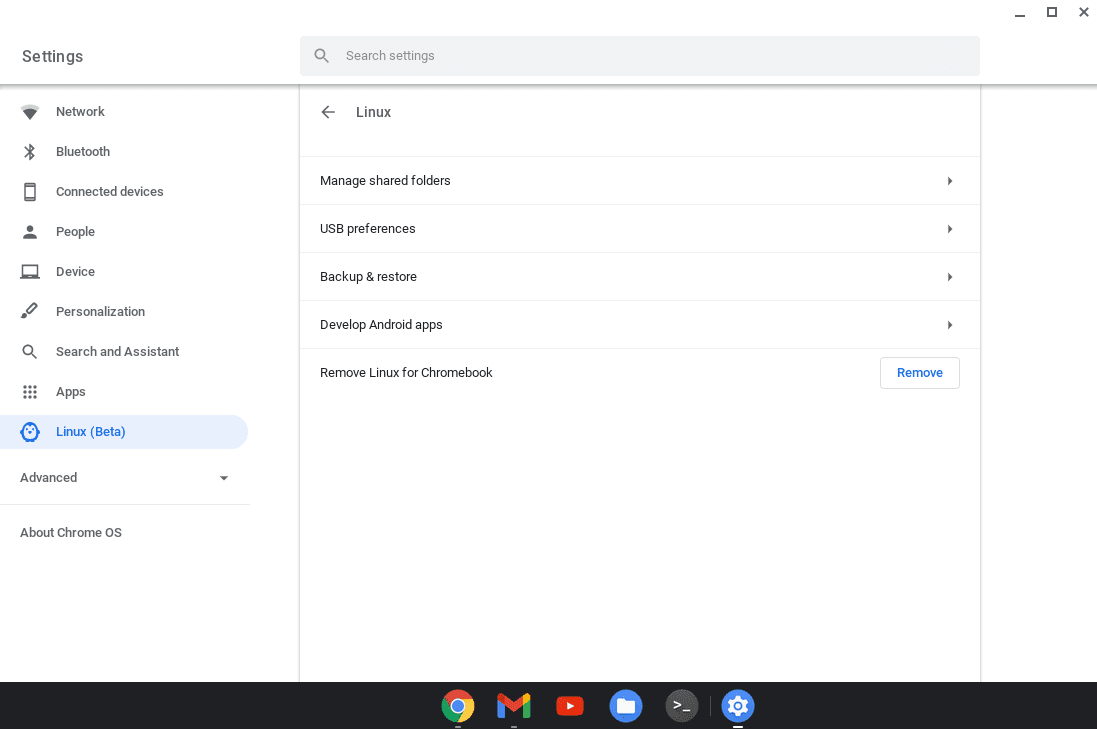
- Next, scroll down on the left side and select the “Linux (Beta)” option

Open Settings, then scroll down through the left panel and locate Linux(Beta)
- Click the “Turn on” option
- An installation process will begin. Be patient till the process completes
- Once the installation process is complete, a blank terminal window will pop up
- Copy and paste the command below to add the required repository resources to your Chromebook:
sudo echo deb https://deb.debian.org/debian bullseye main | sudo tee -a /etc/apt/sources.list.d/krita.list
Output:

Add repo resources to your Chromebook
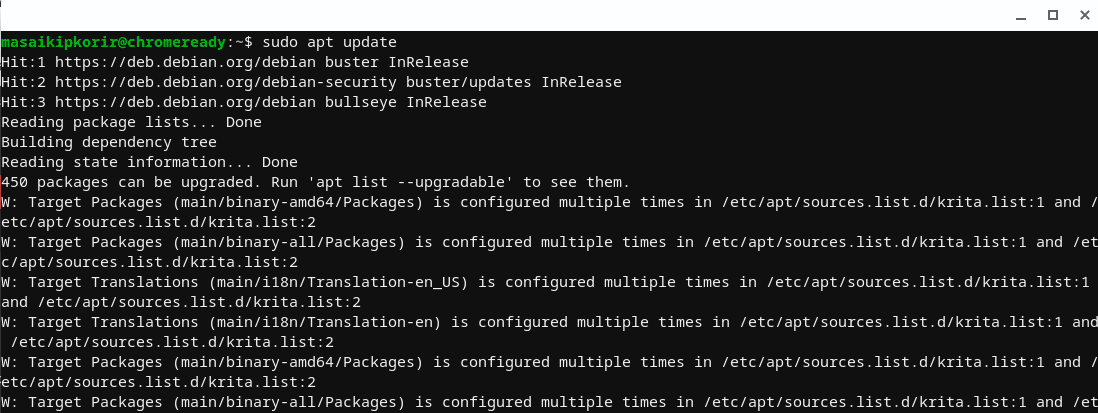
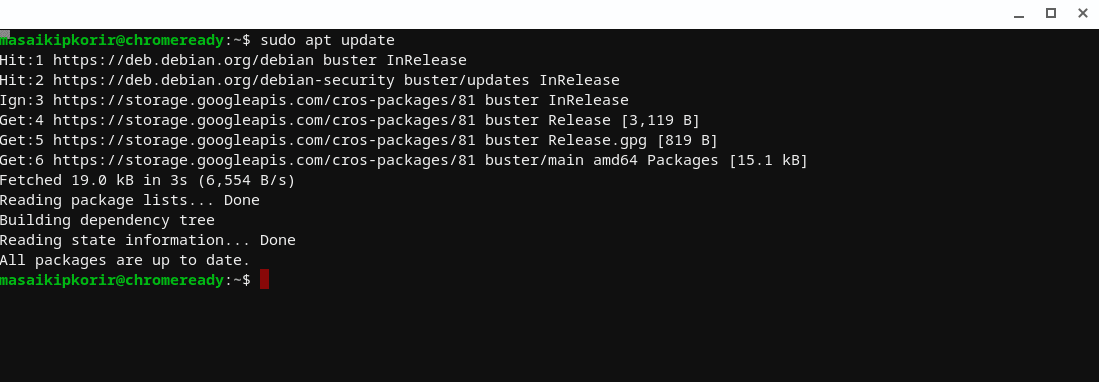
- Once the resources have been successfully added, run the command below to update the Chromebook resources
sudo apt update
Output:

Run sudo update command
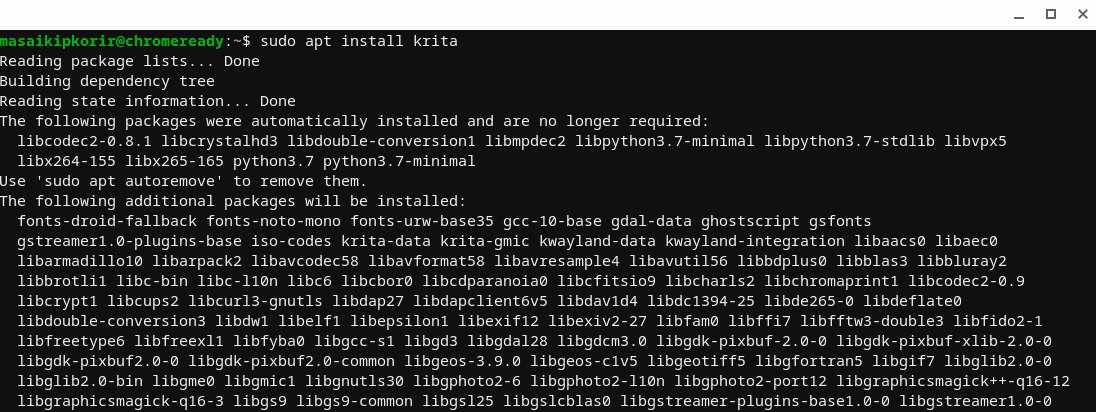
- Now install the Krita app using the command below:
sudo apt install Krita
Output:

Install Krita
- Once the command above has finished executing, we shall remove the repository resources we added in step 6 using the command below:
sudo rm /etc/apt/sources.list.d/krita.list
Output:

Remove repo resources from your Chromebook
- The final step is to update your Chromebook resources using the update command below:
sudo apt update
Output:

Run the sudo update command
That’s all. You have successfully installed the Krita application on your Chromebook.
How to use Krita on Chromebook
Below are some common and standard ways to navigate the Krita application if you are a newbie.
Switch application language
After installing the Krita application, Launch it. If you use Krita for the first time, you might find Kinder confusing, but it is not. First, you might want to change the application language after launching the application. To do so, we shall use the settings option in the menu bar, click on it and scroll down to the “Switch Application Language.” Here you can choose your preferred language.

Switch Application Language
Create a new document
To create a new document, you can use the “File>New” option or the “Ctrl + N” keyboard shortcut combination. Under the Create new document section, you can use the already existing templates or create a “Custom Document” with your preferences. You also have the “Dimensions tab that contains the “Image Size,” “Color” settings, and the other sub-settings.
Note: You can use the “Content” tab under the “Create new document” to create layers
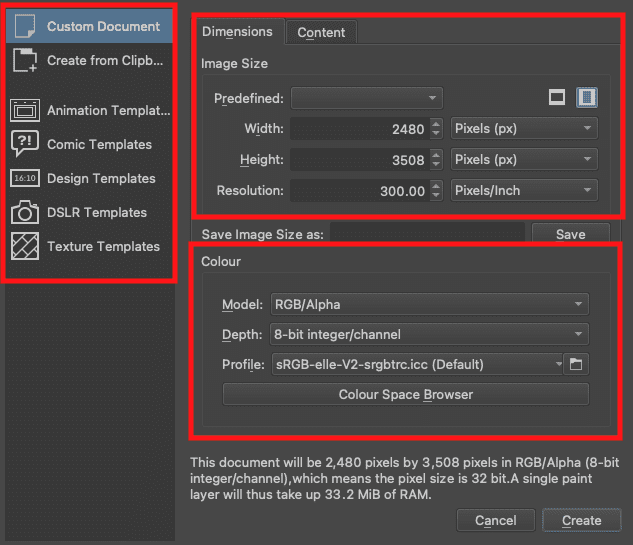
Create New Document
Save and load the workspace
To save your workspace, you can either use the “Ctrl + S” keyboard shortcut combination or click on the icon positioned on the top-right corner of your workspace. Besides, you can use the same icon to load any standard workspace.
Adding and removing Dockers
For this situation, we shall be using the “Dockers” option to add and remove dockers that display on our workspace. Click on the “Settings” option in the menu bar and hover your mouse over the “Dockers” option. You can now tick any docker you want to display on your workspace. If you intend on removing the dockers showing, untick the option you want to remove.
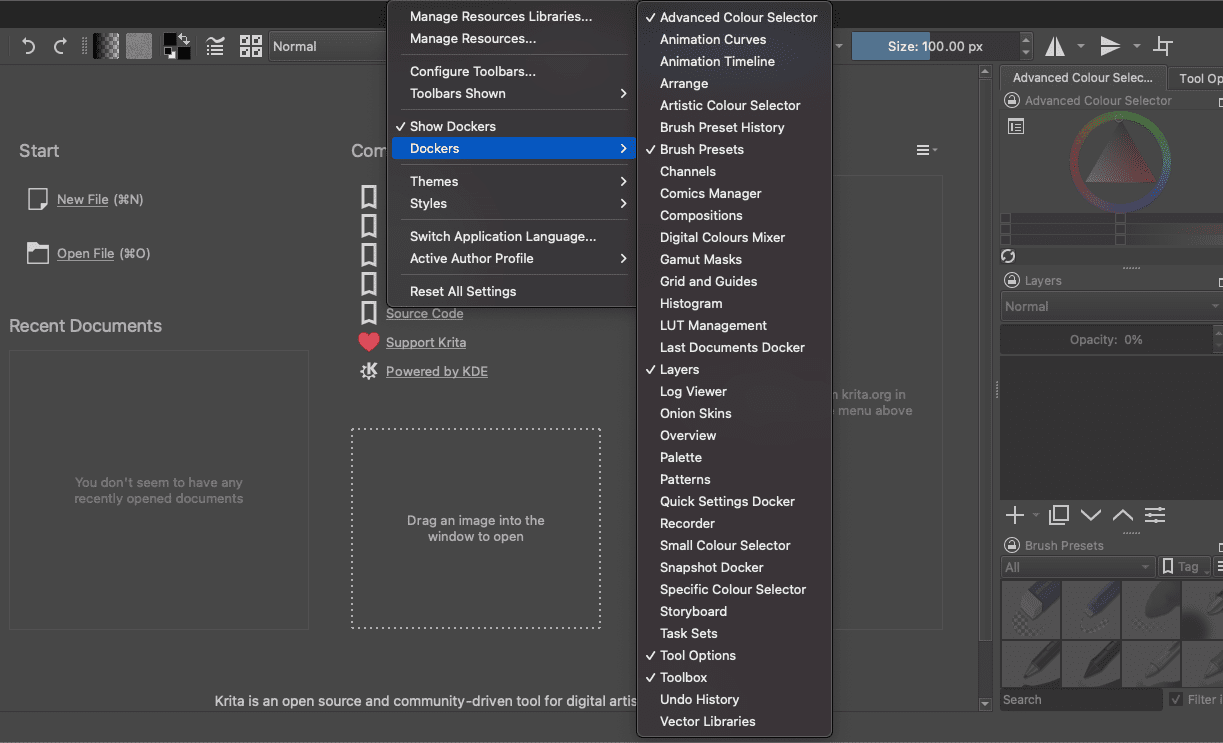
Adding and removing Dockers
Adjusting Shortcuts
Adjusting shortcuts can be done with the settings option on the “Menu” bar. Click on the “Settings” then “Configure Krita.” On the left side of the “Configure Krita” window, select the “Keyboard Shortcuts.” From there, you can choose and customize the “Keyboard Shortcuts” to your preference.
Tools
Most tools are visible on the workspace by default. However, it is important to note that Krita also allows you to use vector tools besides the selection and drawing tools. The vector tools can be used on vector layers. Click on the dropdown menu beside the “+” icon on the bottom right side of your workspace and select the “Add Vector Layer” option.
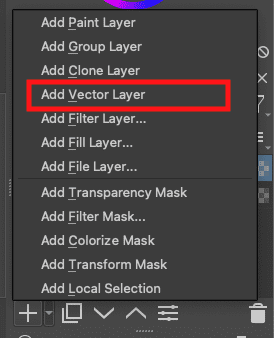
Add Vector Layer
If you want to leave the vector layer option and use the paint layer, you can create it following the exact procedures we used in creating the “Vector layer,” but this time around, you select “Add Paint layer.”
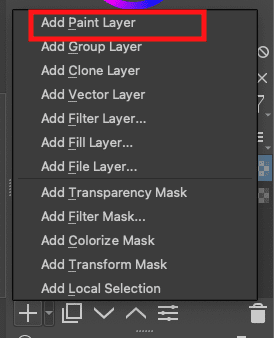
Add Paint Layer
Note: once you select a specific tool, you can customize it using the toolbar that appears with the tool presets under the main bar.
Menu Bar
It contains significant and valuable tabs that aid the user in accessing and using the tools they desire quickly. By default, the menu includes the: “File, Edit, View, Image, Layer, Select, Filter, Tolls, Settings, Window, and help” sub-menus. All the mentioned sub-menus allow users more straightforward and quick access to tools and settings using the Krita workspace.
Conclusion
There are lots of funny and exciting stuff that we can create using the Krita application. Adapting to Krita won’t be a problem if you are a Photoshop enthusiast. Most tools are alike and function similarly to those in Photoshop. This article guide has comprehensively covered the two installation methods one can use to install the Krita application on Chromebook. Besides, it has also provided an overview of how to use the application.
Since Chromebook is lightweight and fast, you might find it much more interesting to run applications than other primary OS such as Windows and Linux. Therefore, using this application on a Chromebook is more fascinating. Try it now and give us your review in the comment section. Don’t forget to also reach out for aid if the installation guide did not work out for you or if you faced any challenges using the Krita application.



1 comment
I don’t get it. I do not understand how to find or even open the app.