Chromebooks are widely acknowledged for their unrivaled speed and stability, making them an all-time favorite for browser-centric workloads and everything of the like. In the tech-forward age of 2021, people want to get things done, and Chrome OS is out there helping enterprises and individuals achieve that. You can find a wide variety of Chromebooks at the time of writing that pack all the bells and whistles in terms of design, performance, and, of course—the Chrome OS hallmark—battery life.
Please take a look at the ASUS Chromebook Flip CX9 to get an idea of what we’re talking about. Of course, there are many more stellar examples like the latter to go on about in that respect, but it’s time that we cut to the chase. For a device that can handle WordPress, powerful desktop-grade software like OpenShot, and even the functioning of another operating system, tax filing sounds like a walk in the park.
If you’ve been meaning to learn how to file your taxes on a Chrome OS laptop and be a responsible, righteous law-abiding citizen, look no further than this Chrome Ready guide. In this article, we’ll teach you how to file taxes on a Chromebook in-depth, so sit tight, grab a drink, and continue reading for an elaborate tutorial.
Filing taxes on a Chromebook
Before we go about showing you how to file taxes on your Chromebook, let’s cover some ground quickly and cover the basics of what can be and what can’t be done on Chrome OS for filing taxes. The following brief overview will help establish a fundamental understanding so the rest of the article will be easier to digest.
Most desktop-oriented software that comes in the format of an executable file cannot run or be installed on your Chromebook, simply because Chrome OS isn’t engineered to handle all that. However, the simplicity makes this operating system so desirable, so if you were to take that away from Chrome OS, there wouldn’t be any point in using a Chromebook anymore.
In addition to that, all those software installed through CDs or DVDs on regular PCs is also not welcome on Chrome OS. There’s exceedingly limited support for optical discs on Chromebooks, meaning that you can’t quickly burn DVDs. Therefore, any software or program that can be bought in a DVD format is a red flag for Chrome OS – be aware of those!
Now that we know what can’t be done to file tax on a Chromebook let’s cast a lens on what can be done. First off, web-based or browser-based tools can comfortably be used on any Chrome OS laptop, as long as you have an internet connection and the website you’re visiting isn’t down. Next, you can also grab applications from the Google Play Store specifically for doing your taxes. Lastly, if there is any availability, you can also use the Chrome Web Store for download applications or extensions that will directly assist you in filing your taxes.
We’ll assume that you’ve now made a mind map, and the scenario appears more straightforward to you. All that’s left is diving deep into the specifics now and discussing the actual methods of filing taxes on a Chromebook. So, without any further chit-chat, let’s jump right in.
Option #1. TurboTax

TurboTax by Intuit
The first entry on the list is going to be a pretty obvious one. If anyone is looking to file taxes on their Chromebook, TurboTax should be their go-to choice. Although this program is available to download on PC as a full-fledged software, there exists a web-based variant of TurboTax as well, making it possible for Chrome OS users to partake in the once-in-a-while tax filing chore without breaking a sweat.
The browser-based version of TurboTax supports Chrome 73 or higher. When writing this article, the latest version of the Google Chrome browser is 95, so you’re pretty much set for the whole part. Furthermore, the performance of this software depends on what Chromebook you’re sporting. If you have something like the Acer Chromebook Spin 713, you need not worry about anything. However, even if you own a lower-end Chrome OS laptop with 2 GBs of RAM, you will experience a minimal amount of performance drops, so rest assured regarding the working of TurboTax.
An in-depth guide on filing taxes with TurboTax
To get started, use this direct link to get to the official website of TurboTax. Once you’re there, click on the “Sign In” button present in the top-right corner to begin the account creation process.
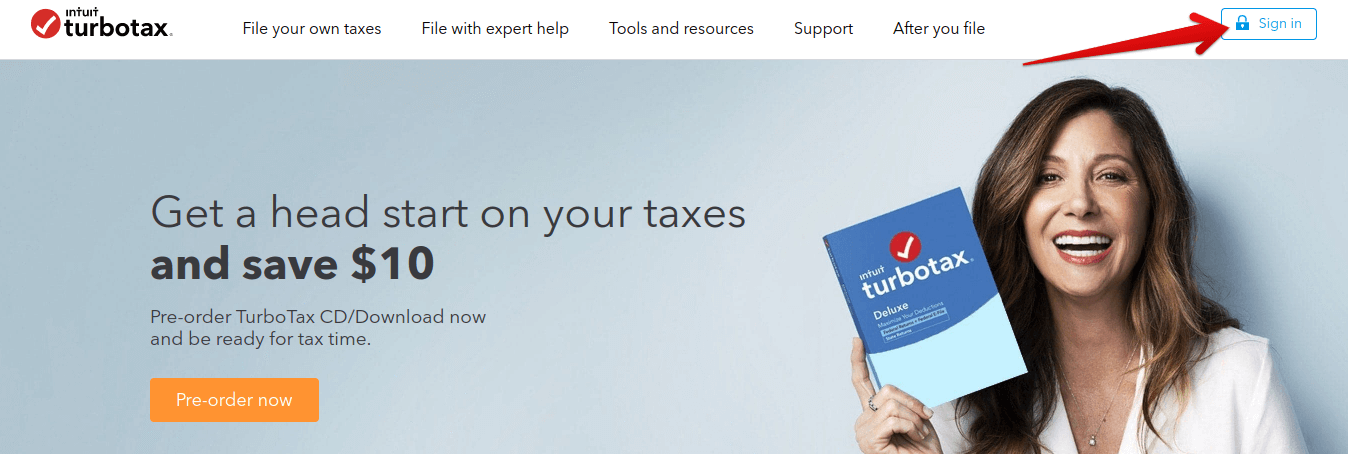
Signing in on TurboTax
Once you’ve clicked on “Sign In,” the next step is to create your account. This will be pretty easy since you only have to put in some of your basic credentials, such as email address, phone number, and a password, and that will be it. Once you’ve entered the information in all the required fields, the next step is to click on “Create Account.”
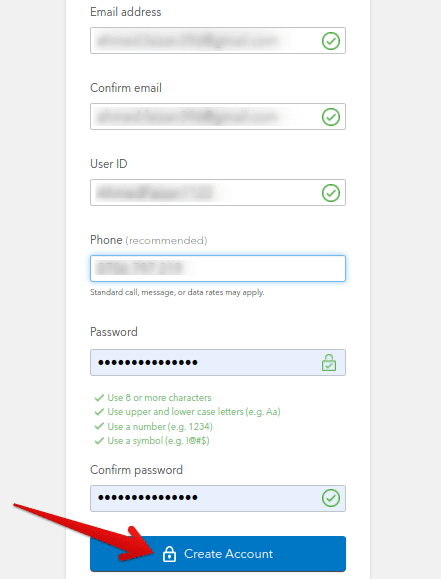
Creating a TurboTax account
Once that’s done, you will have completed the initial part of your account creation process. However, that’s just the tip of the iceberg. You’ll have to go through a series of more steps related to the registration of your account, so your effort doesn’t go in vain, and you don’t have to repeat all this when you come to file your taxes next time on your Chromebook.
At this stage, you should grab the required documents that you need for doing your taxes. Most of these are your government-issued ID, W-2 or 1099 form, earned interest on your investments, medical bills and receipts, charity donation receipts, and education expenses. In addition to all that, your Social Security number might also be needed, so keep that close.
After procuring the needed paperwork, it’s time to carry on the filing process. Luckily, TurboTax makes this big ordeal look uncomplicated and reasonably straightforward, so keep on going with registering your account. After you’ve entered your email address, phone number, and password, the next step is to fill in your basic information regarding your filing status on TurboTax.
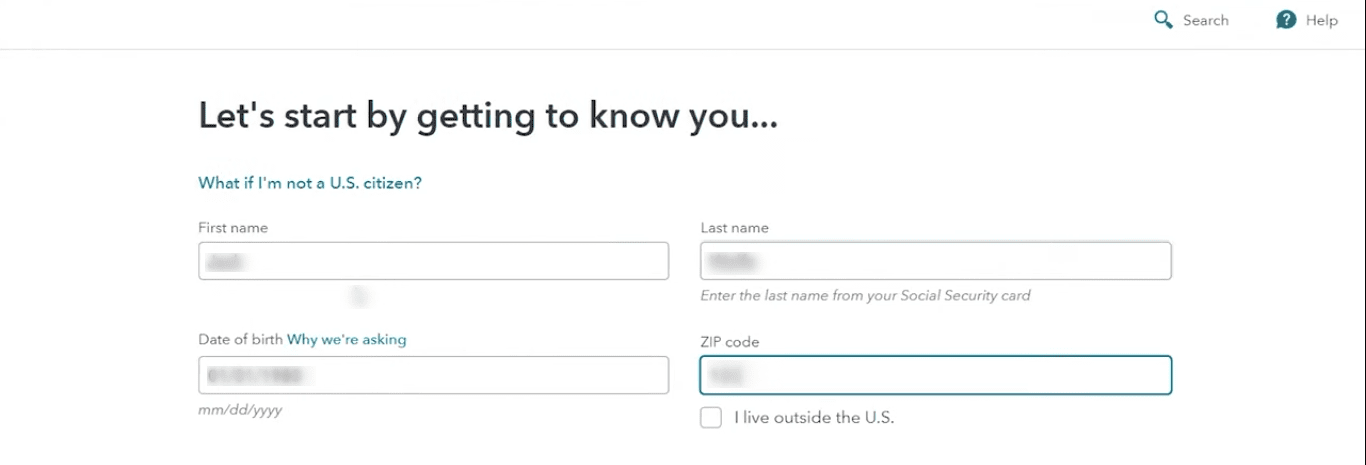
Filling in basic information on TurboTax
After that, the system will now try to get a financial picture of all your expenses, so keep checking off whatever suits your expenditure the best. Remember to stay honest about your choices, or you could get in trouble potentially. After you’ve gone through the basics of your filing status and personal information, which is relatively uncomplicated to complete, the next step is the most important one: entering your federal tax info.
This whole section will be divided into different stages. Let’s take a look at them below.
- Wages and Income
- Deductions and Credits
- Other Tax Situations
- Federal Review
All of those stages are essentially undemanding to go through. You put in whatever that’s asked of you truthfully while having your forms by your side, and you’ll be all set to file your taxes. In the first stage, i.e., Wages and Income, you’ll have to upload your W-2 form, so make sure you’ve already got a scanned copy of that document.
When everything has been dealt with in the first three stages of this section, the last stage is to review everything you’ve entered. It’s essential to go over your inputted details to ensure the filing accuracy is none other than 100%. However, this reviewing process isn’t like how you’re thinking it to be. TurboTax will ask you questions like “Check This Entry” instead of making you review the previous stages yourself. This will prove to be more effortless for you to verify your inputs.
Once done, it’s time for a step that you may or may not need to complete. If you live in the USA, where the state tax is mandatory, you must enter the state tax information. The good news here is that there’s the minimal effort needed on your end. TurboTax will automate the process and convert your federal tax into state tax by itself, so you don’t have to put with any banal paperwork yourself. Therefore, you’ll need to make a couple of clicks, and that will be it.

Filing State taxes
You’re almost at the end now, so do bear a little longer. What’s required next is to choose a refund method for your tax returns. You can opt for a direct deposit, prepaid debit card, credit for next year’s tax payment, saving bonds, or a check sent to you through the mail. When you’ve selected your refund method of choice, it’s finally time to review all of your entries and file your taxes subsequently. Make sure you’ve got everything right at this stage since there aren’t going to be anymore by the time you’re done here.
With that said, you’ve successfully learned how to file taxes on your Chromebook using TurboTax! The IRS may take anywhere from a couple of days to three or four weeks to accept your tax filing, so sit tight and wait for that email.
In our opinion, TurboTax should be the go-to method for filing taxes on a Chrome OS laptop, but if you’re still not satisfied with it for some reason, we’ve got more options for you to try out. So let’s get into those now.
Option #2. H&R Block

H&R Block
Right alongside TurboTax in terms of popularity is H&R Block – an enterprise that has been standing tall since 1955 as one of the most comprehensive tax filing services ever. It boasts many pros and points compared to other tax filing programs, such as its user-friendliness and cost-effectiveness, and is simply one of the top choices when people are looking for software to do their taxes. Like TurboTax, H&R Block makes it look easy, whereas, on the contrary, it’s not.
However, if we’re to compare the two giants head-to-head, TurboTax will sprint just ahead of H&R Block in terms of the ease of using it. While both of these programs can perfectly cater to beginners and casual users, many will find TurboTax more approachable. However, if there’s one aspect where H&R tops TurboTax, it’s affordability. It’s common knowledge that filing your taxes through online services such as these are free to use, but only up to a certain extent, and that is when your taxes aren’t past a certain threshold.
Both services offer a Deluxe upgrade that lets you cover returns that aren’t so simple. This is the purchase that most filers have to make because almost all taxpayers fall in this category. However, the edge that H&R Block will let you have in this regard is that it covers more within its free-to-use version than TurboTax. So it’s another terrific choice to go with if you’re after a service that gets the job done.
An in-depth guide on how to file taxes with H&R Block
To get started, use this direct link to get to the official website of H&R Block. Once you’re there, click on the “Sign In” button in the top-right corner, similar to how it’s done with TurboTax.

Signing in on H&R Block
Everything from here on out is clockwork. You dive in, create or register an account, and go forth with your tax filing. Once you click on the “Sign In” button, a small pop-up will appear from under the screen, prompting you to sign in with your already registered credentials. Since that’s not the case here, we will have to create an account from scratch.
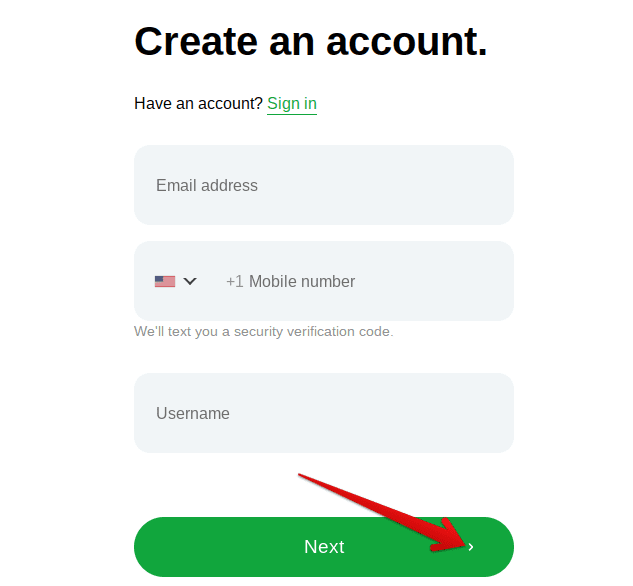
Once you’re all signed in, you’ll be taken to the main dashboard area of H&R Block. They put the whole process quite politely, as we’ve noticed. Many users will appreciate the IT team behind this program for that. However, to come back on the topic at hand, it is from the dashboard page that you’ll start getting acquainted with H&R Block.
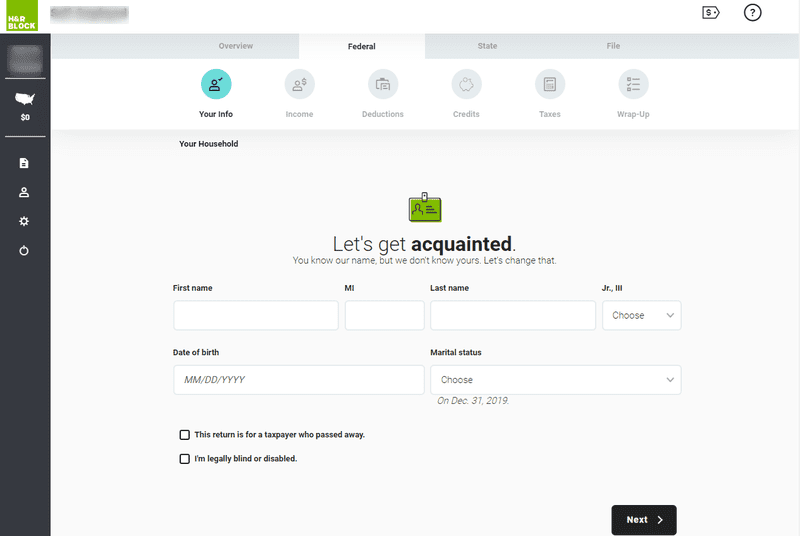
H&R Block Dashboard
The whole tax filing process is divided into the following sections:
- Your info
- Income
- Deductions
- Credits
- Taxes
- Wrap-Up
Each section will walk you through the process where you’ll have to enter the required information. For a list of documents that might be required during this whole procedure, check back with the “An in-depth guide on filing taxes with TurboTax” section. The information of forms can be entered into the system manually, but you’ll also have to upload the whole document at select stages in the process.
One feature of H&R Block is its dedicated “Help” feature that becomes visible under every demanded field during the tax filing procedure. If you’re a newcomer, doing your taxes will not only seem time-consuming but will also appear to be a bit strenuous. The base specialty of H&R Block negates that effectively right from the get-go, but what takes the cake is the added help feature. Opting for help will prompt the system to explain whatever is demanded from you on the current screen.
Once you’ve gone through the Federal section and have entered all your sources of income and your total revenue, you’ll be offered two methods to receive your federal refund, which have been systemically calculated. TurboTax provides you with multiple solutions in this respect, but on H&R Block, you can either opt for a direct deposit or a check via email. Choose whatever sounds better to you to continue.
You’re almost at the conclusion of it all now. The system will ask you a couple of more questions, including your driver’s license and other income sources. After finishing the final section, you’ll finally get to pay off your taxes and bid farewell to this chore.
TurboTax and H&R Block are preferred programs for filing taxes on Chrome OS with downsides that are nothing but trivial. However, if you’d still like to explore more options, we have other services lined up for you.
Option #3. TaxAct

TaxAct
Not a great deal of people find enjoyment in filing their taxes. Several, in turn, stay on the hunt for something that can get this arduous task over with quickly and without costing them too much. That is where they stumble upon TaxAct – a well-renowned tax preparing and filing program with various packages for covering each type of consumer out there. TaxAct can hinge a little on the complicated end of tax filing software, so it’s best suited for experienced taxpayers who’ve been in the DIY filing field for good while now.
TaxAct will offer four different plans for taxpayers. The free version will encompass your unemployment earnings, retirement distributions, educational deductions, W-2 payments, earned income tax credit, and even child tax credit. As for the interface, you won’t find it cluttered with nonsensical elements, particularly those that can cause a fair bit of confusion. If somewhere along the way you require professional assistance, you instantly upgrade your plan and call in an expert to help you carry out the rest of the filing process.
TaxAct is a cheaper alternative to TurboTax and H&R Block, so quite desirable for people not wanting to opt for premium-grade tax filing programs on Chrome OS. However, it’s not entirely free—as you understand by now—since time-saving features like automatic document import justify the fees associated with TaxAct’s various packages. With that being said, if you want your tax filing to hold your hand for you while you go through the tax filing process, TurboTax is probably the better option.
An in-depth guide on how to file taxes with TaxAct
To get started, click on this direct link to get straight to the official Tax Act website. Once you’re there, click on the “Sign In” button to begin creating your account on this platform.
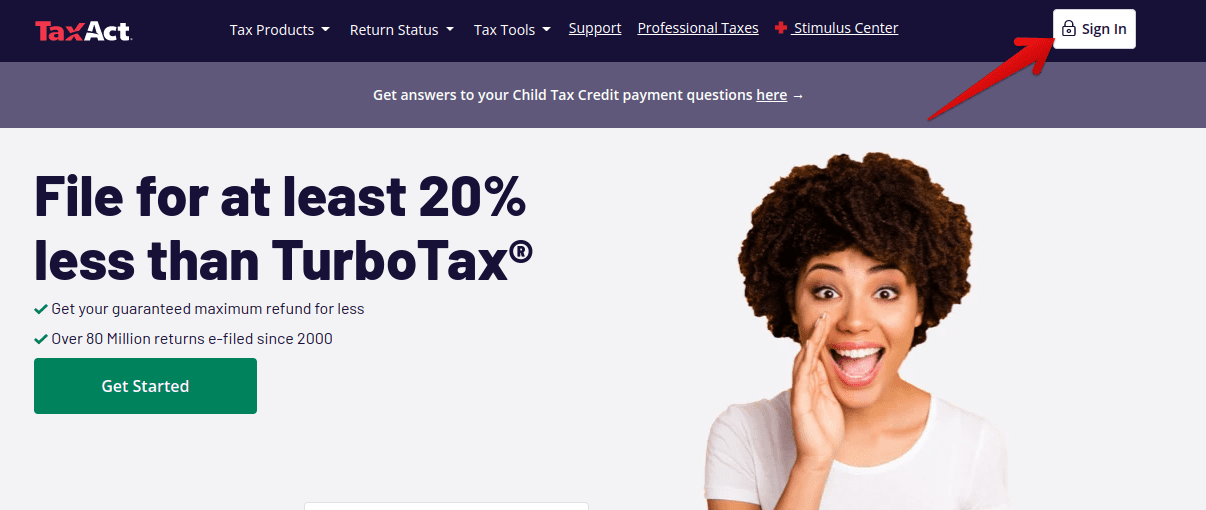
Signing in on TaxAct
From here on out, you’ll go forward with the account creation process by putting in your required credentials. The initial phase is quite basic, as all you have to do is enter your phone number, email address, and password. As you progress through the account creation procedure, you will have to enter more advanced details, though all of them will be related to your tax filing. Since we’re visiting TaxAct for the first time, we will have to create an account from scratch.
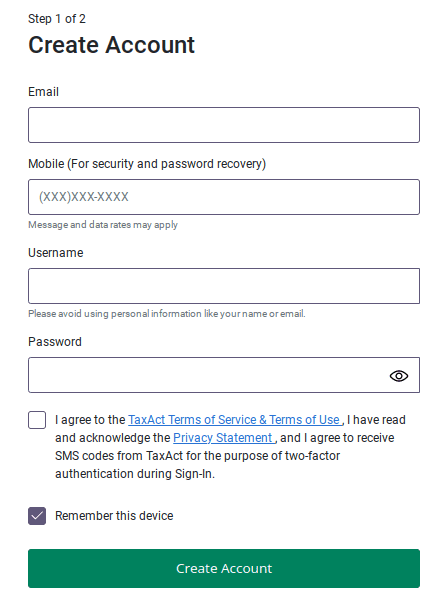
Creating an account on TaxAct
Once you’ve covered the basics, it’s time to get into the raison d’etre of TaxAct – the actual tax filing process. The “My Taxes” screen is the first thing you’ll see after signing in on the platform. This is where you’ll be doing your taxes by adding a federal tax return. Like the previous two software, TaxAct also divides the procedure into multiple stages. The following are the sections you have to complete to file your tax.
- Basic
- Federal
- State
- Review
- Filing
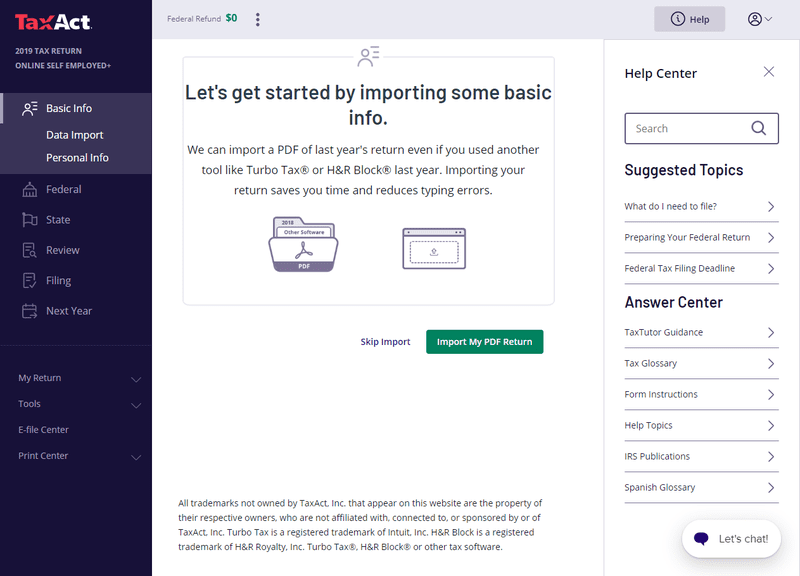
TaxAct interface-
As the name implies, “Basic” is where you’ll be entering your most basic details. Entries like Name, Social Security Number, Occupation, Date of Birth, Filing Status, and Marital Status have to be filled in here. You’ll find the interface working pretty nice up until now as TaxAct is mostly a no-frills program. When you’re done with these basics, it’s time to proceed to the next section.
“Federal” will be relatively straightforward to the point. Everything related to your federal tax return will be required here. This includes your gross income, credits, deductions, and other tax items like estimated taxes. In addition, this section will give you a summary of your federal tax, including the amount you’ll be refunded or the amount you owe to the US government.
Next up is “State,” and this is your state tax. Some states do warrant some tax to be paid while others do not. In this section, you’ll choose the state of your residence and let TaxAct transfer the information from your federal returns to your state returns. After filling in the required entries, you’ll move onto the “Review” section. By carefully assessing all of your previously entered information, you’ll proceed to the “Filing” stage and, finally, conclude doing your taxes.
TaxAct can also be downloaded as a standalone program, similar to TurboTax and H&R Block, but you’ll be needing either a Windows PC or a Macbook for that. The web-based version of the software works excellent for Chromebook users, so if you own a Chrome OS laptop, it’s something you can opt for on an annual basis.
Option #4. Use Chrome Remote Desktop
While many might find this method seemingly unorthodox, there’s another way you can technically use your Chromebook for filing taxes, and this is through the functionality of the Chrome Remote Desktop. Using this web application, you can hook your Chrome OS laptop to your Windows PC quickly.
After you do that, you’ll be basically in control of your Windows PC through your Chromebook. Think of the Windows computer as a television and the Chromebook as a remote control. Lucky for you, we’ve outlined the whole process of connecting your Chromebook to any external monitor in this article here, so do give it a shot if this is something that sounds workable for you.
The most significant advantage that you get by shooting for this method of filing taxes on a Chromebook is no additional cost. If you have already set up high-end software on your PC for tax filing and wouldn’t like to spend anything extra, Chrome Remote Desktop is your best bet.
Option #5. TaxSlayer

TaxSlayer
The final method that we have devised to be included in this article is TaxSlayer, a program that’s even cheaper than TaxAct. We’re not going to detail this software much because the whole filing process sported by TaxSlayer is quite similar to the programs above. If you’ve understood those sections well, operating TaxSlayer will be a walk in the park. However, what we will shed some light on is the reason you should opt for TaxSlayer instead of TaxAct, TurboTax, or any similarly-equipped tax preparation software.
TaxSlayer comes off as an efficient tax preparation program for those who trust themselves to handle complex situations. It’s the least refined out of all the other enlisted options in user-friendliness, but cost-effectiveness is where TaxSlayer shines. It lets you file federal and state taxes for free with only one free state return, and if your demands ever get a bit higher than that, you can grab its Classic package for $24.95. The latter covers all tax situations and is excellent value for money to get the maximum return for your filing profile.
You can use this direct link to check out TaxSlayer.
Conclusion
If you’re a citizen of the United States of America, you know that there are no escaping tax filings. Like death, paying your taxes is something that’s guaranteed in this world, unless you want to spend the rest of your life on the run from the police. To accommodate users of Chrome OS in this regard, we have written this descriptive guide, so Chromebook owners know what options they have for doing their taxes.
Out of all the options we’ve listed, the one that we use personally is TurboTax. It’s fast, efficient, and exceedingly reliable, so you know you’ve picked the right tool for the job. That said, different products may appeal differently to you, so don’t hesitate in giving H&R Block, TaxAct, and TaxSlayer a shot as well. That said, Chrome Ready wishes you an easy-going taxpaying season!
