Chromebooks run on Chrome operating systems whose main capabilities include storage in the cloud, built-in Google, and advanced interlinked layers of security. In addition, it has offline-capable apps that will allow you to use Chromebook when you are not connected to the internet.
The first step to installing NPM in a Chromebook is to put the Chromebook in development mode to allow you to access the terminal. By default, the channel is usually on Stable. However, there is no need to switch if you are using version 69 and above.
Switching Chromebook/CloudReady to the developer channel
The first step is to switch the Chrome OS to the developer channel. By default, Chrome OS runs on a stable channel. Therefore, we shall break the article into two sections. The first section is for the users running Chrome OS via CloudReady on a dedicated computer or a VMware and the second section is for the users on actual Chromebooks.
1: Switch from stable channel to Developer channel on a CloudReady (Chrome OS)
Step 1: You need to open the settings by clicking on the clock at the bottom right of the screen. Among the items that pop up, the settings menu is located in the top right corner.
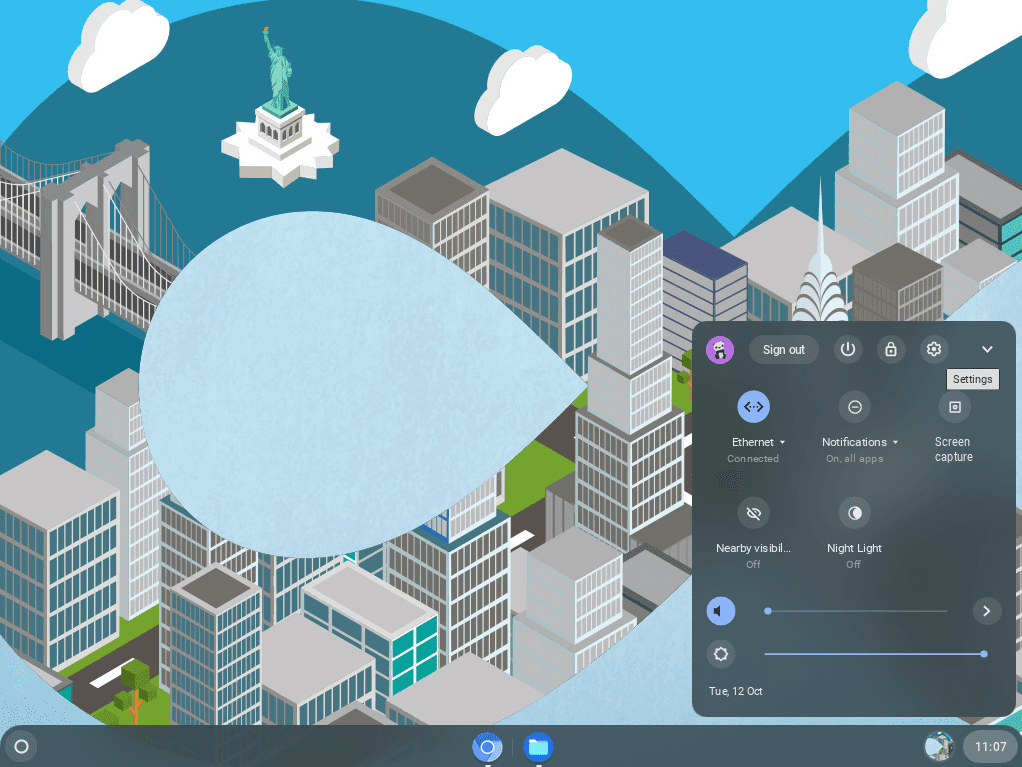
open settings
Step 2: Select the option “About Chrome OS” on the left panel, towards the bottom.
Step 3: Choose the alternative “Detailed Build Information.”
Step 4: After that, choose the option to change the channel.
Step 5: Choose “Developer.”
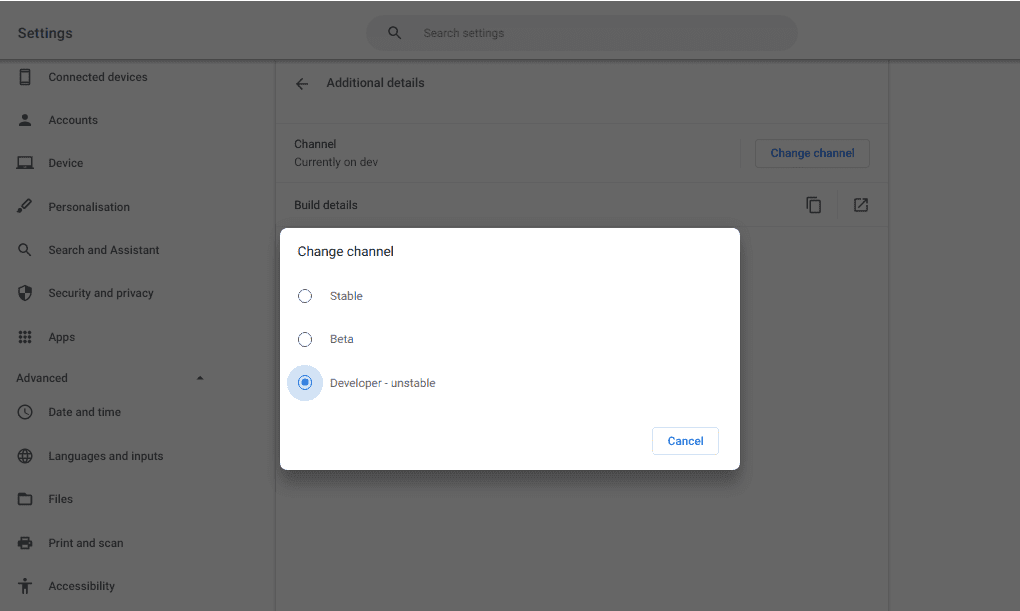
select developer channel
Step 6: To apply the new changes, click on “Change Channel.”
Step 7: The system will then run an update up to 100%. When done, it will load and prompt you to restart.
Step 8: After restarting the system, access the settings menu and scroll down to the point you see the option, “Linux(Beta).”

Click “turn on” under Linux(Beta)
Step 9: Subsequently, click on “Turn On” on the right side of the image shown above.
Step 10: Click on “Install.” The installation will take a few minutes to finish the installation process.
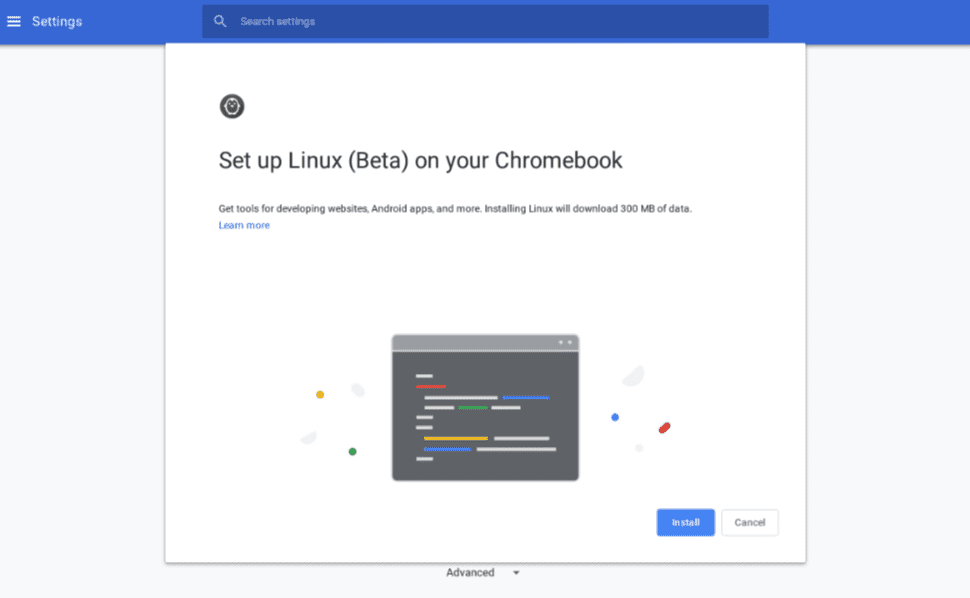
Setup Linux on Chromebook
2: Setting up developer mode a physical Chromebook
When running a physical Chromebook, you can switch to developer mode by hitting three keys at a go (Esc + Refresh (F3) + POWER). What this is going to do is reboot the device into developer mode.
At first, it will come up with a scary message saying that the OS is missing or damaged, and you can quickly scan past this by hitting Ctrl + D on your keyboard. That will then prompt you for a final verification if you want to clear all the data on the computer, turn off verification and reboot your system by pressing enter or pressing escape to go back to the previous step.
Under the hood, it is turning off the regular signing that happens when it verifies that all the software comes from the Google Chrome team and allows you to install the kind of software you wish.
Installing NPM on a Chromebook
We will use developer mode and crouton to get Linux running on this device as a subsystem on top of the same kernel.
The setup process will differ depending on the size of your hard drive. After the device is rebooted, we will set it up like a typical Chromebook. But it would range anywhere from 5-10 minutes. Or a little longer if you have a newer Chromebook with a much larger device.
During the setup, your actual development device benefits from Chrome OS capabilities from all the syncing and passwords from the standard machine.
Crouton is the name of the software that will help you run the Linux operating system within the existing kernel system that comes with Chromebook.
After searching crouton on Google, you should access it from the first link on the page (https://github.com/dnschneid/crouton). Then go ahead and download the single file software called crouton.
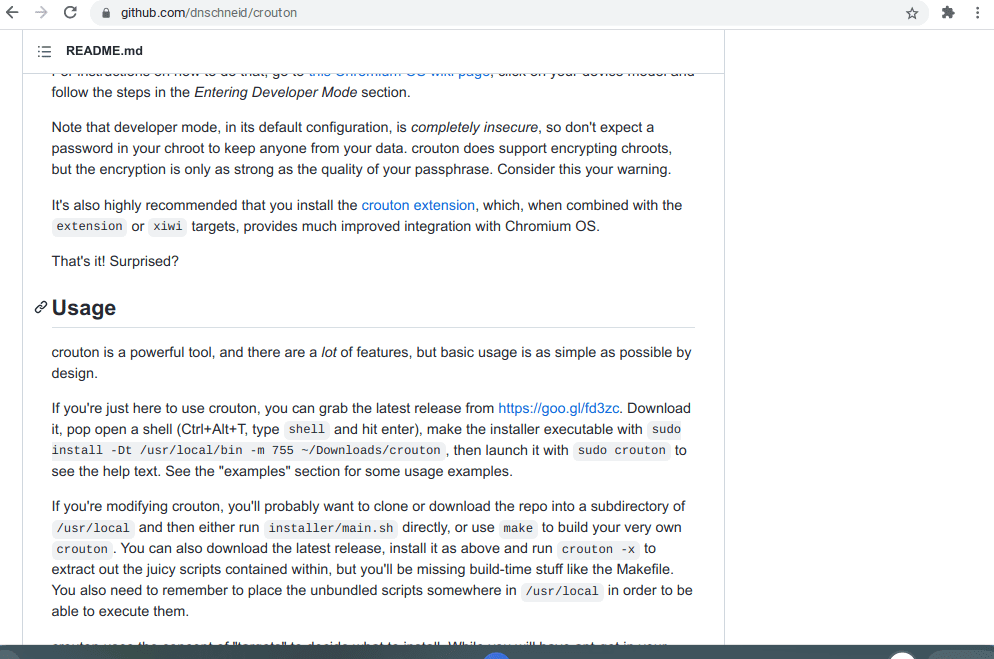
access crouton on GitHub
Subsequently, access the crosh terminal by typing the following combination of keys:
Ctrl + Alt + T
Subsequently, access the terminal by pressing Ctrl + Alt +T in a Chrome Window. It will open crosh. Then, you can now type shell to use the terminal as shown below.
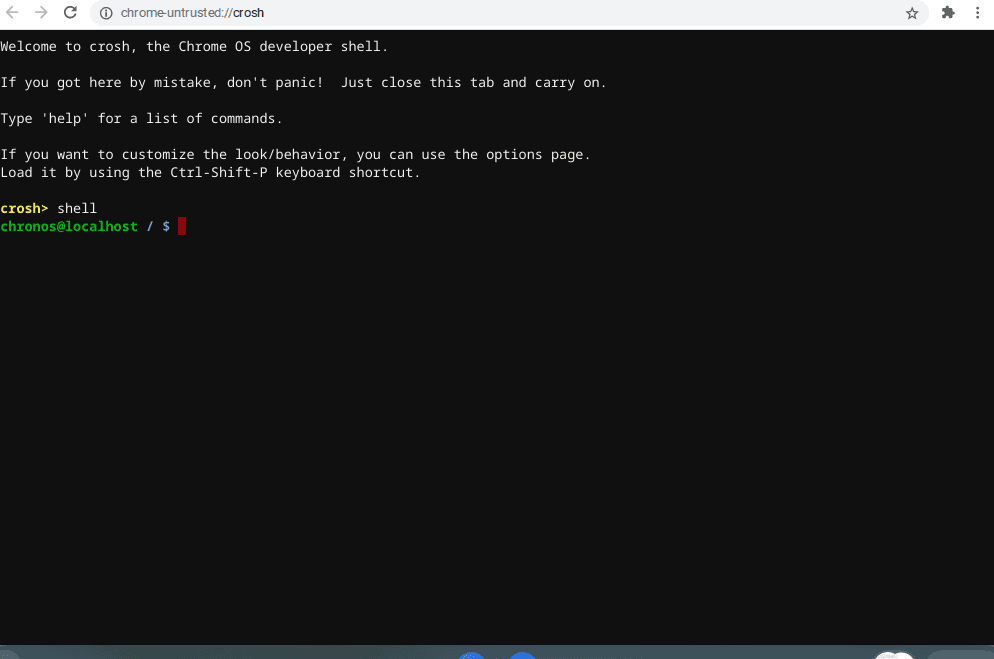
open shell on crosh
The next step is to move the crouton installer to an executable location by running the following command.
$ sudo install -Dt /usr/local/bin -m 755 ~/Downloads/crouton
After that, you can now run it by using the following command.
$ sudo crouton -t xfce
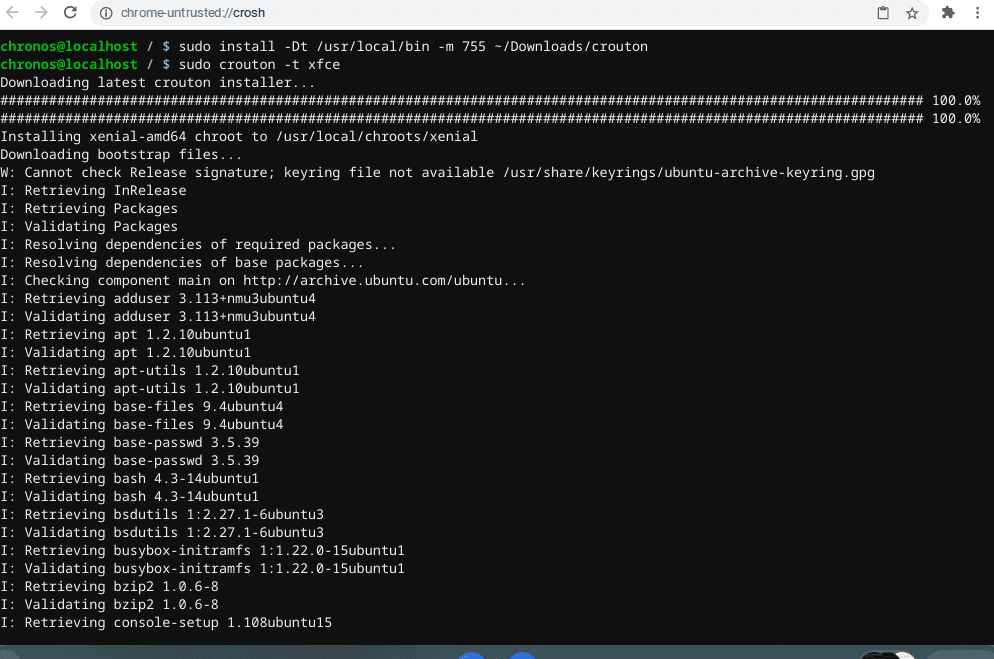
run sudo crouton -t xfce
It will take some time to install the Ubuntu subsystem. When it is done, you will be prompted to answer questions like:
- Specifying the username for the given primary user
- Prompt to enter and confirm the new password
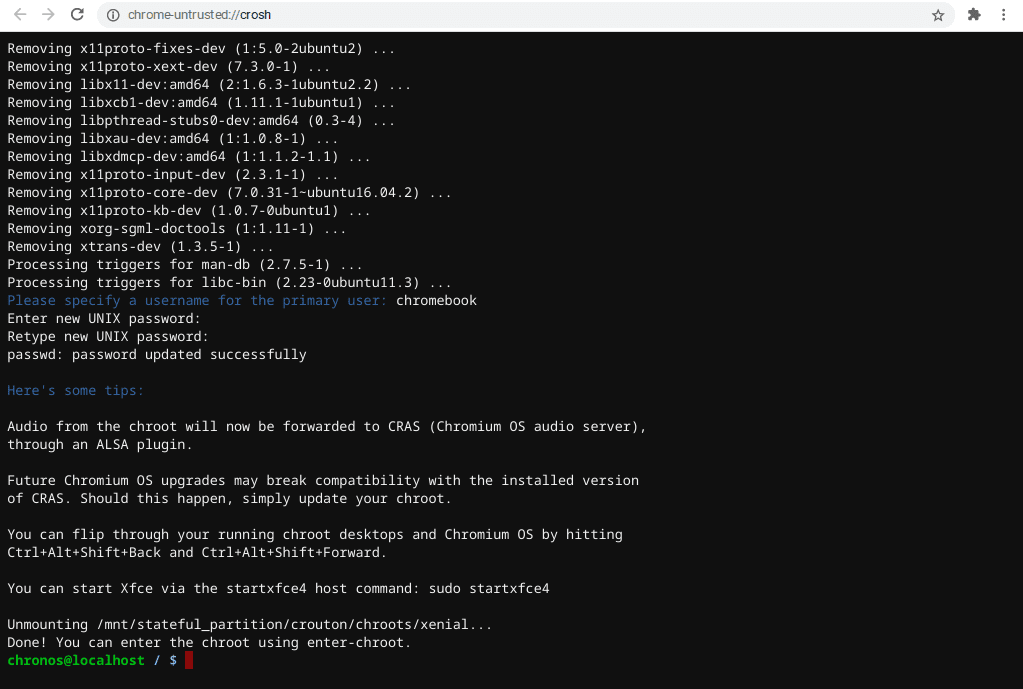
answer questions after installing the Ubuntu subsystem
Now, you can enter sudo enter-chroot to jump directly into the Linux distribution. Since this is a complete ubuntu system, you can use apt-get to install any software you wish.

sudo enter-chroot
For instance, installing git is as simple as follows.
$ sudo apt install ssh git
Now we will download and install NVM from the browser using wget to as follows.
$ wget -qO- https://raw.githubusercontent.com/nvm-sh/nvm/v0.39.0/install.sh | bash

use wget to download nvm
Alternatively, you can download and install NVM using curl. First, install curl using the following command:
$ sudo apt install curl
Then run the following command to install NVM using curl.
$ curl -o- https://raw.githubusercontent.com/nvm-sh/nvm/v0.39.0/install.sh | bash
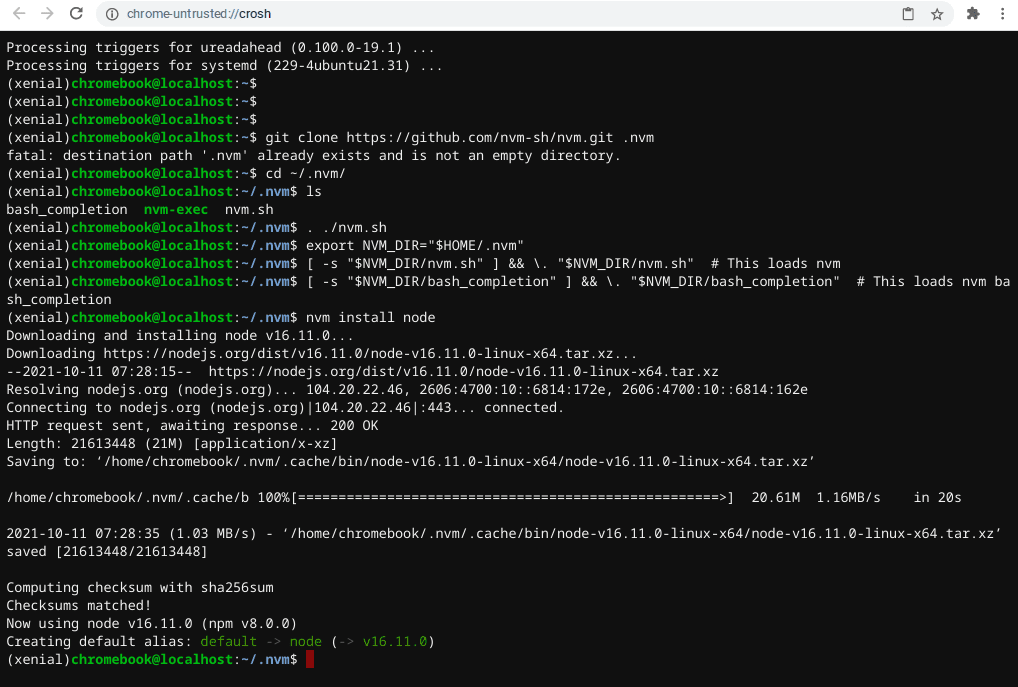
install nvm using curl
NVM allows you to install multiple versions of the node. Then, use the node –version to check the node version that is installed in your subsystem.
In addition, if you wish to make changes to your codebase, you can use xiwi code. The latter can run an integrated development environment like vscode with an xwindow forwarding system.
Setting up Crouton extension
Crouton extension is a Chrome OS browser extension that integrates with the xiwi window forwarding environment. The overall experience is better integration with Chrome OS. For instance, its targets will provide you with synchronized clipboards, the alternative of handling URLs using Chrome OS, and enabling seamless creation of graphical sessions by chroots. These are like Chrome OS Windows.
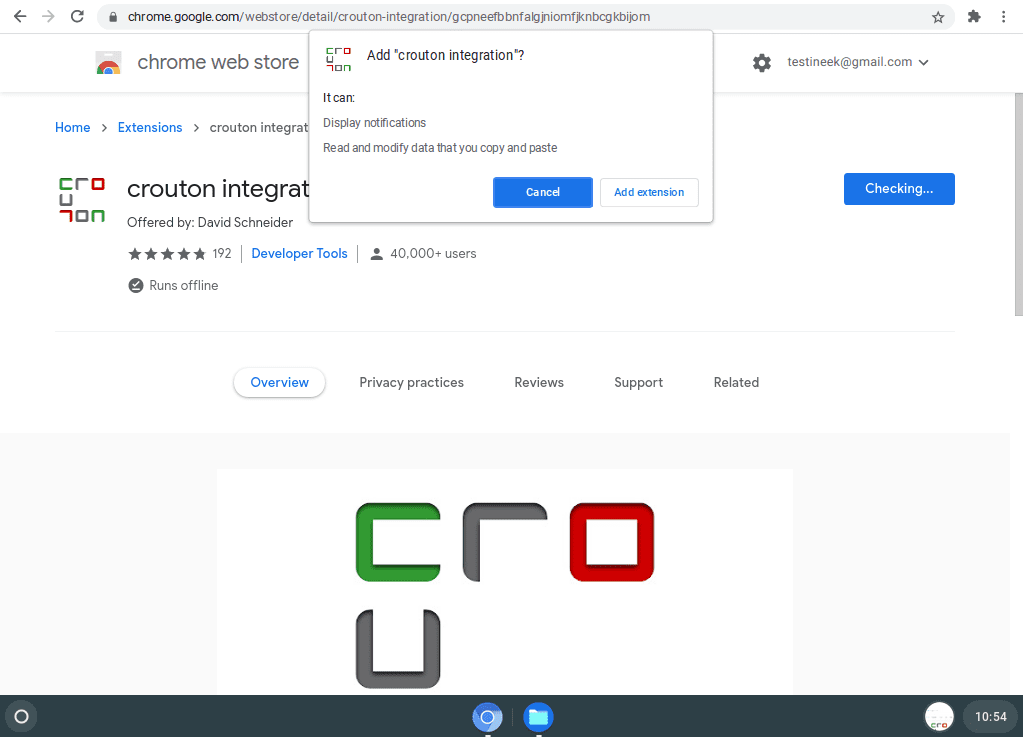
Setting up Crouton extension
How to install the latest Npm packages
You can also install the latest npm packages using nvm by running the following command. Also, note the output results in the following image below.
$ nvm install-latest npm
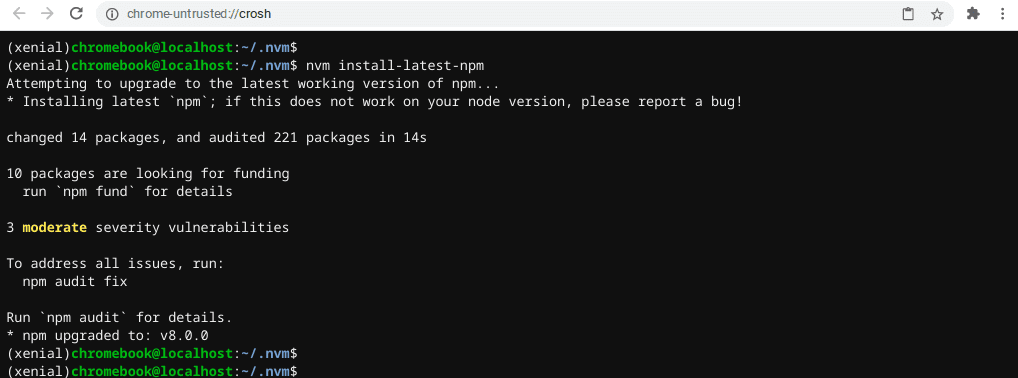
nvm install-latest npm
An alternative way to get the Node package in Chromebook
Use the following link, https://nodejs.org/en/download/, and download the right package for your Chromebook processor architecture. If you are unsure about that, you can check this on the terminal by typing the following words.
$ `lscpu`
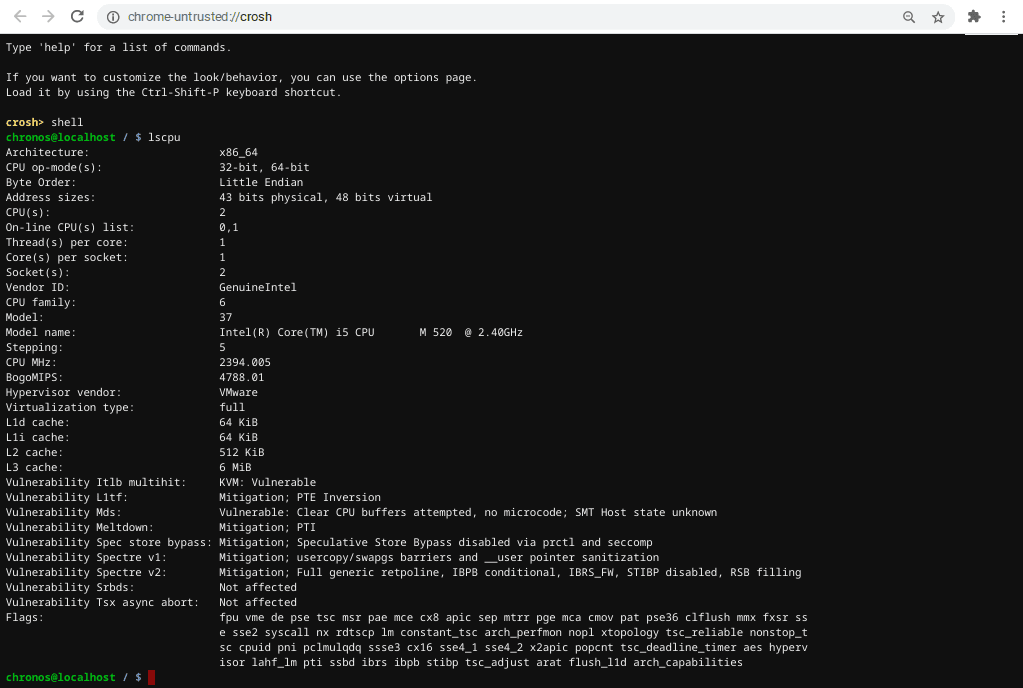
lscpu
Running that command on the terminal will instantly reveal your processor’s architecture, as indicated in the image above.
After downloading the right Node package using the information provided above, access the Downloads directory by running the following command.
$ cd ~/Downloads
After that, extract the node package you downloaded in the previous step.
$ tar xf node* .tar.xz
Then, navigate to the bin file resulting from the extraction above as follows.
$ cd node *
$ cd bin
Now, copy the file that is available under /usr/local/bin/ and then create the bin folder just in case it does not already exist.
$ sudo cp node /usr/local/bin
At this very moment, you should verify your node’s existence and version using the command node -v.
Subsequently, navigate to the npm folder as follows.
$ cd ..
$ cd lib/node_modules/npm/scripts
And then run the following command to install npm
$ sudo sh install.sh
There is a chance of getting an error in the above step. If that happens, it is most likely to be a read-only file-system error. According to the official Chromium Website, that can be resolved by running the following command on the terminal.
$ sudo /usr/share/vboot/bin/make_dev_ssd.sh –remove_rootfs_verification
Depending on your system, you may get a follow-up command to run. After running it, reboot the device. Then you can verify that npm is installed successfully by running the following command.
$ node -v
$ npm -v
Conclusion
In this article, we covered how to install NPM in Chromebook with Ubuntu subsystem. We also covered switching to the developer channel in a Chromebook and a Chrome OS running on VMWare.
The key reminders include changing to a developer channel if you use a version lower than 69 and running the terminal over crosh. In addition, we covered how to use crouton to install the Ubuntu subsystem to run on the Chromebook kernel. The latter will enable you to run the programs as though you were running on the native Ubuntu Operating System.
