Installing Eclipse as a Linux Beta program is your best bet to using Eclipse IDE on a Chromebook. Linux Beta is a Linux virtual machine that runs on your Chromebook and can be set up using the Chromebook’s settings app. Learn how to install Linux Beta on your Chromebook and gain a better understanding of what it is by reading through this article.
Many developers and students as well ask the following question.
Is it possible to code on a Google Chromebook?
Few excellent code editors are available in several Chrome apps. In the native OS, there is a VIM chrome program that provides decent coding ability. In addition, various interactive shells for Python and code editors in the Chrome App Store are devoted to specific languages.
However, none of these provide a good coding environment. It’s nice for a quick patch, and some servers will probably allow you to SCP your code and run that remotely, but it’s only a scratch on the surface.
We treat Chrome OS as if it were a high-end BIOS. As a result, our Chromebook is an excellent Linux machine, so you can very well do coding on it.
Use Crouton
With crouton, you’d turn on developer mode on your Chromebook, open a terminal (ctrl+alt+t), type “shell” for bash shell, go to downloads
cd /Downloads/
make the crouton script executable –
chmod +x crouton
and run it.
Crouton will help you install a native Linux system as a subsystem, for instance, the ubuntu subsystem, where you can now install apps as you would in an Ubuntu operating system.
sudo sh./crouton -t gnome-desktop -r trustworthy, for example, will create a chroot Ubuntu installation alongside the Chrome OS Linux distribution.
As a result, when you turn on your Chromebook, it will be running on Chrome OS. To use Linux after it has been installed, open a terminal and type sudo startgnome.
Why Choose Chromebook?
- Chromebooks are inexpensive.
- Because it’s not genuinely starting a different OS, it uses chroot, which means your kernel, base drivers, and other components are all from Chrome OS. The Ubuntu libraries are simply running on top of them. Thus, this unique benefit eliminates the need for a driver!
- Using ctrl+alt+shift+== and ctrl+alt+shift+==>, you may switch between ChromeOS and Linux. (By mapping, that’s F1 and F2). It is instantaneous. ChromeOS and your Linux processes are both running. Therefore nothing is suspended.
- You can create several Linux chroots and store them on external drives. It is essential if you want to experiment or if you want to set up your development environment differently.
- In addition, backup and restoration take one line of code, and you can continue using Chrome OS while your OS is being backed up. Imagine being able to restore your Linux OS while doing work in Chrome OS.
Enable Developer Mode
While most of your Chrome OS data is stored in the cloud, you may have essential items saved locally, such as those in your Downloads folder. Activating Developer Mode deletes all local data on a Chromebook immediately, in addition to eliminating certain security constraints and allowing you to install a customized version of Ubuntu.
Before proceeding with the procedures below, please backup critical local data on an external device or move it to the cloud.
Press and hold the Esc+Refresh keys while tapping the Power button on your Chromebook. Release the keys when the forced reboot begins.
Following the reboot, a screen with a yellow exclamation point and the statement Chrome OS is missing or damaged shows. To enter Developer Mode, use Ctrl+D.
The following message appears on the screen: “Press ENTER to turn off OS verification”. Then, enter the code with the Enter key.
The OS verification is turned off, according to the new screen. So at this moment, don’t touch anything.
After a few seconds, you’ll notice that your Chromebook has switched to Developer Mode. This procedure could take some time and may require repeated reboots. After a while, you’ll see the OS verification OFF notice, accompanied by a red exclamation point.
Ignore this message and wait for the Chrome OS welcome screen to appear.
You may need to re-enter your network details, language, and keyboard orientation on the OS welcome page, as well as agree to the operating system’s terms and conditions because all local data and settings were destroyed when you entered Developer Mode. Sign in to your Chromebook once you’ve finished.
Setting up the Linux Developer Environment
Select settings menu on Chrome OS
The first step is to open the settings menu by clicking on the clock on the bottom-right of your screen, as shown below.
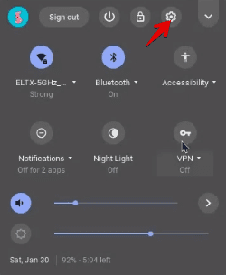
settings menu on chrome OS
Choose the option Developer
On the screen that appears, select developer so that your new screen looks like this one here.
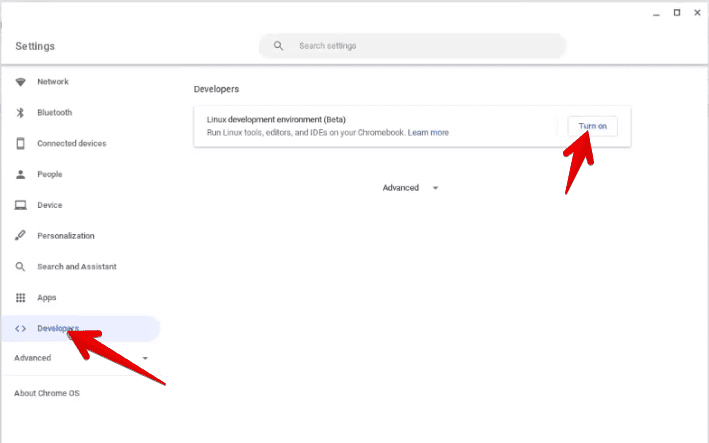
Select Developers
Turn on Linux Development environment
On the extreme right of the diagram above, there is a button labeled “Turn On.” Click on it to turn on the Linux development environment.
Click on the “Next” button to start the process of setting up the Linux development environment, as indicated here.
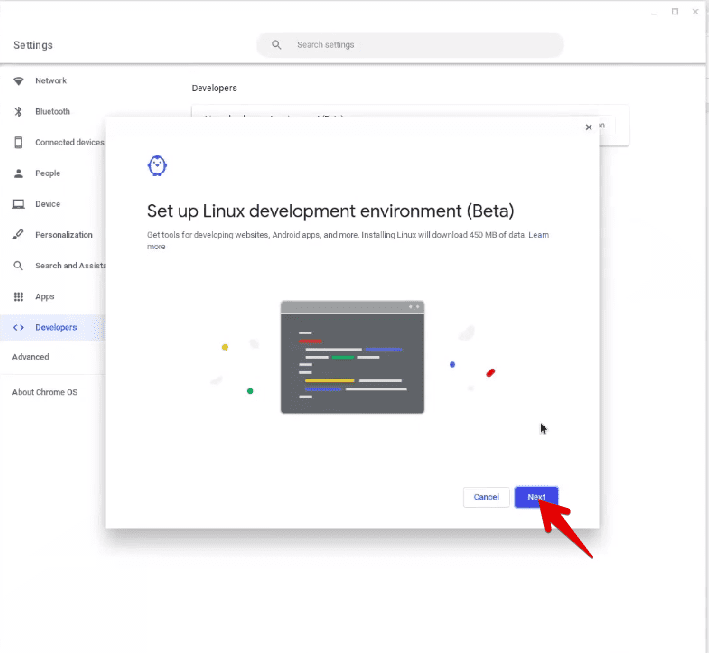
Click next to setup Linux developer environment
The final step is installing the Linux Development environment, as shown below.
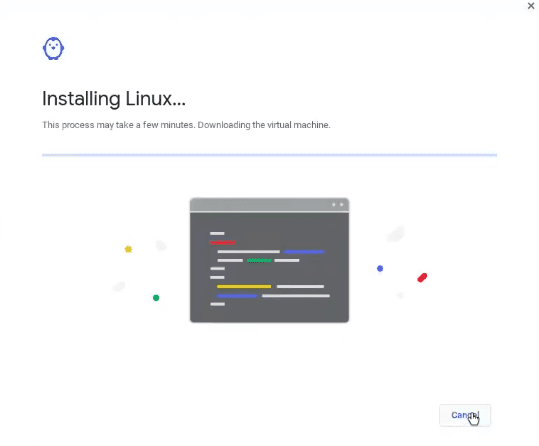
Installing Linux
Before starting the core process of installing Eclipse on Chromebook, we will first open the terminal through the search option. Then, click on it to launch the terminal.
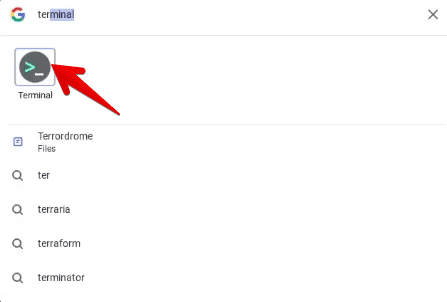
select terminal
Installing Eclipse on Chromebook
The first step is to rename the current sources list to oldsources list so that in case of any breakdown, we have a backup of the previous sources that were already working. This will, in turn, help us to revert to the last state if need be. To do so, run the following command.
sudo mv /etc/apt/sources.list /etc/apt/oldsources.list

sudo mv oldsources.list
Next, we will create a new source.list file. This will house the contents of the new sources.
sudo touch /etc/apt/sources.list

sudo touch sources.list
The following command will populate the sources.list file with contents from,https://deb.debian.org/debian bullseye main.
sudo echo deb https://deb.debian.org/debian bullseye main | sudo tee -a /etc/apt/sources.list

sudo echo sources.list
Subsequently, we will now update the sources by running the following command on the terminal. The latter will ensure that the new sources are in sync and ready to use.
sudo apt update
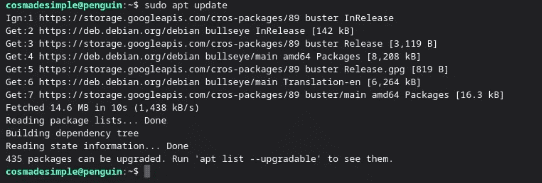
sudo apt update
Further, we will run sudo apt dist-upgrade to ensure that all the latest packages have been updated and successfully installed in the current system though no new packages are added or removed.
sudo apt dist-upgrade

sudo apt dist-upgrade
Eclipse requires dependencies that include default-jdk, libnss3, and menulibre. These dependencies can be installed by running the command below.
sudo apt install libnss3 menulibre default-jdk

install default jdk
wget is a command that aids in fetching resources from various web services. In our case, we are using wget to download eclipse-jdt to our local machine from the remote servers by running the following command.
wget https://apprepo.de/appimage/download/eclipse-jdt

wget eclipse-jdt
First, we will select the menu item and choose the option files, as shown in the diagram below.
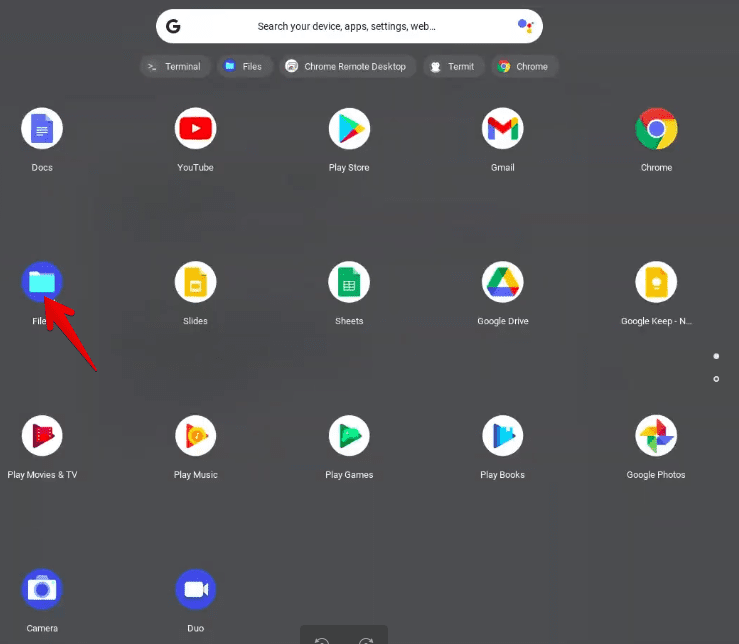
Select Files
Now, we can access the Linux files and view the files contained inside this directory. For example, you should be able to see a file called eclipse-jdt.
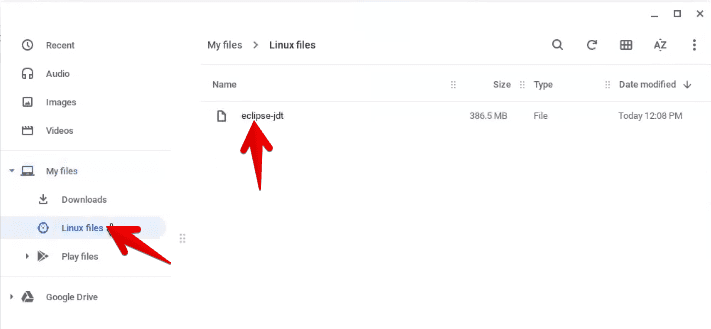
Linux Files
At this point, we will rename eclipse-jdt to Eclipse-JDT.AppImage so that the final look is as follows.
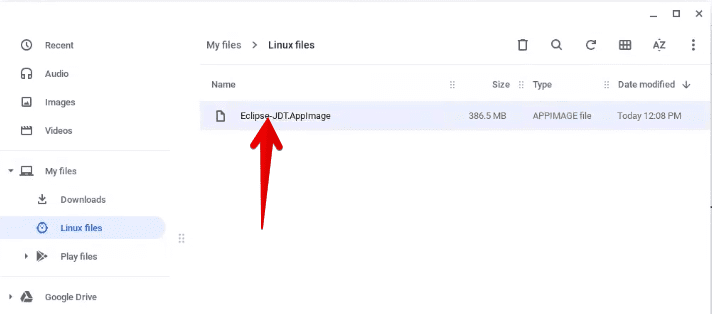
rename eclipse-jdt to Eclipse-JDT.AppImage
We will now make this eclipse file executable by running the following command.
chmod 755 Eclipse-JDT.AppImage

chmod 755 Eclipse-JDT.AppImage
After this, we can now start our eclipse application by running the following command
./Eclipse-JDT.AppImage

start eclipse on the terminal
We are now done with the installation, and you are ready to use your Eclipse IDE as you wish. For instance, you can make customizations on the appearance of the different panels, your base directories, and shortcuts that will make your overall experience worthwhile.
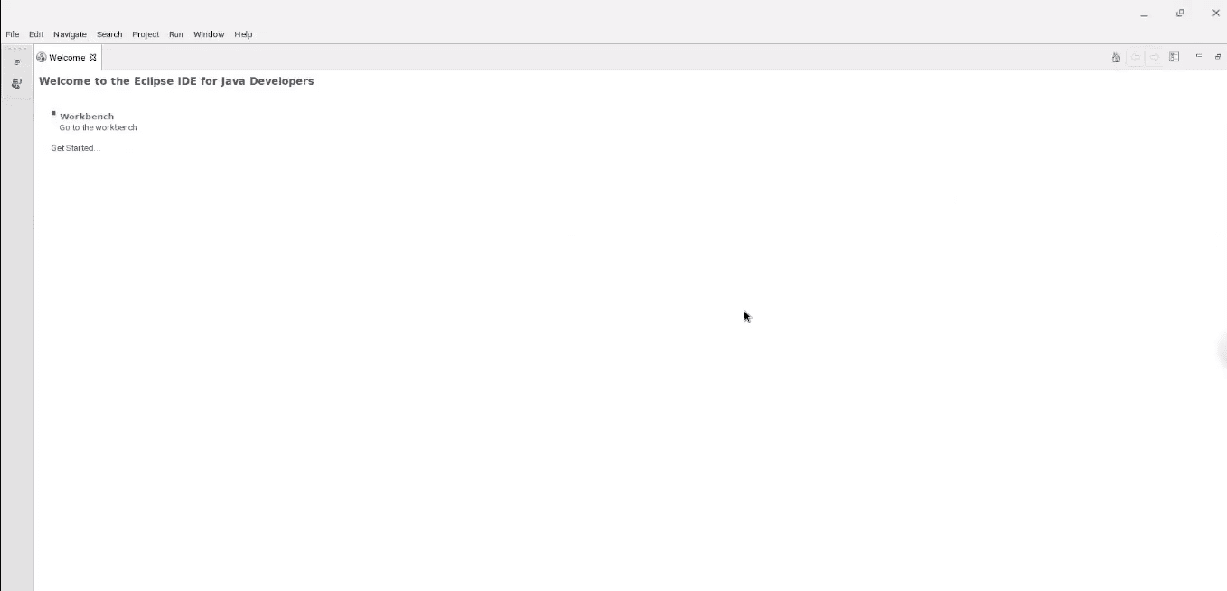
Welcome to the Eclipse IDE for Java Developers
Conclusion
There is a lot of debate as to whether Chromebook is suitable for development or not. Whichever way, there is a workaround to install Eclipse IDE on a Chromebook. The first approach uses crouton to install the Ubuntu subsystem and run Eclipse as though you were on an Ubuntu machine.
In this article, we have used Debian sources instead of the original Chromebook sources. We achieved this by moving the old sources and recreating the Debian sources.
The other steps are similar: you first switch to developer mode, install a Java Runtime Environment, and then download and install Eclipse IDE.
That’s it. We hope you found this article valuable.
