Music is ever-green and has therapeutic effects on the human body. People often refer to the phenomenon as the soundtrack of our lives, and if you’re a solid admirer of the art of music, you can strongly resonate with the latter statement. For such a sizable entity, the world has made several computer applications to help us find our way with music and connect with our favorite artists. Out of all the options we have today at our disposal, if there’s one king to rule them all, it’s undeniably Spotify.
Put, Spotify is an over-the-top digital streaming service that grants you access to millions of songs and podcasts, not to mention the artists in spades that produce all the content. This application is the place to be if you’re an endearing audiophile looking to stream the best music on the planet. It is available on many platforms, including mobile phones like Android and iOS; gaming consoles like Xbox Series X and PlayStation 5; computers, tablets, and even in some cars.
Amidst such multi-faceted availability, Chrome OS is also in on the scene, meaning that you can run Spotify on your Chromebook comfortably. Therefore, in this article, we’ll be penning down everything that you need to know about the popular music streaming application and how you can get it to work on Chrome OS. So without any further ado then, let’s jump right in with some of Spotify’s most salient features.
Spotify features
Playlist creation
Spotify’s immense library ought to have you compiling a whole array of songs and podcasts. There’s just so much out there to discover, and when you start liking what you hear, Spotify lets you create your own playlist to keep coming back to the music you love. So not only do you have the functionality of playlist creation, but you can also share your playlists with your connections and relish the times together in all the glory of music.
Explore new music
The word gigantic doesn’t have enough punching power to describe the real estate of Spotify. Over 60,000 tracks are uploaded to the platform’s database each day. According to the official numbers on the company info area of the service’s website, Spotify has over 70 million tracks to its name to date.
In such a situation, you’re bound just to get lost in the world of Spotify and explore a diverse range of music from different categories. In addition, there are over 2 million podcasts on Spotify if you’re the kind of person to seek out words of wisdom regularly.
It’s no secret that you’ll come across music and artists you haven’t known before, given the catalog of Spotify, so this is where the previous “Playlist creation” feature conjoins nicely with this one – just stumbled upon a banger track? Please save it to your playlist right away, so you don’t forget about it!
Personalized music experience
Spotify affords an intellectual user interface that feeds you personalized suggestions according to your taste to help you discover great artists and stellar music. If you’re a fan of Ed Sheeran and you listen to his tracks frequently, you’ll receive tailored recommendations accordingly.
The same rolls for podcasts. Your following will be analyzed to suggest like-minded content on Spotify. On the contrary, if you’d like a touch of something different every once in a while, you can always unearth different content using Spotify’s “Search” feature, which brings us to our next entry.
Search functionality
In the Spotify application, you’ll find different sections to explore. Out of those, “Search” has the best chances of appealing you to the most. This feature lets you check out a plethora of music categories and is the best way to look for more music. We’ll write down some of those categories below to help you understand the functionality at hand.
- Wellness
- Workout
- League of legends
- Chill
- Sleep
- Party
- Metal
- Indie
- Rock
- Dance/Electronic
- Romance
- Classical
The fun part is that there are multiple playlists created by Spotify to help you get down to business with that specific genre within each of these music categories.
Spotify Premium
Spotify Premium is where the music streaming experience is made a lot better than before. Being a luxury-grade service, Spotify Premium can be purchased for $4.99 every month if it’s your first time upgrading. After that, it’ll be strictly $9.99 a month, although it’s common knowledge now that you also get an ad-supported Hulu subscription with your purchase of Spotify Premium now – only if you’re in the United States, however.
There are many great reasons for upgrading to Spotify Premium. One of them is the ability to download music and play it offline through the Spotify application. This is exceptionally handy in cases where internet availability will be an issue, so you can plan ahead of your journey and pack the music you need right into the Spotify app.
Another enticing feature is the revamped quality of the audio you get with the upgrade. This might come as a surprise since even the free version of Spotify sounds high in quality, but it turns out that Spotify Premium lets you stream music at an audio quality of 320 Kb/s as compared to the free version’s mere 160 Kb/s. So for people who love music more than anything else, a subscription for Spotify Premium could be well worth it for this reason.
How to install and use Spotify on Chrome OS
Now that we’ve laid out the proper incentives for you to try out Spotify let’s get into the raison d’etre of this article. The good news is that there are three different ways that you can use to play Spotify on your Chromebook, and all of them are nowhere difficult. We will break down each of those methods to give you flexibility in using Spotify so you can choose the process that sounds the best to you. So let’s dive right in with the first method.
Option #1. Using the Spotify web application
To accommodate Chrome OS users and other people who find the internet the best place to be, Spotify has its very own web application that demands nothing more than a simple sign-in. This is the first and easiest method of using Spotify on a Chromebook.
The following steps are going to explain this method step-by-step so you can understand it in simple terms.
1) Head over to open.spotify.com to access the web app of Spotify. You can click on the direct link embedded in the previous sentence to do that quickly. When you’re there, click on either “Log In” or “Sign Up,” depending on whether you already have an existing account or you’d like to create a new one.

Logging into the Spotify web app
2) When you’ve either logged in or signed up successfully, you will be taken to the main Spotify home page, which is the user interface of this well-established application. Here, you’re free to browse music and start listening to the tracks you want to without breaking a sweat.

Spotify web app in action
That was easy. So you’re done with the first method of using Spotify on your Chromebook. Let’s now get into the other processes that show you how to do the same thing differently.
Option #2. Installing Spotify from the Google Play Store
The second option that we have at our disposal for running Spotify on Chrome OS is possible due to the courtesy of the Google Play Store. Now, not all Chromebooks have support for Android applications manufactured before 2018, so it’s a good idea to take a look at this article and confirm whether your Chromebook has what it takes to sport the Google Play Store.
With the initial disclaimer out of our way, let’s get into the process of installing Spotify from the Google Play Store. The steps given below are going to take it from here.
1) Launch the Google Play Store from your Chromebook’s Launcher to begin.
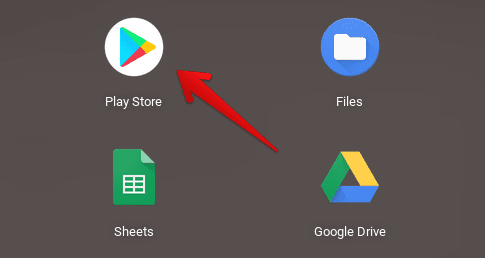
Opening the Google Play Store
2) Having the Play Store all fired up, type in “Spotify” within the interface’s search bar. Once done, press the “Enter” key to continue.

Searching for Spotify on the Google Play Store
3) After pressing the “Enter” key, you will be taken to the official installation page of Spotify. The fact that the application has over 1 billion downloads proves its dominance in the music industry. Next, click on the vividly apparent “Install” button on the Spotify page to begin the download.

Installing Spotify
4) After you’ve been notified that the installation has concluded, check your Chromebook Launcher for the Spotify application.
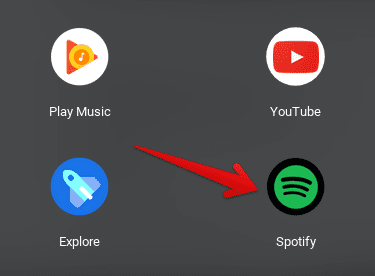
Spotify installed on Chromebook
That’s it! You’ve just learned how to install Spotify on your Chromebook via the Google Play Store. However, before we get into the working of Spotify, along with some helpful tips and tricks, let’s cast a lens on the final installation method of Spotify on Chrome OS.
Option #3. Installing Spotify using Chromebook’s Linux feature
The third and final method of installing Spotify on Chrome OS pertains to the in-built Linux feature. Linux in its Beta phase was introduced to Chromebooks with the onset of the Chrome OS 69 update and had been receiving improvements ever since. It’s a handy program that has enabled Chromebooks to tap into their true potential.
Using the Linux Terminal window, we can install many applications on our device, especially Spotify. Many users prefer the Linux version of the music streaming app because of its through-and-through optimization and better performance and stability on Chromebooks.
However, as we mentioned under the Google Play Store method, not every Chromebook is compatible with Linux, so be sure to look at the interlinked article to know for sure. Anyhow, let’s now get into the step-by-step tutorial of installing Spotify through Linux.
1) The first step is to launch the Linux Terminal through your Chromebook Launcher or from your shelf area if you’ve already pinned the app.
- Struggling with finding and installing Linux on Chrome OS? Check out this article for a detailed guide.
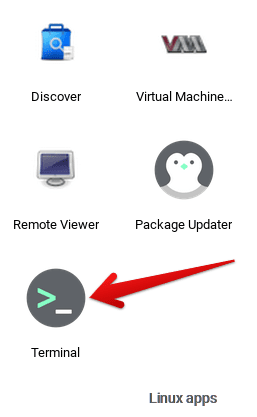
Opening the Linux Terminal
2) With the Terminal window prepared and ready to roll, you will enter the following command to add the relevant signing keys so the process can continue without pause.
sudo apt-key adv –keyserver hkp://keyserver.ubuntu.com:80 –recv-keys 931FF8E79F0876134EDDBDCCA87FF9DF48BF1C90
Once done, you should be seeing the Terminal executing the command with lines of code. When you see your username appearing again, you’ll have to input another command.

Adding a new entry to the repository for Spotify
3) The second command that you’ll need to enter in your Terminal window is given below.
echo deb http://repository.spotify.com stable non-free | sudo tee /etc/apt/sources.list.d/spotify.list

Adding Spotify to the repository
4) Now’s a good time to update your Linux Terminal before proceeding with the installation any further. Therefore, entering the following command will easily do the trick for us.
sudo apt-get update

Updating Linux Terminal
5) Lastly, we will input the command given below into our Linux Terminal to install the desktop client of Spotify. After you’ve entered the command, the system will confirm if you want to continue the installation or not. Press the “Enter” key to continue at that point.
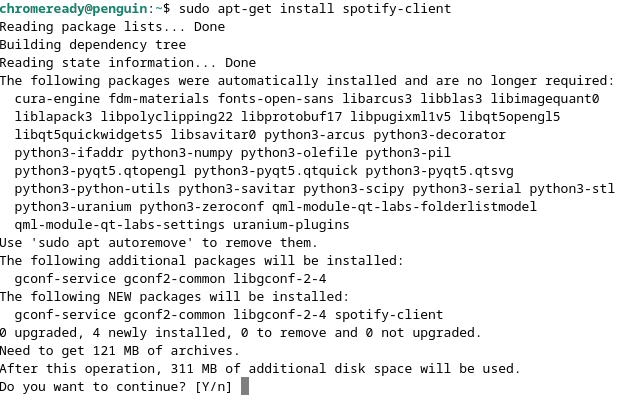
Installing the Spotify desktop client
6) Once done, the Terminal will take a moment to install Spotify on your Chromebook. When the triggers have been processed, and you’re ready to input commands again, it’s a good sign that the installation has been finished. You can check your “Linux apps” folder in the Chromebook’s Launcher for the Spotify app icon.
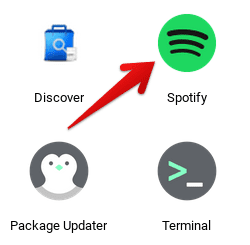
Spotify desktop client installed on Chrome OS.
That’s about it for all the methods concerning the installation of Spotify on a Chromebook. Time to give the application a go and see how it works.
Spotify working
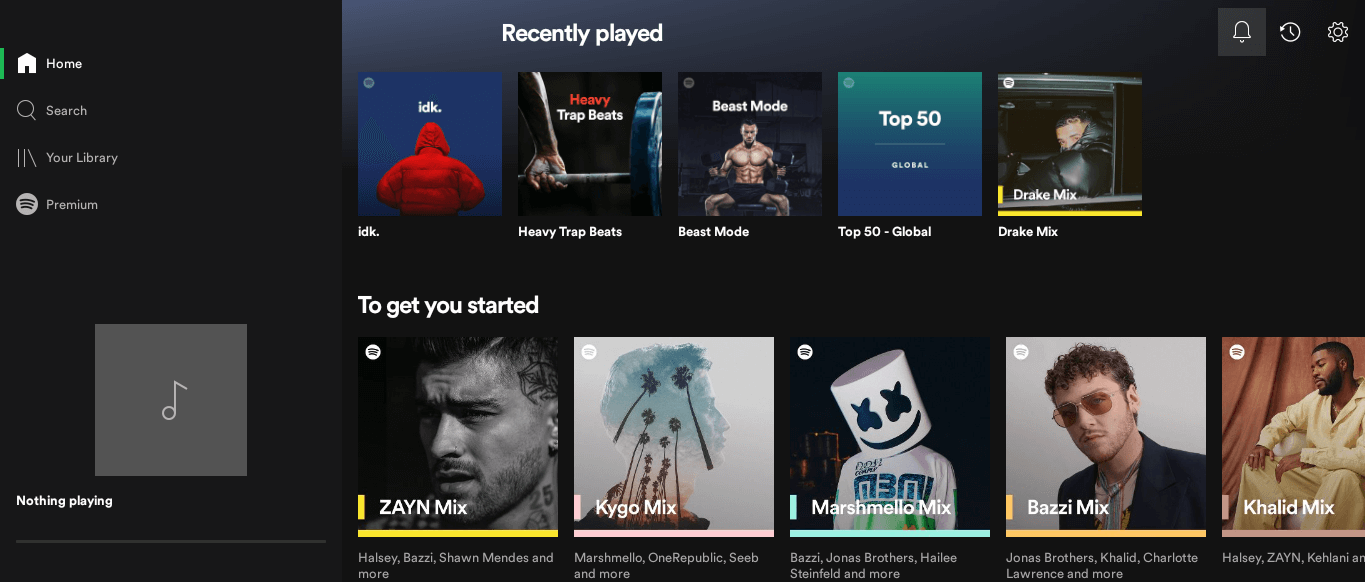
Spotify’s interface
Comprising a highly refined user interface, Spotify’s home page is where you’ll find all the music you need to stay close to you. When you first create your account, you’ll be given a comprehensive list of artists to follow so that you can receive suggestions for their songs. After picking out your favorites, you’ll be taken to the main user interface of Spotify, which will encompass your music followings.
To the left of the Spotify GUI, you have the following functions:
- Home
- Search
- Library
- Premium
“Home” is similar to your feed of music and curated content as per your preferences. This is where you’ll be shown recommendations on the go.
“Search” is significantly more diverse. Upon clicking on it, you will be taken to a page where all the different music categories will be shared with you. Then, you can click on any of them to expand that category of music and find a whole bunch of playlists created by Spotify. The same goes for other types of music.
“Library” is where you’ll see your own created playlists. This is the go-to area for those who tend to gather their own collection of music.
“Premium” is simply an advertisement page for you to upgrade to Spotify Premium. All the benefits you’ll get for paying for Spotify’s subscription service are going to be listed here, such as high-quality music, ad-free listening, and the ability to download tracks for offline usage.
The rest of the scene is nothing but child’s play. You click on a song or a podcast, wait for Spotify to load it up, and begin listening to it. However, there are many tips and tricks to be aware of when using Spotify that could reinvigorate your listening experience. Let’s take a look at them below.
Useful Spotify tips and tricks
Play music from your local storage on Spotify
Spotify has its own license that prevents you from exporting its music content outside of the application. However, there’s no restriction on doing the opposite. In fact, you can enable a specific setting within the app to listen to non-Spotify songs. This would mean that tracks that you have downloaded on your Chromebook will also be made available in Spotify, so all of your music will be compiled together in one place.
To enable your Spotify application to show local music tracks, click on your profile name in the top-right corner of your “Home” page and then select “Settings” out of the options that are revealed. Once done, scroll down a bit to find “Show Local Files.” Enable the toggle beside the setting and choose the relevant folder from your Linux files directory to get this done.

Integrating local files
Recover your deleted playlists
Spotify has a feature where it lets you restore your deleted playlists. This can come in handy when you’ve accidentally removed a playlist from your Spotify application, or you’re starting to have second thoughts about your decision. In cases like those, it can be a good idea to hover over to your profile section on Spotify’s official website, log in if needed, and select “Recover playlists” from the column on the left. Once done, you’ll see all your playlists that can be restored.
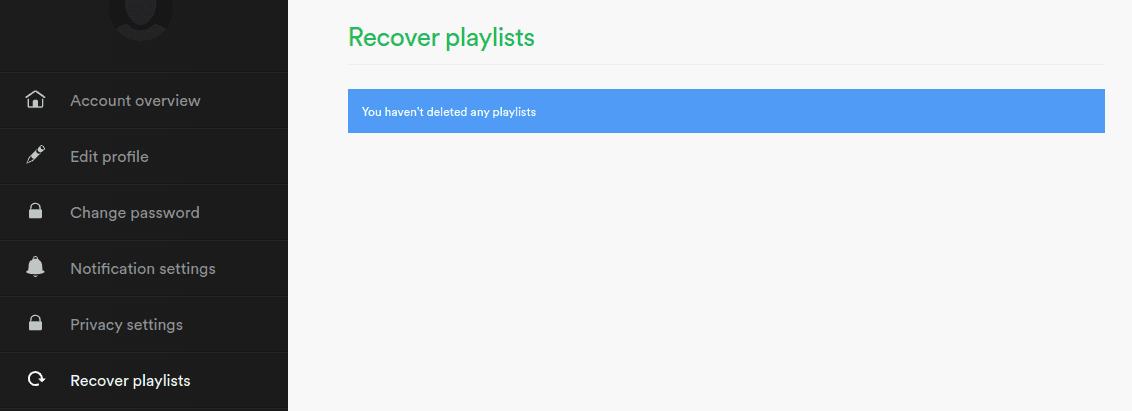
Recovering Spotify playlists
Listen anonymously with Spotify’s Private session
Spotify is a social application in which other users can see what you’re up to. For example, if you’ve connected your Facebook account to Spotify, your Facebook friends can see what you’ve been listening to lately. If you wouldn’t want that for yourself, Spotify has a “Private session” feature where all of your listening activity won’t be recorded. This function can be useful when you desire to explore music without limitations and do not want other people to judge you.
To enable anonymous listening on your Chromebook’s Spotify, click on your profile name within the application’s interface and select “Private session.” As soon as you make the click, an icon of a lock will appear beside your profile name, hinting that the Private session has been toggled on. You can listen to whatever you like without worry now.
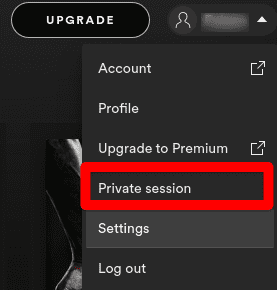
Enabling Spotify’s private session
Connect to other devices with Spotify on Chromebook
Streaming music on Spotify doesn’t only have to be on your Chromebook. You can use the application’s multi-faceted capacity to get your music on the big screens, including smart speakers, televisions, and other devices. All you have to do is look for the “Connect” icon near your music player and click on it.
Do keep in mind that the device you intend to connect Spotify to must be on the same Wi-Fi network as your Chromebook if that’s where you’re playing Spotify from. By clicking on the “Connect” button, you can stream music to other devices effortlessly after a brief pause where the application attempts to form a link between the two devices.

Streaming Spotify music to other devices
How to uninstall Spotify
Didn’t like the application for some reason, or do you want to re-install it? Uninstalling Spotify is a painless process. Since the first method doesn’t warrant any uninstallation because it’s a web app, we’ll talk about removing the Spotify application if you downloaded it using the Google Play Store method as well as using the in-built Linux feature.
Uninstalling Linux through the Google Play Store
If you’re running an Android version of Spotify, it’s easy to uninstall it from the Google Play Store. All you have to do is search for the application first using the Play Store’s search bar and get to the installation page, similar to how you did it before. When you’re there, an option to “Uninstall” will be available. Click on it to do the deed and finalize the process.

Uninstalling Spotify
Uninstalling the Linux-installed Spotify version
Uninstalling the Spotify application that you installed through Linux is even easier than the Google Play Store method. Contrary to the popular methodology, you don’t have to input a command line in the Terminal window to get rid of Spotify. Instead, all that’s required is to head over to the “Linux apps’ folder in your Chromebook Launcher, find Spotify, double-tap on it, and simply click on “Uninstall.”
The uninstallation process will begin as soon as you do that, prompting you to wait a couple of minutes. However, some Linux users say that the option of uninstalling doesn’t appear for them, making it impossible to remove the application. If that happens with you, then entering the following command into your Terminal window to uninstall Spotify is going to be your best bet.
sudo apt-get uninstall spotify-client
Similar to when one tries to install Spotify through Linux, the system will ask you to confirm the uninstallation. Type “y” and press the “Enter” key or press the “Enter” key to continue.
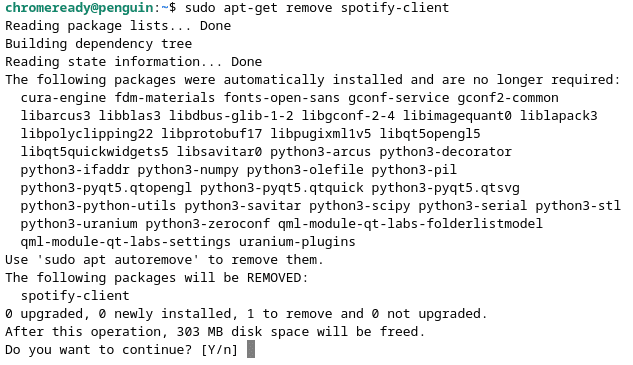
Uninstalling Spotify through Linux
After a short while, the system will get rid of Spotify for you, and this is all there is to uninstalling Spotify on a Chromebook.
Conclusion
Spotify’s eminence in the age of today is simply unrivaled by any other music streaming application. Its popularity strikingly stretches across the globe as millions of people listen to an overwhelming music collection on this giant platform. No matter the device in question, Spotify is available on a multitude of platforms, and Chrome OS cannot be left behind in such a situation.
As we’ve discussed in this exhaustive guide, Spotify can be played on your Chromebook in three different ways. One necessitates using the Chrome browser, while the other two demand that you go through an installation process. We’ve doubled down on the methods in detail, so you should now find it uncomplicated to run Spotify on Chrome OS.
We’ve also mentioned some neat tips and tricks that are bound to come in handy if you’re willing to try them out. The “Recover your deleted playlists” feature is a personal favorite as it has saved us a chock-full of effort several times. Anyhow, we hope that you’ll find this article helpful for your cause, and we’ll be delighted to hear from you in the comments below. Chrome Ready wishes you happy listening!
