Chromebooks are often regarded as nothing more than mere web browsers, but that concept is as wrong as it can be. Chrome OS is an efficient operating system that, although it touts Google Chrome as its mascot, is capable of getting a lot done if you’re willing to take the time and learn how this fluid operating system functions.
Swift integration with the Google Play Store and Linux has allowed Chromebooks to host various applications and powerful, desktop-grade software. Present-day, you can install WordPress, run Microsoft Office, play Nintendo DS games, use video editing software, and even write code using different programming languages. Another enticing feature of Chromebooks is that they make it possible to run other operating systems on them.
A while ago, we covered how to run Windows 10 on a Chromebook, but a lot has seemingly happened since then. For instance, Windows now has a big bad brother on the way, and fans and followers couldn’t be excited more. So if you’ve been wondering whether the next iteration of Microsoft’s industry-leading operating system can be installed on Chromebooks, let this article guide your way to this difficult-seeming prospect.
Therefore, in this article, we’ll show you how to get an early build of Windows 11 to work on your Chromebook. Be sure to follow each step carefully to achieve the desired result. Without any further ado, then, let’s jump right into this.
Installing Windows 11 on a Chromebook
The state of Windows 11 right now
Before we get started, you should know that installing Windows 11 requires a Chromebook with built-in Linux Terminal support. This is a feature available in most modern-day Chromebooks, and therefore, is necessary to accomplish the task at hand. If you’re unsure what that is or are having trouble enabling it on your Chromebook, please refer to this article for a complete tutorial on enabling Linux on Chrome OS.
Now that we’ve covered the basics let’s move onto the installation part. The process follows getting a virtual machine on Chrome OS first and then running the latest Windows on it. The reason we’re going with this method is that Windows 11 hasn’t actually been released yet. Microsoft has given out a tentative release date of sometime in the holiday season of 2021, and the only way to get it right now on Windows PCs is by enrolling in the Windows Insider Preview program and installing an early build. While the entirety of that is reserved for Windows users only, we being Chromebook users, have to resort to a leaked ISO build of Windows 11 for now. When the operating system makes proper landfall later this year, we’ll hopefully get a better version of Windows 11 on Chrome OS, but that is thought about the future.
Since you’ve got the concept down now, let’s get into the fundamental purpose of the article and show you how to install Windows 11 on Chrome OS using a step-by-step guide. Let’s begin.
Getting Windows 11 on Chrome OS
The following steps are going to take it from here.
1) The first step to getting Windows 11 on your Chrome OS is downloading an ISO file for the operating system. Unfortunately, you cannot do that on your Chromebook when writing this article since the only working source for downloading a Windows 11 ISO right now necessitates the use of a Windows computer. When Windows 11 was first leaked ahead of its launch event, many direct links for the ISO had gone green. Still, they’ve been exhausted since, and using a repository called UUP Dump is the only available option at the moment. To begin, go to this link on your Windows computer and click on the “x64” option beside Latest Dev Channel build.

Choosing Windows 11 build version
2) Next, you’ll be taken to a page where all the updates for the ISO will be displayed. There’s only going to be one of them, so click on it to move to the next step.

Proceeding with the ISO download
3) After that, it’s going to be pretty basic. You’ll first have to select the language you want to download your Windows in, preferably English, and then click on the “Next” button. Once done, you’ll now have to decide which version(s) of Windows you’d like to opt for. We recommend checking the Windows 11 Home and the Windows 11 Pro box to avoid any future complications. Similar to what you did earlier, clicking on “Next” is going to do the trick.
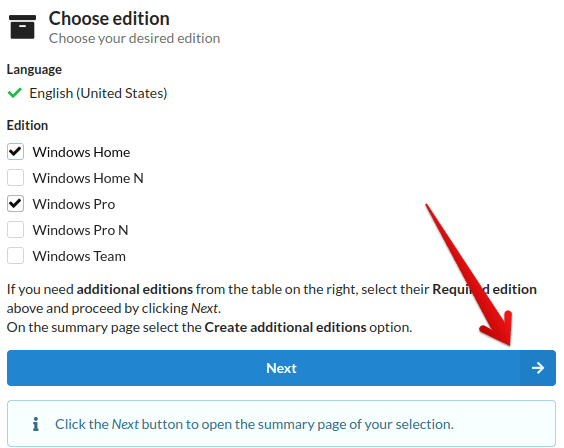
Selecting Windows 11 version
4) The next page that you’ll be seeing might contain a myriad of options, but you don’t have to click on anything but the “Create download package” button to proceed. Doing so will begin downloading a zipped folder that will allow you to get the ISO file for Windows 11.
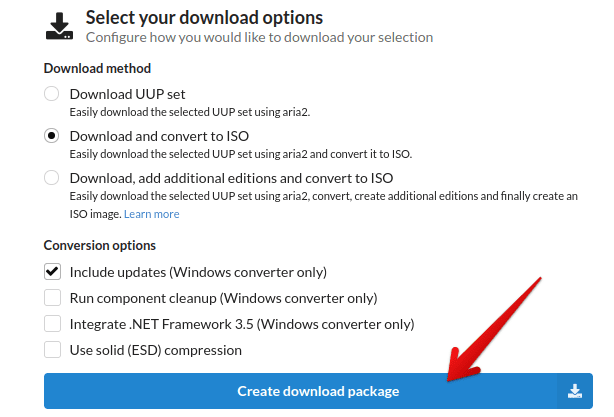
Downloading the installer package
5) This is the part where the perks of using a Windows computer will begin to manifest. You will first extract the files to a different folder. After doing that, you will open the folder, locate a file called “uup_download_windows.cmd,” and run it as an administrator. The command prompt will load up and begin downloading the ISO file on your Windows 10 PC when you do that. The process will take a while, depending on your internet connection, since the total file size of the ISO is somewhere around 5 GB. When the download concludes, you’ll see several files popping up in the already-opened folder. Here, you’ll determine which one is the ISO file. A pointer to help you do that is by looking under the “File Type” area and reading the description; if you see a file that says “Disc Image File,” congratulations on making it this far!
7) Now that we actually have the ISO file, the next step is to copy it and transfer it to your Chromebook. This is fairly easy, considering that you’ve done a fair amount of work up until now. Once done, the next step is to move the file to your “Linux files” folder so you can set your Chromebook up for the steps to come.
8) Next, it’s time to launch the Linux Terminal on your Chromebook. You can do that through your device’s Launcher.
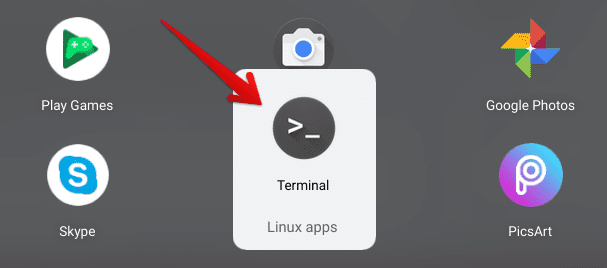
Opening the Linux Terminal
9) After opening the Terminal, you’ll have to enter the following command to install KVM on your Chrome OS. Short for Kernel-based Virtual Machine, KVM is one of the most efficient virtualization solutions that you can get on Chromebooks. We’ll be using our ISO file in this application to create a virtual machine. It will be in this virtual machine that we’ll be running Windows 11. To install KVM, you have to type in a specific text. Use the command below to do that.
sudo apt install qemu-kvm libvirt-clients libvirt-daemon-system bridge-utils virtinst libvirt-daemon virt-manager -y
Installing KVM on Chrome OS
10) The application will be installed on your Chromebook shortly right after that. Check your “Linux apps” folder when you see your Terminal username appear back on your window.
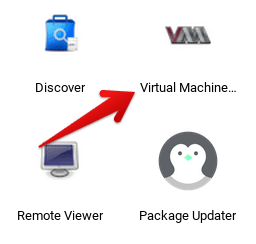
Virtual Machine Manager installed
11) The rest of the process isn’t too difficult. You’re now simply going to load your ISO file in the application and go through the process easily. To begin, click on “File” and then “Create a New Virtualization Machine” to commence the virtualization process.
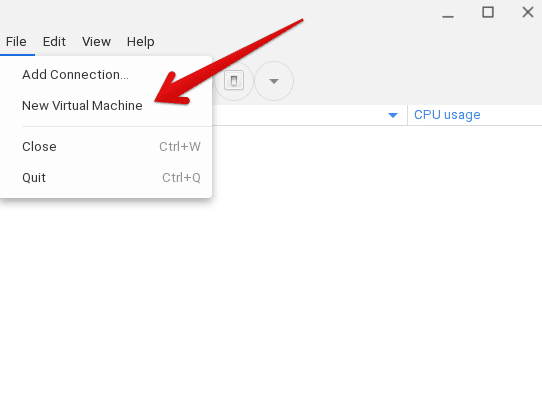
Creating a new virtual machine
12) You’ll now see an internal window pop up that will take you through the installation of the virtualization machine. They will be simple to follow and easy to understand, so you should face no problems.
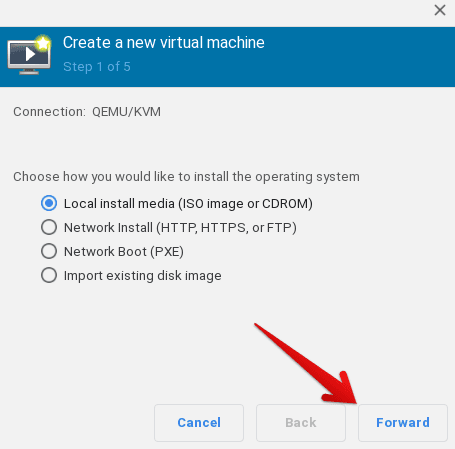
Continuing the virtualization for windows 11
13) After you’re done with the set-up process, KVM will start processing the installation of Windows 11. This step will probably take a while, so better sit tight.
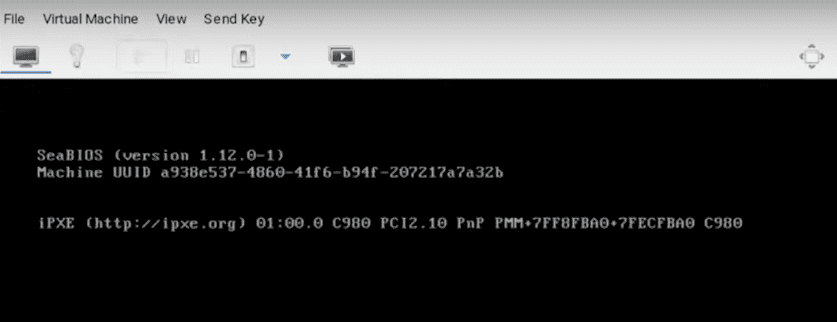
Windows 11 installation
14) When the process concludes, the virtualization machine will show the proper Windows 11 setup. This is exceedingly easy to complete and is similar to how you would install any Windows. Go through it step-by-step until the setup is finished.
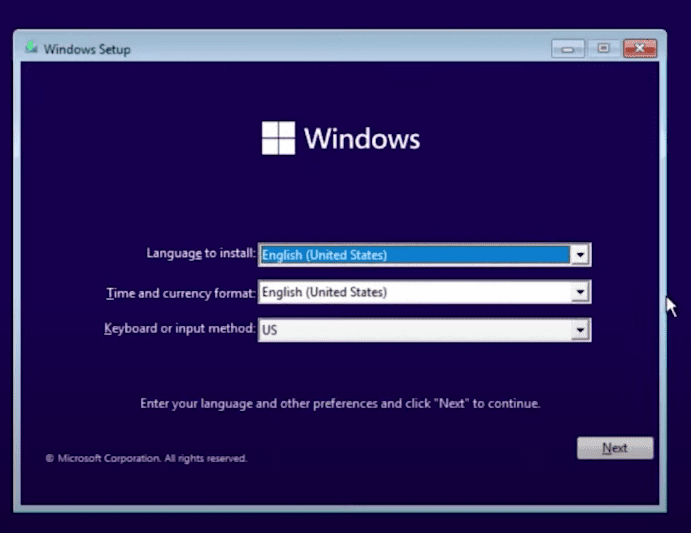
Windows 11 setup on Chrome OS
That’s about it for installing Windows 11 on your Chromebook! The process has been adequately difficult, especially if you’re technically inclined, but it’s safe to assume that this tutorial has been elaborate enough to even the most casual computer users. However, if you’ve managed to install Windows 11 on your Chromebook now, do read the next section.
The caveats of running Windows 11 on a Chromebook
On the surface, installing Windows 11 on Chrome OS might be pretty fancy, but you need to be aware of the caveats associated with accomplishing this task. No version of Windows has been supported on Chrome OS —never has been—and Windows 11 is fresh into the world. It has not even been released yet officially, and the only way you’re getting it on your Chromebook is through the help of a virtualization machine and an ISO file. Therefore, it’s common to expect frequent bugs, glitches, and performance lagging while you’re going to use Windows 11 on your Chromebook. You’re going to get a slowed-down experience overall, even if you’re rocking something like the Acer Chromebook Spin 713. Hopefully, the issues are alleviated down the road as Windows 11 gets an official release later this year and becomes more widely available across the spectrum.
Conclusion
Chromebooks have always been capable machines. They not only sport a phenomenal internet browsing experience but are also fit enough to handle a wide variety of tasks. In addition, they’re reinvigorated with updates throughout the year and have the power of Linux in them, making it possible to use Chromebooks on a whole new level. It’s been a common prospect that Chrome OS can comfortably handle Windows 10, give or take a few minor hiccups, but Windows’ next-gen upgrade has just launched.
So naturally, people are thrilled to use it as soon as it releases, especially Chrome OS users for experimental purposes. As mentioned earlier in the article, you’re not going to get the most satisfying user experiences out of this ISO-driven Windows 11 variant. However, it’s still going to do just fine if you’ve meant to try it out on your Chromebook. We hope that this article has been helpful for your cause. Chrome Ready wishes you good luck!

6 comments
windows 11 chromebook
good window
please they are asking for description what should i type there
I need windows.I’m trying to get steam & download games.
Me Too.
I Tried to Evolve My Chromebook. But it wont let me do it Because of that YouTube Kid Restriction.