Chromebooks are ubiquitously known for their speed, stability, and ease of use they bring into our computing lives. They sport the lightweight Chrome OS and are priced reasonably cheaper than most traditional laptops. All this, however, isn’t without a lack of hardware-intensive features on an otherwise brilliant minimalistic machine. As time progresses, manufacturers are struck inside a fierce competition to produce dazzling Chromebooks and fit them at a fair price point.
When it comes down to their functionality, Chrome OS can handle many things. From offering the Google Play Store services to boasting the Linux Terminal power, these devices have indeed come immensely far from their origin. Come to think of it, and you can even install Windows on your Chromebook and run it almost natively. However, this won’t be without its caveats, and all this is soon to be discussed in this article.
If you’ve been trying to install Windows on your Chrome OS for some reason, this piece of writing is exclusively for you. Let’s get straight to the matter of the moment then.
What You Should Know Before Installing Windows
Installing Windows and running it in place of Chrome OS has its advantages, especially if you have a premium standard device at your disposal—and we think there’s no argument here. However, you should know that there’s no official Windows support for Chromebooks, and this is where the risk factor weighs in. Moreover, installing Windows also requires you to manipulate your Chrome OS mechanically – something we’ll explain more about a bit later on.
That said, attempting to install Windows will also wipe your Chromebook clean of any data or files that you had previously stored on it. It’s best that you back all that up to the cloud or use an external hard drive, for that matter. Finally, this process isn’t for every Chromebook out there – it may work for some Chromebooks, and it may not work for others. You can, thus, check out this list to find out if your device can handle the installation of Windows.
Furthermore, there is quite a hefty prerequisite of installing Windows, which is the mechanical manipulation we talked about earlier. Each Chromebook is manufactured with a distinct BIOS that’s particularly made for Chrome OS’s web-oriented working. This resides inside a write-protect screw located in the motherboard of your device. This sole component makes it impossible to install any other operating system, such as the one in question right now. This is why you’ll, first and foremost, have to get off the bottom shell of your Chromebook and take out the write-protect screw.
Furthermore, Windows computers run with drivers endorsed by Microsoft itself. Without specific drivers, a Windows device cannot function. Since you won’t find any Microsoft-certified drivers for a Chromebook because there’s no official support, you’ll have to resort to third-party options.
That’s about it, we presume. We suggest getting a Windows laptop if the OS is that important for you, but if you have to do what you must, continue reading.
Installing Windows on Chromebook
This will be no effortless accomplishment. We’ll have to break down the full process into steps for your convenience. Let’s get started.
Removing the Write-Protect Screw
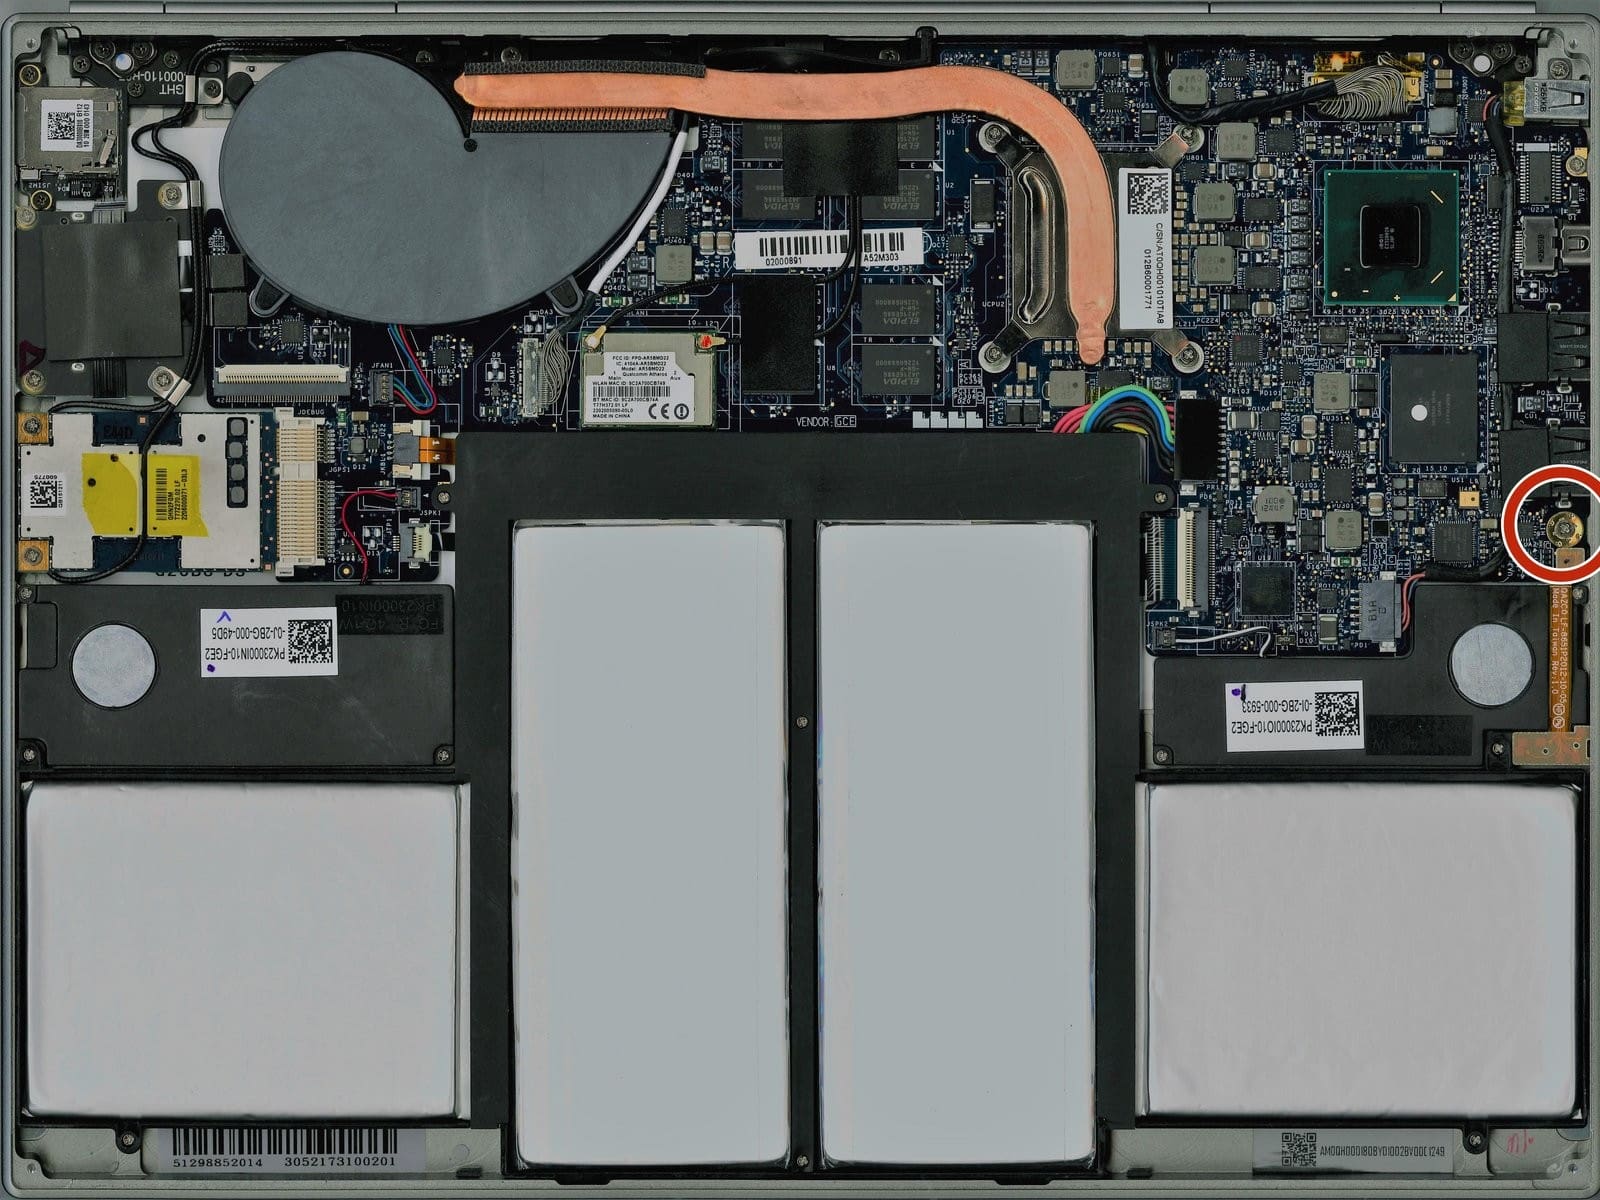
It’s called write-protect because it prohibits one from writing any firmware on the device. Anyhow, what you’ll do is shut your device down and unscrew its bottom with a screwdriver and remove the shell altogether. When the motherboard is accessible, you’ll have to look for a relatively large screw. When you’ve found it, remove the screw and sort your Chromebook back together and turn it on as well. Note: The location and form of the write-protect screw might differ with each Chrome OS, but for reference, here’s a photo of how it looks like.
Turning On Developer Mode
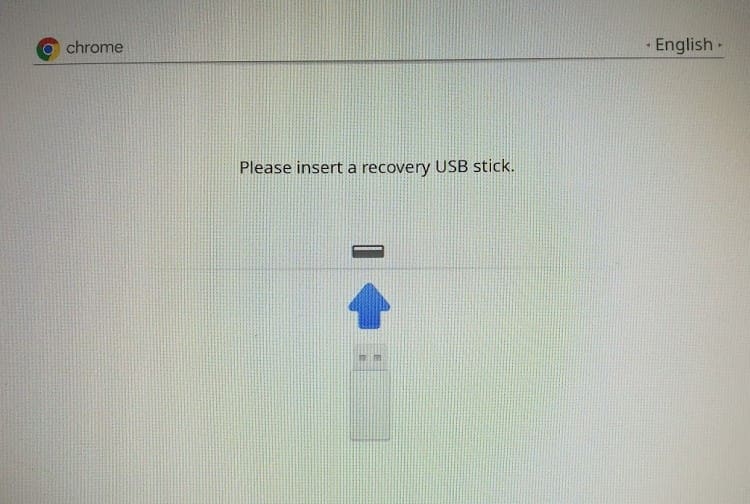
You can’t impose a change this big into your Chromebook without assuming the role of a developer – it’s just not possible. Enabling the developer mode is fast and easy. You have to start by booting your device into “Recovery Mode” by holding down the “ESC + Refresh” keys followed by a prompt press of the “Power” button. Your Chromebook will restart and ask you to insert a recovery USB stick.

Recovery Mode
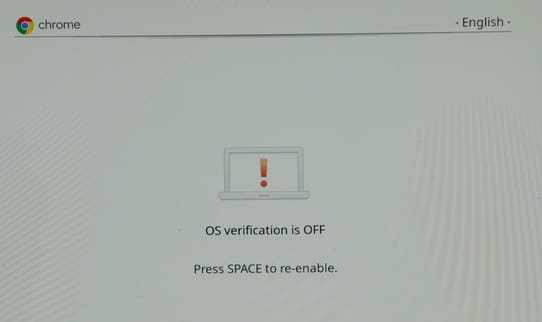
Press “CTRL + D” here. This will trigger a warning that’s going to say, “To turn Chrome OS verification off, press ENTER.” The system is talking about the self-check here that it performs every time a Chromebook boots up. Turning on the developer mode takes away that feature so that you know. To proceed, press the “Enter” key. After that, you should see a screen identical to the snapshot below.

OS Verification Confirmation
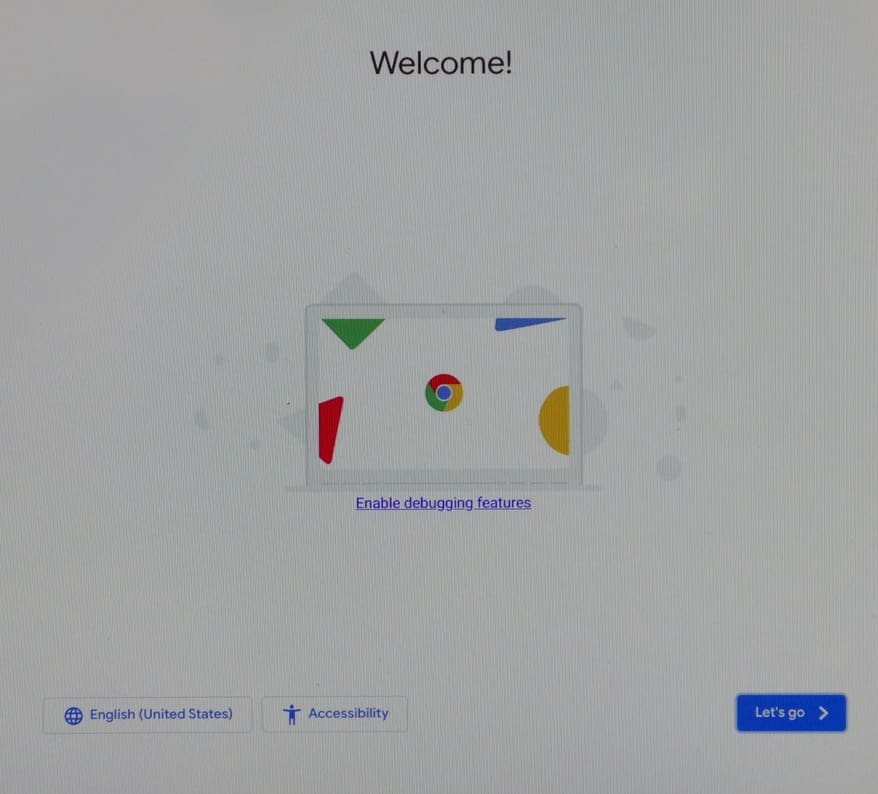
You’ll have to press “CTRL+D” again here and wait for a moment while the system prepares itself. It’ll go through a couple of screens here, but when it returns to “OS verification is OFF,” you’ll have to press “CTRL+D” for a second time to enable the developer mode finally. Best believe that you’re done for now. Go through the initial setup and keep a Chrome tab open for the next step.

Welcome Screen
Setting Up the Firmware Flash
The time is nigh for diving deep. You’ll have to flash the new BIOS now to continue the process. To do this, press the “CTRL + Alt + T” keys together inside a Chrome tab. This will open up the “Chrome OS developer shell” – something similar to the Linux Terminal. Type “shell” in the Terminal to gain access to a more potent shell environment. After that, you’ll have to copy and paste the following command in the Terminal and also press the “Enter” key when you’re done.
cd ~; curl -L -O https://mrchromebox.tech/uefi-flash.sh && sudo bash uefi-flash.sh
This powerful command has the capacity to change your Chromebook’s BIOS. Anyhow, after you’ve entered that command, a list of options will appear before you. Type “3” in the Terminal and press the “Enter” key. This will automatically select “Install/Update Custom Coreboot Firmware (FULL ROM).” You’ll get a standard disclaimer saying, “Flashing new firmware will brick your device.” While this is true to some extent, ignore the warning and enter the “Y” key to continue.
After all that, you’ll have to enter the “U” key in the Terminal to install UEFI-compatible firmware on your Chromebook. This firmware is recommended for Windows, so it’s obvious that we will opt for that.
The next step is optional from a user perspective, but we cannot stress its importance. The system will ask you whether you want to store a backup of the original Chrome OS firmware or not. If you agree to this, insert a USB stick with a good amount of space and press the “Enter” key. When you’re prompted that the backup has been stored successfully, remove the USB drive and press the “Enter” key again. You don’t have to store the Chrome OS backup on your device; you can copy it and store it on any device you like.
When you press the “Enter” key, the system will begin downloading the Coreboot firmware. This is going to take a moment, so do sit tight. After everything’s done, the system will tell you that firmware has been installed. Continue the process with the next step.
Get Windows Using Another PC
This is the part where another PC has to come in. We’ve removed the write-protect screw, fired up the developer mode, and even flashed new firmware, but we’ve yet to install Windows. To begin, click on this link using another computer.
When you get to the desired page, click on “Download tool now.” Then, you’ll have to “Create installation media for another PC.” When the installer pops up, choose “ISO file” with the “You’ll need to burn the ISO file to a DVD later” text beneath it.
As the text predicts, you’ll now have to use a tool called Rufus that specializes in creating bootable USB drives. Click on this link to download the small-scale application. After you’ve done that, insert a USB—make sure not to use the drive that has your Chrome OS backup—and select it using Rufus. At this point, you’ll have to predetermine a bunch of settings.
This includes “GPT partition scheme for UEFI” under the “Partition scheme and target system type” setting. You’ll also need to select “NTFS” as the file system. Lastly, select the ISO image file you’ve downloaded right beside the “Create a bootable disk using” checkbox. Furthermore, also click on the button beside that checkbox. Triple-check everything and click on “Start.”
You’re now all set to install Windows on your Chromebook.
Installing Windows
Begin by plugging in this optimized USB drive containing the Windows installer in your Chromebook. This should automatically power up your device and display the installer on the screen. If that does not happen, turn on the Chromebook yourself and press any key when the option for “Select Boot Option” pops up on your screen. Anyhow, select “Boot Manager” using your keyboard and choose the USB drive you’ve inserted inside.
At this step, you’ll now need an additional USB mouse or a USB keyboard. The built-in trackpad and keyboard won’t work with the Windows installer, not until you install the drivers, at least. When you have the equipment ready, plug it in to navigate the installer. You can now easily install Windows on your Chromebook using this setup.
Beware, however, since your device will restart on its own halfway through the installation. When that happens, be sure to remove your USB stick to finalize the installation. Otherwise, you’ll be taken back to the start of the installer.
After Windows successfully installs on your Chromebook, it’s time for this guide’s next and last crucial step – installing the relevant drivers.
Installing Third-Party Drivers
To install drivers outside the certification of Microsoft, you’ll have to run a specific command in the “Command Prompt.” This enables “test signing”. Use the following and after you’re done, restart your device.
bcdedit -set testsigning on
You can now refer to Coolstar’s guide for installing the relevant drivers on your Chromebook.
After everything has been done and dealt with, you should be able to use your device in a perfectly normal manner. Installing respective drivers will make it possible to utilize your Chromebook’s original hardware as much as possible, such as its keyboard and trackpad.
Hopefully, by now, your Chromebook has undergone a massive overhaul and is ready to be used as a Windows device. Have fun!
Conclusion
Tinkering with your device’s major components never bodes well unless you know what you’re doing. In this article, we’ve shown you how to install Windows on your Chromebook. The process is indeed lengthy and demanding, but rest assured, it is possible and works wonders for some devices. However, we do not recommend that you do this. Instead, there are many alternatives to approach with a modern-day Chromebook, such as maximizing its potential with all Linux apps, Play Store services, and the evergreen spectrum of web-based applications. If you require Microsoft Office, here’s an article that shows you how to use it on your Chromebook. Still, if you must, this guide above will get the job done for you and revamp your Chromebook.


1 comment
It asks for a password, what do i do now?