One of the pioneers of software that enables safe browsing and password encryption is PuTTY – an open-source SSH and telnet client that functions as a terminal emulator and a file transfer application. PuTTY is noteworthy for many reasons, out of which fulfilling a user’s security needs and generating SSH keys to handle confidential data online securely are an eminent couple. PuTTY was originally built for Windows since non-Linux users are at a greater risk of encountering threats and security breaches.
Since a high performing third-party application like PuTTY has jumped into the picture, Windows users can breathe a little easier. Nonetheless, you can also get the software up and running on a Chromebook too! The process is uncomplicated and only requires basic inputs, so keep reading for an installation guide that this article is here to present. First, let’s kick it with the features.
Features
Linux-Like Terminal Window
PuTTY features a terminal window, which will come as a pleasant surprise to Linux users since the interface is pretty much similar to the said operating system. This window handles terminal emulation like a charm and features favorable configurability. There’s a lot you can use to tinker around and optimize to your heart’s content. When you’re done with that, you’ll notice how PuTTY is compatible with multiple cryptographic algorithms such as TCP, IP, SSH, and the most obvious, telnet, which we’re going to talk about later.
Unique Key Format
We reside in a password-protected world today, but the notion is still all in vain. It turns out that PuTTY, among other “Secure Shell” exhibiting software, can generate SSH keys in its very own yet distinct format – .ppk. Using this program, you can create a vast combination of SSH keys that consist of special and alphanumeric characters for the most consolidated form of safekeeping. This makes it impossible for hackers and other threats to breach your device’s security and obtain your private data. What’s more, there’s also a PuTTYgen tool that allows you to create your own series of SSH keys and convert it between many formats.
File Transfer
While PuTTY does not comprise a dedicated file transfer client, there are entities such as PSFTP and PSCP that are actually command-line tools that can be used for transferring files. This is a great benefit for technical, more experienced users familiar with the terminal window and use it for entering commands and yielding an output. This file transfer protocol functionality of PuTTY allows it to serve diverse purposes all within one singular package.
Telnet Compatible
Despite being outdated, PuTTY still shows support for telnet – an application that was first-ever used to establish communication between two parties. However, we can’t say that telnet has aged well since a wide variety of software outclasses it due to the advancements taking place in recent times. That said, there’s a separate variant of this program called PuTTY, mainly used in areas where encryption isn’t the norm. However, cybersecurity is a must for well-networked environments, and that is where PuTTY and PuTTYtel really shines.
How to install PuTTY
As mentioned earlier, PuTTY can easily be installed on your Chromebook, but what you’ll be making use of here will be the all-powerful Linux Terminal. If you haven’t yet got Linux up and running on your Chrome OS, give this article a read for a detailed guide. If you know what we’re on about, the following steps will take it from here.
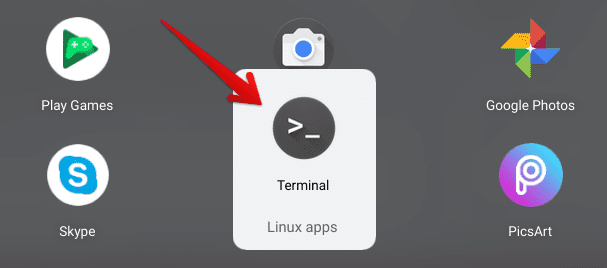
1) Begin by opening the Linux Terminal on your Chromebook.

Opening the Linux Terminal
2) Once you do that, a new window should open, and this will be Linux’s Terminal window. Here, you’ll enter the following command in the command-line. You can copy and paste the text below as well.
sudo apt-get install putty

Installing PuTTY
3) After you’ve done with the above, press the “Enter” key. This will trigger the Terminal to start its operation, and soon you’ll be asked for confirmation whether you want to continue to not. You can either press “Enter” here again or press the “Y” key, followed by the “Enter” key. Both ways work fine.
Confirming the Install
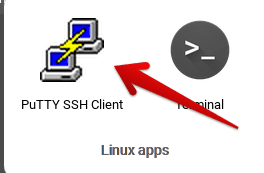
4) You’re almost at the close now. From here on out, the download will begin by itself, and since PuTTY isn’t a sizable application, the process will take around 30 seconds at best. When you see your username again on the Terminal window right below “Processing triggers,” know that the install has been successful. You can now check for your app in the “Linux apps” folder in your Launcher.

PuTTY Installed
That’s it! If you see the app icon the same as above, PuTTY was installed on your system. Please give it a click to see how the software works.
Working

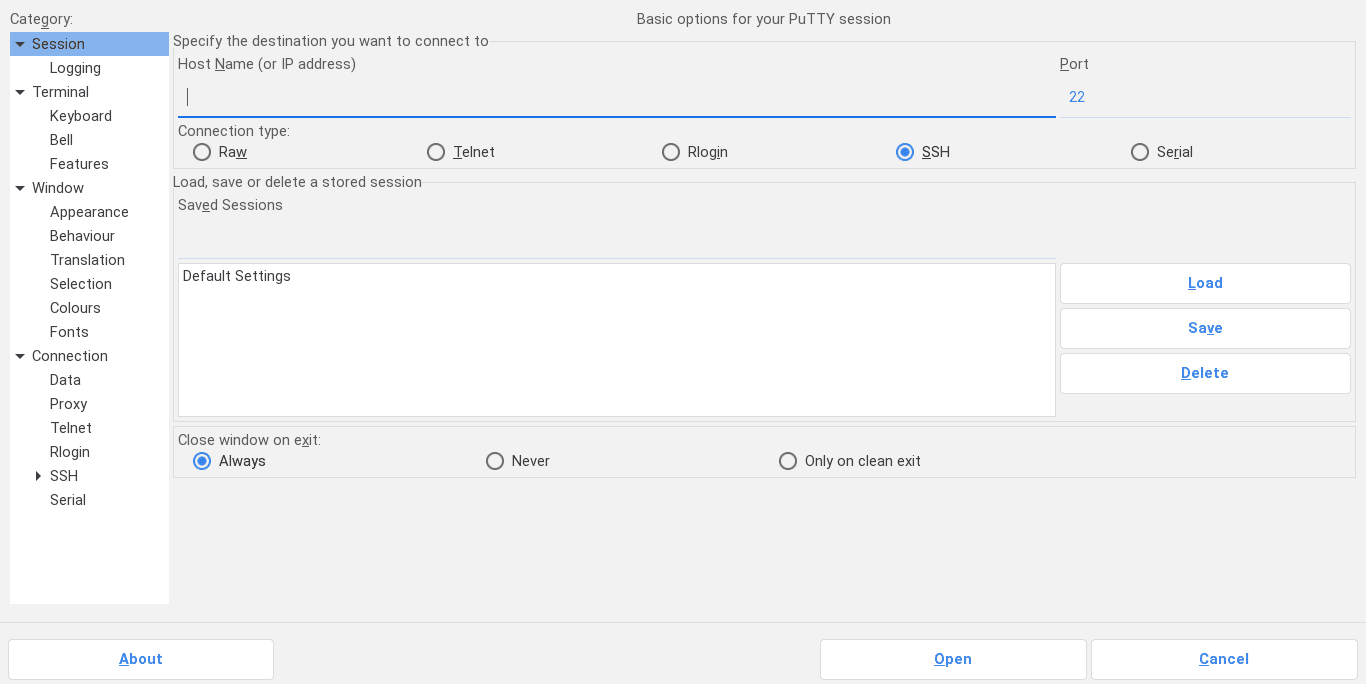
PuTTY’s Working
As you can perceive from the screenshot above, PuTTY is extensive in its working and functionality. It presents a comprehensive array of functions and operations, all that is easily workable within this Linux variant of the software. From the get-go, you can enter the device’s IP address that you wish to connect to and go forth with a successful remote login. Moreover, you can also choose which type of connection you’d like to be formed. By default, it is set to SSH, but there are many others as well that you can opt for.
If you look at the left column in this app’s interface, there are even more settings for you to calibrate and tinker around with. All in all, PuTTY seems like the complete package with all the features that it is packing, so be sure not to miss out on its full potential.
Conclusion
PuTTY is a powerful Linux application that’s in use by many pro-Chromebook users and beginners alike. Its far-flung abilities make it possible for the software to develop secure and classified communication that’s basically impenetrable by threats, malware, and breachers. This app alone is reason enough to use Linux, among other awesome purposes. Therefore, now that your device is a tad bit more specialized, we wish you a great experience with PuTTY!

6 comments
it’s not working after you tape informations of server it can’t load the terminal.
same issue here… type it in.. click to open and nothing
Crashes after clicking open.
not working on my chromebook
Crashes as soon as you try to connect
I had to go in and change the default font to something besides server:default. After that it worked fine on my Chromebook.