As if Chromebooks weren’t super fun to use and accessible enough, the developers up above decided to make it even more practical and feature-rich by introducing the Linux OS to it. Due to its courtesy, Chromebooks have become highly convenient for those trying to find applications that are the norm in Windows and macOS. We’re talking about substitutes for Microsoft Office, Adobe Photoshop, and Adobe Reader. The list goes on and on, so this was to give you a prompt idea.
However, diving deep into the immensity of Linux apps, there are several occasions where you’d be notified to enable microphone access for Linux. If this leaves you baffled and confused, Chrome Ready will make sure you know better after giving this article a read. Apart from all that, if you’re also experiencing trouble setting up this sprawling OS, check out another one of our articles here to make sure you’re headed in the right direction. Anyway, let’s get back to the topic.
Enabling Mic for Linux Apps on Chromebook
The following steps will guide you in getting to the microphone setting of Linux and enabling it subsequently.
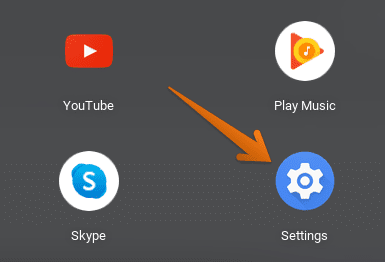
1) Go to Chromebook’s Settings by either accessing them from your Launcher or clicking on the gear icon in the status bar.

Going to Settings
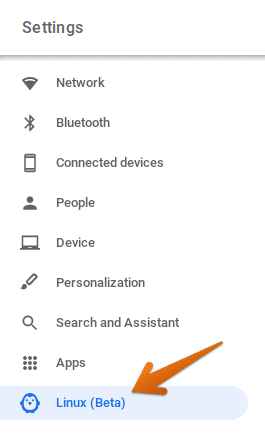
2) After you’ve opened “Settings”, click on “Linux (Beta)” in the left column.

Clicking on Linux
3) As you do that, you’ll see how a page for Linux settings opens up. Click on the expand icon to reveal more.

Accessing Linux Settings
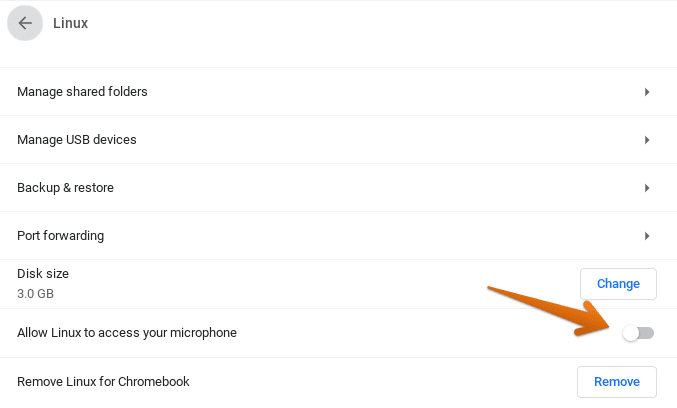
4) You’re nearing the end now. As another page makes its way onto your screen, you’ll observe a setting that should enable microphone access for Linux. It’s disabled by default, so you’ll have to go on and click on the button to enable it.

Allowing Linux Mic Access
That’s it for the tutorial. After allowing Linux to access your microphone, all related applications should be good to use from here on out. For other microphone concerning settings, this article will detail you even more.

1 comment
As of July 22, 2023, this still does nothing… I’m not buying another chromebook, that’s for sure.