Also regarded as desktop sharing, screen sharing is the process of providing access to your screen to another computer or device for collaboration or multi-tasking. This way of utilizing the digital workspace has cut down the extra waste of time, birthed newer possibilities, and made teamwork much easier. You know how the adage goes by, “A picture is worth a thousand words,” since screen sharing tends to live up to exactly that.
In this article, we’ll show you how you can set up screen sharing on your Chromebook using different methods, so be sure to stick around till the very end. First, however, let’s take a brief dive into the very concept of screen sharing.
How Screen Sharing Works
What screen sharing does is use software by using a graphical terminal emulator. This allows the person to view all the content on the screen that’s being shared. Not only that, but what’s being done on the shared screen is also viewed in real-time. This mode of action has enabled one domain to flourish more than ever – online training. Trainers worldwide in their varying fields turn on remote screen sharing from their respective systems for demonstration.
Since the world is foreseeing boundless technological advancements daily, the need to acquire multiple skills and education is also increasing drastically. All of this has collected itself into a vast business, and screen sharing has played and is still playing a tremendously vital role in training people. Rather than an in-person meeting, many people have begun to prefer video conferencing now.
Now that you know the significance of this phenomenon let us shed light on the part where you can easily screen share on your Chromebook.
Option #1: Using Chrome Remote Desktop
For the first method, we’ll be using a native application that Chromebooks can benefit from flawlessly. This is the Chrome Remote Desktop app that’s readily available on the Google Play Store – something that’s pre-built in most Chromebooks of today. The app allows you to gain remote access to your computer from your tablet, phone, or another computer. The interface is fluid, beginner-friendly, and the app itself is free to use.
How to Install
The following steps will guide you in setting up screen sharing on two different devices. In this case, another device will be sharing its screen, and the Chromebook will be the host here.
1) While you can get the Chrome Remote Desktop app from the Google Play Store as well, we recommend the surefire browser extension method. To get started, click on this link, and proceed to install the extension.

Installing Chrome Remote Desktop
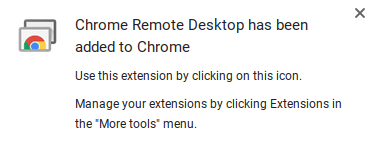
2) When you’re all finished up with that, you should see the following prompt on your screen. This confirms that the extension has been installed in your browser.

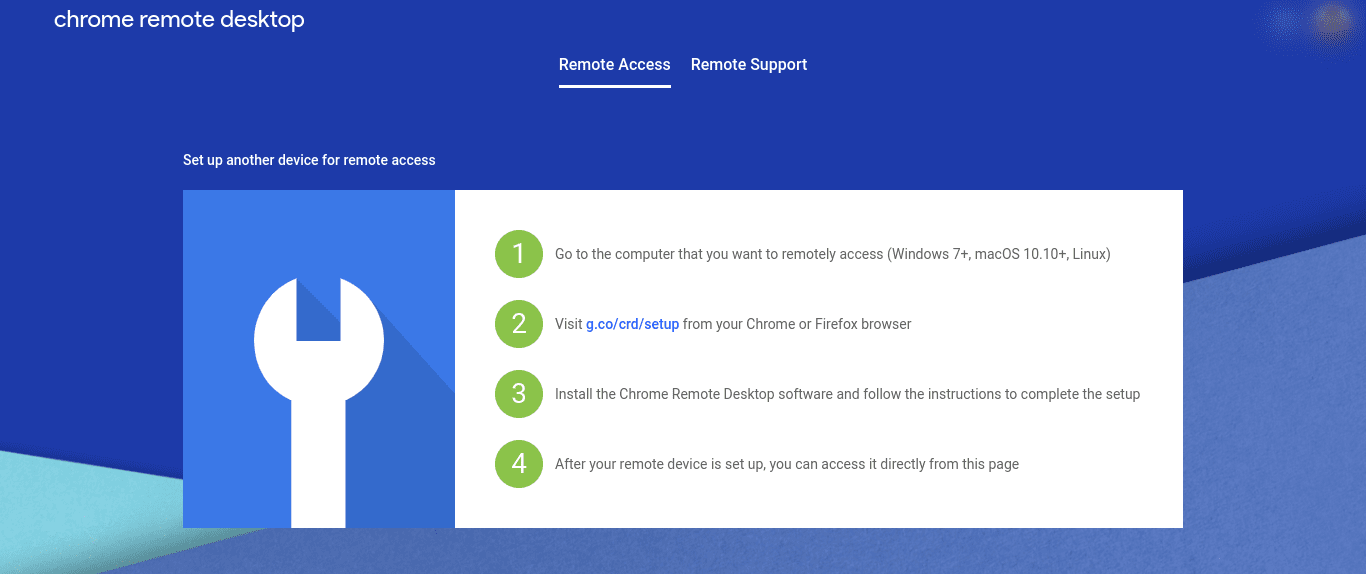
3) Your next step is to click on the extension’s icon. That should open a new window for you. Here’s how it will look.

4) It’s going to get technical from here on out. Now, you’ll have to follow the on-screen instructions to set up screen sharing. This will be done by another device whose screen you wish to share on your Chromebook. You’ll have to visit the link given, install the extension, and download the Chrome Remote Desktop software. After you’ve got the initial setup sorted, you’ll have to choose a name for your device and register a PIN. Here’s how the page looks when you’re finished.
 5) This is the other device that you have used to register with Chrome Remote Desktop. Click on it, and screen sharing will begin automatically. You’ll be asked to enter your predetermined PIN, however.
That’s about it for the first method! Congratulations if you made it this far. Let’s get on with other ways of screen sharing that you should know about on your Chromebook.
Option #2: Using Popular Screen Sharing Software
For effective team communication, screen sharing has become the go-to for the majority of businesses today. People have taken to popular video conferencing applications for this purpose and have found a proficient way for visual collaboration. Due to their lightweight nature and fast output providing features, Chromebooks are no exception to these screen sharing software and work quite well with them. Therefore, the following are some of the best of these applications that you can use to screen share on your Chromebook today.
Zoom
Zoom has skyrocketed to popularity due to the recent Coronavirus outbreak. In the hope of managing businesses, work, and studies, this video conferencing application has tried to do its very best to succeed. Zoom lets you host video calls with up to 100 participants and use its built-in setting to share your screen. Its fluid interface works quite well with Chrome OS and attributes to a lag-less experience. Zoom is best used for interactive presentations, and the joining participants can also share their screens conveniently.
Download it directly as a browser extension from the Chrome Web Store here.
Skype
Skype has been around long enough that it needs no introduction. For the most part, Skype is free, but if you want to get a taste of premium features, you’ll have to pay for a subscription where you’d be able to call numbers from different countries and do a lot more. Skype for business use is included in the Microsoft Office 365 subscription. However, individuals can also share their screen when video calling and extra features such as recording also come natively with this application.
Download it directly from the Google Play Store here.
TeamViewer
TeamViewer is an enterprise-grade application for Chrome OS that’s connected with more than 2 billion devices today. It’s a remote access and support software that allows you to gain access to other devices from the comfort of your own desk. Individuals and enterprises alike can take advantage of the application’s Presentation Mode and share their screen. You can also record and securely save your screen sharing sessions. TeamViewer is free for personal use, but it costs somewhere around $50 monthly for business use.
We did a complete article on TeamViewer so be sure to check that out if it interests you more.
Screenleap
A relatively new yet productive screen-sharing app, Screenleap lacks a luxurious interface but makes up for speed and efficiency. If you’re not looking for anything extra, Screenleap is the best option for your troubles. It’s straightforward to use due to its uncomplicated design and gets the job done timely. It’s a browser-based application and can be installed as an extension to Chrome. Just like Zoom, it’s free for 40 minutes of screen sharing, although this is per day, which is unlike what Zoom offers. That said, there are paid plans to purchase that can allow 7+ hours of screen sharing.
Download it directly as a browser extension from the Chrome Web Store here.
Option #3: Connecting Chromebook to a Monitor
Last but not surely not least, you can connect your Chromebook to an external monitor to share your screen. Although we do not recommend this method, you can always give it a go if nothing else works out, which is still highly unlikely. Begin by forming a connection using an HDMI, DVI, VGA, or DisplayPort, as Google advises. Once you’ve done that, the following steps will show you what to do next.
1) Go to “Settings.”
2) Click on “Device” in the left column.
3) Click on “Display.”
4) When you’ve connected your Chromebook to either a TV or a monitor, there will appear an option called “Mirror Built-in Display”. Click on it to finalize the process.
Conclusion
Sharing your screen using Chrome OS can be a great way to kickstart productivity, allowing you to form a team and collaborate on getting things done together. We’ve shown you many methods to do that, so it now depends on you which route you’d like to take. Be sure to give them all a try to see what suits you the best. Chrome Ready wishes you good luck!
