If you spend significant time on your computer, you will agree that having a delightful backdrop can lift your spirits, fuel creativity, and even boost productivity. Sometimes, it is all about the little joys that a personalized touch can bring to mundane tasks. And what better way to start than with customizing our very own Google Chrome browser? In this blog post, I will share my journey of discovering how to set a Google Chrome wallpaper to my personal taste, sprinkled with my love for a vibrant working space.
Let’s delve deeper and explore the nuanced steps to bring a splash of color and personality to your Google Chrome browser.
Starting with the basics: Understanding the importance of a pleasing setup
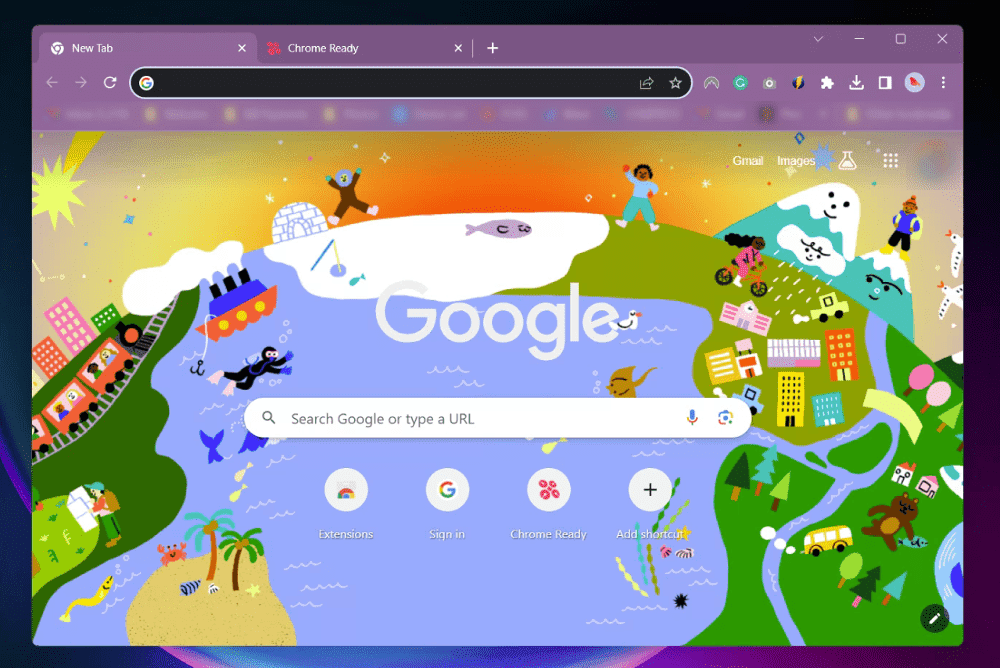
Google Chrome with new theme applied
Setting a custom wallpaper might seem like a small change, but I have found that it can have a considerable impact on your browsing experience. A backdrop that resonates with your style or perhaps, a picture that evokes a cherished memory can set a positive tone for your online ventures. Furthermore, Google Chrome offers various options to customize your wallpaper, making it an engaging activity to delve into.
My journey: Finding the perfect wallpaper
My venture into personalizing my browser was initiated by a sheer accident. One day, as I was browsing, I stumbled upon a vibrant image that instantly captivated my heart. I found myself wishing to see it every time I opened my browser. This was the starting point of my journey into the world of custom Google Chrome wallpapers.
Now, let’s get into the nitty-gritty of how you can embark on a similar journey.
How to set up your favorite Google Chrome wallpaper
Step 1: Launching Google Chrome
You would begin by launching the Google Chrome browser on your computer. I would recommend you to update your browser to the latest version to ensure a smooth process.
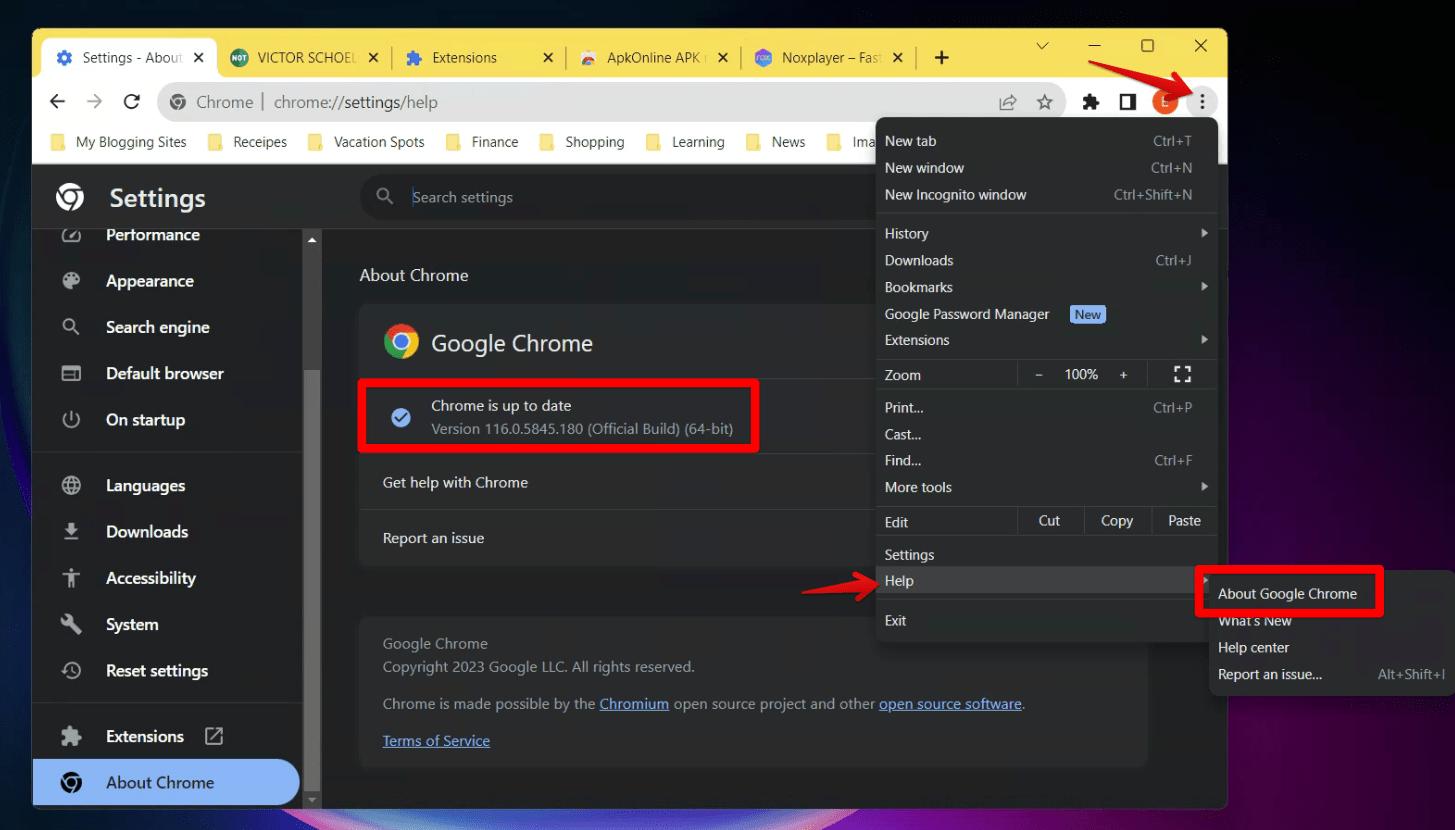
Updating Chrome to latest version
Step 2: Navigating to the settings
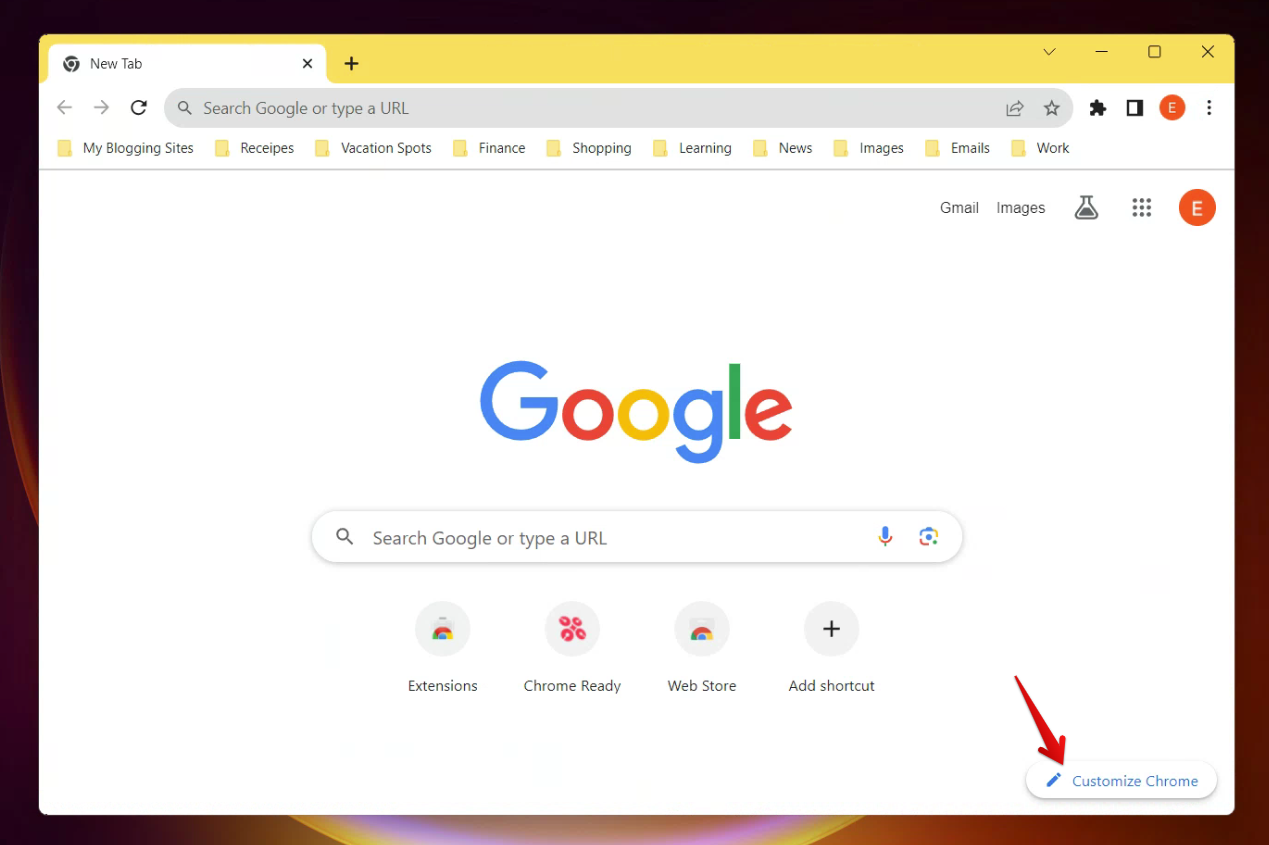
Once the browser is open, look towards the bottom right corner of the screen. You will notice the “Customize Chrome” button. Clicking on this will reveal a side menu with various options.
Step 3: Setting up the wallpaper
In the side menu, you would find an option labeled “Change theme”. This is where the magic begins. Click on it to find further options.
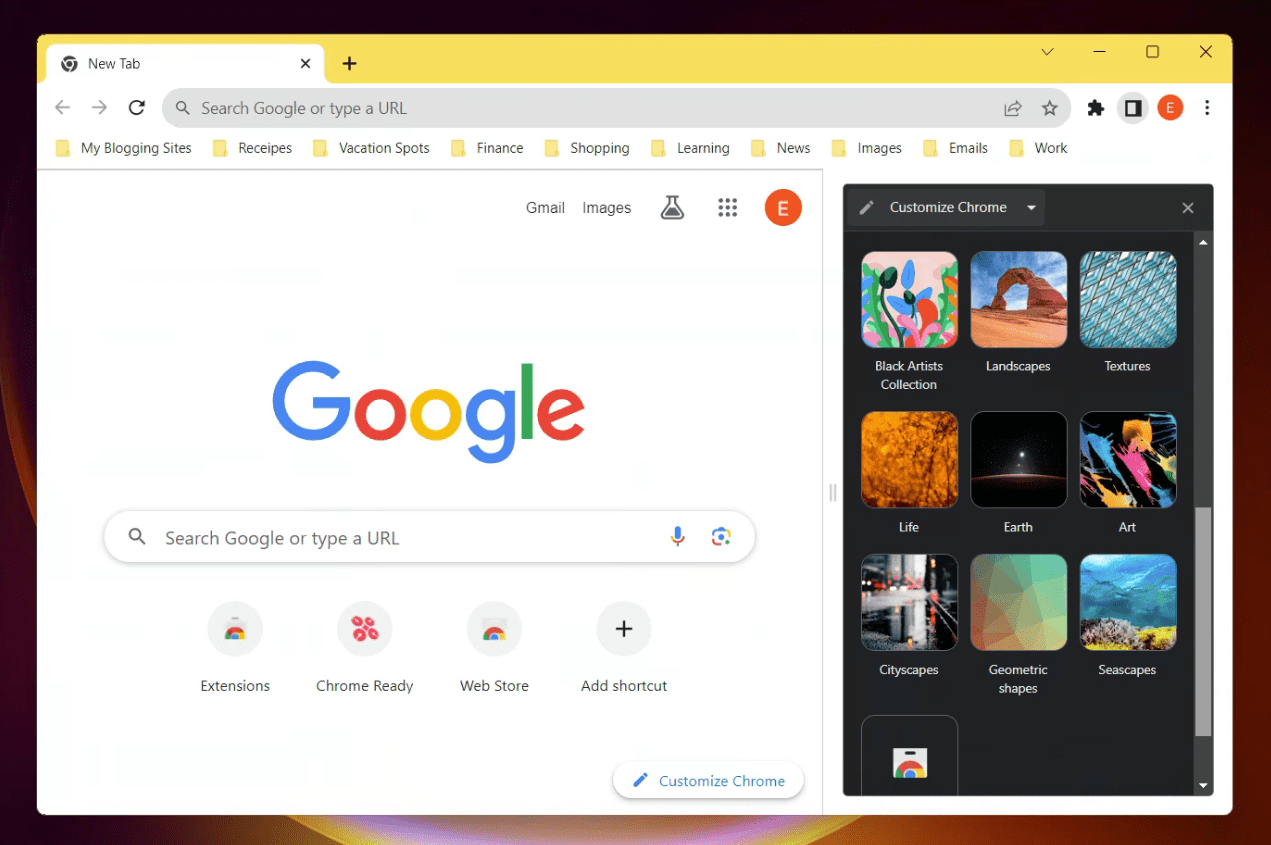
Changing theme and background of Chrome
Now, let me share a little secret here. This section became my favorite spot for experimenting with different looks and styles for my browser. Sometimes I found myself swaying towards vibrant hues, and on other days I was drawn to serene landscapes.
Selecting from Chrome backgrounds
You would notice that Google Chrome offers a plethora of pre-set wallpapers, categorized under different headings like ‘Art’, ‘Cityscapes’, and more. I have often found myself lost in the mesmerizing collection, exploring and experimenting with different visuals. Choose a category that resonates with you and select a wallpaper that catches your eye.
Uploading a custom image
For those who crave a personal touch, like I often do, there is an option to upload a custom image. To do this, click on the “Upload an image” option and select a picture from your computer. This option allowed me to set wallpapers that held sentimental value, making my browsing experience even more endearing.
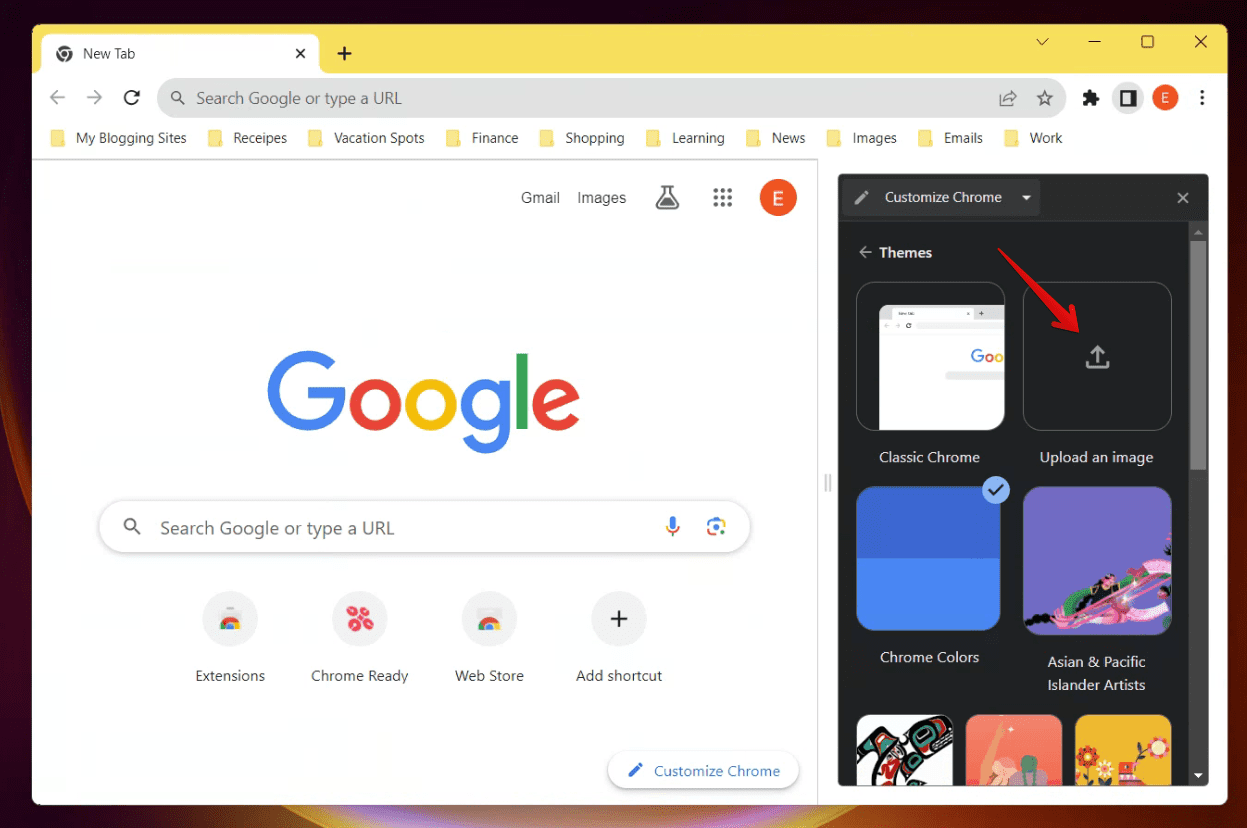
Uploading Image to Chrome as background
Step 4: Admiring your new setup
Once you have selected or uploaded your desired image, take a moment to admire your handiwork. The new backdrop should now grace your Google Chrome background, injecting a dose of personal style and charm to your browser.
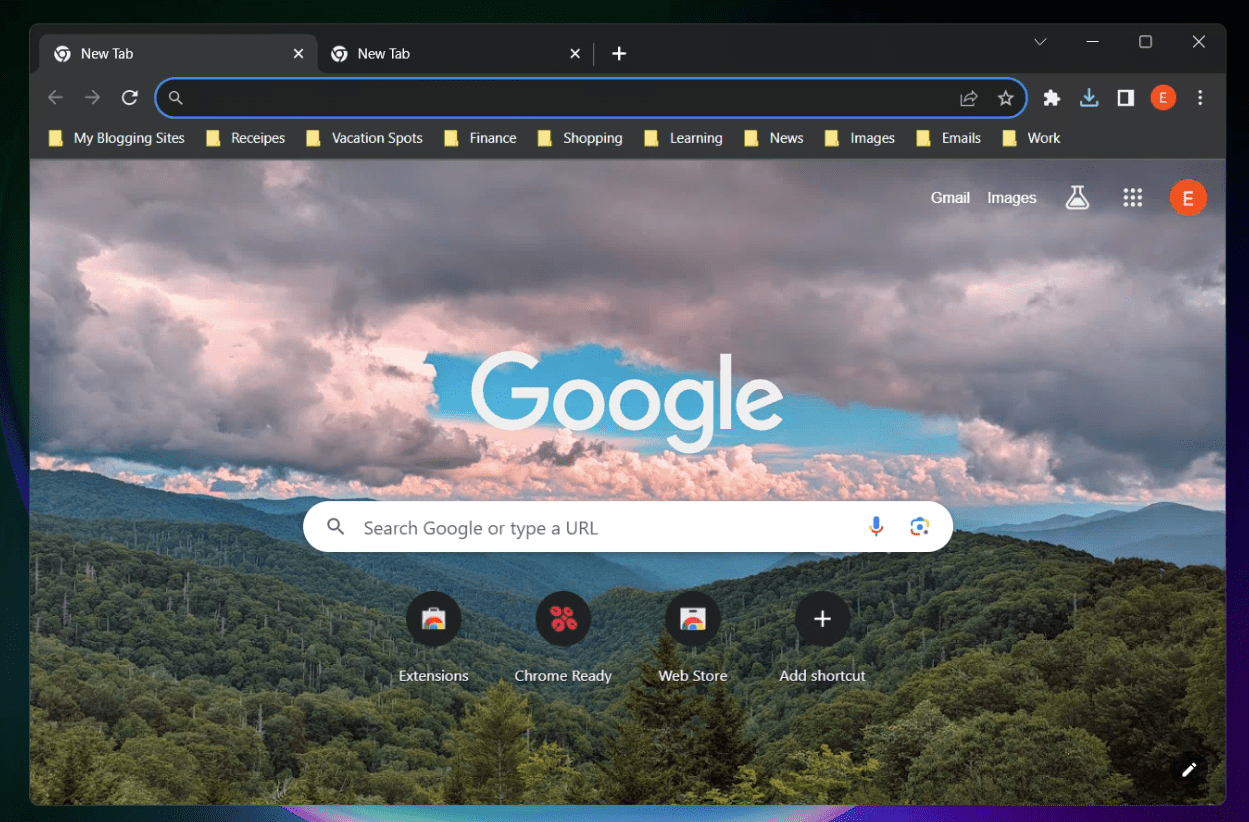
Chrome with uploaded image as background
Extra tips to enhance your experience
Experimenting with themes
Google Chrome also offers an array of themes to change the overall look of your browser. I personally enjoy alternating between different themes based on my mood and the season. It adds an exciting flavor to the daily routine.
Let’s get into the simple steps to access a wide variety of themes:
Step 1: Opening the Chrome Web Store
You would start by opening a new tab in your Google Chrome browser. In the address bar, type “Chrome Web Store” and hit enter. You can also directly visit the Chrome Web Store to explore a plethora of themes.
Step 2: Exploring the Themes Section
Once you are in the Chrome Web Store, look towards the left-hand side menu where you will find an option labeled ‘Themes’. Clicking on this will lead you to a realm of colorful and diverse themes. Here, I often find myself exploring various categories, ranging from minimalist designs to vibrant, artistic creations.
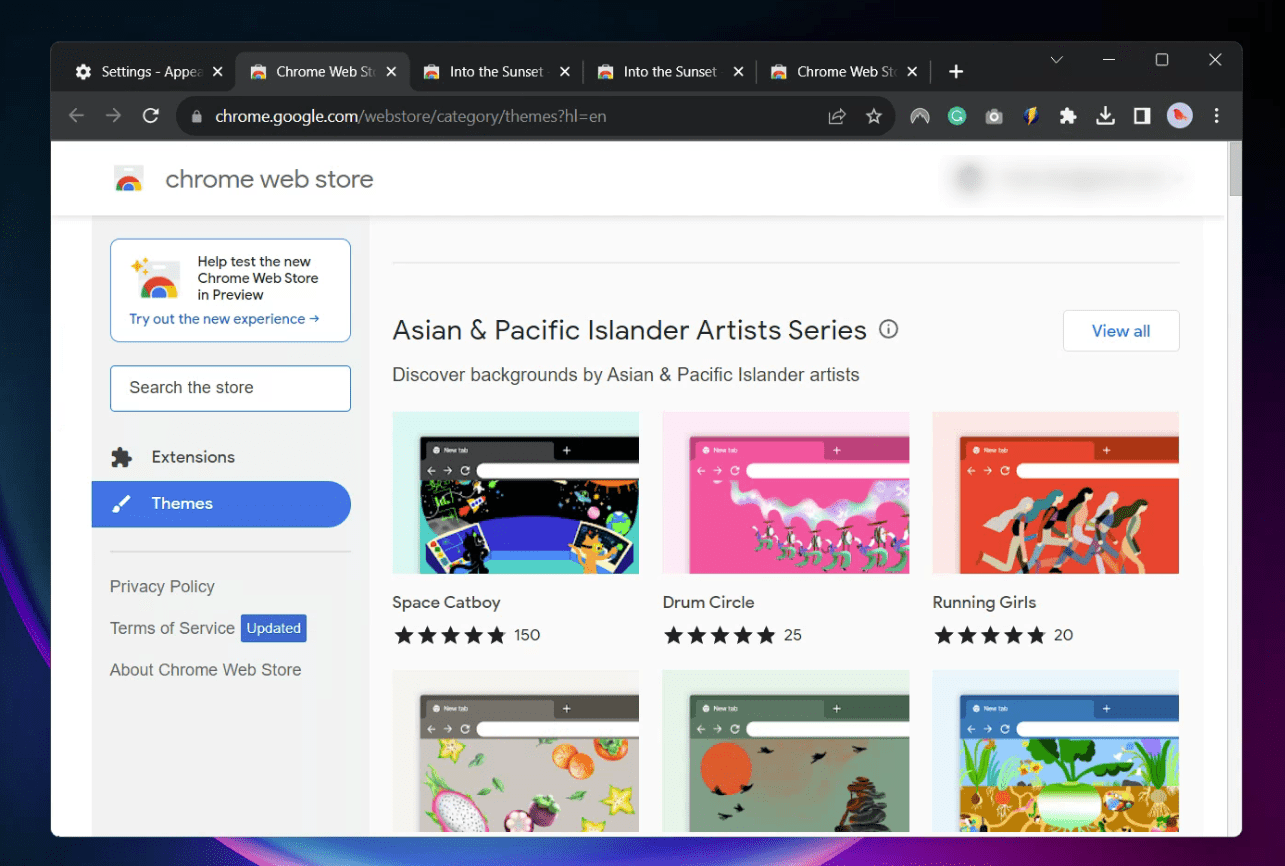
Themes in Chrome Web Store
Step 3: Selecting and Applying a Theme
Now, comes the exciting part – choosing a theme. When I first ventured into this section, I was enthralled by the diversity in designs and colors. Click on a theme that catches your eye to get a preview and more details about it. If it resonates with your style, click “Add to Chrome” to apply it. The theme will automatically be set as your browser’s new attire, giving it a fresh and personalized look.

Installing theme in Chrome
Reverting Back to the Default Theme
At times, I found myself longing for the original simplicity of the default theme. If you ever wish to go back, navigate to Chrome’s settings, click on “Appearance”, and you will find an option to revert to the default theme. This option allowed me to switch between themes without any hassle, keeping the excitement alive.
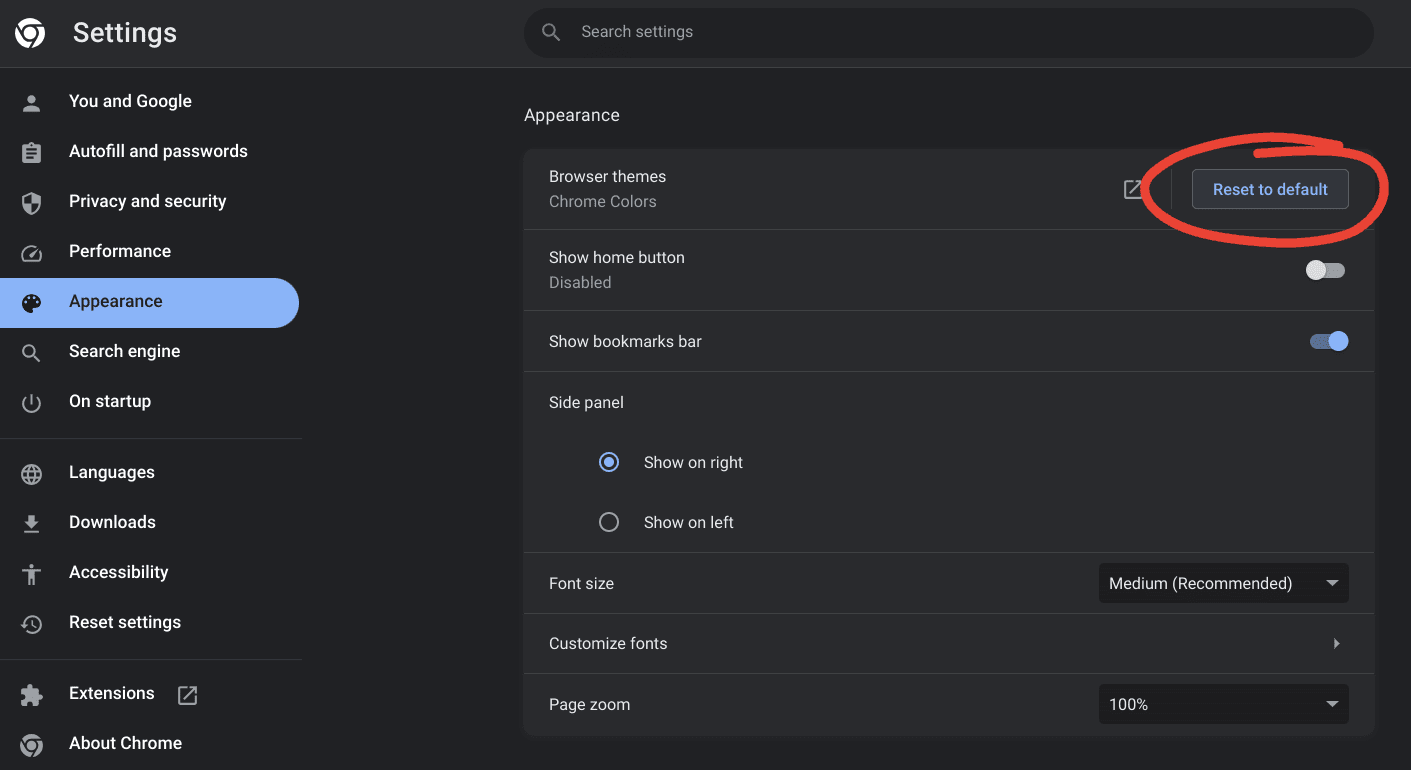
Resetting Chrome theme to default
Conclusion: The joy of a personalized browsing space
Setting up a Google Chrome wallpaper is a simple yet delightful process. It adds a sprinkle of joy to your daily browsing experience, making it uniquely yours. My journey into the colorful world of Chrome wallpapers has been filled with artistic discoveries and personal reflections. It has not just been about beautifying my browsing space, but also about creating a setup that resonates with my personality.
Through this detailed guide, I hope to have ignited a spark of creativity in you. May your browser become a canvas for your personal expressions, a space that mirrors your tastes and preferences.
