Google is celebrated worldwide for bringing a highly approachable productivity solution to billions of users. Still, Google Docs, Sheets, and Slides do not comprise the only Google ecosystem worth getting into. If you’re a parent with an extended family, creating a family group is a wise way ahead regarding complete Google service integration.
In this guide, we’ll explain what a Google family group is, some of its most radiant benefits, and how you can assign roles in a family group so everyone remains on the same page. In this way, you can instill more convenience in your life by not having to tend to your children manually if they ever require access to a service or wish to purchase an item.
Do read until the end for the best results.
What is a Google family group?
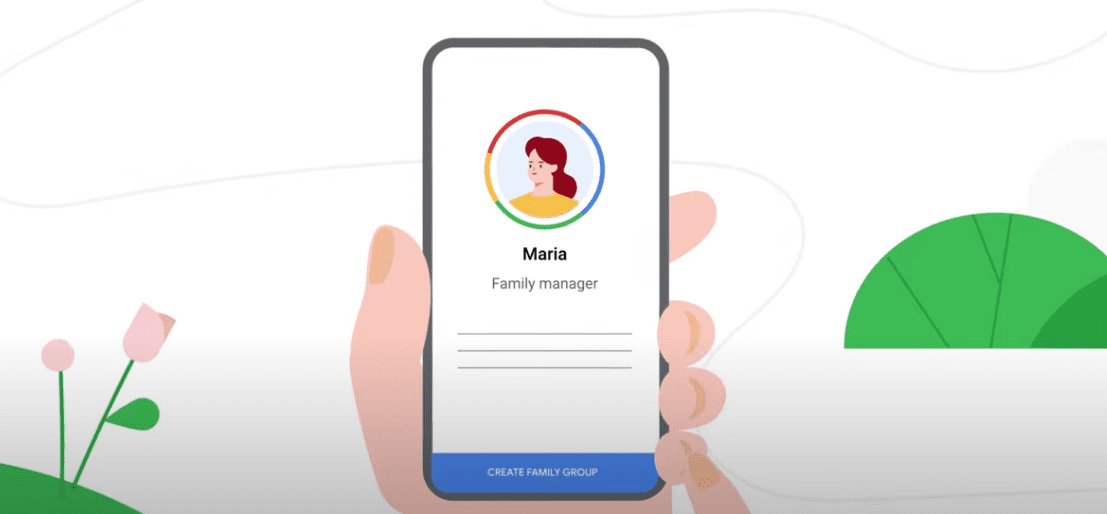
Creating a family group (Picture credits: Google)
One of the purposes of a Google-oriented family group is to share the services you use with other members of your household so no one near and dear to you is skipping out on the good stuff. A family group revolves around getting your family members under the same shelter and connecting as we do in real life.
The creator of the family group is the one who gets to manage the lot. As you become the family manager, you can add more members to the group. Each family group can comprise a total of 6 people, including you. Moreover, the family manager can assign roles to the joining members, such as specifying someone as a parent or child.
There are other privileges to creating a family group as well. Joined folks can enjoy Google features across a shared system, and these services include Google Play Family Library and the YouTube TV family plan. In addition, even if any one of the group members has bought a subscription to Google One, the whole family can enjoy extended storage.
Furthermore, the family manager can add a family payment method for all users to purchase. In addition, the person who creates the family group can quickly require approvals from other members before buying something using Google Play’s billing system. In this manner, you can sustain a controlled and safe family environment.
The members who join your group need to be over 13 to become a part of the family. If you’d like to add younger children, you’ll need to visit Family Link—Google’s dedicated service for catering to child supervision on the internet. We’ll go into more detail concerning this in the sections ahead.
For now, though, let’s explore the benefits of creating a Google family group in detail so that you can align your expectations accordingly.
What are the benefits of creating a Google family group?
Here is a cherry-picked collection of the most notable benefits of creating a Google family group. We must admit the collective spirit of the service, making families come together and enjoy a shared environment, is desirable for millions across the spectrum.
Shared services
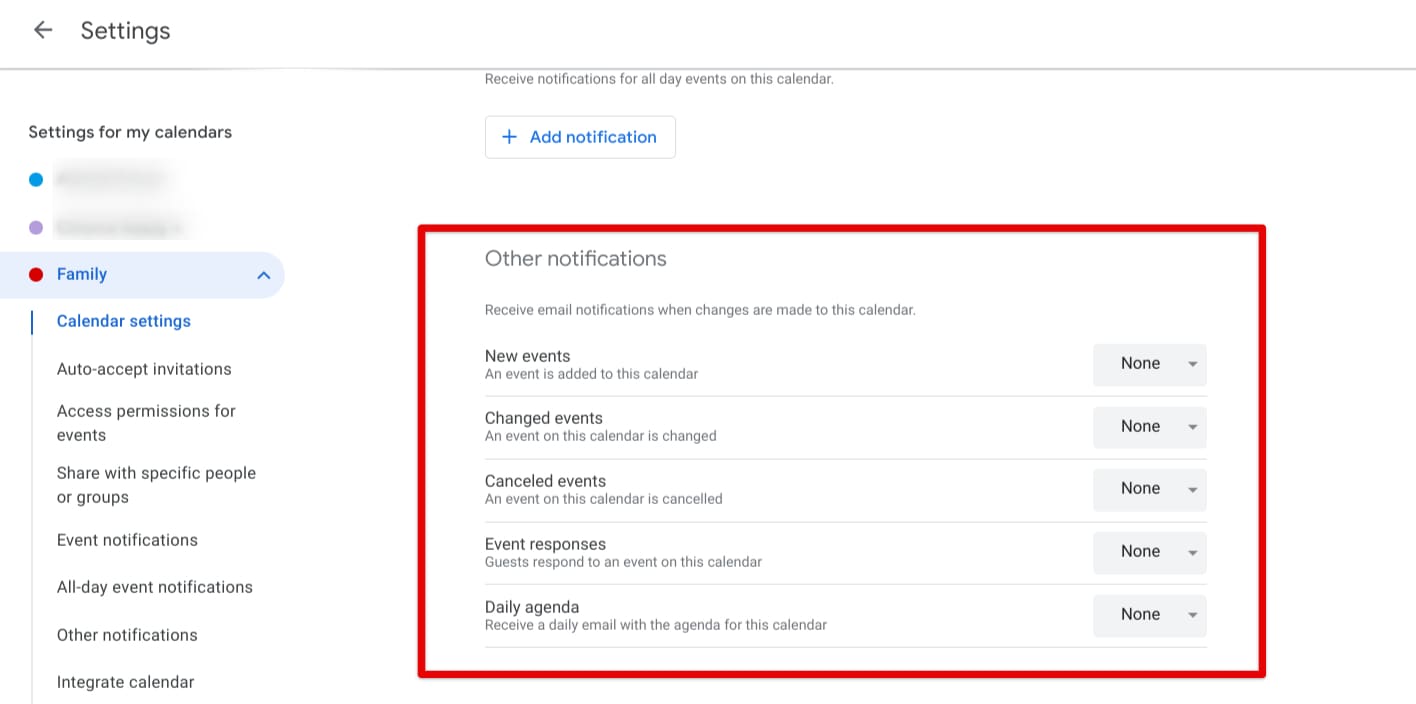
Tweaking relevant notifications for the Google Family calendar
First and foremost, using a Google family group to go about life is a hassle-free way to connect the services that you use with other family members. That way, the people in your household can enjoy extended networking without asking for passwords or relevant permissions.
Some included services are pretty basic, such as Family Keep, which is essentially Google Keep, and Google Assistant. However, advanced measures have also been aligned in motion, and this is where things start to get genuinely convenient. Major Google products such as Family Calendar and YouTube TV are must-haves.
To speak of the former, Google Calendar on its own alone is terrific for managing your family’s busy schedule, not to mention utilizing the calendar service for planning your next vacation as well. It’s possible to set up a family calendar in this service where your group members can access shared data and stay updated with family events.
On the other hand, it’s not just YouTube TV that can be shared with others on a whim; the list of accessible services by family members is pretty adequate and includes YouTube Premium, YouTube Music Premium, Google Play Pass, and Google Play Family Library.
The latter, in particular, helps your family group access the movies, games, apps, podcasts, books, television shows, and other items they have bought over time. Again, nothing but a convenient measure that has been put in place to instill more practicality in the lives of families around the globe.
Extended Google One availability for shared storage

Google One storage breakdown
One of the most profound benefits of setting up Google One is how family members can take advantage of extended storage if any single one of the group members has subscribed to the service. For the uninitiated, Google One grants Google users more cloud storage—100 GB, 200 GB, 2 TB, etcetera—depending on the plan they’d like to purchase.
This storage is then shared across the significant cloud-oriented services of the industry tycoon, including Google Photos, Google Drive, and even Gmail. Now, according to the Plans and Pricing page of Google One, there are several options to choose from, and if you happen to belong to an organization, your options are even more diverse.
Therefore, it’s pretty seamless to enhance your Chromebook experience with Google One integration, and with a Google family group, that amenity will get easier than ever. Before you tread further, though, please clear up how Google Drive and Google One fare against each other for accurate information.
Family reminders and voice message broadcasts
Another admirable feature of using a family group for Google on your Chromebook pertains to reminders and family broadcasts. This is yet another great tool that can help you organize your household tasks and get stuff done on time without missing. On ChromeOS, the best way to do this is by turning to Google Assistant, the reliable virtual handyman.
Out of all the different commands you can use to make Assistant work at will, saying “Set a reminder” will lead you forward on this front. After that initial part, you’ll have to follow up by stating what the reminder is about while specifying a time for it.
With that said, make sure you’ve activated Assistant on your Chromebook before attempting the above to make things smoother for yourself. After you’ve set a reminder successfully with your Chromebook’s Google Assistant, the next step is to head over to Google Reminders to keep track of all the reminders you’ve created.
- Please note that for some reason, you can no longer create reminders from the Reminders website.
As for family broadcasts, this is another means of communication you can exercise effectively across your family members. Broadcasts in the Google family group sense relate to voice notes that can be sent to unconventional yet Google-powered smart devices, such as TVs, smart clocks, and wireless Bluetooth speakers.
Now, for this to work, you need devices that are compatible with Google Assistant. In addition, you have to specify your home in the Google Family app as well. All of the latter comes after you’ve created a Google family group and there are members inside it. For more details, we recommend checking out Google’s relevant support page.
Child account supervision
Next, you can add children under 13 years to your Google family group, but the process will differ slightly from the usual. First, you need to declare the basic details of your little one by creating a separate child account for them with Google. This will be taken care of by the Family Link app. You can download it from the Google Play Store effortlessly.
Once done, use the Family Link app to set up a new account for your child. Doing that only takes care of half the process. You next need to set up parental controls to add your child to the family group. Here’s a handy guide that will walk you through the process of getting that done.
Family payment method
Tired of having to say yes or no to your children whenever they come running to you to buy them something? We’ve all been in the same boat as you, and perhaps, Google has taken this into notice for the parents among us and decided to implement a family payment method system as part of the family group in question.
As the family manager, you can now add a payment method that your entire family can use without breaking a sweat. Of course, before the transaction occurs, a request for approval will be sent to you, which you can either deny or approve.
Please be advised that the payment method applies only to the entries associated with Google Play. Any purchase involved outside of that won’t count as being counted as part of your family group. For dealings meant to be carried out on the Chrome browser, we recommend looking into Google Pay integration.
How to create a Google family group on ChromeOS
Now that we know the defining use cases of owning a family group let’s determine how you can start immediately. First, you need to go to the “Create” page on Google’s Family handle and click the “Create a family group” button if you don’t already have an existing Google family.
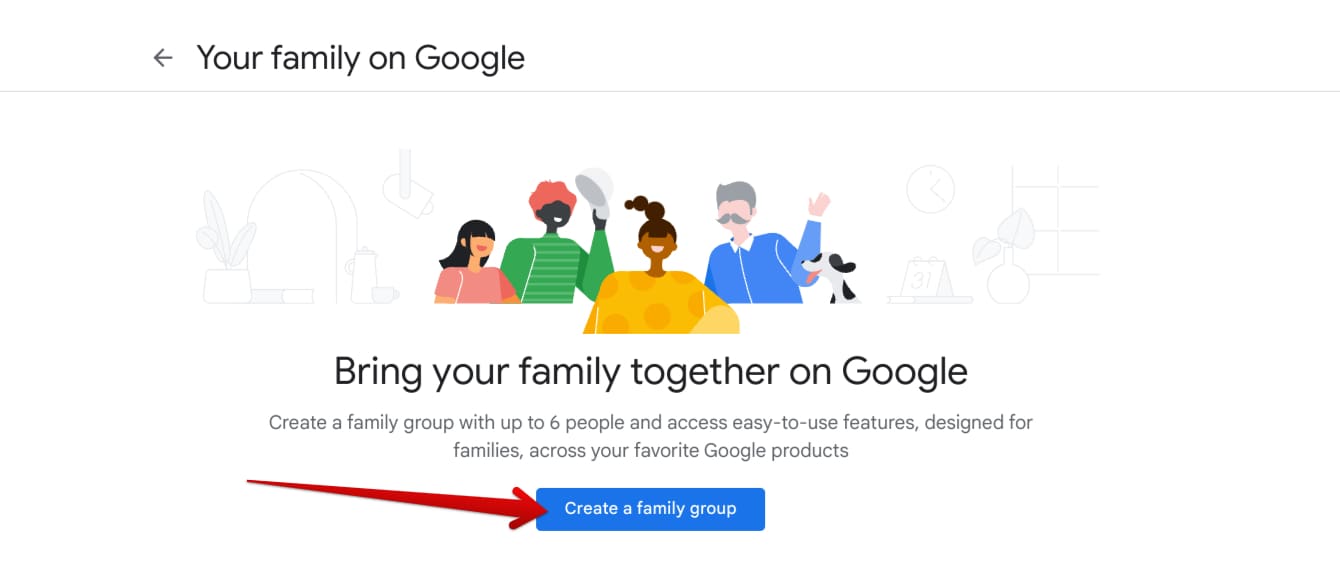
Creating a new family group
Next, a confirmation message will appear, authenticating whether you’d like to become the family manager. Note that this cannot be changed in the future—only the group’s creator can effectively manage it. Click “Confirm” to get to the next step.
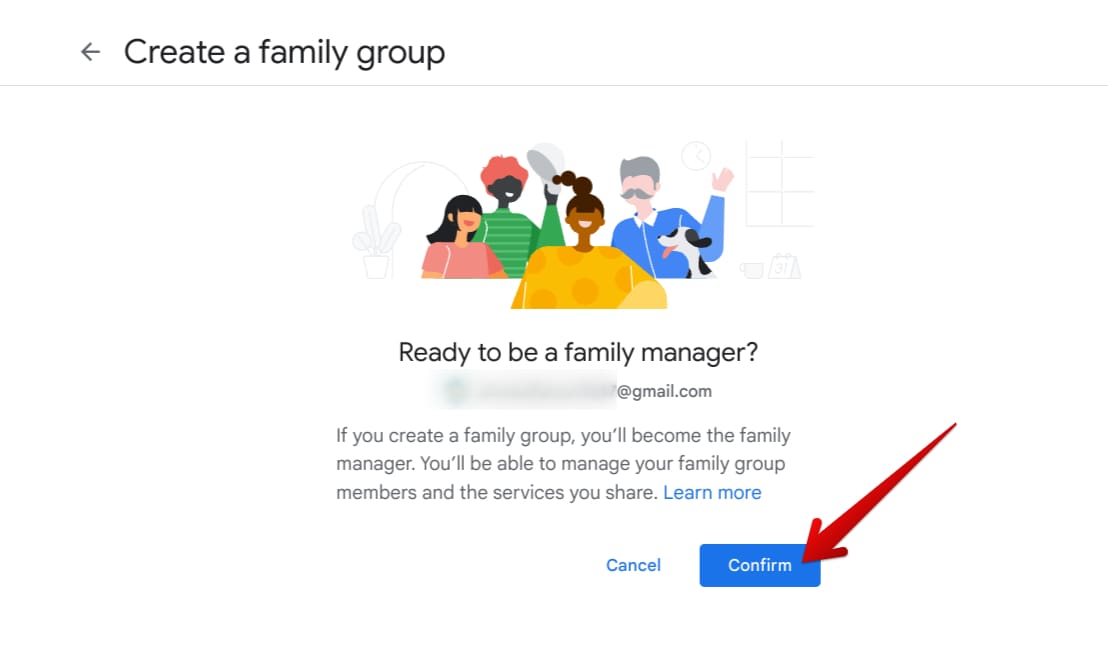
Confirming the selection
It’ll now be required to invite people to your family group. Choose whoever you want from the dropdown list or type in the relevant email manually. As iterated earlier, you can invite up to five more people to the group, so the whole family comprises no more than six individuals.
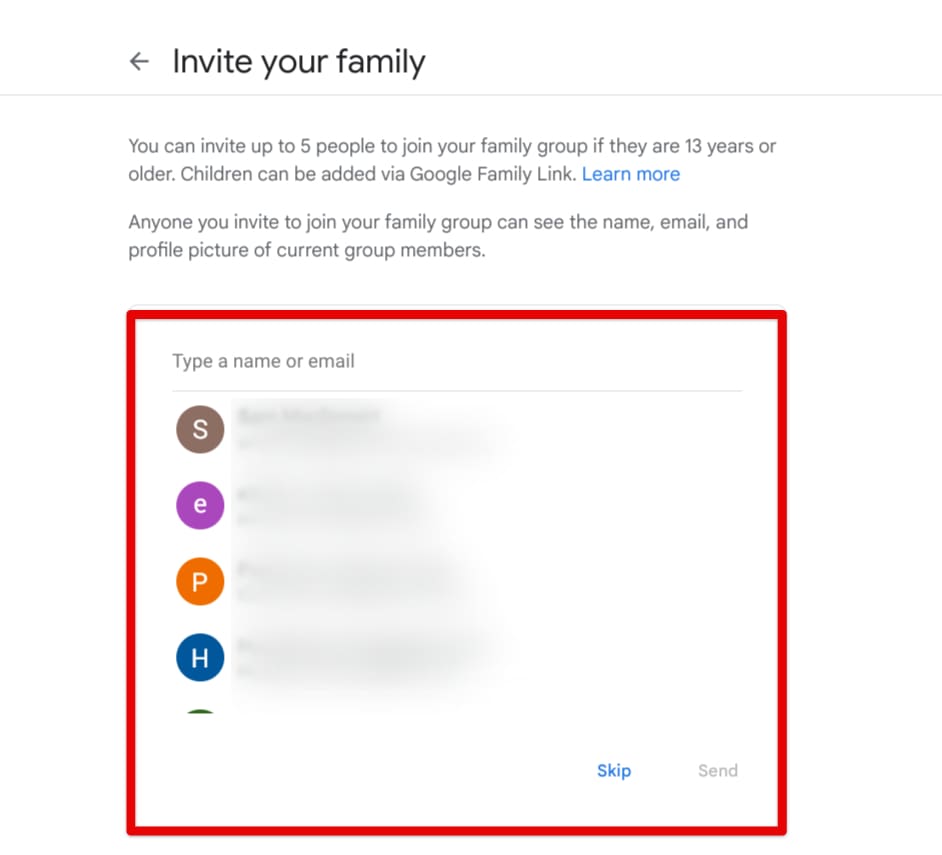
Inviting people to the family group
Right after that, your family group will be created successfully. Click the “Got it” button to wrap things up, or choose “Send new invitation” if you’d like to rethink the choices you made in the previous step.
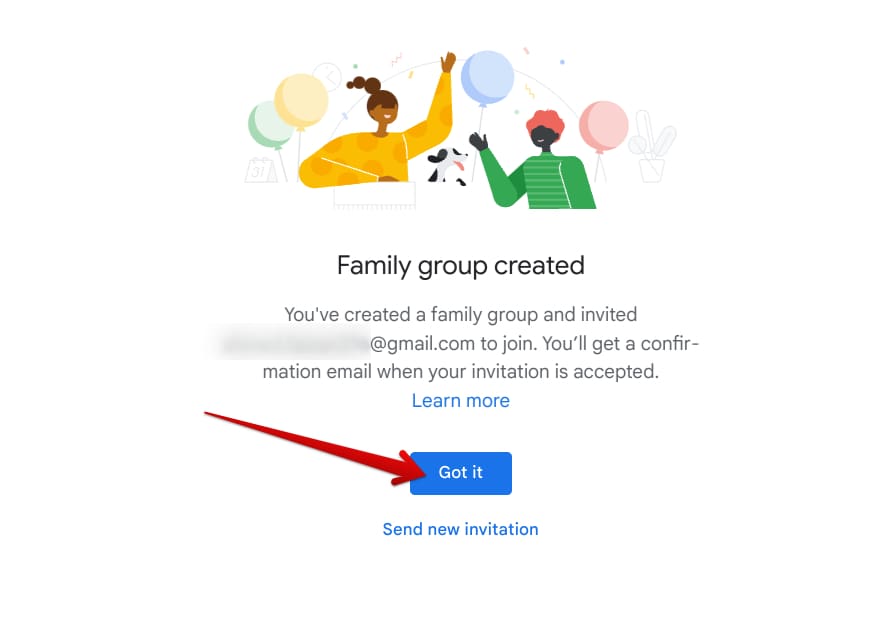
Family group created successfully
Now that the invite has been sent out, you must wait until the person in question accepts your offer. Your family group will automatically update itself with information about the new member as soon as they do that.
How to remove members from the Google family group
As the family manager, you can add and remove members from your group, depending on how you wish to move forward. While the process can be dealt with quickly on the web, things are a little easier on the ChromeOS side of things.
On your Chromebook, open the Google Play Store app from the launcher by pressing the “Search” key on the keyboard or the shelf area if the app is pinned there. Do check for activation before this as well.
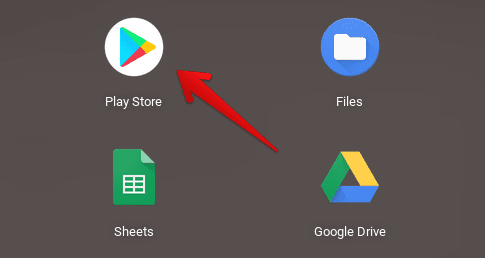
Opening the “Google Play Store”
After the Play Store window pops right up, click on your profile picture in the top-right corner of the screen and select “Settings.”
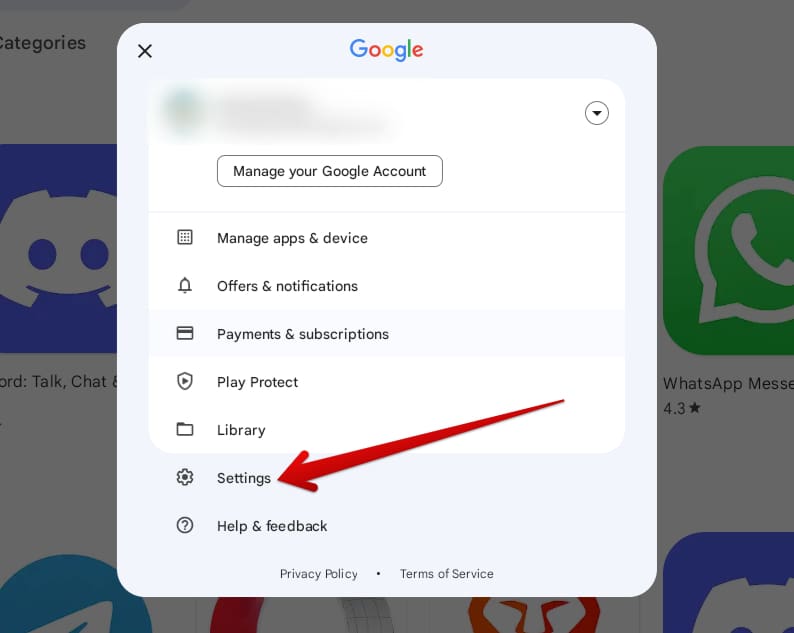
Accessing Play Store settings
You should now be taken to a different page on the screen. Here, scroll down until you come across the “Family” section. Click on it to reveal more options, and follow it up by choosing “Manage family members” next.
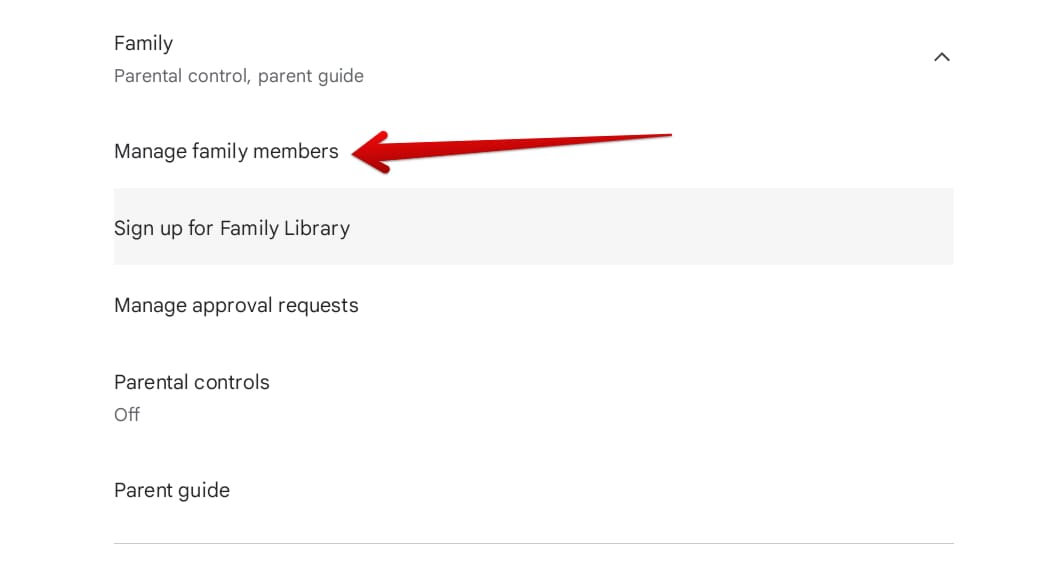
Managing family members
The next step is to select the member you’d like to remove, and you’ll be taken to a different page afterward. Do note that this is also the section from where more members may be added to the group. Once you’ve chosen a member, click the “More actions” button in the top-right corner of the screen on the next page and select “Remove member.”

Removing a member from the family group
After completing the latter, you will now have removed a member from your family group. If you have cut off someone you didn’t intend to, send an invitation to them again, and that’ll do the job for you.
Conclusion
Staying together is the way to go in the day and age we live in today, and Google is out here that its user base does that indeed. By incorporating the flexibility of using a family group, things can be more convenient. Children can be supervised in a flash, payments on Google Play can be regulated, and services ought to be shared.
In this guide, we’ve determined how to create a Google family group on your Chromebook, detailing the ins and outs of the procedure while leaving step-by-step instructions. Since most of the procedure is browser-based, you can also replicate the guidelines above for Windows PC.
As always, Chrome Ready wishes you good luck!
