Filling out online forms has become a routine part of our daily lives. When signing up for a new account or making a purchase, we’re constantly entering personal information into forms on the web. To save time and effort, many web browsers, including Google Chrome, offer a Form Autofill feature that automatically fills in common fields with information you’ve previously entered.
This article will explore how to use Chrome’s Form Autofill feature, including managing personal and payment information, troubleshooting common issues, and protecting privacy. Google Forms has revolutionized the way we collect data and gather feedback. While its basic features are widely known and used, some advanced tools can also help unleash creativity. Please go through our detailed article on these advanced features of Google Forms.
Using Chrome’s Autofill feature to save time
Enabling form autofill is the first step to using Chrome’s Autofill feature. Open Google Chrome on your desktop or mobile device. Click on the three-dot icon in the upper right corner of the browser window. Select “Settings” from the dropdown menu.
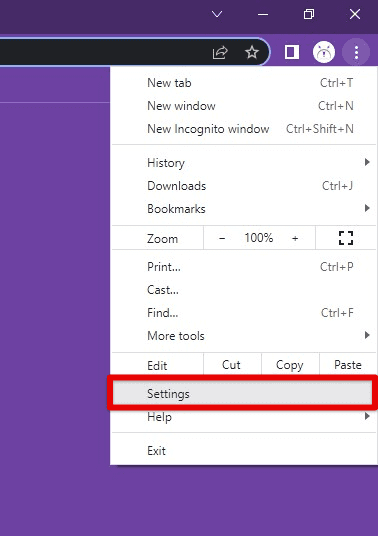
Opening Google Chrome settings
Scroll down to the “Autofill” section and click on it. Toggle the switch next to “Auto Sign-in” to the on position.
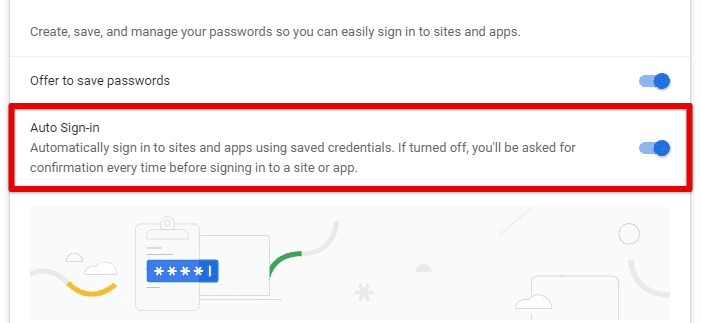
Auto sign-in toggle switch
Optionally, you can also toggle “Save and fill addresses” and “Save and fill payment methods” to enable these.
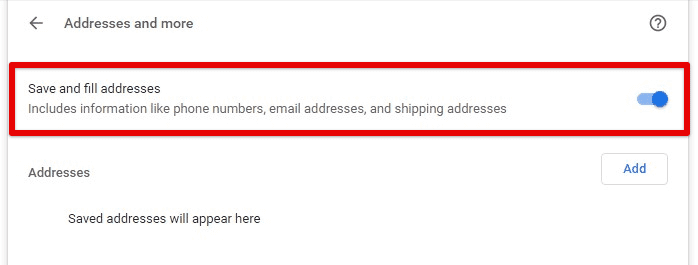
Save and fill addresses toggle switch
Once you’ve enabled Form Autofill, you can save and use frequently entered information for online forms. It’s important to note that the Autofill feature may not work on every website, so be prepared to enter info occasionally manually. Moreover, be sure to keep the saved information up to date.
Adding personal information
Adding personal information to the Chrome Autofill settings is easy and can save you considerable time when filling out online forms. Open Google Chrome and click on the three-dot icon in the upper right corner of the browser window. Next, select “Settings” from the dropdown menu.
Scroll down to the “Autofill” section and click on it. Then, click on “Addresses and more” to expand the section.

Addresses and more section
Click on “Add” to add a new address. Fill in the necessary information, such as name, address, phone number, and email. You can also add a company name and a second address line if needed.

Adding a new address
Click on the “Save” button to finish the process.
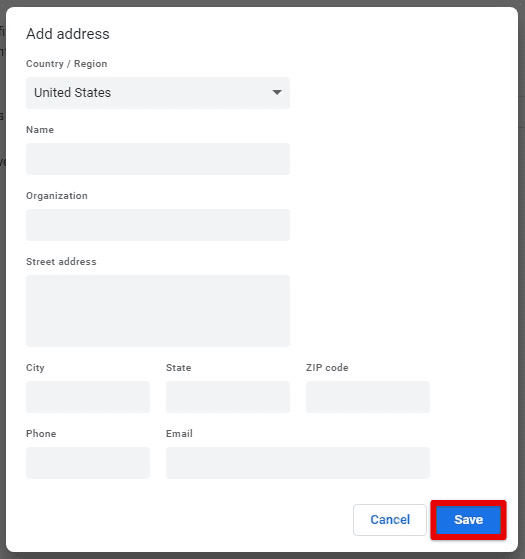
Saving the new address
Once you’ve added your personal information to the Autofill settings, you can quickly and easily fill these fields on online forms. When filling out a form, start typing your name, address, or phone number, and Chrome will offer suggestions based on your saved info. This saves you time and prevents errors when filling out forms manually.
Managing payment information
In addition to personal information, you can also save payment information in the Chrome Autofill settings. This can be especially helpful for online shopping, where you may need to enter your payment information frequently.
Open Google Chrome and click on the three-dot icon in the upper right corner of the browser window. Select “Settings” from the dropdown menu. Scroll down to the “Autofill” section and click on it. Click on “Payment methods” to expand the section.

Payment methods section
Click on “Add” to add a new payment method. Fill in the necessary information, such as your credit card number, expiration date, and the name on your card. You can also add a billing address by clicking “Add billing address”. Click on the “Save” button to finish the process.
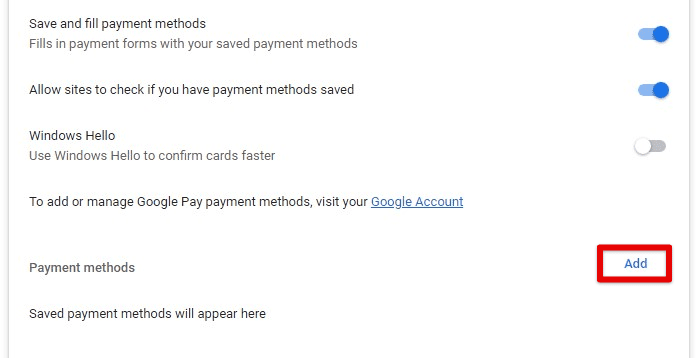
Adding a new payment method
To manage your saved payment information, you can edit or delete it as needed. To edit a payment method, click on the three-dot icon to the right of the payment method and select “Edit”. Make any necessary changes and click on “Save”.
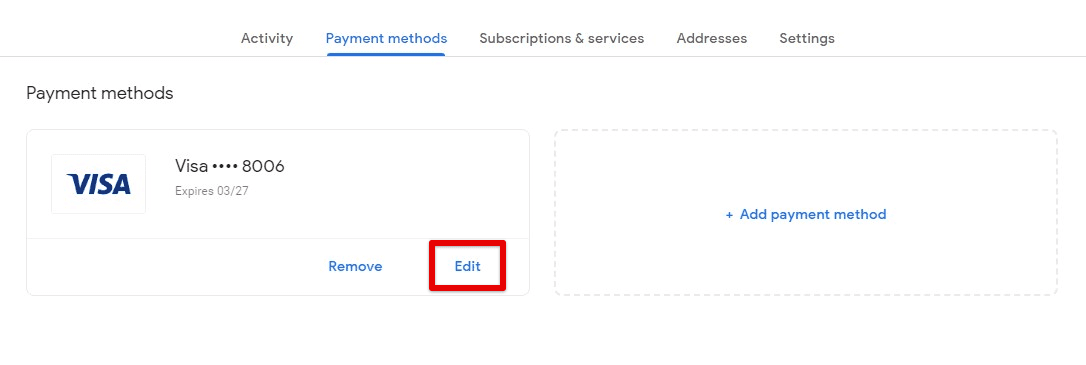
Editing a payment method
To delete a payment method, click on the three-dot icon to the right of the payment method and select “Remove”.
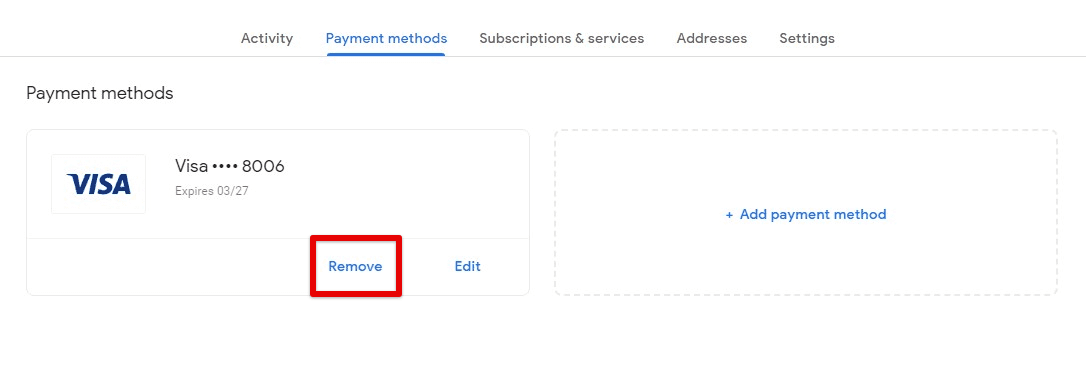
Removing a payment method
Note: While saving payment information can be convenient, it also presents a potential security risk. Be sure to only keep payment information on secure devices and networks, and never share your saved payment info with others. Consider regularly reviewing and updating it to guarantee the utmost security.
Creating custom autofill profiles
Chrome Autofill allows you to create custom profiles for different types of forms. This can be especially helpful if you must fill out different forms for work and personal use.
Open Google Chrome and click on the three-dot icon in the upper right corner of the browser window. Select “Settings” from the dropdown menu. Scroll down to the “Autofill” section and click on it. Click on “Addresses and more” or “Payment methods” to expand the section depending on the type of form you want to create a profile for.

Creating a profile
Click on “Add” to add a new profile.
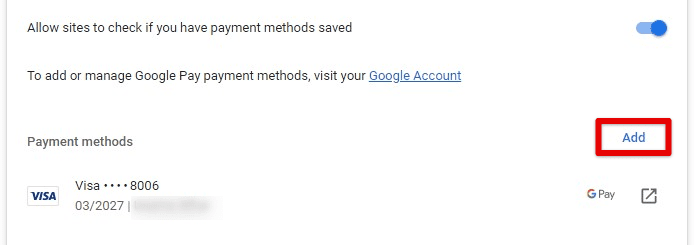
Adding a new profile
Fill in the necessary information for the profile, such as name, address, phone number, or payment information. Finally, click on the “Save” button to finish the process.
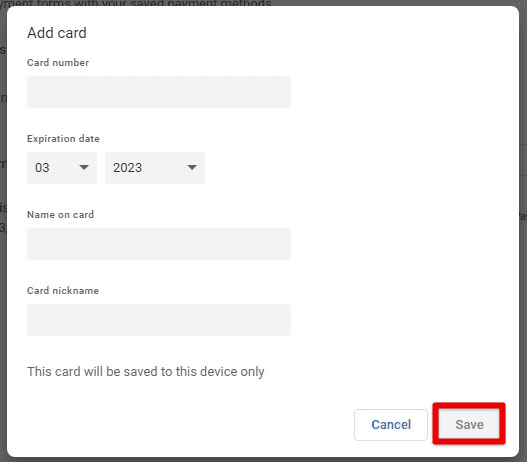
Saving data for the new profile
To use a custom profile, type the profile name in the appropriate field when filling out a form. Chrome will offer suggestions based on your saved Autofill information, including custom profiles. Select the proper profile to fill in the form with the correct information. Be sure to give each custom profile a unique and descriptive name for easy identification in the future.
Editing and deleting autofill entries
Chrome Autofill makes it easy to edit or delete Autofill entries as needed. Open Google Chrome and click on the three-dot icon in the upper right corner of the browser window. Select “Settings” from the dropdown menu. Scroll down to the “Autofill” section and click on it.
Go to “Addresses and more” or “Payment methods” to expand the section depending on the type of Autofill entry you want to edit or delete. For editing an entry, click on the entry you wish to edit and make the necessary changes. Click on the “Save” button to finish the process.
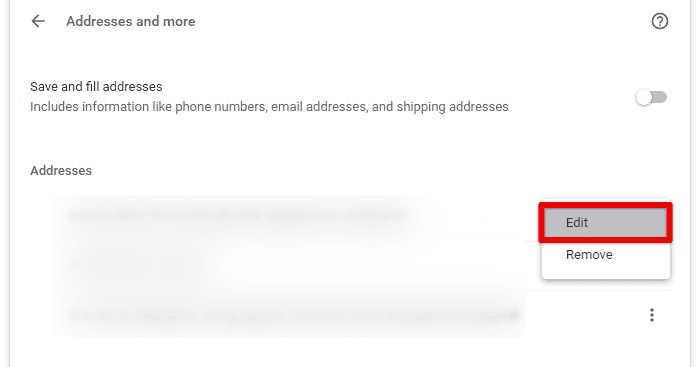
Editing an address
To delete an entry, click on the three-dot icon to the right of the entry you want to delete and select “Remove”.
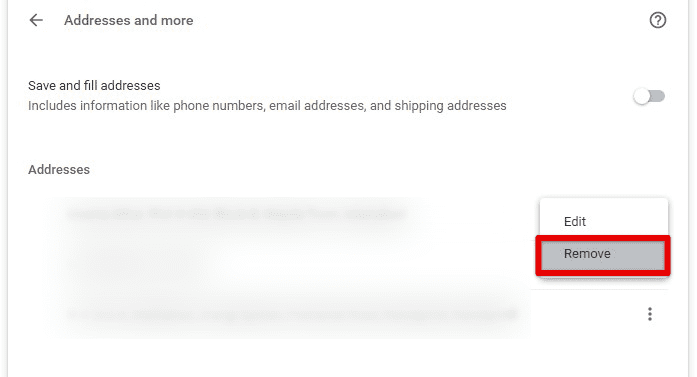
Deleting an address
To clear all Autofill data, click on “Clear browsing data” in the “Privacy and security” section of the Chrome settings. Select the “Autofill form data” and “Autofill credit card data” checkboxes, and then click on “Clear data”.
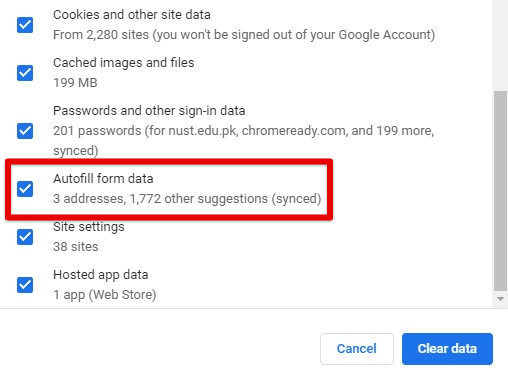
Clearing autofill form data
Note: Clear your Autofill data if you have been using a shared or public computer to prevent others from accessing this personal information.
Chrome is a consistently updated software, made quicker, faster, and better with each stable update release. Although, if there’s one reasonably hidden feature in this browser that can certainly upscale the way you use the internet surfer, it’s site search. Learn how to use the site search in Google Chrome.
Incorrect or outdated information
While Chrome Autofill is a convenient feature, users may occasionally encounter issues such as incorrect or outdated information being filled in.
Check your Autofill settings: Ensure your Autofill settings are correct and the correct information is stored on input. Check that the accurate Autofill profile is being used for the specific type of form you are currently filling out.
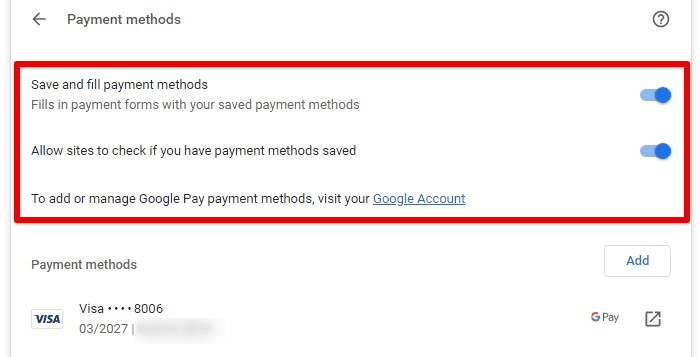
Checking autofill settings
Clear your Autofill data: If you consistently see incorrect or outdated information being filled in, it may be time to clear your Autofill data. Follow the instructions in the previous section to do so. This will remove all previously saved information and format the internal record for a fresh start.
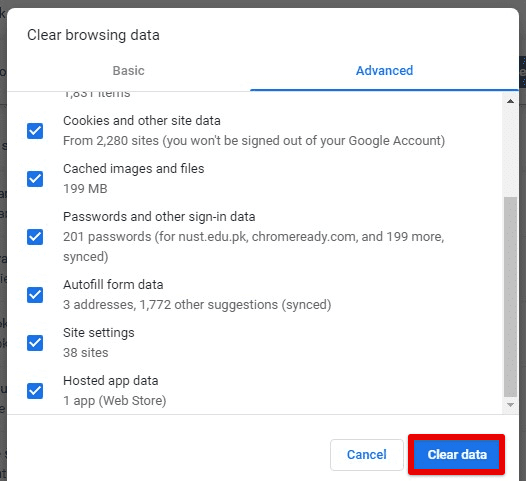
Clearing autofill data
Edit your Autofill data: If you notice some Autofill entries are outdated or incorrect, you can edit them directly from the browser settings. Follow the instructions in the previous section to edit these entries as required.
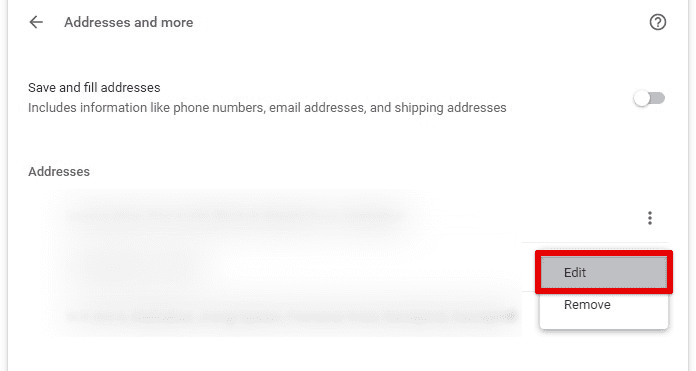
Editing autofill data
Manually enter information: If you cannot fix the issue with Autofill, you can always manually enter the correct information into the form fields. It will take more time, but I would ensure that no outdated or incorrect info is being filled in.
Alternative autofill tools
While Chrome’s Autofill feature is convenient, plenty of alternatives are available. Following are a few notable options:
LastPass: LastPass is a password manager that also includes Autofill capabilities. It securely stores your personal information and login credentials, automatically filling in form fields when visiting a website. LastPass is available as an extension on Chrome and other browsers as well.

LastPass
RoboForm: RoboForm is another password management software that can also be an autofill tool for filling out forms on Google Chrome. It is designed to help users store and manage their passwords securely and automatically fill in web forms with accurate and reliable data.
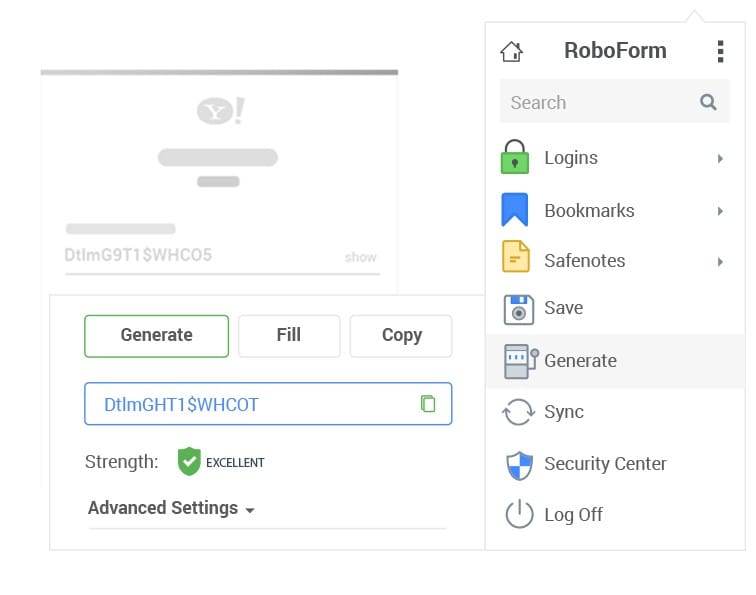
RoboForm
Dashlane: Dashlane can securely store your login credentials for various websites and applications. It offers password generation, automatic login, and secure note storage. One of its most convenient features is its autofill tool, which makes filling out forms and entering payment information quick and easy.
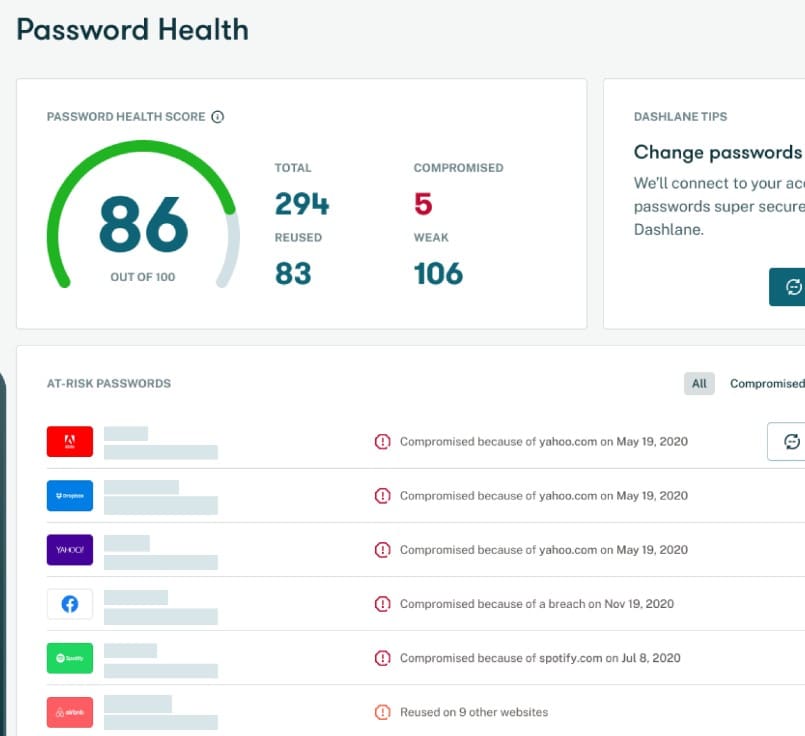
Dashlane
Google Smart Lock: Google Smart Lock is a built-in feature of the Chrome browser that can automatically fill in passwords, addresses, and credit card information across multiple devices. This tool can be enabled in the browser settings and may be employed on any device currently signed in to your Google account.

Google Smart Lock
While these tools have unique features and benefits, they all offer a secure way to store and use your personal information online. It’s important to research each of these and choose the one that best fits your needs and preferences.
Conclusion
Chrome’s Autofill feature is a powerful tool that can save time and increase productivity for users who frequently fill out online forms. With this, you can now securely store your personal information and have it automatically filled in when visiting any website on Google Chrome. Moreover, it is straightforward and may be customized to individual user preferences.
Are you a frequent Chrome user? Most people think they already know all of its features and capabilities. However, several hidden hallmarks are not well-known but can significantly supplement your browsing time. Here are 10 hidden Chrome browser features you probably didn’t know about.
