As you browse the web, Chrome stores a lot of data about your online activity, including the browsing history and cache. While this data can be helpful for faster browsing and easy access to your frequently visited sites, it can also take up valuable storage space on your device and compromise your privacy if not appropriately managed.
Fortunately, Chrome offers a range of built-in tools and settings for managing your browsing history and cache, from viewing and clearing specific items to customize your preferences and using advanced features. This article will guide you through the steps to use Chrome’s history and cache management features effectively. Accessing your computer remotely has become a must-have for many users worldwide. Here is a beginner’s guide to using Chrome Remote Desktop for remote access.
Managing browsing history and cache in Google Chrome
Managing your browsing history and the cache is essential to maintaining a healthy and secure browsing experience. Following are some reasons why:
Improving browser performance: Browsing history and cache help Chrome load frequently visited sites faster by storing commonly used data locally. However, these files can accumulate over time and slow down your browser’s performance. Regularly clearing your history and cache can free up storage space and ensure your browser runs smoothly.
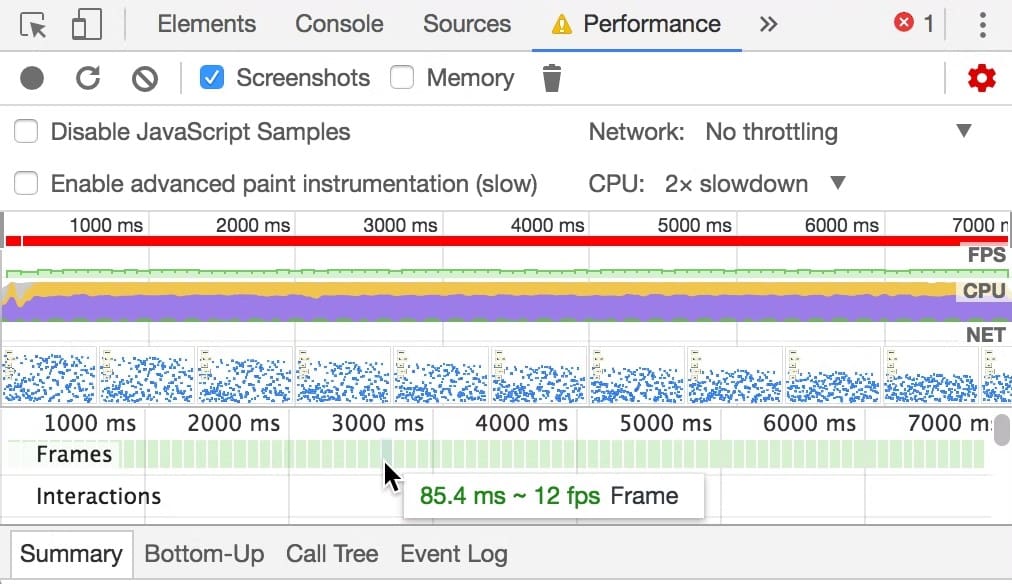
Improving browser performance
Protecting your privacy: Your browsing history and cache contain sensitive information about your online activities, including sites you’ve visited, searches you’ve made, and forms you’ve filled out. Someone who gains access to your device could access this data and compromise your privacy. By managing your history and cache, you can limit the exposure of this information and keep your online activity private.

Protecting your privacy
Freeing up storage space: As mentioned earlier, browsing history and cache can take up a significant amount of storage space on your device. If you’re running low on space, clearing your history and cache can help free up some room and make your device run more efficiently.
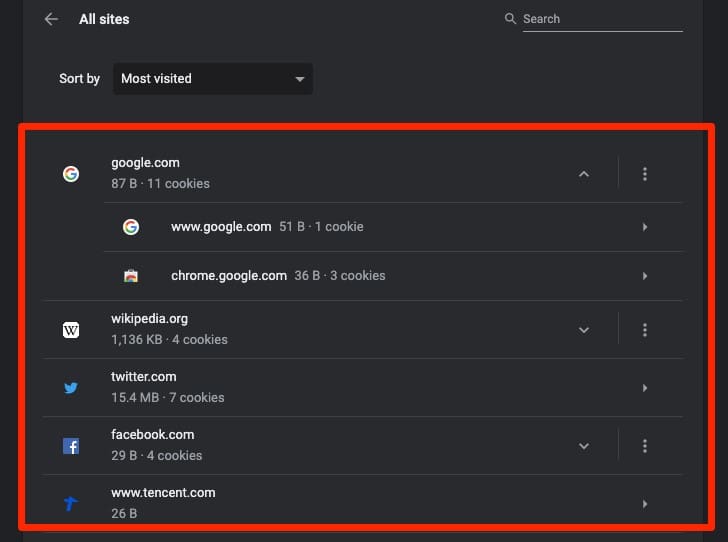
Freeing up storage space
By managing your browsing history and cache in Chrome, you can enjoy faster, more secure, and streamlined browsing. In the following sections, we’ll show you how to access and customize these settings, so you can optimize Chrome usage to suit specific needs and requirements.
Viewing and clearing browsing history
One of the most basic ways to manage your browsing history in Chrome is to view and clear specific items or the entire history.
Viewing your browsing history: To access your browsing history in Chrome, click the three-dot icon in the top-right corner of the browser window and select “History” from the drop-down menu. Alternatively, you can use the keyboard shortcut “Ctrl + H” on Windows or “Command + Y” on Mac. This will open the History page, which chronologically lists your recently visited sites, with the most recent ones at the top.
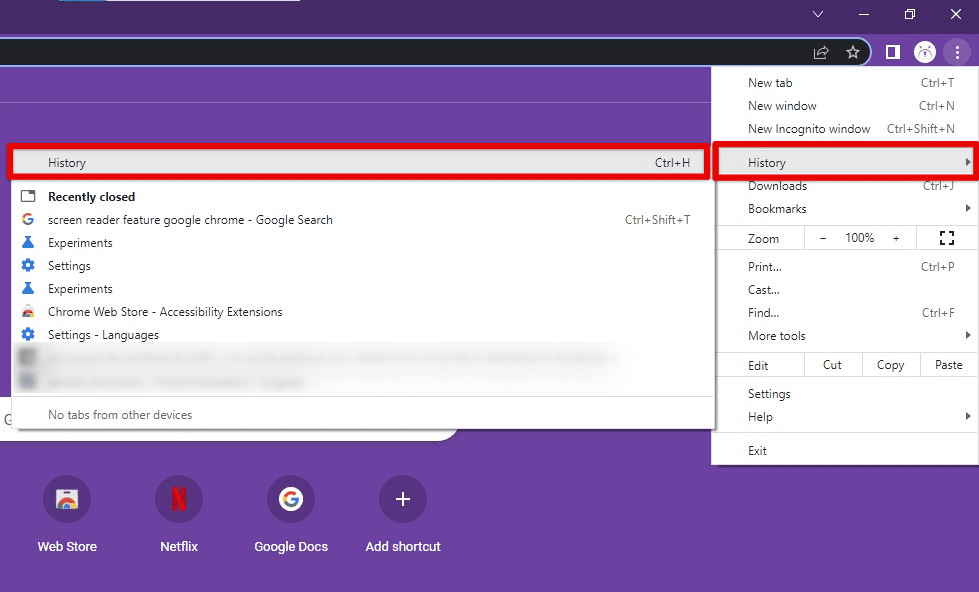
Viewing your browsing history
Clearing specific items: To remove individual items from your browsing history, hover over the entry you want to delete and click on the three-dot icon next to it. Select “Remove from history” from the drop-down menu to delete the item. If you want to delete multiple things at once, select them by clicking on the checkbox next to each one, then click on the “Delete” button in the top-right corner of the page.
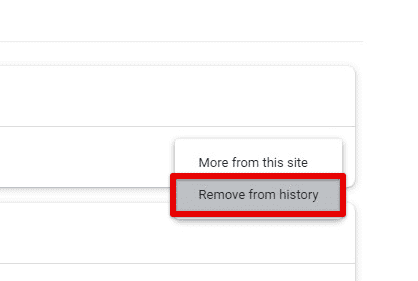
Clearing specific items
Clearing your entire browsing history: If you want to delete your complete browsing history, click on the “Clear browsing data” button on the left side of the History page. This will open a pop-up window where you can select the time range you want to clear (such as the last hour, day, week, or all time) as well as the types of data you want to delete (such as browsing history, cookies, cached images and files, and more). Once selected, click the “Clear data” button to delete the selected items.
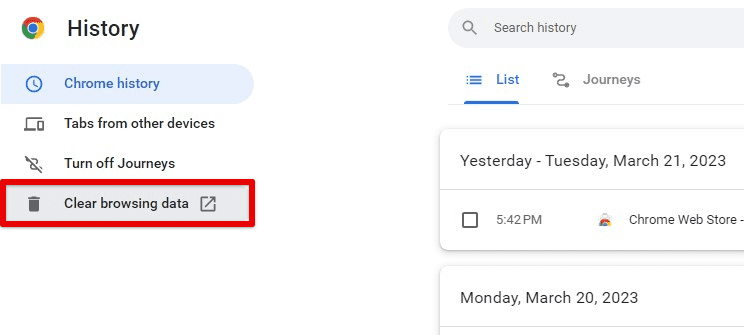
Clearing your entire browsing history
Managing browsing history settings
Chrome offers a range of customizable settings for managing your browsing history, so you can control what types of data are saved, how long they are saved for, and whether they’re synced across your devices.
Controlling what types of data are saved: To customize what types of data Chrome saves in your browsing history, click on the three-dot icon in the top-right corner of the browser window and select “Settings” from the drop-down menu. Next, scroll down to the “Privacy and security” section, and click on “Clear browsing data” under the “Site settings” category. From there, you can select the types of data you want Chrome to clear, such as browsing history, cookies, cached images, cached files, and more.
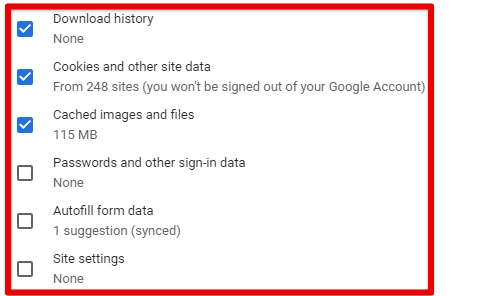
Controlling what types of data are saved
Setting how long data is saved for: By default, Chrome saves your browsing history indefinitely, but you can change this to delete your history after a certain period automatically. Go to the “Settings” page, and click “Advanced” at the bottom. Scroll down to the “Privacy and security” section, and click on “Site settings” under “Clear browsing data”. From there, you can select a time range.
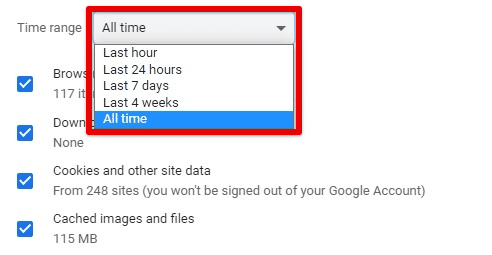
Setting how long data is saved for
Enabling or disabling sync across devices: If you use Chrome on multiple devices, you can allow the sync to share your browsing history and other data across them automatically. To do this, go to the “Settings” page, and click “Sync and Google services”. From there, turn on sync for different data types, such as bookmarks, history, and passwords.
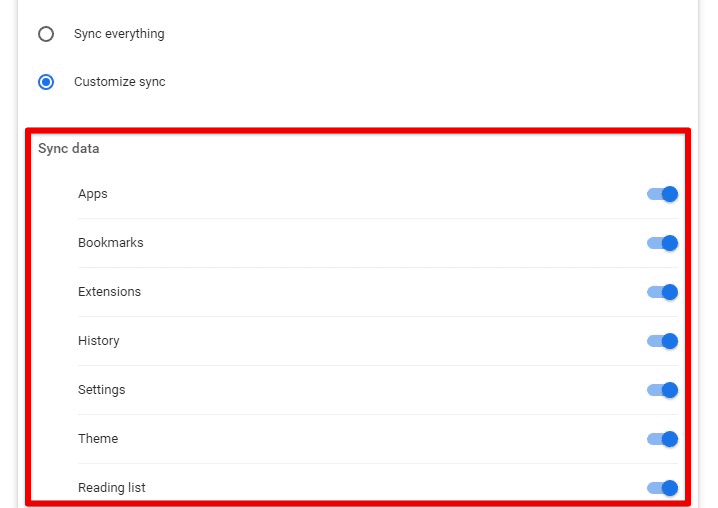
Enabling or disabling sync across devices
Viewing and clearing your cache
In addition to your browsing history, Chrome stores temporary files called cache, which help websites load faster by storing copies of images, scripts, and other resources locally on your computer. However, over time, your cache can become cluttered and take up unnecessary space, slowing down your browser.
Viewing your cache: To access your cache in Chrome, click on the three-dot icon in the top-right corner of the browser window and, select “More tools” from the drop-down menu, then select “Developer tools”. Alternatively, you can use the keyboard shortcut “Ctrl + Shift + I” on Windows or “Option + Command + I” on Mac. This will open the Developer Tools window, where you can click on the “Application” tab. Expand the “Cache” section in the left-hand menu to view your cached resources.
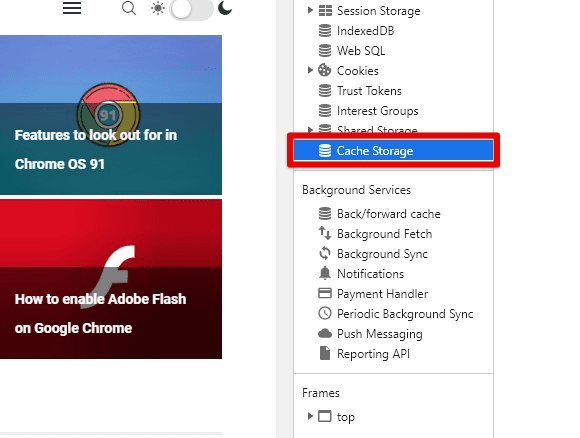
Viewing your cache
Clearing specific items: To remove individual items from your cache, select the item you want to delete and click on the “Delete” button at the bottom of the window. You can also right-click on the item and select “Clear” from the context menu. To clear all items from a particular website, right-click on the website’s name and select “Clear site data”.
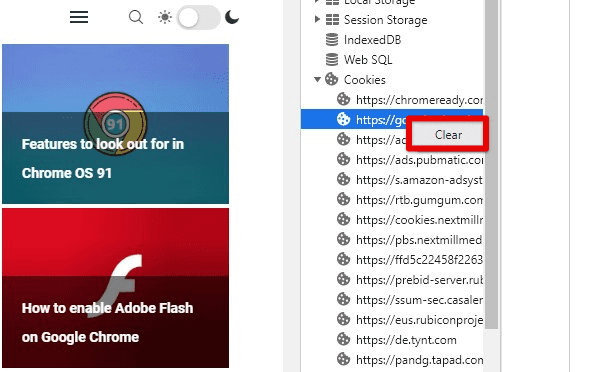
Clearing specific items in the cache
Clearing your entire cache: If you want to delete your full cache, click on the three-dot icon in the top-right corner of the Developer Tools window and select “Clear storage” from the drop-down menu. From there, check the box next to “Cached images and files” and click the “Clear site data” button. Doing so deletes all the cached resources stored on your computer.
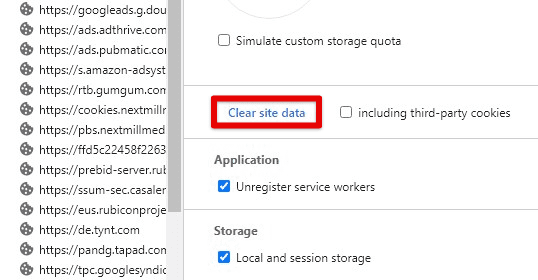
Clearing your entire cache
Remember that clearing your cache will also delete any saved passwords or other information stored by websites, so log back into any websites that require authentication after clearing your cache.
Managing cache settings
Chrome also allows you to customize the cache settings for optimizing your internet browsing experience.
Accessing cache settings: To access your cache settings, click on the three-dot icon in the top-right corner of the browser window and select “Settings” from the drop-down menu. Next, scroll down to the bottom of the page and click on “Advanced” to expand the advanced settings options. Then, under the “Privacy and security” section, click “Site settings”.
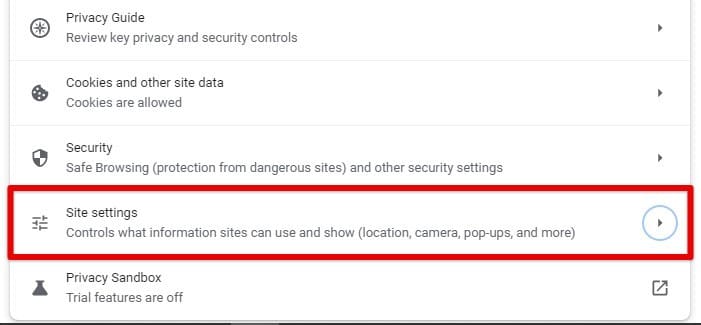
Accessing cache settings
Customizing cache settings: From the “Site settings” menu, scroll down to the “Permissions” section and click on “Additional permissions”. Then, click on “Cache” to access your cache settings. Here, you can customize the following settings:
Storage limit: Set the maximum amount of storage space that Chrome can use for caching by adjusting the “Storage” slider. If you’re short on disk space, you may want to reduce this limit to free up space on your computer.
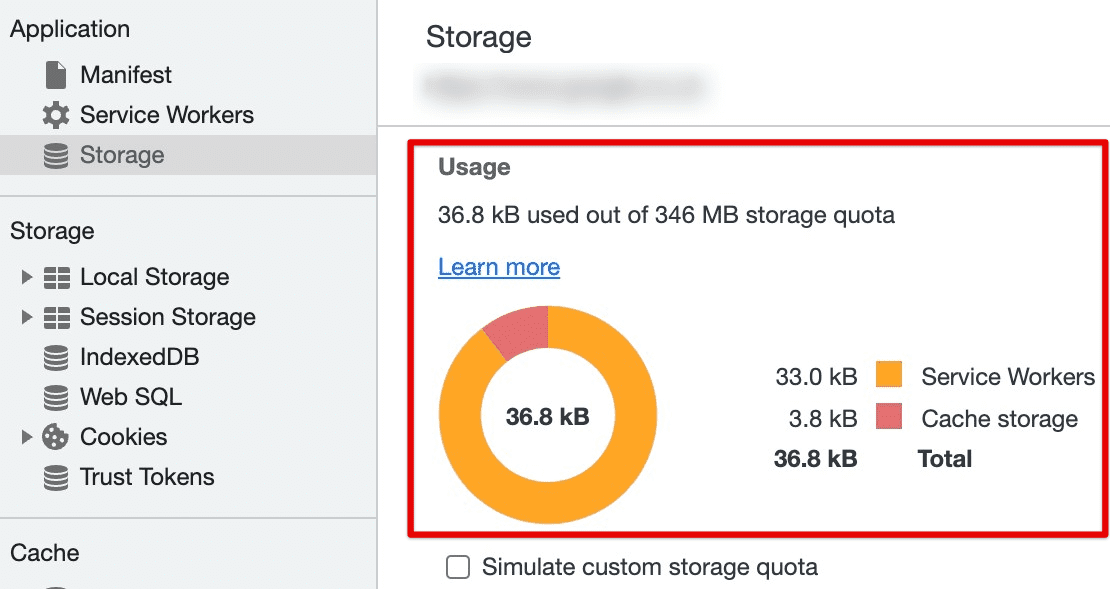
Storage limit
Cached images and files: Choose whether to allow Chrome to cache images and other files by ticking the checkbox next to “Cached images and files”. If you turn off caching, websites may load more slowly, but you’ll save space on your computer.
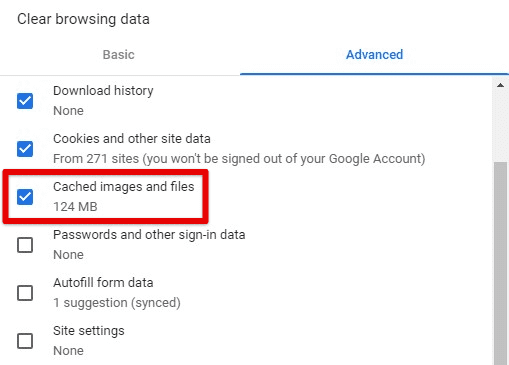
Cached images and files
Third-party services: Choose whether to allow third-party services to cache content by selecting “Block sign-in prompts from identity services”.
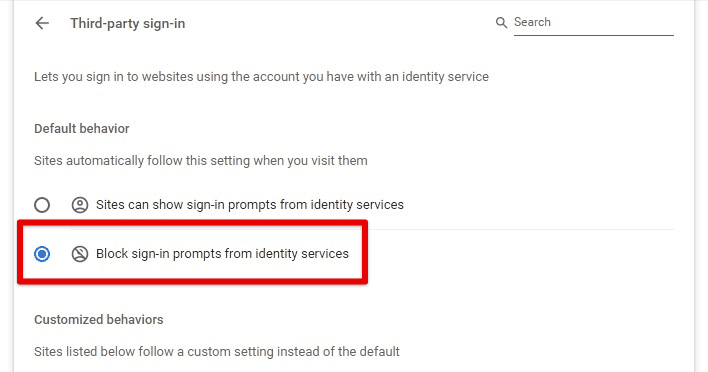
Third-party services
Disabling cache altogether: If you want to disable caching altogether, you can do so by clicking on the “Disabled” radio button in the cache settings menu. Remember that disabling caching can significantly slow your browsing experience, especially on websites with many images or large files. Experiment with these settings to find the optimal balance between performance and storage space on your computer.
Advanced cache management features
If you’re a power user, you may want to take advantage of some of Chrome’s more advanced cache management features. Following are a few tips to do so:
Monitoring cache usage with DevTools Network panel: Chrome’s built-in developer tools include a Network panel that lets you monitor network activity and inspect requests and responses. You can use the Network panel to see how much data is being cached by a website. Clear specific cache entries by right-clicking on a request and selecting “Clear browser cache”.
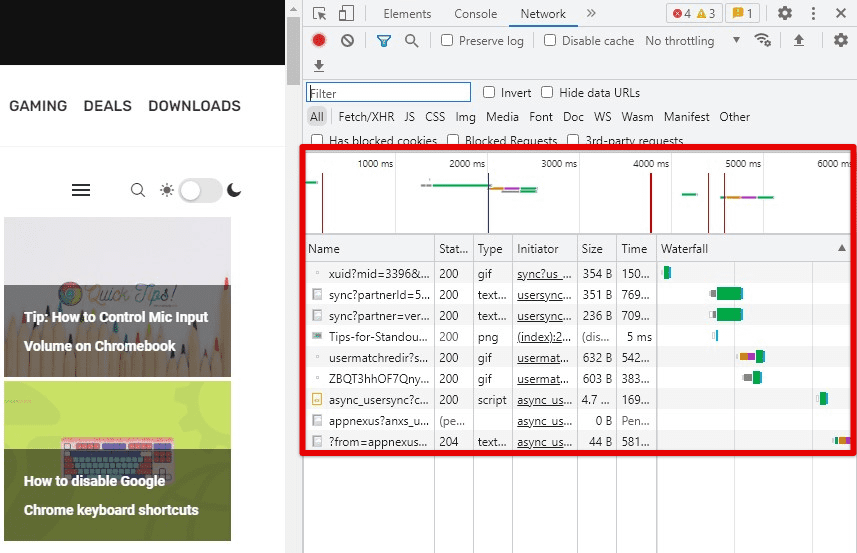
Monitoring cache usage with the DevTools Network panel
Adjusting cache behavior with command line flags: Chrome’s command line flags allow you to customize various settings and behaviors, including cache management. To access the command line flags, right-click on the Chrome shortcut and select “Properties”. In the “Target” field, add a space and then one or more of the following flags:
–disk-cache-size: This flag lets you set the disk cache size in bytes. For example, to set the disk cache size to 50 megabytes, you would add “–disk-cache-size=52428800” to the end of the target field.
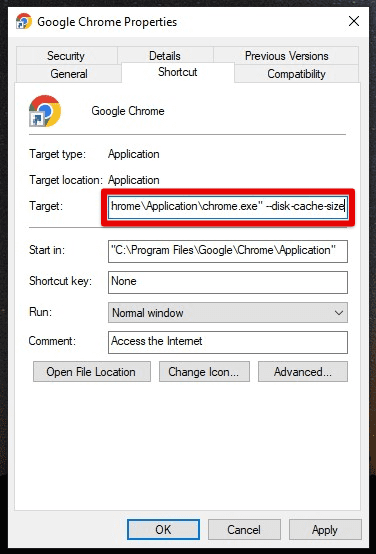
Disk cache size flag
–disable-application-cache: This flag disables the application cache, which stores data for offline web applications.
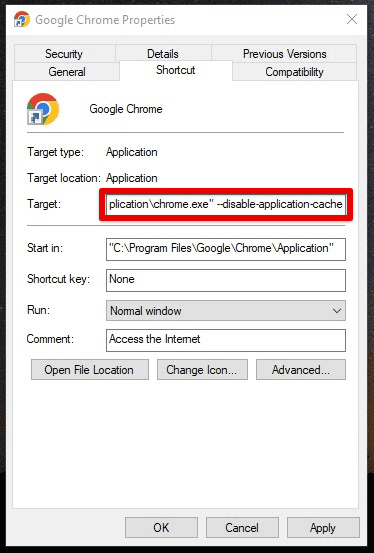
Disable application cache flag
–disable-cache: This flag disables all caching, including in-memory caching and the disk cache.
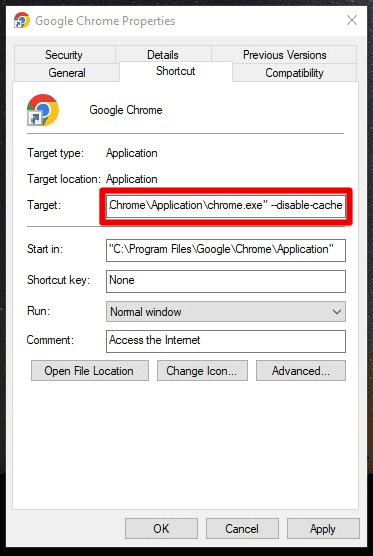
Disable cache flag
Note: Modifying Chrome’s command line flags can have unintended consequences and may cause instability or unexpected behavior. Only use these flags if you know what you’re doing and are comfortable with the risks involved.
With a growing demand for user-friendly and engaging web experiences, developers and designers need tools to help them achieve their goals efficiently. Here are some tips and tricks for mastering the Chrome browser’s DevTools.
Using extensions or third-party tools
In addition to Chrome’s built-in features for managing your browsing history and cache, you can also use extensions or third-party tools to enhance these controls and customization options.
Click&Clean: Click&Clean is a free Chrome extension that helps you clear the browsing history, cache, cookies, and other data with just one click. It also includes a secure file shredder to delete sensitive files permanently.
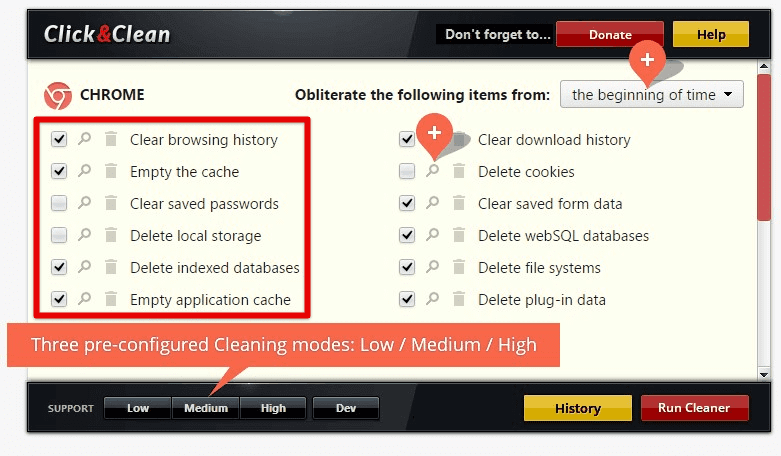
Click&Clean
CCleaner: CCleaner is a popular system optimization tool with a built-in feature for cleaning up your web browser’s cache, history, cookies, and other temporary files. CCleaner can be downloaded for free and offers advanced features such as automatic cleaning and scheduled cleanups.
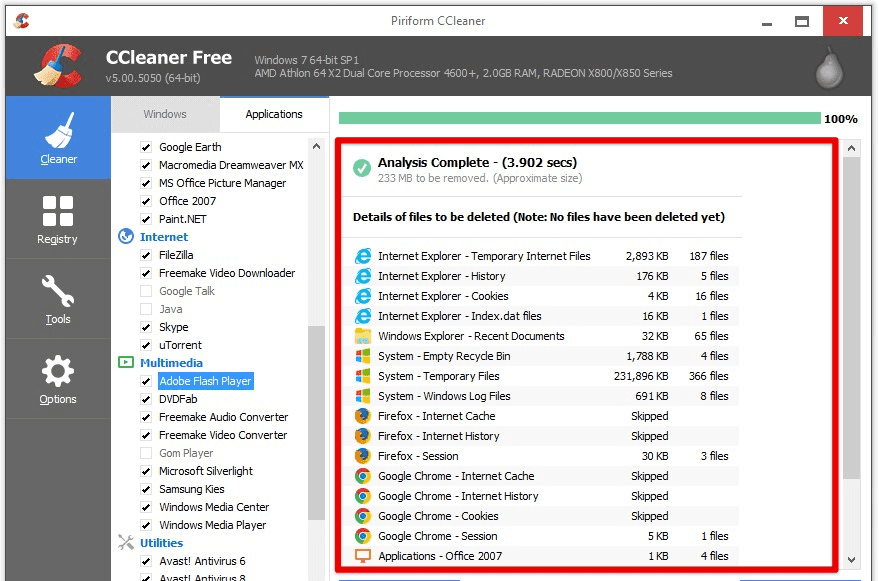
CCleaner
BleachBit: BleachBit is an open-source system cleaning tool that can help you clear the browsing history, cache, cookies, and other temporary files. It offers various customization options and can be used on all operating systems.
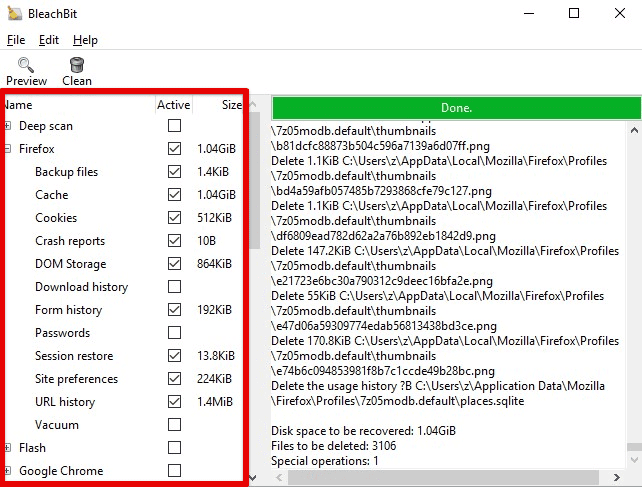
BleachBit
Note: While extensions and third-party tools provide additional functionality and customization options, they may pose security risks or negatively impact your browser’s performance. Always research and vet any extensions before downloading and using them, and keep them updated for maximum security and stability.
Conclusion
Managing your browsing history and cache can help improve your browser’s performance, protect your privacy, and free up storage space. In this article, we’ve explored the various features and options available in Chrome for managing your browsing history and cache, from viewing and clearing your history to customize your settings and using advanced tools.
By taking advantage of these features, you can better control your online activity and optimize your browser. Regularly check and clear your history and cache to keep the browser running smoothly. With these tips and tricks, you are well on mastering Chrome’s history and cache management features. Another of Chrome’s main features is providing location-based access to different websites. Learn how to manage your location tracking on Google Chrome.
