Most people use their web browser for both work and personal tasks. However, keeping these two sessions separate can be challenging, especially using the same browser. Fortunately, Chrome offers a simple solution: multiple profiles. With these, you can keep your work and personal stuff separate, manage multiple accounts, and do much more.
In this article, we will show you how to create and manage multiple profiles in Chrome, along with some tips and tricks to help you get the most out of this feature. So, whether you’re a freelancer, a student, or someone who wants to keep their online browsing organized, read on to learn how to use multiple profiles. Even the very best software can encounter issues from time to time. Google Chrome is not an exception either. Learn how to troubleshoot common problems with the Chrome browser.
Creating and managing multiple profiles in the Chrome browser
Why use multiple profiles?
You might be thinking, why use multiple profiles in the first place? As it turns out, there are plenty of good reasons to do so. First and foremost, using multiple profiles allows you to keep different kinds of work and personal accounts separate. Mixing these two can be a recipe for disaster. You might accidentally send a personal email from your work account or vice versa. By using different profiles for both, you can avoid all of this.

Google Chrome profiles
Secondly, multiple profiles allow you to manage various user accounts efficiently and effectively. In case a single device is used by more than one user, different profiles are obviously required for each one. Otherwise, you would log in and out of Google accounts all day. Multiple profiles make it easy to switch between accounts without having to log out and log back in each time.
Google Chrome multiple user accounts
Moreover, multiple profiles also help you stay organized. You can customize each profile with different settings, bookmarks, and extensions based on your needs. For instance, one can have a profile dedicated to online shopping, with all favorite shopping-related bookmarks and extensions.
Gone are the days when students would have to chase after teachers and fellow pedagogues to resolve their queries and have their questions answered. Here are the 10 best ChromeOS extensions for students. Now that you have seen why to use multiple profiles in any internet browser let us move on to the next sections on creating and managing these in Google Chrome.
Creating a new profile
Click on the profile switcher icon in the browser window’s top right corner. It looks like a circle with your current profile picture or initials.
Profile switcher icon
In the dropdown menu that appears, click on “Add” at the bottom.
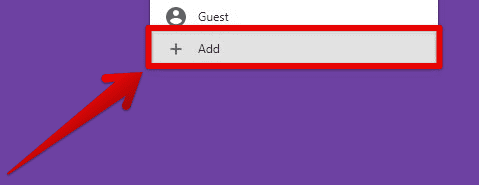
Adding a new profile
In the “Add person” dialog box, enter a name for the new profile and choose an icon for it. This will help you distinguish between multiple profiles easily. Once you’ve entered the name and selected an avatar, click the “Add” button to proceed.
Picking an avatar for a Chrome profile
Chrome will open a new window for this profile. You can customize this window with your preferred settings, bookmarks, and extensions.
That’s it! You have just created a new profile in the Chrome browser. To switch between profiles, click the profile switcher icon and select the one you want to use. You can customize user settings for each profile by clicking on the three dots menu icon in the top right corner of the window and going to “Settings”. More on this is included in the next section.
Customizing profile settings
Now that you’ve created a new profile customize various settings to suit your specific needs. Set a different default search engine for each profile. You might want to use Google for your personal profile and Bing for office-related tasks.
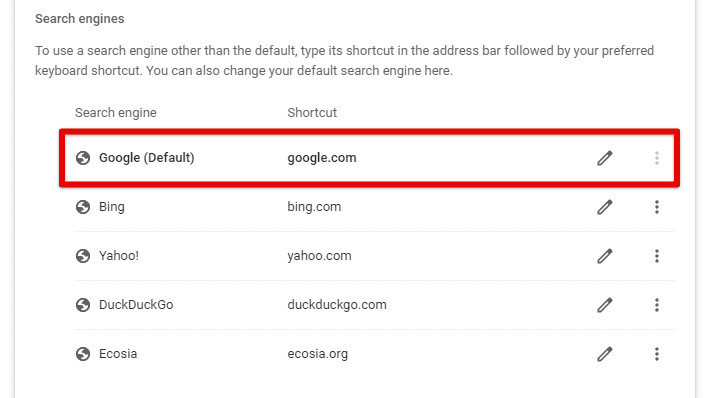
Setting default search engine
There is also an option to set a different language for each profile. It is helpful if you have a roommate or a friend who prefers to browse in languages other than English.
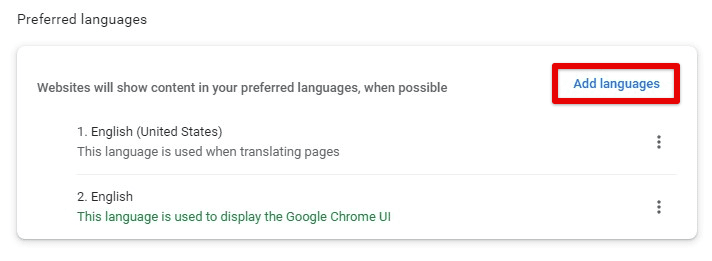
Setting preferred languages
You can customize the bookmarks and extensions for each profile as well. If these profiles are used by different persons or even for different work settings, having a separate set of bookmarks and extensions makes perfect sense.
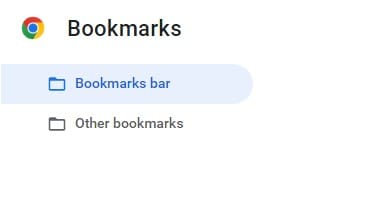
Setting up bookmarks
The appearance of each profile can be customized, too, including the theme and font size. Each profile also can save different passwords in a separate password manager. It is helpful if you have different login credentials for work and personal accounts.
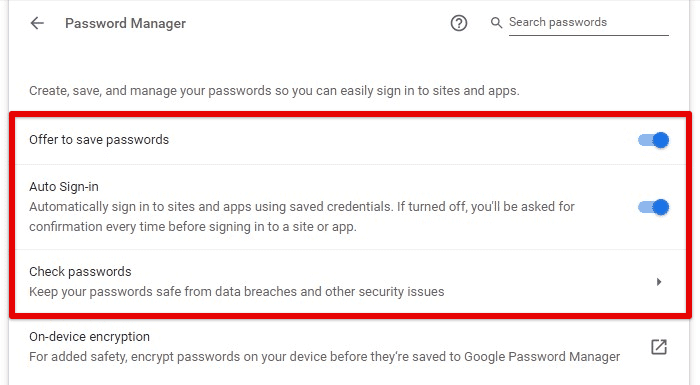
Password manager
To customize these settings for a specific profile, click the profile switcher icon in the top right corner of the browser window.
Go to the profile you want to customize. Click on the three dots menu icon in the window’s top right corner. Then, select “Settings” from the dropdown menu.

Opening profile settings
Customize the settings as desired by going to the respective tab, as explained above. As you proceed to change the settings for a profile, they will be saved automatically. Therefore, you can switch between profiles at any time during this process.
Importing and exporting bookmarks
Chrome makes it easy to import and export bookmarks for each profile. It helps when you want to share them between multiple profiles or computers or if you want to back up these for safekeeping.
To import or export bookmarks for a profile, click on the profile switcher icon in the top right corner of the browser window. Select the profile you want to import bookmarks to or export them from. Click on the three dots menu icon in the window’s top right corner. Select “Bookmarks” from the dropdown menu and go to “Bookmarks manager.”
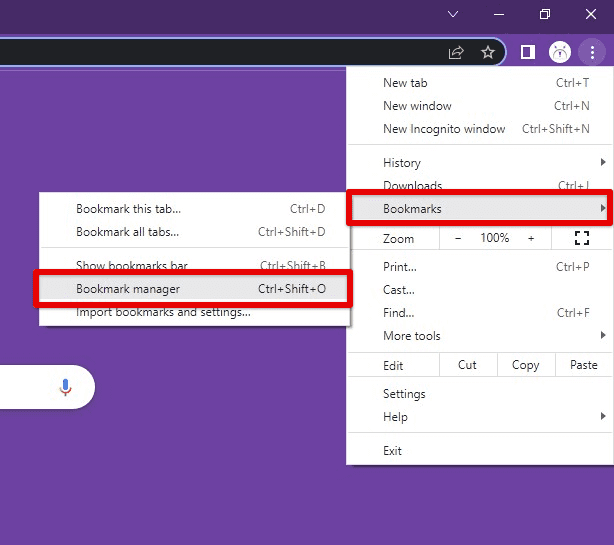
Opening bookmark manager
You will see another three-dot icon in the top right corner of the bookmark manager page. Click on it to open the drop-down menu. Select “Import bookmarks” or “Export bookmarks” from there.
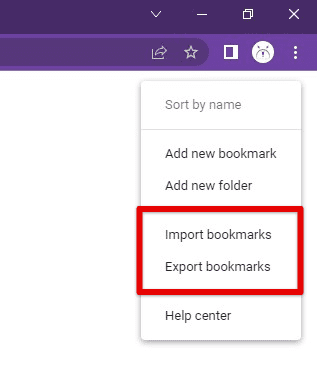
Importing or exporting bookmarks
If you import bookmarks, Chrome will ask you to load the saved file. On the other hand, if you are exporting them, the browser opens the download window and asks for a location to save the bookmarks file. From there onwards, follow the prompts to complete the process.
Once you’ve imported or exported bookmarks for a profile, they will be saved and synced automatically. These features make sharing bookmarks between profiles or devices as convenient as ever.
Managing multiple profiles
If you have created multiple profiles, you must manage them occasionally. Here are some tips for managing multiple profiles on Google Chrome:
Renaming a profile: To rename a profile, click on the profile switcher icon in the top right corner of the browser window. Select the profile you want to rename. Click on the three dots menu icon in the top right corner of the profile window. Select “Edit” from the dropdown menu. Enter a new name for that profile and click on “Save.”

Renaming a Chrome profile
Deleting a profile: To delete a profile, click on the profile switcher icon in the top right corner of the browser window. Select the profile you want to delete. Click on the three dots menu icon in the top right corner of the profile window. Select “Delete” from the dropdown menu.
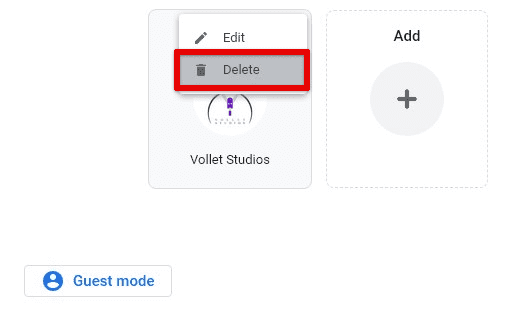
Deleting a Chrome profile
Confirm that you want to remove that profile.
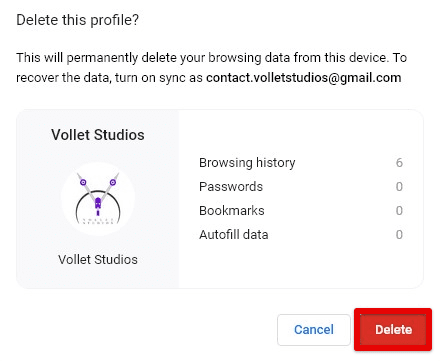
Confirming profile removal
Note: When you delete a profile, all associated data, including bookmarks, history, and saved passwords, will be removed for good.
Syncing multiple profiles
When using multiple profiles in Chrome on more than one device, you may want to use syncing to keep the browsing data and preferences consistent everywhere. Syncing allows you to access your bookmarks, history, saved passwords, and other data from any device signed in to Chrome. Here’s how to set up syncing for multiple profiles:
Click on the profile switcher icon in the top right corner of the browser window. Select the profile you want to sync. Click on the three dots menu icon in the top right corner. Go to “Settings” from the dropdown menu.
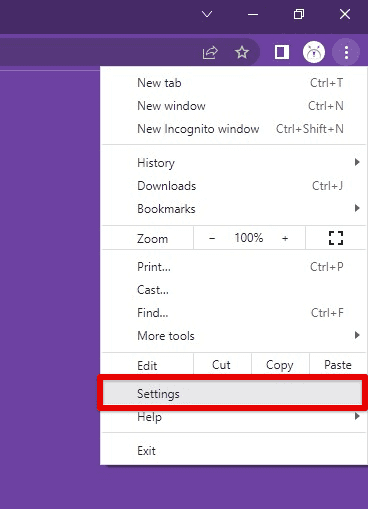
Opening Google Chrome settings
In the left sidebar, click on “You and Google”. Go to “Sync and Google services” and click “Manage what you sync”.
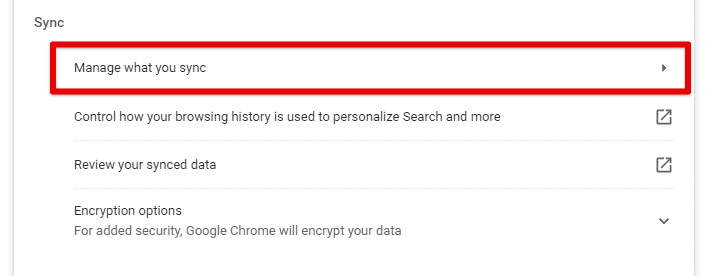
Manage what you sync tab
Choose the items you want to sync, such as bookmarks, history, passwords, and other settings, as required.
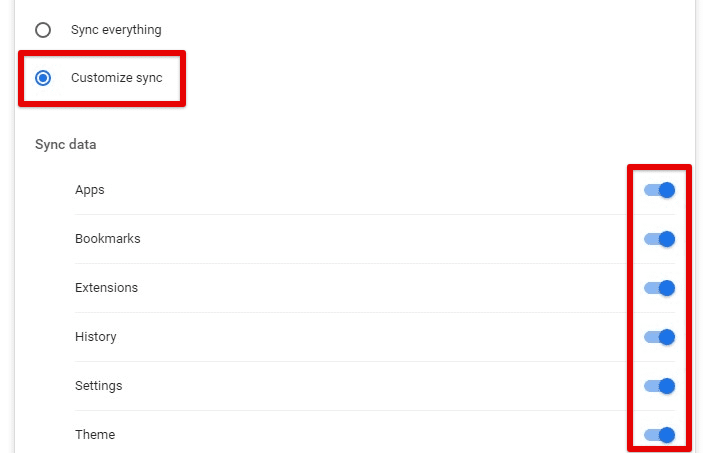
Selecting what to sync
Repeat these steps for all other profiles as well. Once you’ve set up syncing for multiple profiles, your browsing data and preferences will remain consistent across all devices. If you change one device’s synced data or browser settings, those will be immediately mirrored everywhere else.
Note: If you share a computer with others, creating separate user accounts on the computer for each person is recommended. This allows everyone to have their own profile and sync their data separately.
Using guest profiles
A guest profile is a temporary profile in Chrome that can be used by someone who doesn’t have one set up on the computer. Guest profiles allow others to use the browser without accessing your browsing data or settings.
To use a guest profile or to set it up for someone else, click on the profile switcher icon in the top right corner of the browser window. Select “Guest” from the dropdown menu.
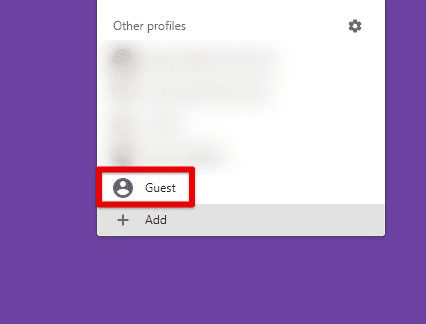
Opening a guest profile
A new guest profile will open in a new window without access to your browsing data or settings. When the guest is finished using the browser, they can close the profile window. Any data generated during their session will be deleted after closing the window.
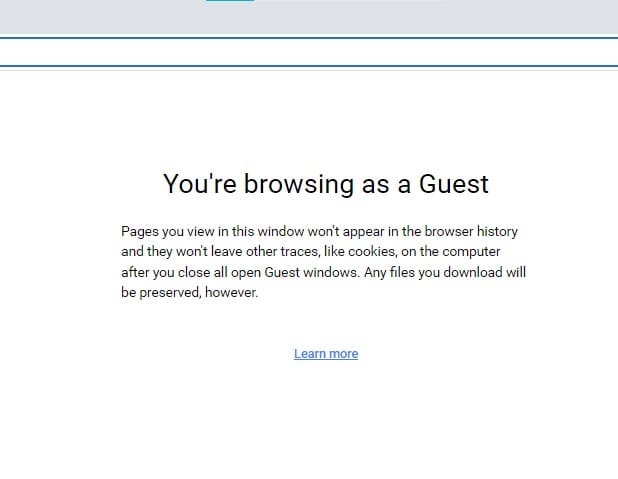
Guest window
Guest profiles can be helpful if you share a computer with others without a profile set up. With this, they can use the browser without accessing the host’s data.
Note: In case you want to allow someone else to use the browser regularly, it’s better to create a new profile for them rather than using a guest profile. A new profile will allow them to save their own bookmarks, history, and other important data.
Conclusion
Creating and managing multiple profiles in Chrome can be pretty helpful in keeping your work and personal browsing separate, managing various accounts, and more. With this article, you should have a good understanding of creating a new profile, customizing profile settings, importing and exporting bookmarks, managing multiple profiles, syncing them, and using guest profiles, if needed.
This is a great help for people who need to separate various aspects of their life or have someone else to share their devices with. So, give it a try today and see how it benefits you. Do you often struggle with traveling uninterruptedly and want to learn your city’s traffic pattern? Maps has got you covered. Learn how to use Google Maps to get real-time traffic and transit updates.

1 comment
I wanted to know what the maximum logged in accounts is, currently I have 10 but I need a few more. Hope there is a trick out there that you are not limited to 10, 15 or 20 would be better. I don’t like profiles because I just want to switch the easy way to a different gmail to read mail or other google service.