If you’ve been facing trouble establishing a secure network over which you can connect to remote servers, this guide is just what you need. Whether your computing devices cannot handle multiple connections at once or you’re simply looking to have a unique program to take all your SSH clients, an SSH extension will do the trick for you. This guide will explain how to install Secure Shell and set it up on Chrome.
From being able to use multiple profiles simultaneously to auto-refreshing pages with the help of a Chrome Web Store extension, the Google Chrome browser is capable of many things. There are even ways to increase the browser’s speed beyond what it comes with by default, not to mention the swath of high-quality Chrome Web Store extensions that substantially revamp the optimal Chrome experience. Read ahead to find out how the SSH extension can be set up.
- A helpful article: How to make Google Chrome faster on Windows 10/11.
What is the SSH extension in Google Chrome?
The Secure Shell extension on the Chrome Web Store is a highly specialized application that is marked by the “Featured” category. This means that the software in question has been hand-reviewed by Google experts, hence why the extension has over 700,000 logged users across the globe. The Secure Shell, or in other words, SSH extension, comes from Google and isn’t made by a third-party developer, so expect things to go swimmingly.
You will need the Chrome browser to run the SSH extension, not to mention a remote server to establish your connection to. The extension is as good as nothing without the latter’s presence, so bear that in mind. As for the Secure Shell application, what we have here at our disposal works as a terminal emulator, similar to Crostini Linux or Crosh in a more general sense.
In addition, it’s an xterm-compatible emulator and an SSH client that works right within the Chrome browser. When you have the SSH extension installed, you no longer need to rely on third-party apps or programs. The Google-made Secure Shell app takes good care of remote connections since it utilizes a native-client protocol to connect to SSH servers. That way, the need for using external proxies is eliminated right out of the gate.
One added feature of the SSH extension is that it works with Chromebooks too. If you’re on Chrome OS, you can easily integrate the SSH extension with the built-in system “Files” app to create SFTP mounts, which is basically a Secure Shell File Transfer Protocol system for establishing remote connections. Last but not least, the developers have also included an alpha build of Mosh in the Secure Shell extension.
Mosh is secondary to SSH and is a tool that boasts improved features over its counterpart. You can use it to enjoy a secure connection between the client and the remote server. However, since the functionality is in its alpha phase, don’t expect a 100% working environment. There might be a few discrepancies that you will need to tolerate in case of using Mosh. Now that we’re aware of the SSH extension let’s talk about its installation steps in the section ahead.
Installing the SSH extension in the Chrome browser
You can install the Secure Shell Chrome Web Store extension relatively painlessly from the Chrome Web Store. All you need to do is head over to the official extension page on the Web Store, followed by verifying and downloading it using the on-screen instructions. Let’s look at the installation of SSH on Google Chrome in more detail ahead. Please follow the steps diligently for the best results.
1. The first step is to use this direct link to head straight to the main SSH app page on the Chrome Web Store. As soon as you are there, you can click on the “Add to Chrome” button to proceed with the download. At this point, the system will check and verify the forthcoming installation.

Adding Secure Shell to Chrome
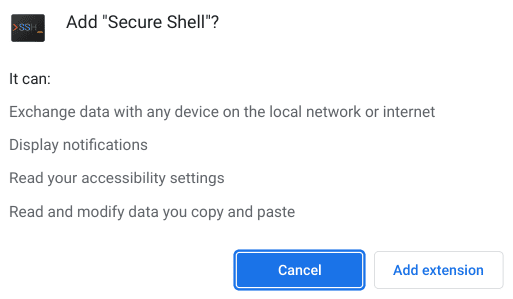
2. After clicking the “Add to Chrome” button, a pop-up will appear at the top of the page, asking you to confirm the installation. Next, click on the relevant button, and the download for the app will begin. SSH extension will be present on the Chrome browser in no time.

Confirming the installation of Secure Shell
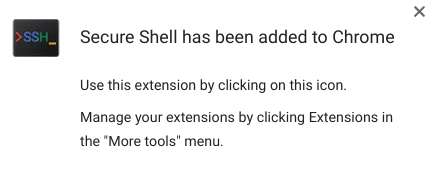
3. As soon as you have been notified that the installation was a success, a pop-up will appear in the top-right corner of the screen, confirming that SSH was installed on the Chrome browser. You may pin it to the extension toolbar for seamless access the next time you want to use the app.

Secure Shell extension installed
That’s all there is to know about installing the SSH extension on Google Chrome. Let’s now take a look at how this extension works. We’ll only be covering the basics of the Secure Shell application in the next section. If you require an in-depth tutorial, YouTube and other platforms are loaded with self-help videos.
- Check this out: A beginner’s guide to Google Workspace (formerly Google Suite).
SSH extension working
Before you start working with the SSH extension, please ensure that your Google Chrome browser is on the latest release. It’s imperative to have an up-to-date Chrome for the best possible experience with Secure Shell. Otherwise, we cannot guarantee smooth performance from the side of the extension. Besides, the minimum requirement of the browser version for Chrome by the extension in question is 88. Any iteration below that is subject to failure.
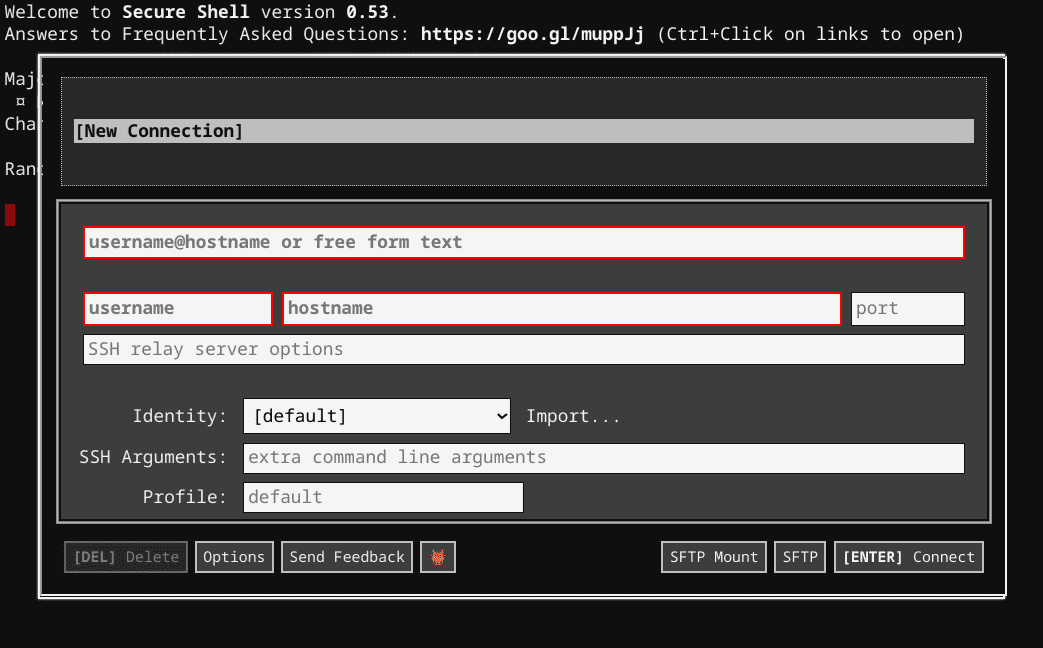
With that being out of the way, we can finally launch the Secure Shell extension from the Chrome browser’s extension toolbar. First, click on the app icon to make the application load up in another window on your end. Once done, the following screen should appear on your end. This is the primary registration section you need to fill out to proceed with the Secure Shell application.

Secure Shell on Google Chrome
First, to set up a new connection, you need to enter the username and the hostname, not to mention combining both in the top bar for things to proceed smoothly. These parameters relate to the remote server you will be connecting to, so keep those details nearby to insert them here. The bars that are highlighted in red are required to fill up. The rest, including the port number, are optional and will be resorted to using default settings if you don’t fill them in yourself.
After entering the relevant username, hostname, and the “username@hostname” of the cloud server, click on the “Connect” button or press the “Enter” key to begin the connection. If it’s your first time connecting to the server on a device using SSH, you will be asked to log in with a password, which, in other terms, is called a fingerprint. Type in “yes” and press the “Enter” key at the subsequently appearing prompt to be able to enter your password.
If you’d like to make things flow without the obstruction of entering a password repeatedly, you can import an identity to save your PC as a trusted device. This “identity” is a key pair that relies on a public and private key. You will need to create a key pair to import it successfully to Secure Shell if you haven’t already. That way, no password restriction will bar you from this point on.
You can utilize it to ensure seamless access to the Secure Shell app without having to keep clicking on the extension icon in the toolbar. Type in “ssh” in your Chrome’s address bar at the top of its interface and press the “tab” key on your keyboard. Any follow-up command will be processed directly in Secure Shell.

Accessing Secure Shell seamlessly
That’s about setting up and using the SSH extension on Google Chrome. Thanks for reading!
- Don’t forget to try out: How to go Incognito on Chromebook and know what it doesn’t do.
Conclusion
We’ve tried out the SSH extension on Google Chrome by installing it from the Chrome Web Store and then running it on the web afterward. It’s a thoroughly efficient solution to one’s remote server connection needs, especially if the workload is heavy-duty and a singular application is required to take care of the matter at hand. Please let us know in the comments section if you found the article helpful.
Thanks for reading!
- Another worthwhile read: How to connect to Remote Servers using SSH on your Chromebook.
