It doesn’t take long for a Chromebook user to notice that the ChromeOS desktop isn’t entirely customizable. You cannot put app icons anywhere on the desktop, but you do have the launcher section serving that purpose. However, if it’s desktop widgets you want for your Chromebook, then it’s desktop widgets that you shall get for your Chromebook in this guide.
One of the reasons why ChromeOS is so popular is that it’s a straightforward operating system. Chromebooks feature a clutter-free user interface, so those who like to keep things as minimalistic as possible will undoubtedly enjoy all these sleek devices offer. However, there are ways to get creative and make your Chromebook’s UI stand out more.
Let’s talk about desktop widgets and how to get them to appear on a Chromebook. In the meantime, check out our tutorial on whether adding icons to the Chromebook’s desktop is possible.
- Trending on Chrome Ready: The 5 best Chrome extensions for students.
What are desktop widgets?
If you’ve been using mobile phones for a long time now, then you probably already have a fair concept of widgets and their purpose. To break the definition widget down in easy terms, these are small-scale components of the user interface that provide a shortcut for interacting with many of your operating system’s core features and apps.
Let us clear that up with the help of an example. A desktop widget for a clock will not only tell you the time but will also serve as an instant way of setting alarms and reminders without having to maneuver to the main ChromeOS clock app in the first place. And that’s just one small example of the great prospect of desktop widgets.
Another glaring instance where a desktop widget can come in handy is a calendar widget. Along with displaying the day and date, calendar widgets make it possible to set events whenever you want and allow you to do just about everything that a normal calendar app can offer, but only faster.
Desktop widgets are a commonplace part of mobile operating systems and phones, not to mention the likes of Microsoft Windows, including them in their user interface in one way or the other. On ChromeOS, the idea seems bleak since a Chromebook’s desktop is more or less intangible from a software perspective.
However, few people know that specific workarounds can allow you to place particular desktop widgets on ChromeOS. So, with no further ado, the following section will take it from here and explain how this will be possible. Let’s get right into it straight away.
Getting desktop widgets on a Chromebook
You can unofficially get desktop widgets to work on your Chromebook in two major ways. One pertains to installing specific widgets from the Chrome Web Store—home to some of Chrome’s most high-rated extensions—while the other method revolves around installing a Google Play Store Android app.
We’ll be going through both in this section, so you can determine which trick seems more appealing to your preferences and style.
Option #1. Downloading desktop widgets for ChromeOS from the Chrome Web Store
That headline is pretty much self-explanatory. The Chrome Web Store, being the boon it is, has come forth with a solution for individuals seeking ChromeOS desktop widgets.
We’re happy to report that the Google Chrome storefront comprises several different widgets that can be downloaded and made to show up on the ChromeOS desktop.
Feel free to grab these on the Web Store and invigorate your Chromebook’s home screen like never before. Here are some of the best options that you have in this regard.
Calendar Clock
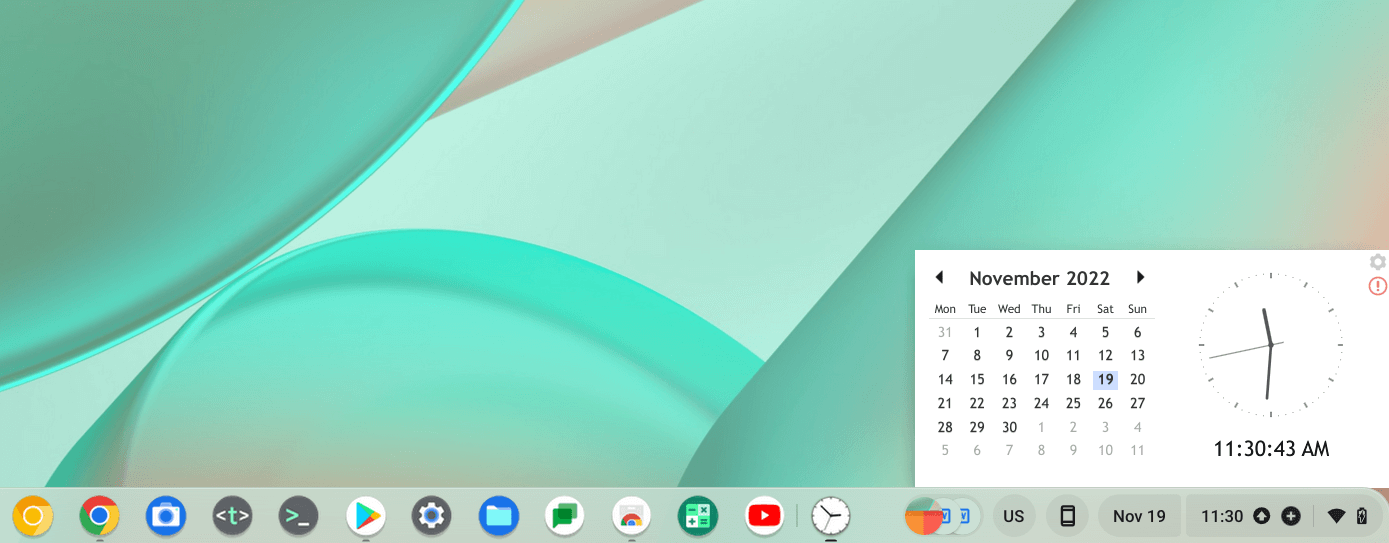
Calendar Clock widget on ChromeOS
One of the first desktop widgets that have managed to grab our attention is Calendar Clock. It’s a straightforward and convenient tool that allows you to glance at the day and date along with a complete overview of the number of days in a month.
It even tells the time second by second, so if you’re tracking something and you have to be truly precise about it, you can rely on the Calendar Clock widget for the days to come. Some extra features include enabling the auto-hide functionality, so the widget never comes your way when using the Chrome browser.
In addition, you can alter the clock format and switch to a 24-hour clock style just as well. There’s the added ability to change to different time zones if you’d ever like to switch that manually for personal use. It’s a lightweight application with its fair share of reviews and ratings on the Chrome Web Store. Don’t miss it.
Sticky Notes
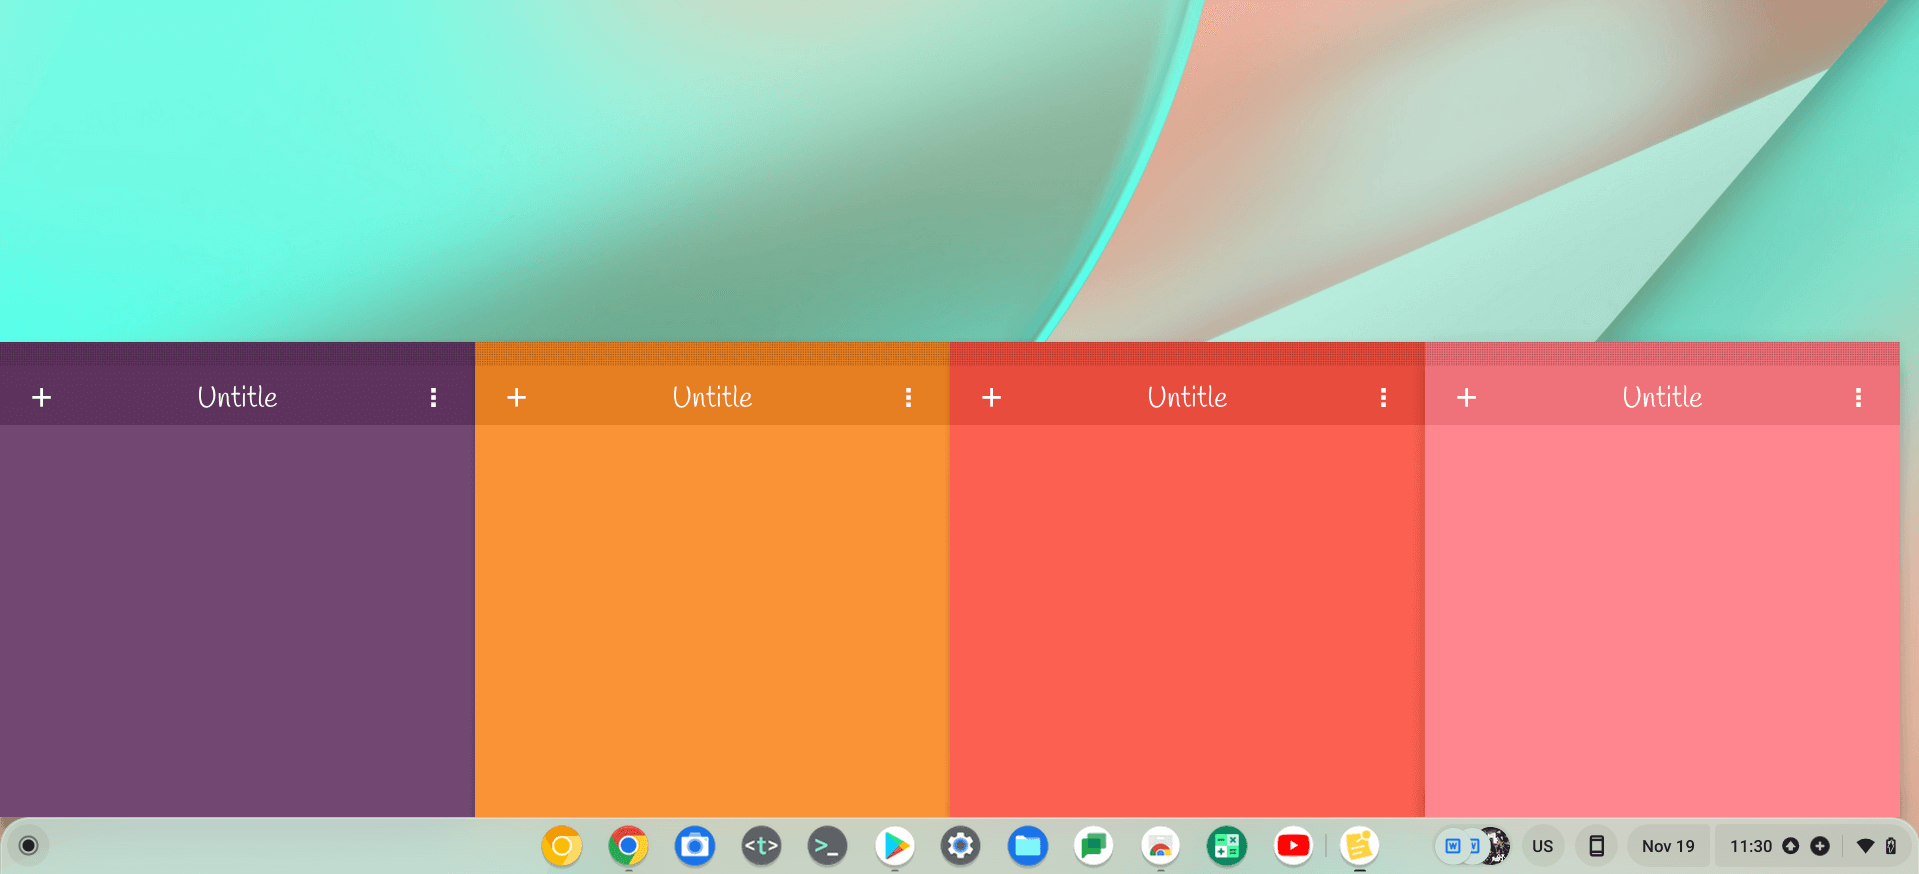
Sticky Notes widget on ChromeOS
Sticky App is another helpful tool that does just what you think it does. Consider it a digital manifestation of sticky notes you carry around in your classroom for jotting down something important on the fly. It’s highly convenient and relatively light on the system, and you can pop open as many of these apps as you want, as shown in the screenshot above.
You can change the font size and background color and create as many new entries as possible. It’s a convenient widget on your ChromeOS desktop, and you should be able to heighten your productivity with such an application on board with you.
Weather Now
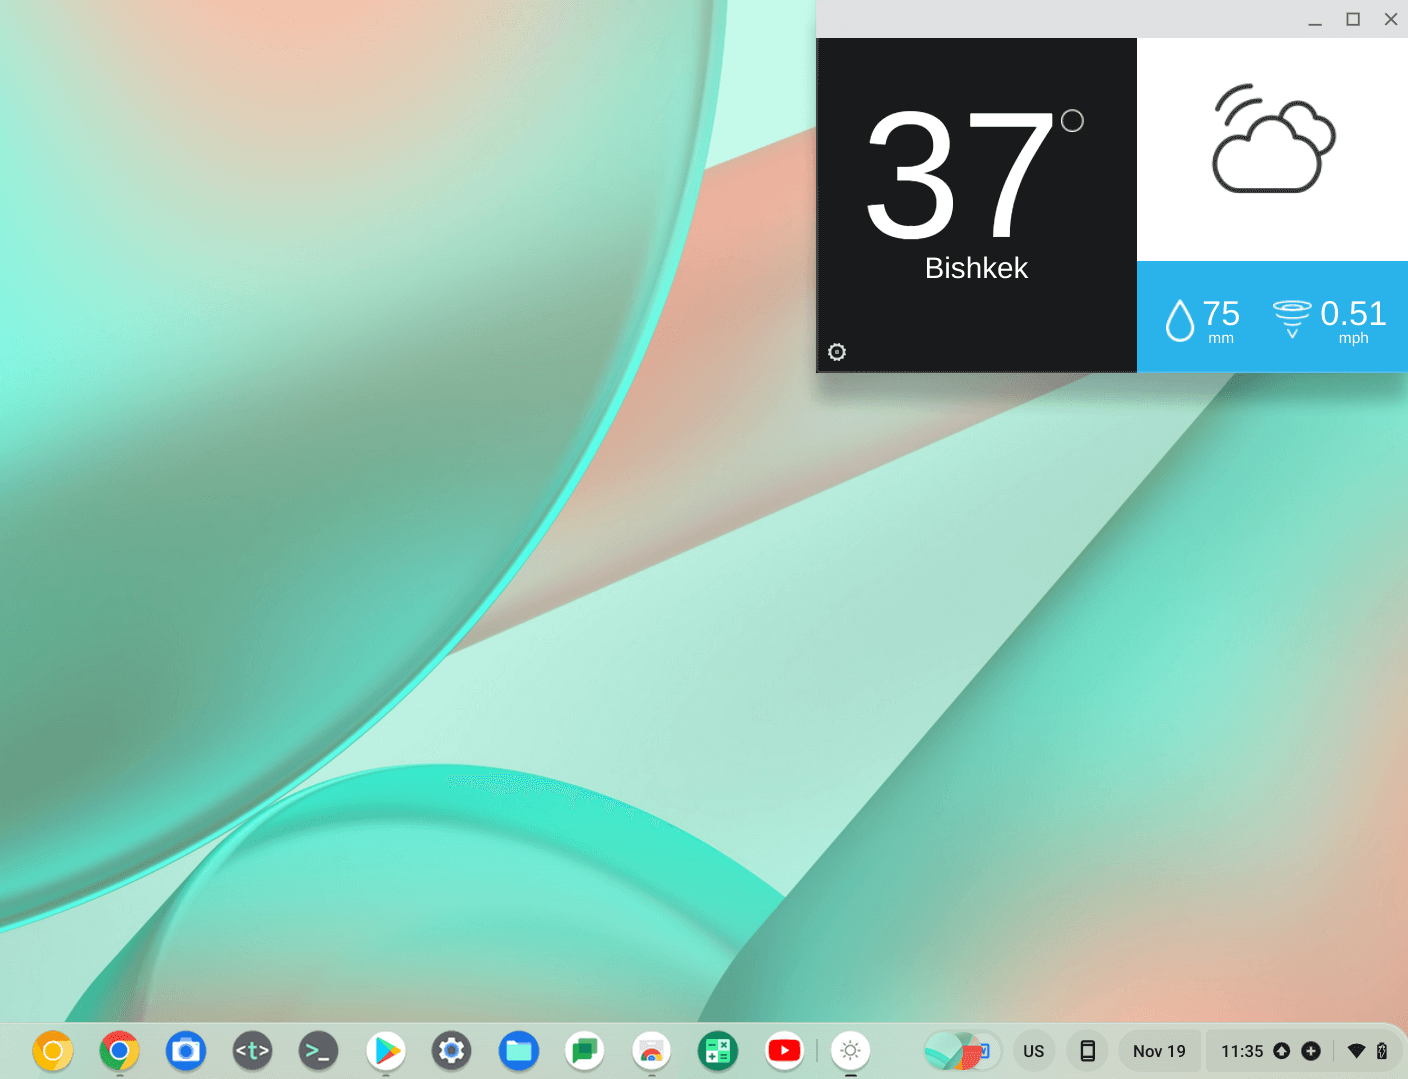
Weather Now widget on ChromeOS
The last noteworthy desktop widget that we can recommend to get for your Chromebook is Weather Now—a highly streamlined and well-groomed application that does its job effectively. You can download it on ChromeOS from the Chrome Web Store and arrange it on your desktop anywhere you want.
Weather Now allows its users to choose the location they want to inquire about the weather. Alongside the temperature in your choice of unit, either Celsius or Fahrenheit, you can quickly glance at the overall representation of weather conditions. There’s also the wind pressure and the humidity factor that Weather Now features in its UI.
Option #2. Using the Taskbar Android app to get desktop widgets
With the first option of sorting your ChromeOS desktop out with widgets out of the way, the following method relates to installing a particular Google Play Store app. Take it from us; this utility does not play games when decorating your Chromebook’s home screen with various widgets and apps.
Enter Taskbar—a highly optimized Android app responsible for decking out the ChromeOS desktop. Even though the software was designed for Android smartphones, it’s surprising to observe how fluid Taskbar works on Chromebooks while fully utilizing the ARCVM container in ChromeOS.
We’ll go through the installation of the application from Google Play and then show you how to set it up for favorable results ahead. Read until the end for the proper know-how of going about Taskbar on your Chromebook.
- Before you get started, it’s certainly worth taking a look at our in-depth Google Play Store guide. You might be missing out on essential settings and such.
Installing Taskbar on ChromeOS
The following steps explain how you’ll install the Taskbar app on your Chromebook.
1. The first step is to open the Play Store app on your Chromebook. This can be quickly done from the ChromeOS shelf area if the app is pinned there or from the launcher section.
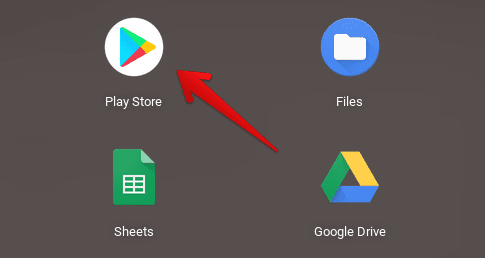
Opening the “Google Play Store” app
2. Once done, dig up the app out of the sea of various Play Store apps by using the in-app search bar. Type in “Taskbar” and press the “Enter” key.

Searching for the Taskbar app on the Google Play Store
3. After completing the previous step, you will be taken straight to the application’s official Play Store page. There, a vividly apparent “Install” button should be present. Click on it to begin the download. Since Taskbar’s file size is minimal, the installation shouldn’t take too long.

Installing the Taskbar app on ChromeOS
4. The moment the installation concludes, you can head to the launcher section and find the app installed there. The app icon should look similar to what we’ve got in the screenshot below.
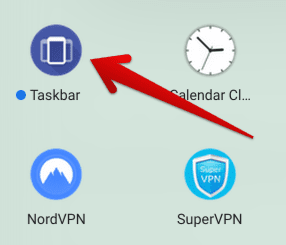
Taskbar app installed
Now that you’ve installed the Taskbar app, it’s time to put it to good use. The following section will explain how to set the tool up and enjoy multiple different desktop widgets on ChromeOS.
Setting up Taskbar to bring desktop widgets on ChromeOS
The Taskbar app is vastly detailed and built by bearing in mind multiple operating systems. Thankfully, the software works like a charm on ChromeOS regarding overall optimization. However, you’ll still need to delve deep into the app to get the maximum possible convenience.
To get started, click on the app icon on your Chromebook to launch Taskbar. Next, the utility should fire up and introduce you to its user interface. Here’s what that will look like on ChromeOS. We recommend venturing into the “General settings” section first to sort out the fundamentals of the app before anything else.

Entering the “General settings” section
Within the “General settings” section, you can find the following options to tweak and adjust. You can sort the Taskbar app to align with your preferences, from the start menu layout to the search bar visibility. One important thing to take care of here is to select the right “Position on screen” option.
That way, the Taskbar app will not interfere with the ChromeOS shelf, which, by default, rests at the bottom of the operating system’s user interface. However, if you wish to keep things that way, you’re more than welcome to experiment. It’s also important to enable the “Alternative position for collapse button” for a more effortless display setting.
You may also enable the “Chrome OS dock compatibility fix” if you use the Taskbar app and the ChromeOS shelf side by side. Some other important settings include collapsing the Taskbar app when selecting items and launching on boot. If you’re after a seamless experience, enabling the latter will pave the way for you to have just that.
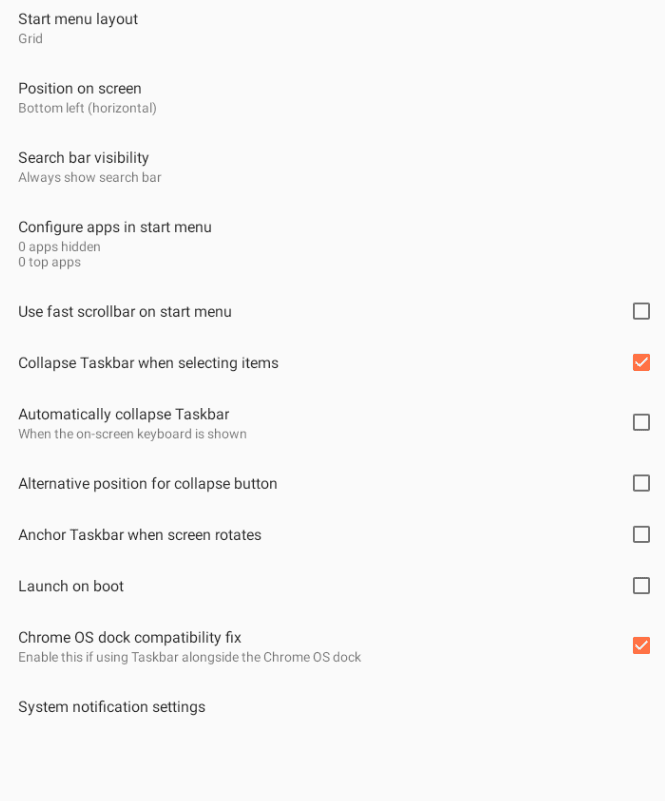
The “General settings” section of the Taskbar app
That’s the “General settings” section, but you’re not entirely done yet. Continue by heading back to the home page and selecting the “Advanced features” section next.

Tweaking the advanced features of the Taskbar app
Ensure that the “Enable widget support” option is toggled on for the Taskbar app to pull off its core features correctly. In addition, you can also set the Taskbar app to replace your ChromeOS screen, which we’d advise ticking off. Another basic setting to look into is “Widget dashboard grid size.”
Depending on your Chromebook’s display, you can choose from various options. Ideally, a 2 x 2 grid can work well for devices with a 16:9 aspect ratio, but you’re free to try out other grids. Other than the “Advanced section,” you can tweak other portions of the Taskbar app, too, such as “Appearance,” “Recent apps,” and “Free form mode.”
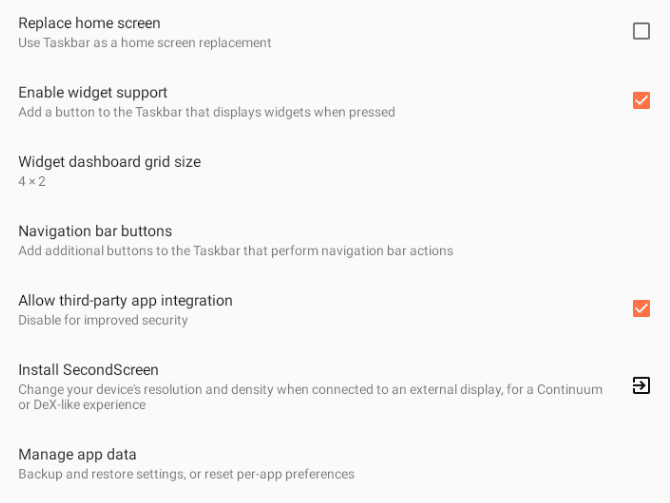
The “Advanced features” section
Now that we’re through the initial settings, let’s move on with enabling the Taskbar app so it appears on your Chromebook’s desktop. Click on the toggle in the top-right section of the Taskbar app’s user interface, as shown in the screenshot below, to get started.

Enabling the Taskbar app
As soon as you click on the toggle, a prompt will appear on the screen asking you to grant permission to “Displaying over other apps” for the Taskbar app to function correctly. Click “Grant Permission” and follow the on-screen instructions to complete this step.

Granting permission to the Taskbar app
Once you grant the relevant permission to the Taskbar app, a dock will appear on your Chromebook’s screen. It will feature the characteristic launcher section and an option to add widgets to the ChromeOS desktop. Click on the dedicated widget-installing icon shown in the screenshot below to proceed.
Clicking on the widget icon
After that, you’ll be able to add widgets on your Chromebook’s desktop. Then, click on anywhere on the home screen, as shown in the screenshot below, to continue and bring up the list of available widgets.
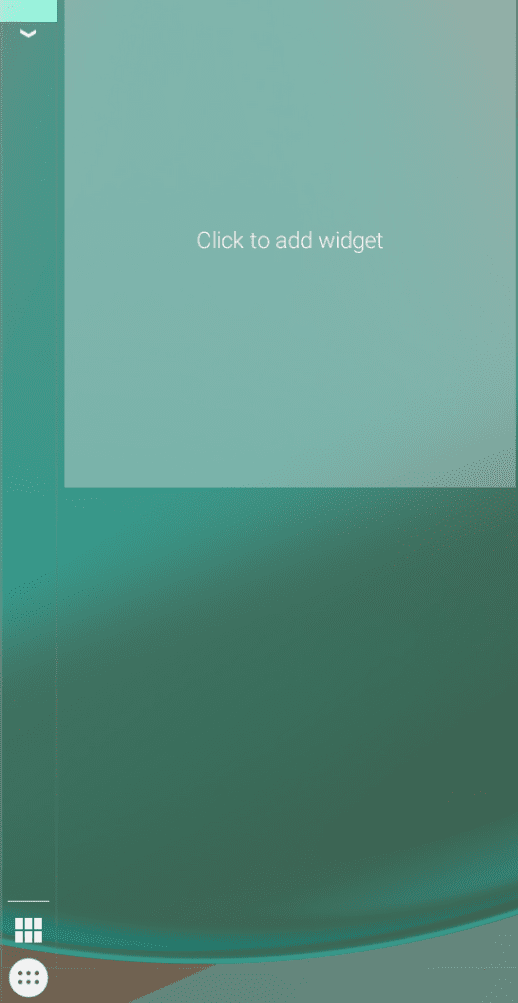
Placing a widget on the desktop
After clicking on a section for placing the widget, a prompt will appear on the screen in front of you, making it possible to select widgets for your ChromeOS desktop. The image you see ahead is just an example of what the prompt looks like. Your catalog of apps can vastly differ, so you’ll see different selectable widgets accordingly.

Choosing a widget
Repeat the previous steps as often as you want to get the desired widgets on your ChromeOS desktop. Our Chromebook’s screen looks like it after decking it out with convenient widgets.
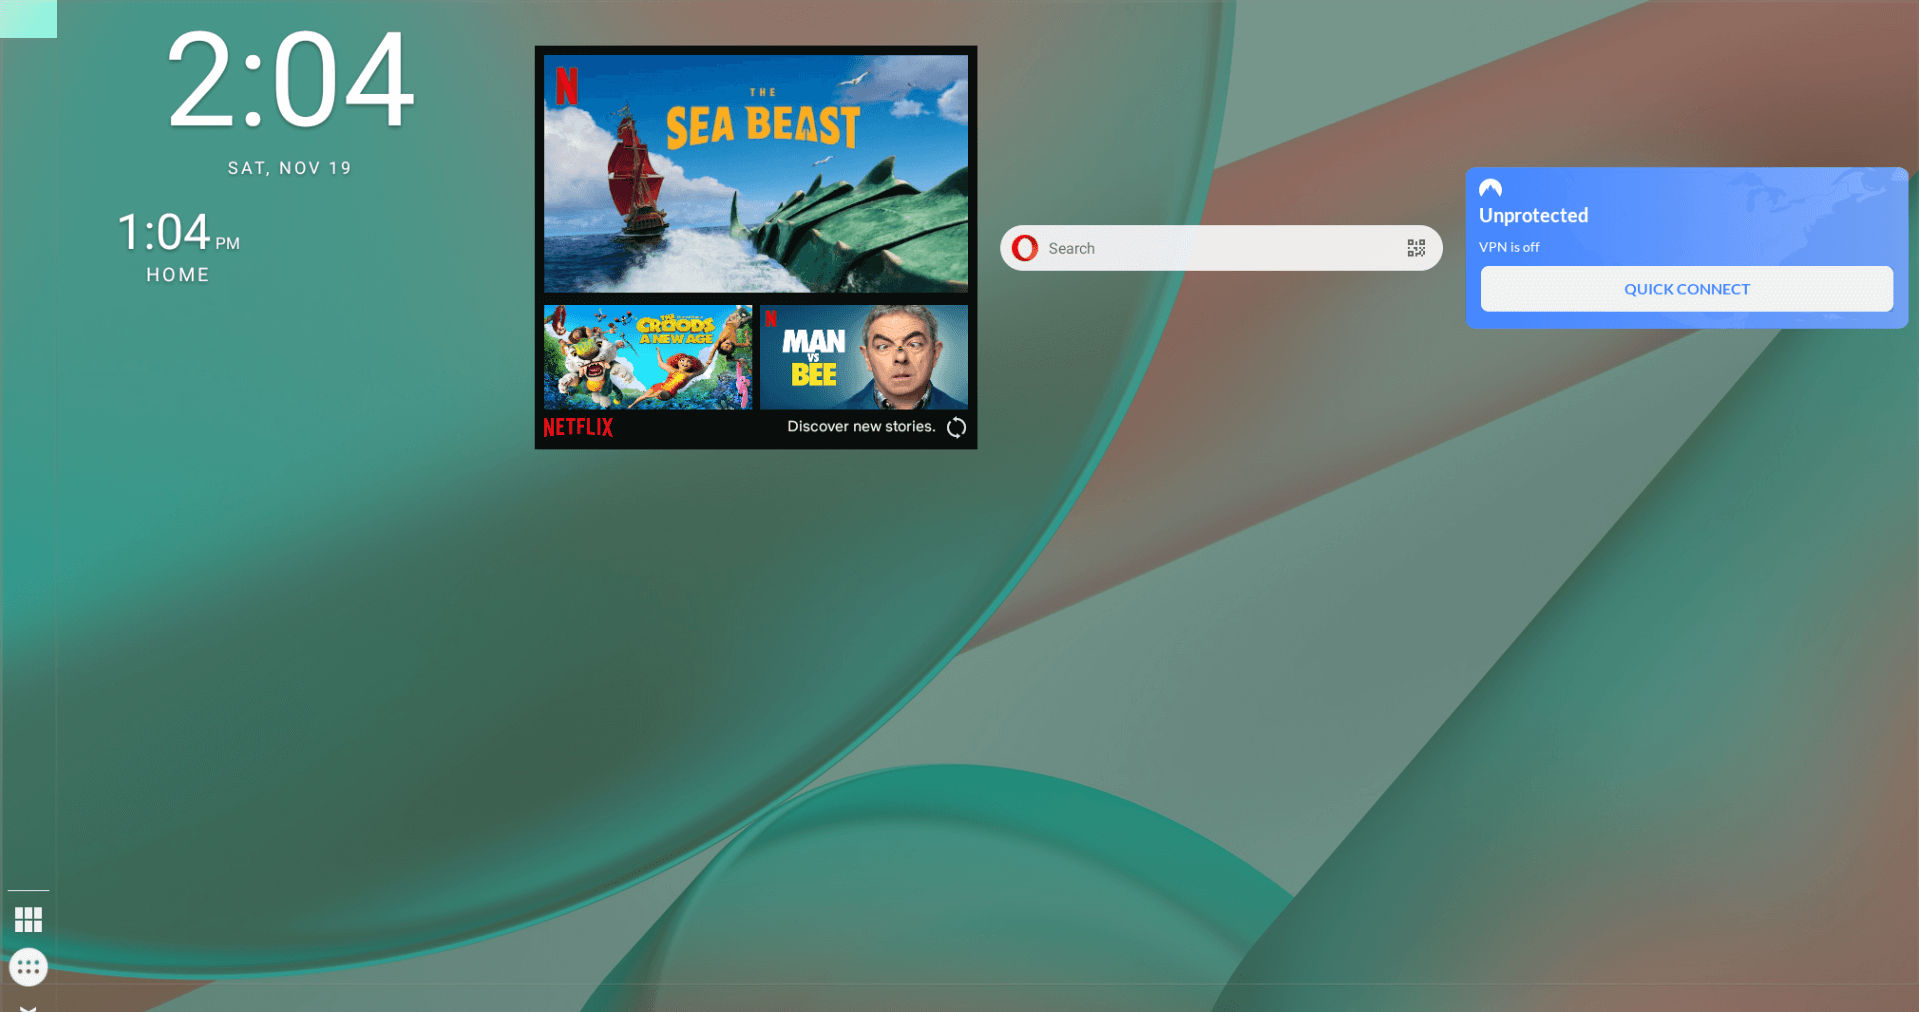
ChromeOS desktop filled with widgets
Please note that you must click the widget icon on the Taskbar app’s dock to open the widget screen. It’s a minor convenience, but it’s at least better than nothing.
That’s all there is to learn about getting desktop widgets on your Chromebook. We’ve laid out two methods for you above to accomplish the task at hand, so feel free to try out any one or perhaps both to determine which one suits your preferences the best.
Conclusion
We’ve talked about another tip and hack to further stylize your Chromebook’s user interface by adding desktop widgets. There are plenty of options, so we hope you’ve made the right choices for yourself moving forward. Please let us know in the comments section if you found this guide useful.
As always, Chrome Ready wishes you good luck!
