Windows 10 and 11 are two of the most popular operating systems in the world, known for their ubiquitous prevalence across various businesses and whatnot. However, Windows PCs are best utilized when you’ve got yourself the convenience and feature-rich functionality of the Google Chrome browser. Whether you’re someone new who doesn’t have the Chrome browser installed on your PC or looking to fix an error quickly, this guide is just for you.
We will be walking you through the process of installing and uninstalling Google Chrome on your Windows PC in the tutorial at hand. That way, you will be ready to take on whatever challenges the Chrome browser entails for you, whether that’s an error code that is not going away anytime soon, no matter what you do, or you’re just trying to reinstall the internet crawler. So keep on reading until the end for the best results. Also, consider reading how to use auto refresh in Google Chrome.
What is the Google Chrome?
The software in question barely needs any introduction, but to add more depth to the write-up, we’re going to shed some light on what exactly makes Google Chrome the world’s most popular internet browser. After its initial release in 2008, Chrome quickly started to create a name for itself among the already well-established brands of Mozilla Firefox and Internet Explorer.
However, the punch that Chrome was packing was nowhere near its internet-crawling counterparts. The product was just built with such a winning recipe that the world didn’t take long to realize that this is the net browser that all of us should be using right now. And the rest is history. Today, Chrome has gathered more than 2.6 billion users, which shows the software’s sprawling growth and unparalleled dominance.
From the Google Chrome Task Manager to viewing and managing saved credit cards in the internet browser, there’s a lot that you can do with Chrome by your side. For instance, it’s possible to enable GPU acceleration in Chrome for faster performance, not to mention being able to restore closed tabs. Last, the added convenience of importing and exporting passwords in Google Chrome is added.
Side by side, you should also know how to access Chrome plugins and manage them effectively since the Chrome Web Store has generous offerings to choose from, and not all of them are too easy with their permissions. Apart from all the advanced features, you’ve got basic stuff such as zooming in and zooming out of pages on the Google Chrome browser, right alongside being able to enable JavaScript.
Now that you have a fair idea of the various capacities of the Chrome browser in which it functions let us make haste toward installing and uninstalling the app on a Windows PC. The following section will explain the whole process so it’s easier to replicate it on your end.
- Check out another article: How to view and delete saved passwords in Google Chrome.
Installing and uninstalling Google Chrome on a Windows PC
Both installing and uninstalling Google Chrome on a Windows PC is nothing but a simple affair. All that you need to do is head over to the official Google Chrome download page, download the setup file, run it on your Windows PC, and the browser should be installed accordingly. Once done, you’ll be able to enjoy Chrome’s various services consequently. However, as soon as you want to uninstall Chrome for any probable reason, there’s a method to get that done too.
We’ll break down both processes into two subsections to improve readability and help you accomplish the task at hand with easy-to-grasp instructions. Let’s get started right away.
Installing Google Chrome on a Windows PC
To get started, we’re first to discuss the installation of Google Chrome on a Windows PC. As iterated earlier, this is nothing but painless to follow through with. The following steps are going to guide you further from here on out.
1. The first step is to visit the official Google Chrome website to find the download section. Of course, since you won’t have Chrome downloaded already, you can use the browser of your choice to go to this site. As soon as you’re there, click on the “Download Chrome” button underneath the “There’s no place like Chrome” highlight. Check out the following screenshot for a visual illustration of how to get this done.

Downloading the Chrome browser
2. After clicking on the “Download Chrome” button, you should be able to download the setup file of Chrome. Check out the “Downloads manager” section of the internet browser you’re using to download Chrome, and the setup file should be there. Click on it to launch Chrome’s installation process. Alternatively, you can also open the “File Explorer” app on your Windows PC and open the setup file from there if you choose to go that route.
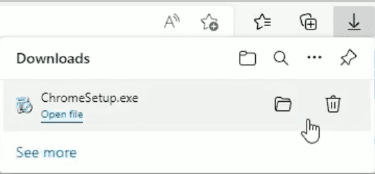
Opening the Chrome setup file
3. After running the setup file, a prompt should appear on the screen, allowing you to proceed with the program’s installation. From this point onward, all you have to do is wait since Chrome will wrap up installing on its own. Here is what the prompt will look like on your Windows PC. On our end, the installation procedure took about 2 minutes.

Chrome’s installation begins
6. After the installation, Google Chrome will open up on its own, and that’s all there is to this. Here’s a screenshot of the Chrome browser’s homepage. The typical welcome screen is willing to show you around the browser and teach you tips and tricks on how to utilize Chrome effectively.
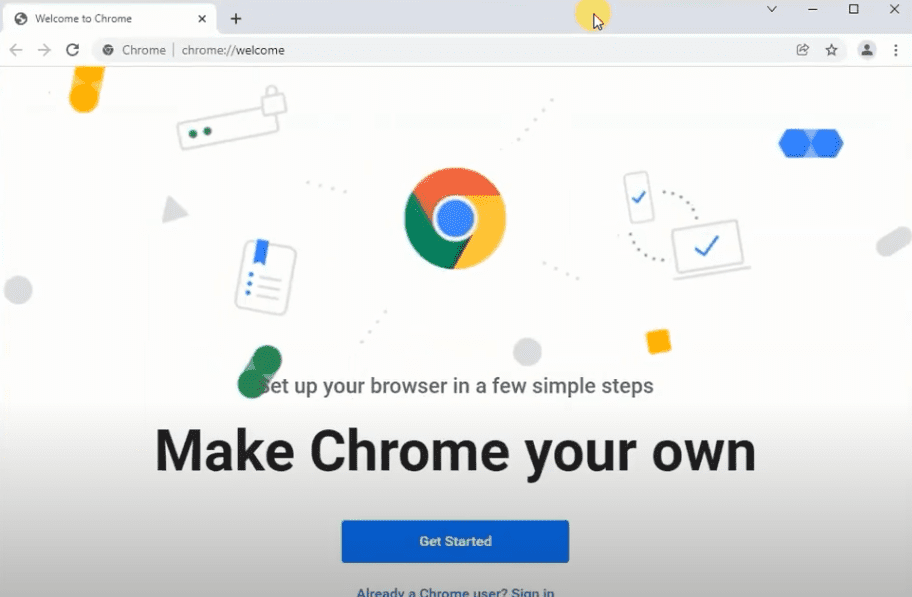
Google Chrome installed
Now that we have covered the installation part of Google Chrome let’s talk about its uninstallation just as well. As for that, the following section will take it from here.
Uninstalling Google Chrome on a Windows PC
Should you choose to uninstall Google Chrome on a needful basis on your Windows PC, the steps given ahead will serve as a handy guide. Uninstalling applications on Windows is quite a painless process. All you need to do is head over to the “Add or remove programs” section on the device, scroll down until you find Google Chrome, and select “Uninstall.” That’s quite it. However, let’s break these guidelines down in more detail ahead.
1. To begin, you’ll need to open the “Settings” app on your Windows PC.
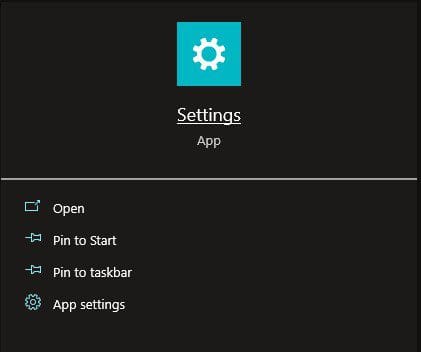
Opening Windows settings
2. After opening “Settings,” click on the “Apps” section to continue to the next step. The screenshot below should help you pinpoint the button you need to click.
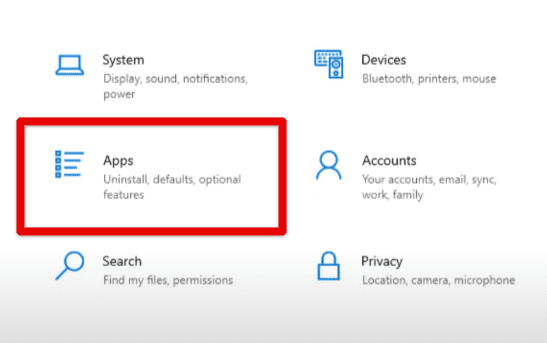
Clicking on the “Apps” section
3. After the previous step, you will next be required to scroll down as you’re taken straight to the “Apps” section. However, ensure that you’re within the right space of the “Apps” settings of your Windows PC from the sidebar. If you’re moving forward correctly, find Google Chrome from the different apps you’ve got on your screen. It shouldn’t be too much of an issue, given the easy-to-spot appearance of Chrome.
Click on the “Uninstall” button beside the app’s entry, and you’ll receive a pop-up to confirm your selection. Make sure to say yes, and you’ll shortly be done with Chrome’s uninstallation. That’s about it for uninstalling Google Chrome on a Windows PC.
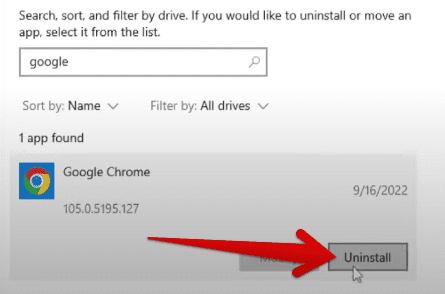
Uninstalling Google Chrome on Windows 10
Before we steer you toward the article’s conclusion, it’s essential to address that Chrome’s uninstalling from this section does not guarantee the removal of all of its related files. If you wish to erase the remaining Chrome data from your PC, you will need to head into the File Explorer app, enter the “Local Disk (C:)” section where all of your Chrome files are stored possibly, and then disable the “Hidden items” option from the toolbar.
Eventually, you should be able to dig up the “Google” folder that rests in one of your hard drives. The pathway that leads to this folder is somewhere along the lines of the following. Once you find it, delete the folder to get rid of Chrome properly.
Local Disk (C:) > Users > Your Username > AppData > Local > Google
There you have it! We’ve extensively covered both Chrome’s installation and uninstallation in the subsections above. Thanks for reading!
Conclusion
Google Chrome is an exceptionally remarkable internet browser, paving the way for billions of people to gain access to the internet uniquely. With the efficacy of Google’s very own search engine, Chrome can get a ton of stuff done for you without breaking a sweat. While Mozilla Firefox, Microsoft Edge, and other browsers such as Opera and Brave do come quite close, we think it’s understood that Chrome sits at the top of the ranking.
In this guide, we’ve talked about installing and uninstalling the Chrome browser on a Windows PC in an in-depth manner. We’ve gone through the steps necessary to make the transition happen eloquently, so there are minimal interruptions in-between. Thankfully, installing Chrome is as easy as uninstalling it, so even if you’re a casual user, things shouldn’t be too hard to kick off. Please let us know in the comments section if you found this guide helpful.
We would love to read your feedback!
- What to know if things go wrong with Chrome: How to deal with an unresponsive Google Chrome.
