Did you know there was a way to determine storage for Linux on ChromeOS? Doing so can help partition a Chromebook’s available storage capacity and allow it to dedicate a specific portion to come under use for Linux exclusively. Keep on reading, therefore, to learn how to increase or decrease storage for Linux on your Chromebook.
The Crostini Linux terminal on ChromeOS has managed to uplift the working capacity of Chromebooks in multiple ways. After all, these sleek devices started modestly but eventually gained a strong foothold in the modern enterprise and educational world thanks to the integration of both Google Play and Linux.
For now, though, let’s get straight into Linux’s storage setting on ChromeOS, and show you how to tweak it at will. In the meantime, check out the six best Linux distros for Chromebooks for an added experience.
- Related read: How to use a Linux computer to recover your Chromebook.
Increasing or decreasing storage for Linux on your Chromebook
Specifying a particular storage limit for Linux on ChromeOS is done from right within the “Settings” section of the device. You head to the “Linux development environment” space, dig out the appropriate option, and use the provided slider to increase or decrease the storage. It’s remarkably as easy as that.
Still, we’ll dumb it down for you even more with the help of the following steps. So follow along with them until the end diligently for the best results.
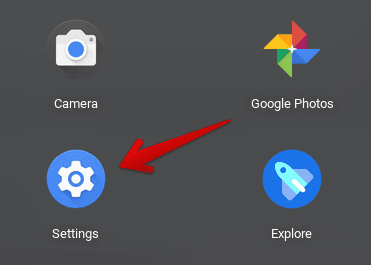
1. To begin, open the “Settings” system utility on your Chromebook. You may also use the ChromeOS search bar to look for the app in case you don’t have it pinned to the shelf area.

Opening “Settings”
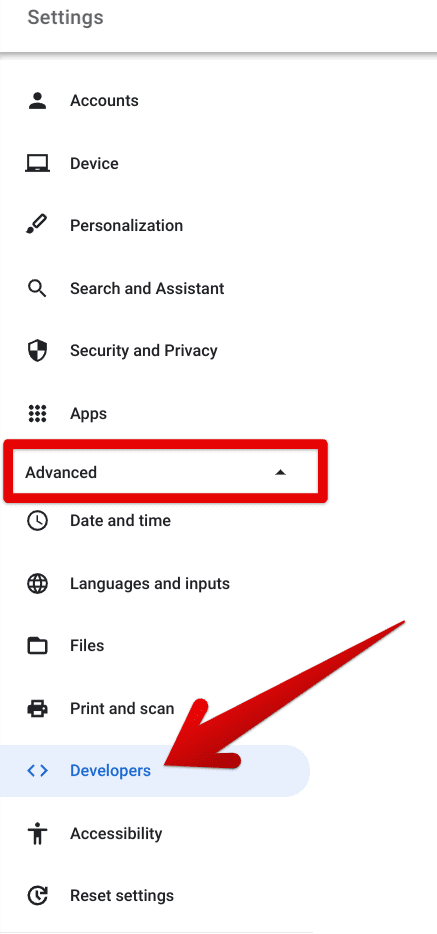
2. Next up, click on the dropdown button of “Advanced” in the side panel to the left and proceed by selecting the “Developers” option. Check out the screenshot ahead to visualize how it’s done.

Entering the “Developers” section
3. As soon as you click “Developers,” the interface will take you to the relevant section in the middle of the page. You will now need to click on the “Linux development environment” button to proceed.
- Do note that the following option won’t appear on your end if you don’t have Linux configured and set up already.

Clicking on “Linux development environment.”
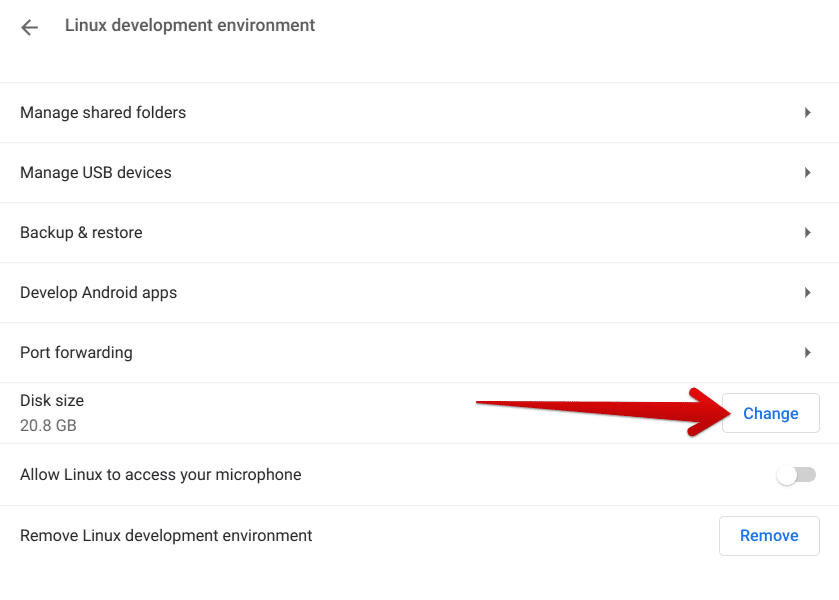
4. At long last, here’s where you can painlessly increase or decrease your Linux storage. Click on “Change” beside the “Disk size” option to continue. There’s just one more step left, and you’ll be done here for the days to come.

Altering the “Disk size” for Linux
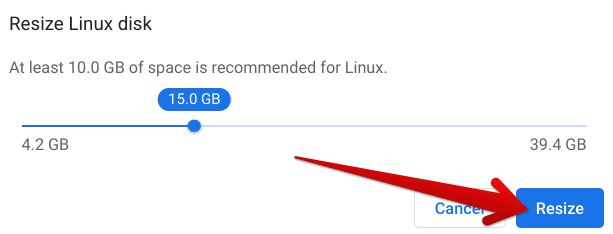
5. Clicking on the “Change” button will bring up a prompt that will ask you to wait until the disk change operation is processed. After a while, a dedicated section will appear in the prompt with an adjustable slider. You will use this slider to increase or decrease storage for Linux on your Chromebook.
Currently, we have our disk size specified at 20.8 GB. However, if someone were to expand or reduce their allotted storage, simply take the slider to the right or left to increase or decrease the storage. The system recommends that you at least allocate 10 GB of free space to Linux so that the best practice would be any figure above that range.
However, if you don’t employ the diverse services of Linux on your Chromebook that often, such as writing code or programming, you may keep the disk size in the 8-9 GB range. Once you’re done with your selection, click “Resize” to finalize the process.

Resizing the Linux disk size
That’s all there is to increasing your decreasing Linux storage on a Chromebook. The moment you click on the “Resize” button after making the desired change, your storage capacity for the Linux terminal will be reallocated. There’s nothing more to bother yourself with here.
- Trending on Chrome Ready: How to access Chrome plugins and manage them effectively.
Conclusion
People often ask whether they should shop for more RAM or storage on a Chromebook, and the answer to that depends on the use case of the individual involved. Additional RAM can make your device’s performance skyrocket. Still, if you plan on negating cloud-based storage services and storing your data locally, storage is an essential factor to consider.
In this guide, we’ve talked about the Linux terminal and how you can resize disk space for it. ChromeOS is a proponent of simplicity, so tasks like these will be dealt with on the double. Do let us know in the comments section ahead if you found the tutorial helpful on your end. As always, Chrome Ready wishes you good luck!
- Next up: How to install Arduino on Chromebook.
