Many aspiring Google Photos users wonder whether removing their search entries in the application is possible. After all, no apparent option appears when a casual individual tries to find the solution themselves. But the good news is that the application features an easy-to-approach method for getting rid of your previous searches. Learn how to delete the search history in Google Photos and read until the end for the best results.
Google Photos is one of the most well-grounded cloud-based storage solutions that one can truly rely on in 2022. There’s just no shortage of features that this novel service boasts daily, so it’s no wonder why more than 1 billion people have hopped onto the platform for their usual work routine. So, with no further ado, let’s get onward with the search history deletion in the app so that you can alter the user experience more to your liking.
- Recommended Read: How to import Google Photos onto a USB flash drive.
What is Google Photos?
Google Photos, at its core, is a very popular cloud-based storage application that works in tandem with Google Drive, which is yet another like-minded software, although with a greater purpose. The program in question is not only suited to a remarkable photo storage capacity but also the sheer capability of editing photos to a reasonable extent.
Sure, what we have here isn’t on par with Adobe Photoshop, but the essential features that Google Photos poses are a hearty delight. Now, if we were to talk about some of the functionalities that the software is capable of, we would have to cast a lens on the extraction tool that lets you copy text from images in a moment. However, we will have to say that many of Google Photos’ features are exclusively available on mobile.
For instance, the portrait depth editor and the Color Pop effects can be used exclusively on Google Pixel and iOS devices that arrive with the “Portrait Mode” feature in their respective cameras. Otherwise, it can get painfully challenging to try and replicate those features on Google Photos web, which is the online iteration of the cloud storage platform. That is to say; this is another facet of the software that you should be wary of.
Google Photos can be used online by heading over to photos.google.com/ or in the form of a Play Store or App Store application. You can even run it on Linux machines for your cause, provided you can get the Chrome browser to run within them. Now that you know what Google Photos is and what service it offers its users feel free to read on and find out the search deletion part in particular.
Deleting the search history in Google Photos
Deleting the search history in Google Photos is nothing but a walk in the park. It’s overly simple to follow through with the process here, and we’re sure you’ll be up and running with it in no time. Simply put, you must sign into your main Google account, search for a specific feature, and finalize the operation by choosing to delete your search history from there. The entirety of the process shouldn’t you any longer than a couple of minutes at best.
However, we must warn you that the developer currently does not allow users to remove their Google Photos search history. You will need to remove the search history of your Google account, in general, to get that done, so this operation will involve the removal of search results from other Google apps as well, such as YouTube and Google Drive. With that said, the following steps, therefore, are going to take it from here to guide you further on the subject.
1. The first step is to sign into your primary Google account specifically for the My Activity page. This can be done quickly by heading to this link. You must log in with your credentials if you are not signed into Google already. Once done, you should be able to see the following page on your end.
The developers refer to this as the “My Activity” section of the account. Once you’re in, click on the three vertical dots button to reveal more options. Finally, click on “Delete activity by” to continue.

Deleting the activity
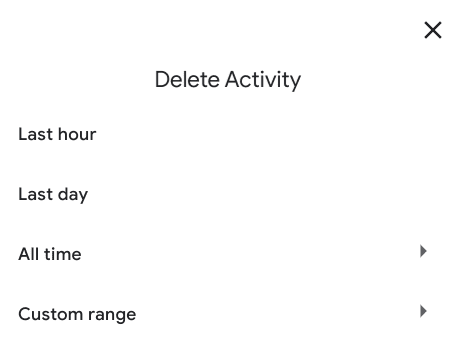
2. After clicking on “Delete activity by,” you will visualize a small-scale window on your end. This is where you will have to select a time range to delete your activity. Feel free to set a custom time range if you’re not sure what period it was that you did your searches in Google Photos. Or a safer approach would be to opt for “All time.” Then, make the right decision on your end to continue.

Specifying a range
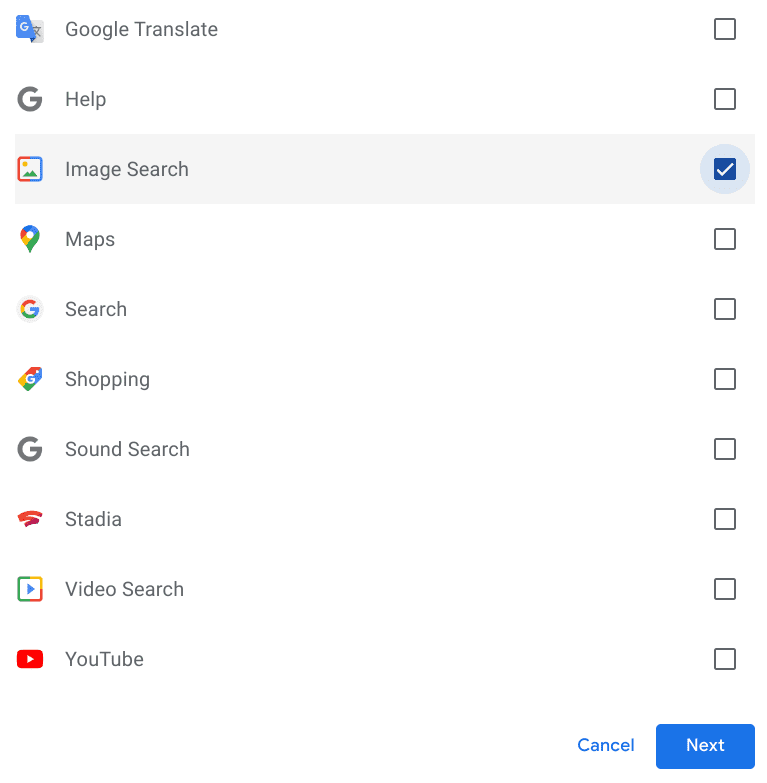
3. The next step is to select the product from which you’d like to remove your image search history. Again, we highly encourage you to select “Image Search” only since that’s what we’re purely after, and then finalize the process by clicking on the “Next” button. However, please note that the window ahead will only appear if you choose the “All time” range in the previous step. If not, the activity will be erased for all your apps used within that time frame.

Clearing the “Image Search” option
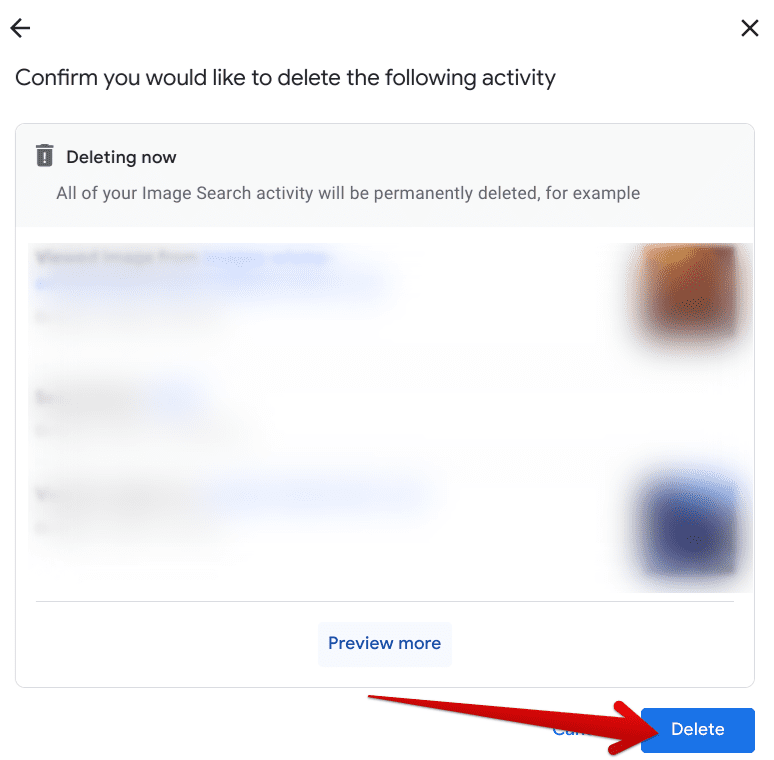
4. The final step is to review your Google Photos search history and click on the “Delete” button to finalize the procedure. After clicking “Delete,” the changes won’t be reversible anymore, so please make a well-informed decision moving forward.

Deleting the search activity
That’s all there is to do about clearing your search history in Google Photos. Clicking on the “Delete” button will do the trick for us, so please feel free to follow through with the process diligently. We must conclude the article now that the tutorial for the operation above has been laid out.
Conclusion
Google Photos has been offering its users a breadth of functionality since it came out to the forefront of the Google One mainline subscription plan. Speaking of which, the latter is Google’s one-for-all service that allows you to purchase more storage and opt for higher-grade features across different Google applications like Drive and Gmail.
Now, some of the most prominent features that Google Photos boasts include the ability to use the Live Albums feature, not to mention the video stabilization functionality in the famous image storage app. Now that you have learned what exactly it is that will help you actualize the process of deleting your search history, do let us know in the comments section whether this guide was able to help you out. We would love to read your feedback!
